
I stood on my back porch last July with a cold beer and a sinking feeling in my chest. What was once a rich, chocolatey brown had turned into a dusty, chalky gray that looked more like an old sidewalk than a premium outdoor living space. I felt like I’d been sold a lie. We’re told these materials are practically invincible, but the sun is a relentless beast. In my early days as a homeowner, I actually made the disastrous mistake of attacking my deck with a high-pressure power washer, thinking I could just ‘blast’ the gray away. All I did was etch permanent furrows into the boards and void my warranty. Today, I’m going to show you how to avoid my blunders and actually bring that vibrant hue back to your boards without destroying them in the process.
Stop Staring at Your Chalky Gray Boards
I’ve spent years tinkering with different cleaners and sealers, and the first thing you need to realize is that fading is often just surface oxidation. It’s like the clear coat on an old car getting cloudy. If you have older generation boards, you might notice they lack the protective shell found on modern products. You can identify high-quality capped decking versus the older, more porous stuff by looking at the end grain. According to research from the Forest Products Laboratory, UV radiation can degrade the polymer surface of wood-plastic composites significantly if the material isn’t properly stabilized, leading to that ‘ghostly’ appearance we all hate. Before you give up and think about a full replacement, remember that the secret to making composite decking look like real wood often lies in a deep, pH-neutral cleaning followed by a specialized color-restoring sealer. Have you noticed your deck losing its luster, or are you worried that a restoration attempt might just make things worse?
Is this whole process just a waste of a weekend?
It is easy to be skeptical when a ‘miracle’ product claims to fix years of sun damage in an hour. I’ve tried the ‘as seen on TV’ stuff, and trust me, most of it is garbage. However, using a dedicated composite deck restorer—one specifically designed for synthetic fibers—really does work because it penetrates the oxidized layer rather than just sitting on top of it like a cheap paint. Whatever you do, why you should never use bleach on your composite deck is something I can’t stress enough; it eats away at the structural binders and leaves you with a brittle mess. We aren’t just looking for a temporary shine; we are looking to rebuild the surface integrity so you can actually enjoy your summer instead of scrubbing on your hands and knees.
Scrub Away the Scars of Winter
Start by treating your deck like a high-end countertop rather than a driveway. You want a soft-bristle brush—something with a bit of flex—and a bucket of warm, soapy water using a pH-neutral cleaner. The goal here isn’t to strip the material, but to lift the ‘biofilm’ and oxidized particles that have settled into the grain. I remember one humid Saturday in Georgia where I tried to skip the scrubbing and just spray it down with a hose. Within two days, the gray film was back, because the hose alone couldn’t break the surface tension of the oils trapped in the plastic. You have to put some shoulder into it. If you are working on a larger project, such as maximizing outdoor living with low-maintenance composite decking, keep your sections small so the soap doesn’t dry before you rinse. 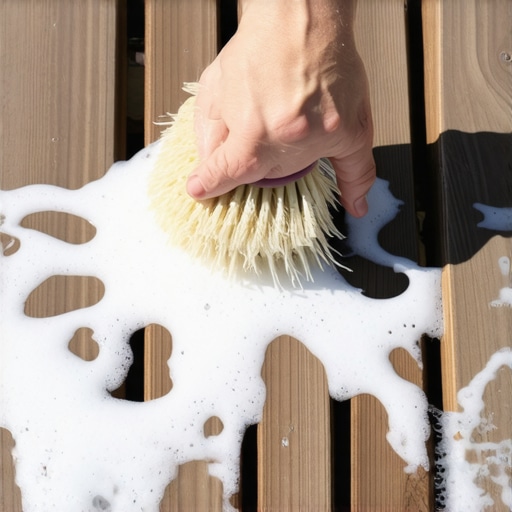
Wait for the Perfect Weather Window
Timing is everything when you are applying a restorer. If the boards are too hot, the product flashes (dries) instantly, leaving hideous lap marks that look like zebra stripes. You need the boards to be cool to the touch. This is also when you should pay attention to how your materials are behaving; for instance, understanding why your composite decking is expanding more than the manual says is crucial because applying a sealer when the boards are at peak expansion can lead to ‘bridging’ where the product cracks once the temperature drops and the boards shrink. I once made the mistake of sealing a deck at noon in July; by October, the sealer was peeling off in strips because the boards had moved so much. Aim for a dry, overcast day with temperatures between 60 and 75 degrees Fahrenheit.
Applying the Restorer Without the Mess
Once the deck is bone dry—usually 24 to 48 hours after cleaning—it is time for the restorer. Think of this like a moisturizer for your skin. Use a synthetic pad applicator on a pole for the main floor, but keep a small brush handy for the details. If you have added a cocktail rail hack for easier outdoor entertaining, be careful not to let the restorer drip onto the siding or the vertical railing posts, as it can leave permanent stains on different materials. Work from one end of the board to the other in long, continuous strokes. This prevents the ‘double-overlap’ darkening that happens when you stop in the middle of a plank.
Don’t Ignore What Lies Beneath
While you are focused on the surface beauty, don’t forget that the longevity of your investment depends on the skeleton. Even the best surface treatment won’t save a deck if the joists are failing. It’s a common misconception that synthetic tops mean the structure is invincible, but why pressure treated wood still needs maintenance under composite is a lesson many homeowners learn too late. While you have the furniture moved, take ten minutes to check for soft spots in the framing. Following these composite decking secrets and longevity tips ensures that your restored boards aren’t sitting on a rotting foundation. When I did my own restoration, I actually found a small pocket of rot near the ledger that I would have missed if I hadn’t cleared the deck off completely. Fixing it then saved me thousands in structural repairs later.Everyone tells you that hidden fasteners are the holy grail of deck aesthetics. They give you that smooth, fastener-free surface that looks like an indoor hardwood floor. But I’m going against the grain here: in high-heat environments, they can be a nightmare. In my experience, these clips often fail to restrain the immense force of thermal expansion in longer boards. I’ve walked onto high-end projects where the boards have ‘unzipped’ from their tracks because the sun beat down on them for twelve hours straight. This is exactly why your hidden fasteners are popping up in heat. Sometimes, using high-quality color-matched face screws—especially at the ends of your runs—is the expert move that prevents a callback three years down the line. Don’t let a trend ruin your structural integrity.
The One Gapping Error That Voids Your Warranty
Then there is the ‘butt-joint’ trap. Most DIYers and even some pros treat composite like pressure-treated lumber and jam the ends together. This is a massive mistake. According to the North American Deck and Railing Association (NADRA), failing to account for linear expansion is the leading cause of composite deck buckling and subsequent warranty denials. If you don’t strictly follow the expansion gap rule that stops boards from buckling, the boards will have nowhere to go but up when the temperature hits 90 degrees. I always tell people to use a spacer specifically designed for the ambient temperature at the time of installation; it’s a nuance that separates a backyard hobbyist from a master builder.
Why does your high-end deck feel like a furnace in July?
You paid a premium for the best materials, yet you can’t walk on them barefoot. This is the nuance of material science that often gets glossed over in the showroom. Standard Wood-Plastic Composites (WPC) contain wood fibers that hold onto heat, but it’s the density of the plastic shell that really radiates it back at you. Research from ASTM International indicates that the thermal emissivity of darker synthetic boards can lead to surface temperatures exceeding 150 degrees Fahrenheit. If your backyard is a sun-trap, you need to understand why capped polymer composite stays cooler than wood-plastic. Capped polymers (PVC) are generally less dense and dissipate heat faster than their WPC counterparts. This is also why you should avoid dark decking near a sunny pool. It’s not just about the look; it’s about whether you can actually use the space without boots. Beyond the surface, always remember that the joist tape secret for doubling your decks lifespan applies regardless of the board type you choose. Protecting the skeleton is just as vital as protecting your feet. Have you ever fallen into the ‘maintenance-free’ trap or had your boards buckle unexpectedly? Let me know in the comments.I’ve spent too many hours fighting warped boards and misaligned balusters to rely on ‘good enough’ tools anymore. If you are serious about keeping your outdoor space in top shape, you need to stop treating your deck like a DIY weekend project and start treating it like the precision engineering feat it actually is. One tool I never step onto a job site without is a dedicated deck board straightener—specifically the BoWrench. I use it because composite boards, despite their plastic content, can still have a slight crown or bow. Trying to manhandle a 20-foot board into a perfectly straight line while trying to set a hidden fastener is a recipe for a back injury and a crooked deck. For those of you working on intricate details, I’ve found that using the drill guide hack for centered baluster holes is the only way to ensure your railing looks professional rather than amateur. It’s about removing the margin for error before you even pull the trigger on your drill.
How do I maintain my composite deck’s safety and style over time?
Maintenance isn’t just about a quick spray with a hose; it’s about a proactive defense strategy. Every spring, I perform a ritual check of my hardware. I’ve seen too many decks fail because homeowners ignored the structural connections. According to the International Residential Code (IRC) Section R507, lateral load connections are vital for preventing the deck from pulling away from the house, yet these are often the first things to rust if you didn’t use G90 galvanized or stainless steel. While you are down there, look at the gaps between your boards. If you live in a damp climate, you need to know how to stop moss from growing in the gaps of your deck, as trapped organic debris acts like a sponge, holding moisture against your joists and accelerating rot. If your deck features modern aesthetics, don’t forget that the tensioner secret for tight cable railings is what keeps the system from sagging and becoming a safety hazard over the years. Looking ahead, the world of outdoor living is shifting toward ‘smart’ integration. I predict that within the next five years, we will see composite materials with embedded thermal sensors or even self-cooling technology that adjusts to UV intensity in real-time. We are already seeing a move toward more specialized finishes, such as the non-slip coating that actually works on wet composite, which solves the age-old problem of these decks becoming ice rinks after a summer rain. The future isn’t just about durability; it’s about adaptive comfort. I challenge you to go out this weekend and check the tension on your railing system or look for any signs of ‘bridging’ in your expansion gaps. Taking twenty minutes now to use a proper tensioning tool or clear out a few gaps can save you a full weekend of repairs three years down the line.
The Brutal Lessons My Faded Boards Taught Me
After years of maintaining various outdoor spaces, I’ve realized that the ‘maintenance-free’ label is more of a marketing dream than a reality. My first big revelation was that heat is the silent enemy of synthetic materials. If you don’t account for the sun’s intensity, even the most expensive boards can become unbearable to touch or, worse, start to warp. I also learned the hard way that dirt hides the damage; often, what looks like a total loss is just a layer of oxidized plastic and pollen that a deep clean can fix. Finally, I discovered that the longevity of your deck isn’t just about the surface but about the protection you provide to the frame. Using the flashing tape move that doubles the life of your joists is the single most important step I now recommend to every homeowner, as it prevents the hidden rot that eventually makes your beautiful boards sag.
My Secret Toolkit for Restoration Success
To get the results I’ve talked about, you don’t need a garage full of gear, but you do need the right specialized items. I swear by a high-quality synthetic pad applicator; it provides a much more even coat than a standard brush when applying restorers. For the cleaning phase, I always reach for a pH-neutral, oxygen-based cleaner rather than harsh chemicals that can strip the protective cap. I’m also a firm believer in the BoWrench for any board realignments, as it gives you the leverage you need without damaging the material. If you are still in the planning phase or looking to upgrade, understanding the resale value battle between wood decks and composite upgrades can help you decide how much to invest in your restoration versus a full replacement. I trust these tools and strategies because they’ve consistently turned gray, lifeless spaces back into the crown jewels of the backyard.
Bring Your Outdoor Sanctuary Back to Life
Restoring your deck is more than just a weekend chore; it is about reclaiming the space where your family makes memories. It’s easy to feel overwhelmed by the graying boards, but once you start the process and see that first rich streak of color return, the momentum takes over. By staying on top of composite decking trends and durable solutions, you can ensure your home stays modern and functional for decades. Don’t let another summer slip away while you hide inside from a dusty, chalky deck. Take the first step, grab a brush, and transform your composite decking back into the vibrant retreat it was always meant to be. Have you ever noticed a specific spot on your deck that fades faster than the rest? Let me know in the comments below.