
I remember the first time I stood on my brand-new composite deck during a record-breaking July afternoon. I had spent weeks obsessing over durable solutions for modern outdoor living, thinking I’d finally built a maintenance-free sanctuary. Then I heard it—a groan of shifting plastic and wood fibers that sounded like a sinking ship. I looked down, and those perfectly uniform gaps I’d measured with a spacer were gone. The boards were fighting for space, crowning in the middle like speed bumps. It was heartbreaking. I’d followed the manual to the letter, yet my deck was expanding way beyond the ‘maximum’ the manufacturer promised. [IMAGE_PLACEHOLDER_1]
Your Manual Doesn’t Know Your Backyard
The truth is, those installation guides are written for ‘ideal’ conditions, usually in a climate-controlled warehouse. They don’t account for the blistering sun hitting a dark grey board for eight hours or the way humidity trapped under a low-clearance frame affects movement. I learned the hard way that low-maintenance composite decking still obeys the laws of physics, regardless of what the glossy brochure says. If you’ve noticed your boards buckling or your hidden fasteners popping up in the heat, you aren’t crazy. Have you ever stepped onto your deck and noticed the boards felt ‘tighter’ than they did in the spring?
Is this just a sign of cheap materials?
It’s easy to blame the brand when things go sideways. You might think you accidentally bought the ‘budget’ stuff, but even high-end boards have high thermal expansion coefficients. According to research by the Forest Products Laboratory, plastic-composite materials can expand at a rate significantly higher than traditional timber because the polymer matrix reacts aggressively to temperature swings. I once skipped the expansion gap rule that stops boards from buckling because I thought a smaller gap looked ‘cleaner’ during a cool October build. Big mistake. By the following August, the friction was so intense it was shearing my screws and warping the frame. Understanding the ‘why’ behind this movement is the only way to prevent your investment from turning into a wavy mess. Let’s get into the real-world physics the manufacturers forgot to mention.
Space Your Boards Based on the Thermometer
Most people think a gap is a gap, but the temperature of the air the moment you drive that screw is the most important variable in your build. Think of your deck boards like an accordion. If you install them on a 95-degree day, they are already fully expanded. If you leave a massive gap then, you’ll have a canyon-sized hole when the winter frost hits. Conversely, if you install them tight during a crisp October morning, they will have nowhere to go when July rolls around, forcing them to crown or snap your fasteners. I always keep a digital thermometer on the joists. If the board surface is above 80 degrees, I use a smaller 1/16-inch spacer. If it’s below 50 degrees, I jump to 1/4-inch. This precise application of the expansion gap rule that stops boards from buckling is the only way to ensure the deck looks consistent year-round. 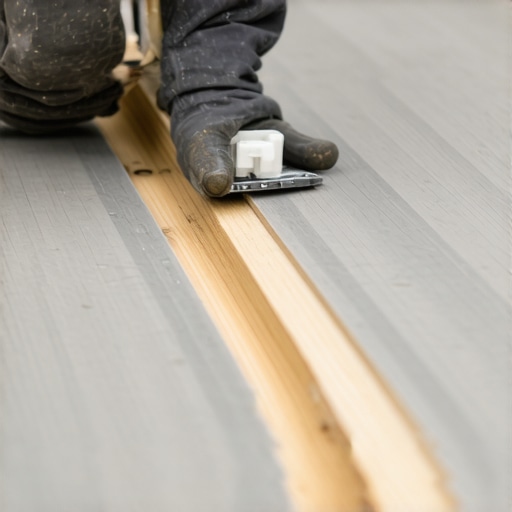
Stop Relying Solely on Hidden Fasteners
I love the look of a fastener-free surface, but hidden clips have a dirty secret: they allow the board to slide like a piston inside an engine. On a 20-foot run, that sliding can accumulate at one end, causing the board to walk right off the joist or push against the rim board until it bows. To fix this, you must ‘center-pin’ every board. This involves driving two face screws into the center joist of every board run, hidden by color-matched plugs. This forces the board to expand outward in both directions from the middle rather than shifting entirely to one side. If you don’t do this, you’ll likely find why your hidden fasteners are popping up in the heat as the board’s lateral force simply shears the plastic clips. I remember a project in Charlotte where we skipped the center-pinning on a 40-foot expanse. By the next summer, the entire picture-frame border was pushed out two inches. We had to unzip the whole deck just to reset the boards.
Double Your Joists to Save Your Edges
Never try to share a single 1.5-inch joist between two board ends. It’s a recipe for rot and structural failure. When two boards meet end-to-end, they both need full support and their own dedicated fastening points. I always implement the double joist trick for perfectly flush picture frame borders, which involves sistering an extra joist at every butt joint. This provides a 3-inch wide landing zone, allowing you to keep your screws back from the very edge of the composite material, which is where it is most prone to cracking. While you are at it, consider composite decking secrets longevity tips for a lasting deck by applying flashing tape to these double joists. Water loves to get trapped between sistered lumber, and without tape, your frame will rot long before your expensive boards do. If you find the boards are stubborn during the layout, try the soap slippage method for pulling composite boards tight to get them perfectly aligned without scarring the finish.But even with perfectly aligned boards, there is a hidden nuance most people miss that can compromise the entire structure within a few years. The common marketing pitch is that these decks are ‘maintenance-free,’ which leads homeowners to ignore the skeleton underneath the surface. In my experience, focusing only on the boards is like putting a luxury engine inside a rusted-out frame. While the composite itself won’t rot, the pressure-treated lumber beneath it is still highly susceptible to moisture trap. I always insist on using the flash and tape method for protecting deck joists to prevent water from sitting in the screw holes. Without this barrier, the wood fibers around your fasteners will eventually soften, leading to ‘screw pull’ where the boards begin to wobble regardless of how well you spaced them. 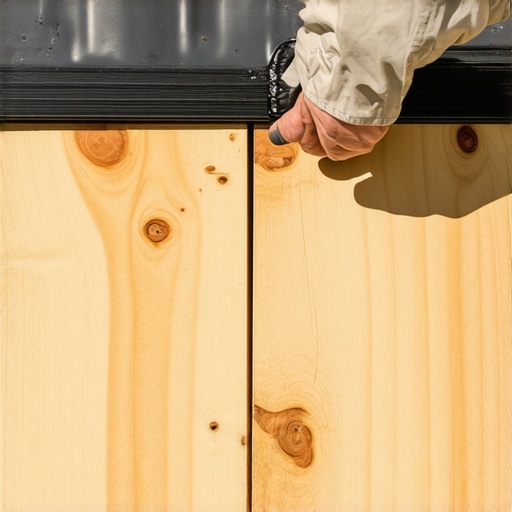
The Dangerous Myth of the ‘Strong Enough’ Railing Post
A common belief among DIYers and even some contractors is that a few heavy-duty lag bolts through the rim joist are sufficient to secure a railing post. This is a dangerous mistake. In reality, that connection is the most common point of failure because the rim joist itself isn’t structurally tied to the rest of the frame for lateral loads. A study by the Virginia Tech Department of Sustainable Biomaterials revealed that traditional through-bolting often fails to meet the 200-pound lateral load requirement once the wood fibers begin to compress over time. To avoid a wobbly and unsafe perimeter, I recommend the hidden bracket trick for perfectly rigid railing posts. This method uses structural tension ties to connect the post directly to the floor joists, transferring the force into the entire deck mass rather than just the edge.
Why are my post sleeves cracking every winter?
If you have noticed hairline fractures at the base of your decorative post sleeves, it is rarely a manufacturing defect; it is a thermal expansion trap. Most installers jam the sleeve tight against the deck surface for a ‘clean’ look. However, the internal wood post and the outer PVC sleeve expand and contract at different rates. When the wood swells from winter humidity and the sleeve shrinks in the cold, the pressure becomes intense enough to split the plastic. Leaving a tiny 1/8-inch relief gap and understanding why your railing post sleeves are cracking at the base will save you from expensive repairs.
Don’t Let Your Pergola Become a Giant Sail
When designing shade structures, people often over-engineer the roof and under-engineer the anchors. If you add too many rafters or a solid canopy, your pergola becomes a massive wing during high winds. This lateral force can literally pull a ledger board right off your house walls. This is why I often advocate for the ledger-free pergola why freestanding is often better, as it keeps those wind loads independent of your home’s structural integrity. If you want a modern, open feel without the structural risk, you should also learn how to tension cable railings without specialized expensive tools to maintain a sleek look that allows wind to pass through freely. Building a structure that lasts requires looking past the brochure and respecting the physics of the environment. Have you ever fallen into this trap? Let me know in the comments.Building it is just the first half of the battle. I’ve seen gorgeous $50,000 installations look like a dilapidated pier within five years because the homeowner treated ‘low maintenance’ as ‘no maintenance.’ To keep your backyard sanctuary truly pristine, you have to shift your mindset from construction to stewardship. One tool I never start a project without anymore isn’t a saw or a drill—it’s 3D rendering software. I realized why you need a 3d model before buying a single deck board after a client wanted to add a heavy granite outdoor kitchen mid-build. Without that digital blueprint to check the load-bearing paths, we would have collapsed the joists by August. It allows you to stress-test your innovative deck design ideas for 2025 before you waste a dime on materials. 
How do I protect my composite investment from the elements?
The biggest mistake I see involves a gallon of Clorox and a scrub brush. You have to understand why you should never use bleach on your composite deck; the harsh chemicals can actually break down the UV inhibitors in the capped layer, leading to premature fading and a chalky residue that no amount of ‘restorer’ can fix. Instead, stick to mild dish soap and a soft-bristle brush. When winter hits, put away the metal shovel. I’ve spent countless hours replacing scratched boards because of poor winter care. Learning the best way to handle snow removal on composite decks—which usually involves a plastic shovel and a leaf blower—is the difference between a surface that sparkles in May and one that looks like a skating rink gone wrong.
Don’t Ignore the Skeleton Underneath
Even if your boards are top-tier, the pressure-treated frame is where the real vulnerability lies. The American Wood Protection Association (AWPA) standard M4 specifically mandates that all field-cuts on pressure-treated lumber be treated with a copper naphthenate preservative. Most contractors skip this, leaving the ‘heart’ of the wood exposed to rot. I always keep a small tin of end-cut solution and a brush in my tool belt. Pairing this with the flashing tape move that doubles the life of your joists creates a dual-layer defense system. I predict the future of decking will move toward complete steel-framing systems to bypass this wood rot issue entirely, but until that becomes the cost-effective standard, you have to be obsessive about moisture management. If you want to elevate your game, my best advice is to stop viewing your deck as a static floor and start seeing it as a living system. Take ten minutes this weekend to perform the 15-minute deck inspection every homeowner should do. Look specifically for any signs of screw-pull or moisture pooling near the ledger. It’s the small, proactive adjustments today that prevent the massive structural headaches of tomorrow.
Hard Truths from the Joist Hangers
After years of building, I realized that composite decking is less like a static floor and more like a dynamic system that reacts to every temperature swing. One lightbulb moment for me was realizing that the gap you set during installation is actually a ‘movement allowance’ you’ll need for the next twenty years. If you don’t respect the expansion rates, the material will eventually win the fight against your fasteners. If you’re still on the fence about project costs, looking into the resale value battle wood decks vs composite upgrades can help you see the long-term financial benefits of choosing high-performance materials. I’ve also learned that hidden fasteners aren’t a ‘set it and forget it’ solution; they require precision in the substructure to avoid board walking. Remember, your deck’s lifespan is dictated by the hidden wood frame, not just the boards you see.
[IMAGE_PLACEHOLDER_FINAL]
Tools for a Lifetime of Outdoor Comfort
I no longer rely on guesswork when I’m on a job site. Here are the three resources I consider essential for any serious builder: First, a reliable 3D modeling process. I’ve found that why you need a 3d model before buying a single deck board is more about ensuring structural loads are distributed correctly than just picking colors. Second, always keep a tin of copper naphthenate to treat every saw cut on your pressure-treated joists to prevent premature rot. Third, for those finishing touches that provide real security, I always refer back to the complete guide to choosing railing systems for safety style to ensure the deck isn’t just beautiful, but code-compliant and safe for everyone.
Start Your Build with Confidence
Building a high-quality outdoor space is a marathon, not a sprint, and it starts with a solid foundation of knowledge. Whether you are currently browsing innovative deck design ideas that elevate your homes curb appeal or you are already knee-deep in joist hangers, keep your focus on the small details of moisture management and thermal movement. These ‘invisible’ steps are what separate a 5-year deck from a 25-year deck. Respect the physics of your composite decking, and you will create a sanctuary that stands the test of time. Have you ever noticed your deck boards shifting more than expected during a summer heatwave? Let me know about your experience in the comments below.