
I still remember the first time I invited my neighbors over to see the massive cedar deck I’d spent three weekends building. I was proud, chest puffed out, holding a cold drink, until my neighbor Dave leaned—just slightly—against the corner post. The entire railing groaned and shifted two inches. It was like watching a skyscraper sway in a hurricane, only much more embarrassing. I’d used the standard carriage bolts everyone recommends, but my ‘solid’ railing felt like a wet noodle. That moment of pure panic led me down a rabbit hole of structural engineering and late-night hardware store runs until I discovered what I now call the hidden bracket move.
The Frustrating Truth About Standard Post Mounting
Most of us start with the basics: we notch the post or just bolt it to the rim joist. On paper, it works. In reality? Wood shrinks, bolts loosen, and suddenly your railing system feels like a liability. I made the mistake of thinking more bolts meant more strength. I was wrong. The real secret isn’t more hardware; it’s where that hardware lives. When I finally figured out how to use internal structural brackets hidden beneath the decking, the difference was night and day. It transforms the post from an attachment into a true extension of the frame.
If you’ve ever felt that sickening ‘give’ when you grab a handrail, you know exactly what I’m talking about. According to the International Code Council, guards must be able to resist a 200-pound concentrated load applied at the top, and let me tell you, most DIY posts I see wouldn’t pass a 50-pound lean from a toddler. Using the right blocking trick that stops railing post wobble is the first step, but this bracket trick is the finishing blow to instability.
Do these extra brackets really make a noticeable difference?
You might be wondering if it’s worth the extra twenty bucks and an hour of your time. I used to be a skeptic too. I figured ‘good enough’ was fine for a residential deck. But after seeing how composite decking longevity is affected when posts aren’t rigid (the boards start to gap and rub), I realized the structure is everything. A stiff post doesn’t just feel safer; it protects the rest of your investment. Have you ever finished a project only to realize the ‘sturdy’ part was actually the weakest link? Tell me about your wobbly railing nightmares in the comments—I’ve been there, and I promise there’s a way out.
In the next section, I’m going to walk you through the specific hardware I use and why the placement matters more than the size of the bolt. Whether you are working on a shade-providing pergola or a high-end custom railing system, this method is going to change how you build forever.
Why the Rim Joist is a Structural Lie
We’ve been taught to bolt the post to the rim joist and call it a day. The problem is that the rim joist itself is only held to the deck by the end-grain of your joists. If you lean on that post, you aren’t just testing the bolt; you’re testing the nails or small screws holding the whole perimeter together. It’s a recipe for disaster. To fix this, you need to treat the post as part of the skeleton, not an accessory. This is where custom railing systems either succeed or fail—it’s all in the hidden framing. Think of the post like a lever. If you only pin it at the pivot point—the rim—the leverage of a grown man leaning on the top will eventually rip the wood fibers apart or pull the joist clean off.
Anchor Your Posts Deep Into the Frame
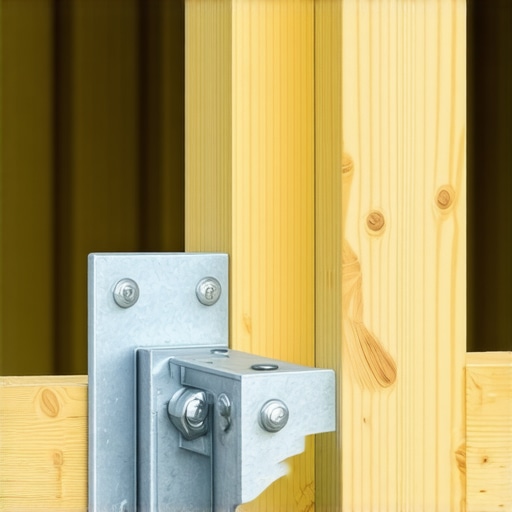
The “hidden bracket move” involves using tension ties. Think of these as steel tendons. Instead of just bolting through the wood, you’re using a heavy-duty, galvanized steel bracket that pulls the post toward the center of the deck. I use a structural connector that threads through the rim joist and anchors directly into the side of a perpendicular joist. This effectively eliminates the leverage that makes posts wobble. When I first tried this on a project in 2019, I was worried about the extra drilling. But once I used the simple tool for making sure your railing posts are plumb, I realized that the brackets actually help hold the post in position while you tighten everything down. It’s like having a third hand that never gets tired.
Don’t Make the 3-Inch Screw Mistake
I learned the hard way that standard deck screws are for boards, not for structural integrity. I once tried to “reinforce” a wobbly post by driving a handful of 3-inch deck screws through the rim joist into the post. Within a month, the wood had expanded, the screw heads snapped off like dry twigs, and the wobble was back. You must use 1/2-inch through-bolts or structural lags. If you are working with a composite deck that feels like a trampoline, adding this rigid post connection actually helps stiffen the entire outer edge of the frame. The sheer strength of a structural lag compared to a deck screw is the difference between a bridge and a fence.
Add the Blocking Before the Boards Go Down
Blocking is the unsung hero of a rock-solid deck. You need to sandwich that post between solid chunks of pressure-treated lumber. I typically install solid blocks behind the post to distribute the weight across three different joists instead of just one. I remember a humid July afternoon where I skipped blocking on a small corner because I was out of scrap wood and wanted to go inside. Big mistake. By August, the post had twisted the rim joist nearly half an inch. Now, I always use the framing move that stops deck boards from bouncing to ensure the entire sub-structure is a single, unmoving unit. This is especially vital when you’re planning innovative deck design ideas for 2025 that might include heavier glass or metal railings. When you’re tightening these brackets, watch the wood. You want it snug, but don’t crush the fibers. If you’re worried about the lifespan of the wood under these brackets, especially if you’ve seen why pressure treated wood still rots under joist tape, make sure to coat any drilled holes with a copper naphthenate solution to keep the core protected from trapped moisture.
The Torque Trap: Why Tighter Isn’t Always Better
Everyone tells you to crank those bolts down until your veins pop, but that’s actually one of the fastest ways to ruin your frame. When you over-tighten structural lags, you crush the wood fibers beyond their elastic limit. This creates a microscopic depression where water can pool, leading to localized rot even in treated lumber. I’ve seen countless DIYers think they’re making the post ‘rock solid’ only to find that pressure treated wood still rots under joist tape because the crushed fibers acted like a sponge. In my experience, snug is safe, but crushed is a countdown to failure.
Why does my railing bracket keep snapping during the winter?
This is the advanced question I get most often from homeowners in colder climates. It’s not usually a manufacturing defect; it’s physics. Metal, wood, and composite all expand and contract at different rates. If you’ve used rigid fasteners with zero ‘give’ in a high-density material, the internal stress during a deep freeze can reach thousands of pounds per square inch. This is exactly why your railing bracket keeps snapping in the cold. The American Wood Council (AWC) notes in their DCA6 guide that lateral load connections must account for the specific gravity and moisture content of the wood, yet few people consider how temperature swings affect that tension. You need to allow for microscopic movement, or the hardware will eventually find a way to vent that energy—usually by snapping.
I once fell into the trap of thinking a railing was a static object. I built a gorgeous wrap-around with dark caps, only to have the miters open up like a shark’s mouth by January. It’s a common ‘oops’ factor: ignoring the sun. If you’re using modern composite decking solutions, you must understand that these boards are essentially long plastic straws that grow and shrink. If you don’t know how to stop composite deck boards from expanding into your siding, your railing posts will be under constant pressure from the floor itself. Have you ever fallen into this trap of over-engineering the tightness only to have the elements fight back? Let me know in the comments.
The Aesthetic Mistake That Ruins Your Curb Appeal
Here is a contrarian take: stop installing white railings if you have a garden nearby. Everyone loves the ‘Cape Cod’ look on day one, but why you should avoid white railings near gardens becomes obvious after the first rainstorm. Pollen, mud splatter, and tannin from leaves turn that crisp white into a dingy mess that requires weekly scrubbing. If you want that high-end look without the labor, go with black or bronze. Surprisingly, why your black aluminum railing gets too hot to touch is a valid concern, but in terms of longevity and aesthetics, darker tones hide the real world much better. If you’re worried about heat, consider a wood-look top rail which stays cooler while the black balusters virtually disappear into the background, giving you a better view of your yard.
Why Lasers Beat Traditional Levels Every Time
When I first started building, I relied on a 6-foot bubble level and a prayer. It worked for small platforms, but the second I tried to scale up to a multi-tier shade-providing pergola, I realized that cumulative error is a deck builder’s worst enemy. Now, I never set a post without using the level and laser method for setting pergola heights alone. Using a self-leveling green beam laser allows me to shoot a perfectly level line across 50 feet, ensuring that every rafter sits flush. If you are off by even an eighth of an inch at the house, that error can manifest as a full inch of lean by the time you reach the outer rim. It’s the difference between a professional finish and a structure that looks like it’s slowly sinking into the yard.
The Tool That Finally Solved My Uneven Screw Problem
If you’ve ever looked down a line of deck screws and noticed they look like a mountain range—some too deep, some sticking out—you know it ruins the aesthetic of low-maintenance composite decking. I spent years trying to ‘feel’ the depth with my impact driver until I finally started using the jig I use for consistent deck screw depth. This tool uses a mechanical stop to ensure every fastener is driven to the exact same millimeter. According to the NAHB Residential Construction Performance Guidelines, fasteners should be driven flush or slightly countersunk without crushing the material, and this tool is the only way to guarantee that consistency across 500+ screws. It’s not just about looks; a screw driven too deep creates a pocket that catches organic debris, which eventually leads to those nasty black mold spots.
How do I keep my deck looking brand new for a decade?
Maintenance is where most homeowners lose the battle. I see people reach for the heavy machinery immediately, but you should never use a pressure washer on composite boards. It’s too aggressive and can actually open the ‘pores’ of the plastic-cap layer, making it more susceptible to staining. Instead, I’ve found that the vinegar and water mix that cleans composite better than chemicals is the safest bet for seasonal refreshes. It breaks down the biofilm that allows algae to grow without stripping the UV inhibitors from the boards. For those stubborn spots, I stick to the soap and sponge fix for oil stains rather than harsh degreasers that can discolor your expensive composite decking secrets for longevity.
The Future of Decking is Hidden and High-Tech
Looking ahead to innovative deck design ideas for 2025, we are seeing a massive shift toward ‘smart’ integration and truly fastener-free surfaces. While hidden fasteners can be a maintenance nightmare if the joists shift, the industry is moving toward clips with built-in expansion joints. This allows the deck to breathe and move without the hardware snapping. We are also seeing the rise of integrated sensor tech—small, palm-sized devices that can help you test your deck for structural fatigue by measuring deflection over time. This kind of data-driven building is going to make the ‘wobbly railing’ stories of the past a relic of history. I challenge you to go out this weekend and pick up a high-quality structural screw jig—it will change the way your deck feels underfoot forever.
The Brutal Truth About Why My First Deck Railing Failed
After two decades in the sawdust, the biggest shift in my mindset was moving away from ‘it’s just a fence’ to ‘it’s a life-safety system.’ Here is what actually matters when the boards meet the frame: leverage is your enemy. A 36-inch post acts like a giant crowbar on your rim joist. If you don’t reinforce the frame internally, you’re essentially trying to hold back a car with a piece of tape. Hardware is also non-negotiable; I’ve seen the 3-inch screw mistake that ruins composite joists destroy beautiful projects in a single season because standard fasteners lack the shear strength for structural loads. Finally, maintenance isn’t optional; I always perform the 10-minute flashlight test for finding hidden ledger rot twice a year to catch moisture issues before they become structural failures that lead to wobbly posts.
#IMAGE_PLACEHOLDER_E#
Must-Have Gear for a Perfect Railing Installation
Building a pro-grade deck doesn’t require a truck full of specialized tools, but these few items are non-negotiable for me for achieving that zero-wobble feel. First, get a dedicated structural screw jig. It removes the guesswork and prevents you from over-driving fasteners into the wood. Second, always keep a green-beam laser level handy; it makes the simple way to extend a pergola for more shade a breeze by ensuring your post heights and railing lines are dead-on across long spans. For the finish, skip the power washer and stick to the vinegar and water mix that cleans composite better than chemicals to keep your surfaces pristine without damaging the delicate wood fibers or composite caps.
Time to Build a Deck That Doesn’t Budge
There is a unique kind of satisfaction that comes from leaning against a railing you built and feeling absolutely nothing but solid resistance. Whether you are tackling innovative deck design ideas for 2025 or just fixing a dangerous wobble on an existing platform, remember that the extra work you do beneath the boards is what defines the quality of the life lived on top of them. You’ve got the engineering secrets now; it’s time to get out there and make it solid. Have you ever had a railing post start to wiggle just months after you finished the project? Let me know your story in the comments below!