
I remember my first big deck build back in the early 2000s. I had just finished the last board, the grill was hot, and my brother-in-law—a guy who weighs a solid 250 pounds—leaned casually against the corner post. My heart stopped. That post didn’t just budge; it groaned and tilted like a palm tree in a hurricane. I had used the thickest lag bolts I could find, but I had missed the one fundamental secret to structural stability. It was embarrassing, dangerous, and entirely preventable.
Why Your Deck Railing Feels Like Wet Noodles
Most DIYers and even some pros think that the strength of a railing lies solely in the bolts. It doesn’t. If you have performed the 3-second push test for wobbly railing systems and the post moves more than an inch, you aren’t just dealing with a loose screw; you are dealing with a lack of leverage control. The rim joist—that outer board of your deck—is basically a giant hinge unless it is reinforced from the inside. When I first started, I made the classic mistake of thinking more hardware equaled more safety. It turns out, according to the North American Deck and Railing Association (NADRA), railing failures are one of the leading causes of deck-related injuries, often because the connection point at the rim joist fails under lateral pressure. Without solid internal blocking, those expensive bolts are just crushing the wood fibers every time someone leans back.
Is a little bit of wobble really that dangerous?
You bet it is. Beyond the immediate safety risk, a moving post slowly eats away at your low-maintenance composite decking by widening the holes around the fasteners, leading to moisture intrusion and rot. Today, we are going to fix that once and for all. I am going to show you the blocking trick—a method that uses scrap lumber to turn your rim joist into a rigid structural beam. This is the same logic I use when choosing railing systems for safety and style for high-end clients. It is cheap, it is fast, and it works whether you are building fresh or trying to fix a wobbly top rail on an existing structure. Have you ever had a guest lean on your railing and seen that look of pure terror on their face? Let me know—I have definitely been there, and it is a wake-up call you never forget. We are about to turn that terrifying sway into a structure that feels like it’s part of the house foundation.
How Blocking Turns Your Joists into Iron
To fix a railing that sways, you have to think like a lever. When someone pushes on the top of a 36-inch post, they are applying massive torque to the bottom. If that post is only bolted to a single 2×10 rim joist, that joist is going to twist. To stop this, we use solid blocking. You need to cut pieces of pressure-treated lumber—the same size as your joists—and wedge them tightly behind the post location. By connecting the rim joist to the first interior joist with these blocks, you distribute that leaning force across the entire floor frame rather than just one board.
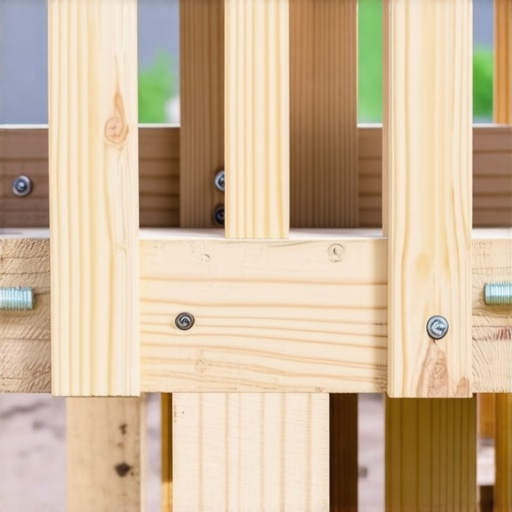
Last summer, I worked on a project where the deck was perched twenty feet above a rocky ravine. The homeowner was terrified of the height because the existing railing felt like a wet noodle. We went underneath and applied the same logic found in the hidden blocking move for supporting heavy pergola beams. By sandwiching the post between the rim joist and two solid blocks tied into the next joist over, that railing didn’t just stop wobbling—it became as stiff as the house foundation. It’s the difference between a fence post in sand and a post set in three feet of concrete.
Why Your Rim Joist Needs a Backbone
A standard rim joist is designed to carry vertical loads, not lateral ones. When you install a post, you are asking that board to resist a pulling force it wasn’t meant for. This is where many DIYers fail. They assume that if they used the 3-4-5 triangle move for squaring up a new deck frame, the structure is automatically strong enough for railings. It’s not. You must install ‘DTT2Z’ deck tension ties or solid wood blocks to tie the post back into the joist run. This ensures that when someone leans on the rail, the force is pulling against the length of the joist rather than just the face of the rim board.
The Right Way to Place Your Bolts
Bolt placement is just as critical as the blocking itself. I see people put two bolts side-by-side all the time, but that does nothing for leverage. You want your bolts vertically aligned and spaced as far apart as the post-to-joist overlap allows. While why your pergola posts need to be 6×6 minimum for stability is common knowledge for shade structures, deck posts are often 4x4s that rely entirely on these fasteners. Use 1/2-inch galvanized carriage bolts, and never skip the washers. Before you tighten them down, apply a bit of the joist tape secret for doubling your decks life over the top of the blocking and the post-joist seam to prevent trapped moisture from rotting out your new, stiff connection. If you are dealing with a frame that feels soft overall, you might also need to learn how to fix the bounce in your over-spanned deck joists to ensure the floor doesn’t flex while you’re leaning against the rail.
Everyone tells you to just ‘crank down the bolts’ when a railing feels loose. In my experience, that is actually the worst thing you can do. Most people believe that mechanical pressure alone ensures stability, but they are forgetting about the biology of the wood itself. When you over-tighten a 1/2-inch carriage bolt, you aren’t just securing the post; you are often crushing the wood fibers perpendicular to the grain. According to the USDA Forest Products Laboratory, wood is significantly weaker when compressed from the side rather than the end-grain. Once those fibers are crushed, they lose their elasticity, creating a permanent gap that no amount of tightening will ever truly fix. This is why you see so many veteran builds with ‘post-shimmer’ despite having massive hardware installed.
What happens to stability when you swap wood for heavy glass or cable?
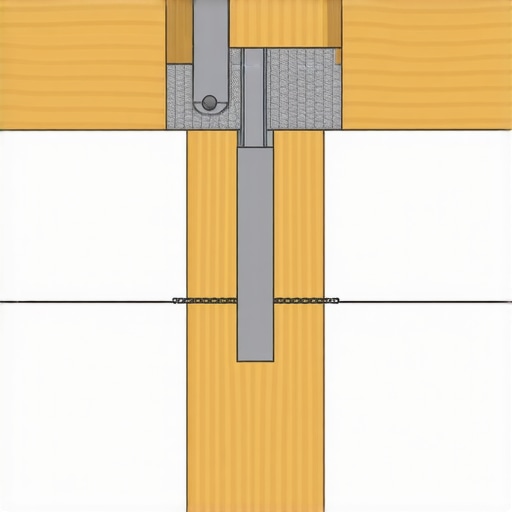
This is where the nuance really kicks in. If you are planning on how to install glass railings without professional help, the physics change completely. Unlike wood balusters, glass panels act like giant sails. They catch the wind and apply constant, rhythmic lateral pressure to your posts. Standard blocking isn’t enough here; you need to account for the vibration that leads to hardware fatigue. I’ve seen railing brackets fail because the builder didn’t realize why your railing bracket keeps snapping in the cold—often it’s due to the metal becoming brittle and unable to handle the micro-movements of a wind-loaded glass panel. To combat this, I always recommend the hidden bracing move for rock-solid corner posts, which involves using steel-to-wood connectors that bypass the wood’s natural compression limits.
The biggest ‘oops’ factor I see with modern builds is ignoring the thermal dance of materials. If you are using composite decking trends like dark, high-density boards, you have to remember they expand and contract at a different rate than your pressure-treated frame. I’ve seen beautiful railings literally pulled out of alignment because the builder didn’t understand why dark composite boards need extra expansion space. The decking pushes against the post base, and since the post is tied into the joists, something has to give. Usually, it’s your expensive railing brackets or the rim joist itself. Even if you use the joist tape secret for doubling your decks life, the mechanical stress of that expansion can create new entry points for rot that the tape can’t cover. You have to leave a ‘breathing gap’ around the post base and use high-quality flashing to keep the core dry. Have you ever fallen into this trap and watched your perfectly straight railing start to bow mid-summer? Let me know in the comments—it’s a frustrating lesson to learn the hard way.
Once you have conquered the physics of wobbly posts, the game shifts from construction to preservation. I have learned that the secret to a professional finish isn’t just in the big beams; it is in the repeatability of the small details. For example, when I am finishing a massive surface, I swear by the jig I use for consistent deck screw depth. If one screw is countersunk a fraction of an inch deeper than the rest, it creates a tiny pool for water. Over five years, that tiny pool becomes the epicenter of rot. It is those micro-decisions that separate a weekend project from a thirty-year legacy.
The One Tool That Actually Saves My Back
I am also a huge advocate for using the right alignment tech. I have seen guys spend hours with a bubble level only to realize their entire rim is sagging. Now, I always go back to the string line method for perfectly level deck surfaces. It is simple, foolproof, and doesn’t run out of batteries. If you are dealing with a complex pergola, I use a similar approach with the string line move for perfectly plumb pergola posts to ensure that every beam sits exactly where the blueprints intended. Precision is your best friend when you are scaling up to complex structures. 
How do I keep my deck and railing looking fresh over the long haul?
Maintenance is where most homeowners check out, but it doesn’t have to be a chore. If you have chosen low-maintenance composite decking, your biggest enemy is actually heat and surface friction. I always keep a heat gun in my kit; it sounds crazy until you see how to fix scuffs on dark composite boards with a heat gun. It essentially heals the plastic fibers, making scratches disappear in seconds. For everything else, I follow the composite decking secrets and longevity tips for a lasting deck, which mostly involves keeping organic debris out of the gaps. According to the American Wood Council’s Design for Code Acceptance (DCA) 6, proper drainage and ventilation are the primary factors in preventing premature structural decay. If air cannot move, your deck will eventually fail from the inside out.
What the future holds for your backyard
We are entering an era where outdoor spaces are becoming as smart as our kitchens. I am seeing pergola trends shifting toward motorized louvers and integrated lighting that can be controlled via smartphone. Even deck design strategies are evolving to include dedicated zones for tech, like the propane fire pit clearance rule every deck owner needs to know to safely integrate heating elements into composite surfaces. If you want to stay ahead of the curve, try this advanced tip tomorrow: use a structural vulnerability assessment to check your joists before you invest in any new railing upgrades. It is better to know your foundation is solid before you put the jewelry on top.
What Years of Swaying Posts Taught Me About Wood Physics
I spent the first decade of my career trying to solve wobble with sheer metal force. I would drive three bolts where one would do, thinking the steel was the ultimate savior. The real lightbulb moment came when I realized that wood is a living, breathing sponge. If you do not respect the compression limits of those fibers, no amount of hardware will save you. Always prioritize the ‘sandwich’ effect—where the post is squeezed between two solid structural members like a vise. This creates a friction lock that outlasts the tension of the bolts themselves. Additionally, never underestimate the power of a pilot hole; if you do not pre-drill with precision, you are creating micro-fractures that will eventually expand into the very ‘sway’ you are trying to avoid.
Another lesson that took me too long to learn is that the sound of a deck is its health report. A silent deck is a safe deck. If you hear a ‘tick’ or a faint ‘groan’ when you lean on a post, the wood has likely already started to fail around the fastener. In those cases, you are not just tightening; you are reinforcing. This logic applies whether you are working on custom railing systems for safety and style or a standard perimeter build. By listening to the structure, you can catch failures before they become dangerous.
The Essential Kit for a Rock-Solid Finish
When it comes to building something that won’t move an inch, I rely on a specific diagnostic and structural toolkit. First, I never start a repair or a final inspection without performing the flashlight trick for finding hidden joist rot at night. It allows me to see deep into the wood grain to ensure my new blocking is actually biting into a solid foundation. If the core of your rim joist is soft, no amount of blocking will fix the sway.
Second, I always recommend the American Wood Council’s DCA 6 guide as your primary resource for code-compliant connections. Pair those professional standards with practical field hacks like the shingle trick for protecting the top of your deck beam to keep water from pooling in the very spots you have just reinforced. For those moving into more aesthetic builds, exploring pergola designs that turn your garden into a sanctuary can provide inspiration for carrying this structural integrity into overhead shade structures.
Bring the Stability of Your Foundation Outdoors
A deck should not just be an attachment to your home; it should be a seamless extension of its structural foundation. When you step out into your outdoor space, you want to feel that same sense of permanence you get from a hardwood floor or a concrete porch. By taking the time to install internal blocking, using proper tension ties, and respecting the leverage of your posts, you are giving your family more than just a place to grill—you are giving them peace of mind. Do not be afraid to pull up a few boards today to fix a problem that could cause a failure five years from now. Your future self will thank you every time the wind blows or a guest leans against the corner post. It is time to build railing systems that stand the test of time. Have you ever encountered a railing that felt solid in the store but felt like a wet noodle once you installed it on your deck? Let me know your experience in the comments below!