
I still remember the first time I stood back to admire a ‘perfect’ composite deck I’d finished for a neighbor. It was a scorching July afternoon, and those boards were tight, seamless, and looked like a million bucks. I was proud. Fast forward to the first cold snap of November, and it sounded like a ghost was living under the joists. Pop. Snap. Creak. By spring, the boards hadn’t just moved; they had buckled into a literal wave, tripping my neighbor’s kid and making me look like a total amateur. I made the classic rookie mistake of ignoring thermal expansion, thinking a ‘tight fit’ was a sign of craftsmanship. It wasn’t. It was a structural disaster waiting to happen. Today, I’m going to show you exactly how to calculate the expansion gap so your hard work doesn’t warp, crack, or rip itself apart when the seasons change.
The Day I Realized Tight Boards Are a Disaster
When I started out, I hated the look of gaps. I wanted my low-maintenance composite decking to look like indoor hardwood flooring. But science doesn’t care about my aesthetic preferences. Unlike wood, which mostly reacts to moisture, composite materials are incredibly sensitive to temperature. If you install them on a 90-degree day with zero gap, they have nowhere to go when they expand further, leading to those hideous waves. Conversely, if you don’t account for the cold, you’ll end up wondering why your deck boards are popping up at the ends because they’ve contracted and yanked right past the screw heads. I learned the hard way that these boards need room to breathe. According to the North American Deck and Railing Association (NADRA), failing to provide proper ventilation and spacing is one of the top three reasons for premature deck failure. Following the right composite decking secrets means respecting the physics of the material.
Do these gaps actually look as bad as people say?
Many DIYers fear that a 3/16-inch gap will look like a canyon, but once the project is finished, the shadow lines actually create a professional, rhythmic look. More importantly, it prevents you from having to learn how to stop composite deck boards from expanding into your siding, which can cause thousands in damage to your home’s exterior. Have you ever stepped out onto your deck and noticed a board that seems to be ‘growing’ or arching toward the sky? If so, you’re likely dealing with a spacing issue that could have been avoided with a simple plastic spacer. This isn’t just about looks; it’s about making sure your investment lasts twenty years instead of two.Before you even pick up a saw, you need to let those boards sit on-site. Think of it like acclimating a new pet to your house. I once rushed a job in early October, pulling boards straight from the back of a refrigerated truck and screwing them down immediately. Within three days of ‘normal’ weather, the ends had pushed so hard against the border that they snapped the heads off my fasteners. This is why following composite decking trends isn’t just about color; it’s about material science. Leave your boards near the install site for at least 48 hours to let them reach the local ambient temperature.
Give Your Boards Two Days to Settle In
Once the material is acclimated, you have to look at the thermometer. The rule of thumb is simple but often ignored: the colder it is during installation, the larger the gap must be. If you’re installing on a 40-degree morning, that board is at its shortest. It’s going to grow significantly come July. If you’re working in 90-degree heat, you want a tight gap because the board is already ‘swollen.’ Use the pencil trick for marking dark composite boards to keep your measurements precise without leaving permanent marks that ruin the finish.
The Math Behind the Perfect Gap
Imagine a balloon in a freezer versus a balloon in the sun. Composite boards behave the same way. Most manufacturers recommend a 1/8-inch to 3/16-inch side-to-side gap and a specific end-to-end gap based on temperature. For instance, if it’s 60 degrees out, a 1/8-inch gap is usually the sweet spot for most brands. If you’re spanning a huge distance, you might even consider the staggered joist trick for ultra-long deck spans to ensure your framing is as stable as your decking. Precision here prevents the board from ‘crowning’ or buckling under its own pressure. 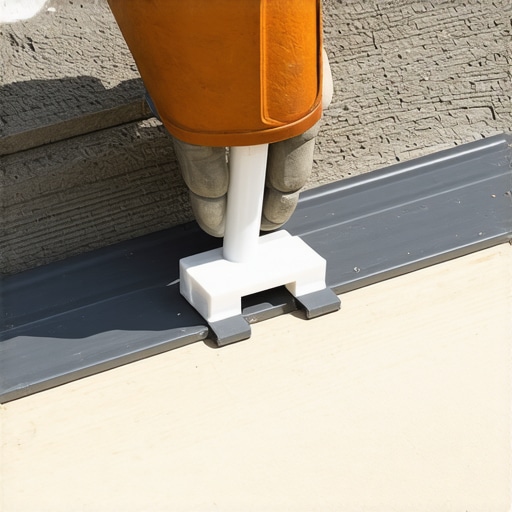
Stop Using Your Eyes and Start Using Spacers
I used to think my ‘carpenter’s eye’ was good enough to keep gaps consistent. It wasn’t. On a 40-foot deck, being off by just 1/32 of an inch per board adds up to a massive disaster by the time you reach the railing. I learned this the hard way on a project in a rainy suburb where I thought I could save money by using scraps. I tried the cardboard spacer trick for consistent board gaps, but I used cheap shipping cardboard. A sudden afternoon shower turned my spacers into mush, and by the time I realized it, half the deck had shifted. Use dedicated plastic spacers that won’t compress or dissolve.
Don’t Over-Tighten Your Fasteners
When it comes time to lock things down, don’t over-tighten. You want the board held firmly to the joist, but you aren’t trying to fuse them together. Avoid the 3 inch screw mistake that ruins composite joists by using the specific fasteners recommended for your board type. Most modern systems use hidden clips that actually allow for a tiny bit of lateral movement while keeping the board secured vertically. This ‘controlled float’ is the secret to a deck that stays flat through blizzards and heatwaves alike. If you’re using face screws, pre-drilling is your best friend to prevent the ‘mushrooming’ effect where the composite material pushes up around the screw head.While the industry pushes hidden fasteners as the ‘luxury’ standard, I’ve seen them turn into a total nightmare when a single board gets damaged in the middle of a deck. Most people believe they are the ultimate choice for a high-end finish, but why hidden fasteners can be a maintenance nightmare becomes clear the moment you have to replace a plank. You often end up having to dismantle a significant portion of the surface just to reach the one board that a hot coal or a dropped heavy tool ruined. In my own projects, I have started recommending face-screwing with color-matched plugs for high-traffic areas; it offers a similar seamless look with vastly better serviceability for the future.
Why does my composite deck feel like a trampoline?
If you have ever walked across a brand-new deck and felt a slight ‘give’ or bounce underfoot, you have likely fallen into the 16-inch joist trap. Traditional wood decks frequently use joists spaced 16 inches apart, but composite material is not as structurally rigid as pressure-treated pine. Following composite decking secrets means acknowledging that many high-performance brands perform better with 12-inch on-center spacing to maintain a rock-solid feel. This is particularly critical if you are planning the diagonal board layout that makes small decks look huge. When you run boards at a 45-degree angle, the actual span between the joists increases effectively, making why your composite deck feels like a trampoline a mathematical certainty unless you tighten up the underlying framing. 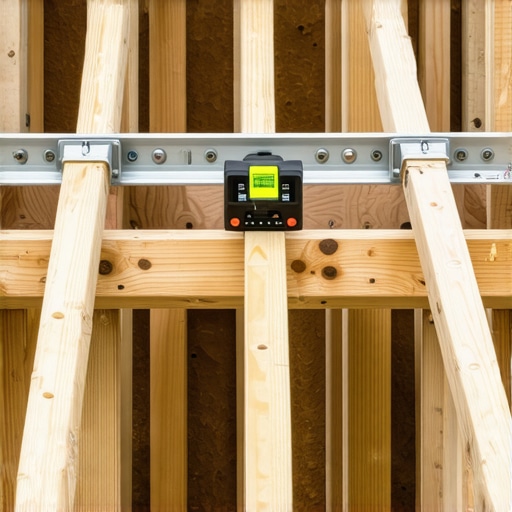
The Load-Bearing Nuance Most DIYers Ignore
Expert installers always look at the ‘span rating’ found in the International Code Council (ICC-ES) Evaluation Reports, specifically the AC174 criteria which dictates how far a composite material can stretch before it fails safety standards. This is not just about the boards snapping; it is about the material ‘creeping’ or sagging over time due to heat and weight. If your joists are set too far apart, summer temperatures will eventually cause the boards to sag permanently between the supports, creating a wavy surface that is impossible to fix without a full tear-off. This is why the framing move that stops deck boards from bouncing is the most important step of the entire build. Do not simply trust the general advice that 16 inches is fine for every material; always verify your specific board’s span rating for the climate and load requirements of your specific region. Have you ever fallen into this trap and ended up with a bouncy deck? Let me know in the comments.Once the last board is snapped into place and the scrap pile is hauled away, the real test of a craftsman begins: the long-term survival of the structure. I have watched homeowners spend a fortune on high-end materials only to see their investment degraded by aggressive cleaning or poor maintenance choices within the first three years. If you want your project to stay pristine, you have to transition from a builder mindset to a caretaker mindset. For instance, many people reach for the heavy machinery when they see a bit of pollen or dirt, but why you should never use a pressure washer on composite is a lesson usually learned the hard way; the high-pressure stream can actually etch the surface of the boards, creating microscopic pores that trap mold and grime forever. Instead, I rely on the vinegar and water mix that cleans composite better than chemicals, which breaks down organic buildup without stripping the protective UV-resistant cap.
How do I keep my composite deck looking brand new for decades?
Maintaining a deck isn’t about hard scrubbing; it is about consistency and using the right chemistry. I always tell my clients that the best maintenance is preventative. During the winter, for example, the best way to handle snow removal on composite decks involves using a plastic shovel rather than a metal one to avoid deep gouges that no amount of heat-gunning can fix. Beyond the surface, you should perform a yearly inspection of the substructure. I use the simple spray that identifies hidden rot on old deck posts to catch moisture issues before they compromise the safety of the entire frame. For those with second-story builds, following composite decking secrets longevity tips for a lasting deck means checking that your drainage systems aren’t clogged with debris, which can lead to trapped moisture against your house siding. 
Specific Tools That Make the Professional Difference
My tool trailer isn’t filled with the most expensive gear, but it is filled with the *right* gear. For railing installs, I stopped guessing at ‘level’ years ago. I now use the simple tool for making sure your railing posts are plumb, which is a specialized post level that wraps around the corner of a 4×4 or 6×6. It sounds basic, but when you are installing the stainless cable trick for views that never get blocked, even a quarter-inch lean becomes painfully obvious once the cables are tensioned. I also keep a set of high-quality carbide-tipped blades specifically for composite. According to the International Residential Code (IRC) Section R507, the structural integrity of your deck depends heavily on the corrosion resistance of your fasteners. I personally use stainless steel screws for everything within 50 miles of the coast, as standard galvanized coatings often fail faster than the composite boards they hold. Looking ahead to 2025 and beyond, I predict we will see a massive shift toward ‘smart’ decks with integrated moisture sensors buried in the joists to alert homeowners of leaks before rot starts. For now, stay ahead of the curve by switching your cleaning routine to a soft-bristle brush and a mild solution. If you really want to level up your next project, try integrating a ‘controlled float’ with your hidden fasteners today to see how much better your deck handles the next heatwave.
What most homeowners overlook about seasonal shifts
Reflecting on my early mistakes, I realized that composite boards are like living organisms that breathe with the temperature. One major lightbulb moment was discovering that why your deck boards are popping up at the ends usually has nothing to do with the fasteners and everything to do with restricted movement. Another takeaway is that color choice impacts physics; why black composite decking burns your feet and how to fix it taught me that darker boards expand more aggressively than lighter ones. Finally, never assume your joists are ‘good enough’ for the switch to composite. Realizing why your composite deck feels like a trampoline because of the 16-inch spacing rule was a hard lesson in structural rigidity.
My go-to toolkit for a professional deck finish
To avoid the headaches I faced, I rely on a few specific items. First, ditch the scrap wood and use the cardboard spacer trick for consistent board gaps only as a last resort; high-quality plastic spacers are non-negotiable. For cleaning, skip the expensive chemicals and use the vinegar and water mix that cleans composite better than chemicals to protect the UV-cap and maintain that fresh look. I also recommend keeping a post level on hand, specifically the simple tool for making sure your railing posts are plumb, because even a perfect floor looks bad if the rails are crooked. Lastly, always protect your frame. The deck joist tape test proved to me that it actually stops rot, even if why pressure treated wood still rots under joist tape reminds us that installation technique still matters.
Build it once and enjoy it for decades
You have done the research, seen the mistakes I have made, and now you have the blueprint for success. Composite decking is an investment in your home’s future, and getting the spacing right is the difference between a project you love and one you regret. Whether you are adding pergola design inspiration from modern to classic looks or just refreshing your backyard, take your time with the prep work and respect the thermal expansion of your materials. Your future self will thank you when those boards stay perfectly flat through every season for the next twenty years. What is the biggest climate challenge your deck faces—extreme summer heat or freezing winters? Let me know in the comments below.