
I stood there in the 2:00 PM sun, sweat dripping into my eyes, staring at a beautiful piece of charcoal-grey composite board. I had my measurement. I had my trusty #2 pencil. But for the life of me, I couldn’t see a single mark. Every time I made a tick, it just vanished into the dark, textured surface like a ghost. I tried pressing harder. Nothing. I tried a carpenter’s pencil. Still invisible. I actually felt a bit foolish—how can a guy who’s built dozens of structures be defeated by a piece of plastic and some graphite? That’s the day I realized that the “old way” of marking lumber doesn’t work when you’re dealing with modern, high-tech materials.
Stop Squinting at Your Cut Lines
We’ve all been there, trying to maximize outdoor living with low-maintenance composite decking, only to find that the very thing we love about the material—its rich, deep color—is our biggest enemy during the build. If you’ve ever made a “close enough” cut because you couldn’t see your line, you know the pain of a 1/8-inch gap that stares at you forever. One of my biggest early mistakes was thinking a standard black marker was the answer. It wasn’t. It bled, it stained, and it looked unprofessional.
Is a fancy white pencil really worth the extra trip to the store?
You might be thinking, “Can’t I just use a piece of chalk?” Trust me, I tried that too. It’s too thick, and precision goes out the window. According to the North American Deck and Railing Association (NADRA), poor layout and imprecise cutting are leading causes of aesthetic dissatisfaction in DIY projects. You need something that provides high contrast without ruining the composite decking secrets for longevity you’re trying to implement. Today, I’m going to show you why a white mechanical pencil or a silver welder’s pencil is the secret weapon you didn’t know you needed. Have you ever ruined a board because you simply couldn’t see where to stop your saw? Tell me I’m not the only one who has spent twenty minutes looking for a mark that was right in front of my face.
Why Graphite Fails on Dark Surfaces
Graphite is essentially dark grey. When you put it on a dark grey or espresso-colored board, it’s like trying to see a black cat in a coal cellar. Even worse, some composite colors that look terrible under LED lights have a reflective sheen that masks graphite even more. I once spent an entire afternoon fighting with a chalk line error that ruins your picture frame border simply because I couldn’t verify my cross-marks. [image_placeholder] You need a solution that stands out against the grain and won’t wash away at the first sign of dew.
Trade Your Graphite for Silver or White
I finally threw my #2 pencil into the grass and drove to the hardware store. I picked up a silver welder’s pencil—a tool usually reserved for steel fabricators—and it was a total game-changer. Think of it like this: graphite is a whisper, but silver lead is a shout. On dark boards, it glows. It’s like the difference between trying to read a paper map at night and using a backlit GPS. When you are looking at composite decking trends durable solutions for modern outdoor living, the materials are becoming denser and darker, making these specialized marking tools mandatory rather than optional.
Why Silver Pencils Beat Graphite Every Time
The silver lead isn’t actually lead; it’s a proprietary reflective core that shines under the light of your saw. I remember trying to layout a complex herringbone pattern last summer. My graphite marks were invisible by 11:00 AM, swallowed by the shadows of the grain. Once I switched to silver, I could see my cross-marks from five feet away. If you can’t find a welder’s pencil, a high-quality white mechanical pencil works just as well. It provides a crisp, thin line that doesn’t smudge as easily as schoolhouse chalk. This precision is vital because when you’re working on innovative deck design ideas that elevate your homes curb appeal, a fraction of an inch can be the difference between a seamless joint and a glaring gap.
The Blue Tape Trick for High-Contrast Cutting
Sometimes even a white pencil isn’t enough, especially if the board has a very aggressive wood-grain texture or if you’re working in direct midday glare. This is when I use the “Tape and Mark” method. I lay a strip of blue painter’s tape exactly where I want to cut. This serves two purposes. First, it gives you a bright, flat surface to draw on with any pencil you have handy. Second, it helps with the painters tape hack for cutting composite boards without fraying. 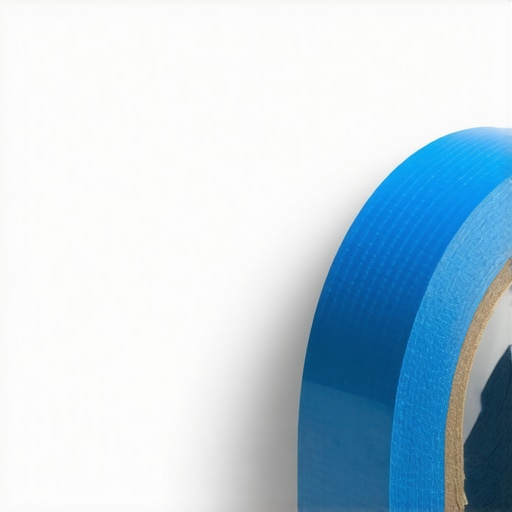 I once forgot this on a high-end wrap-around project and ended up with tiny plastic “fuzz” along every cut edge. The tape keeps the plastic fibers of the composite from splintering as the saw blade exits the top of the board, leaving a factory-clean finish.
Keep Your Layout Consistent With Hidden Fasteners
Once your lines are visible, the real work begins. You need to ensure your boards stay aligned over the long haul. I’ve seen builders get so focused on the individual cut line that they forget the overall layout. Use the chalk line move for aligning hidden fasteners fast to keep your screws in a perfectly straight row. Just remember: only snap a chalk line on the joists, never on the top surface of the composite unless you want a permanent blue stripe on your new deck. If you are struggling with a frame that isn’t true, don’t forget the 3-4-5 triangle move for squaring up a new deck frame. If the skeleton isn’t square, your visible cut lines won’t matter because the boards will eventually “run” and leave you with a wedge-shaped gap at the end.
Avoid These Common Marking Disasters
I once used a red wax crayon on a light-colored “sandstone” composite board. I thought it would be easy to see. It was—and it was also impossible to remove. The wax melted into the porous surface of the board during the heat of the day. Now, I stick to tools that are easily wiped away or covered. For those installing a second-story surface, remember the 2 degree slope rule for drainage under second story decks. Your marking and layout should always account for water runoff. If your lines are straight but your slope is flat, you’ll be marking puddles instead of cut lines in six months.
But even if your lines are laser-straight and your cuts are surgically precise, there is a physical reality most DIYers—and even some pros—ignore until the first heatwave hits: thermal expansion. Everyone tells you that composite is ‘set and forget,’ but that is a dangerous half-truth. While the boards won’t rot, they move significantly more than natural wood. According to the Forest Products Laboratory, wood-plastic composites can expand or contract up to three times more than traditional lumber. If you don’t account for this, your perfectly marked joints will either buckle in July or leave gaping maws in January. This is often why your pressure-treated frame is pulling your composite apart; the two materials are literally fighting each other for space.
Why do hidden fasteners fail on extra-wide deck boards?
I’ve seen a growing trend where homeowners insist on 8-inch wide boards for a ‘luxury’ look, but they use standard hidden clips. This is a recipe for disaster. On wider profiles, the lateral force exerted by the board as it swells can actually snap the plastic clips or sheer the screws. It’s one of the main reasons why hidden fasteners fail on wide-profile boards. If you are going wide, you have to consider face-fastening or specialized heavy-duty clips. Have you ever fallen into this trap? Let me know in the comments if your ‘seamless’ look ended up popping a clip after the first winter.
Your Low Maintenance Deck is Harboring a Secret Rot Problem
The biggest ‘oops’ factor in modern deck building is the false sense of security composite provides. We focus so much on the composite decking secrets for longevity for the boards that we forget the wooden skeleton underneath. When you trap moisture between a plastic board and a wooden joist, you create a greenhouse for fungi. I’ve seen five-year-old decks where the composite looks brand new, but the joists are soft as butter. 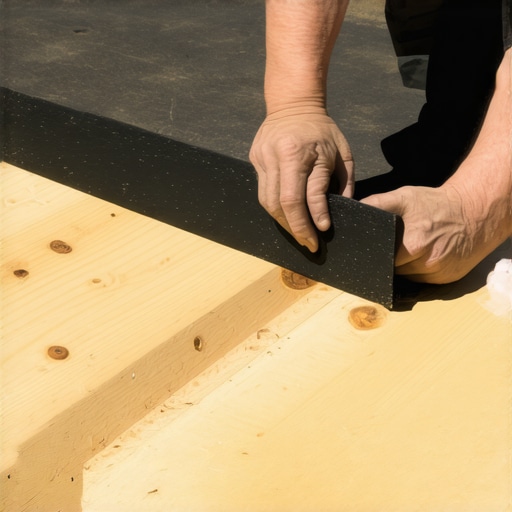 This is why I now consider the joist tape secret for doubling your decks life to be a non-negotiable step. Without that protective barrier, you’re just building a beautiful mask for a decaying structure.
Stop Installing Your Railings as an Afterthought
Advanced builders know that a rock-solid railing doesn’t start at the end of the project; it starts during the framing. A common myth is that you can just ‘bolt on’ the railing posts once the decking is down. If you do that, you’ll be searching for how to fix a wobbly top rail without removing the balusters within six months. Real structural integrity comes from the blocking trick that stops railing post wobble, which involves internal frame reinforcement that must happen before a single deck board is laid. Similarly, if you’re adding a pergola, remember that most DIY structures fail because they lack the ‘hold-down’ strength required for wind. I always point people toward why most diy pergolas fail the uplift test in storms to explain why those tiny 3-inch deck screws won’t keep your overhead beams from becoming sails in a thunderstorm. Don’t let your quest for aesthetics compromise the literal safety of your family.
Even if your structure is rock-solid and your pergola is anchored for a hurricane, the way you maintain that finish determines if it stays a backyard sanctuary or becomes a source of frustration. The most common mistake I see homeowners make isn’t neglect; it’s over-enthusiasm. I’ve watched neighbors destroy their expensive boards by using high-pressure water because they were impatient. I always tell my clients to never use a power washer on composite boards because it can drive dirt deeper into the grain and cause permanent etching. Instead, I rely on a simple home remedy. I found that the vinegar and water mix that cleans composite better than chemicals is safer for your plants and won’t strip the protective UV coating that keeps your colors vibrant.
How do I keep my composite deck looking sharp for decades?
It’s about mastering the small wins before they become big headaches. If you see a scuff from a dragged chair, don’t panic. You can actually fix scuffs on dark composite boards with a heat gun if you’re careful; the warmth draws the oils back to the surface and blends the mark away. For organic stains like grease or bird droppings, skip the harsh bleach. I’ve seen the soap and sponge fix for oil stains work wonders if you catch it early. According to the International Association of Certified Home Inspectors (InterNACHI), a simple annual inspection of your ledger board and hardware is the most effective way to ensure long-term structural safety. Don’t wait for a squeak to perform the 10-minute flashlight test for finding hidden ledger rot. Catching moisture issues before they spread is the true secret to longevity.
The Precise Tools That Separate Pros from Amateurs
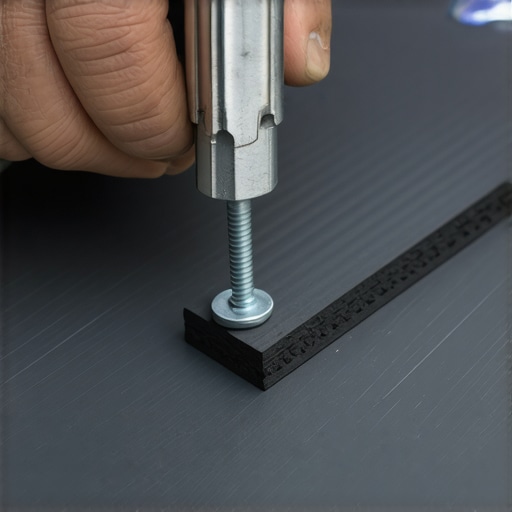
Beyond cleaning, the right specialized tools make the difference between a rough DIY project and a professional masterpiece. I never step onto a job site without the jig I use for consistent deck screw depth. If your screws are all at slightly different depths, the shadows they cast will make your deck look wavy or unfinished. Consistency is the hallmark of high-end deck design strategies. If you are scaling up your project to include a pergola, I highly recommend using the level and laser method for setting pergola heights alone. It is the only reliable way to ensure your beams are perfectly horizontal across a wide span without a second set of hands constantly checking your work.
Why Heat-Reflective Boards Are the Future of Outdoor Spaces
Looking ahead, I predict that heat-mitigation technology will be the next massive shift in composite decking trends durable solutions for modern outdoor living. Manufacturers are already perfecting “cool-deck” technology that reduces surface temperatures by up to 30%, which is a huge relief for anyone who knows why black composite decking burns your feet in the direct summer sun. If you’re planning a build for 2025, ask your supplier about IR-reflective pigments to ensure your barefoot comfort. My best advice for right now? This weekend, take a bucket of warm water and a soft-bristle brush to a small corner of your surface. You’ll be amazed at how much the original luster returns and how easily you can maximize your deck’s longevity with just a little bit of sweat equity.
The Brutal Truth About Building With High-Tech Plastic
If there is one thing I have learned after years of framing, it is that composite decking is a living, breathing thing—well, technically a moving thing. My biggest ‘aha’ moment came when I realized that the material isn’t the problem; it’s our assumption that it behaves like wood. Here are the three truths that changed my approach:
- The Gap is Your Friend: We want tight joints, but on a hot July afternoon, those joints will buckle if they don’t have room to breathe. I stopped aiming for ‘zero-gap’ and started respecting the expansion charts.
- Shadows Reveal Everything: On a dark board, even a tiny 1/16th variance in screw depth looks like a crater. This is why consistency is more important than speed.
- The Skeleton Matters More Than the Skin: You can spend $10,000 on the best boards, but if you skip the joist tape secret for doubling your decks life, you are just putting a tuxedo on a termite’s dinner.
My Battle-Tested Gear for a Flawless Finish
I’ve wasted hundreds of dollars on ‘gimmick’ tools, but these few items are the ones that actually earn their keep on my belt. If you are serious about composite decking secrets for longevity, start here:
First, the Silver Welder’s Pencil. It sounds niche, but for dark boards, it’s the only way to see a line without a headlamp. Second, I always keep a roll of blue painter’s tape for those tricky miters. It’s the simplest way to prevent fraying. Finally, I never start a layout without the jig I use for consistent deck screw depth. [image_placeholder] It removes the guesswork and ensures that every single fastener sits exactly the same way, which is vital when you want to transform your home with stunning deck design strategies.
Take the First Step Toward Your New Backyard
Building a deck can feel overwhelming, especially when you’re dealing with expensive materials that don’t forgive mistakes. But remember, every pro started with a visible pencil mark and a bit of hesitation. By focusing on the small details—the hidden fasteners, the joist protection, and the precise marking—you’re not just building a platform; you’re crafting a space for memories. Your dedication to the “invisible” parts of the build is exactly what will make the final product shine. Don’t be afraid to slow down and double-check your lines. You’ve got this.
Have you ever had a project where your layout marks just seemed to disappear into the grain? Let me know in the comments how you handled it!