
I’ll never forget the afternoon I was finishing up my new deck project, feeling pretty proud of my work. As I stepped back to admire my handiwork, I noticed a slight wobble in the railing. Turns out, I had spaced the posts 8 feet apart, thinking it would save money and time. But that decision quietly set the stage for bigger headaches down the road. Later, I learned that many homeowners make this same mistake, often without realizing how it compromises safety, durability, and overall aesthetics.
The Hidden Danger of Wide-Spaced Railing Posts
Most people assume that spacing posts 8 feet apart is acceptable—after all, it looks cleaner, and the materials are less expensive. However, that tiny gap can turn into a significant problem. When railing posts are too far apart, they can wobble under pressure, sag over time, and even pose safety risks, especially in homes with children or pets. In my early days of deck building, I overlooked this critical detail, which led to costly repairs and a re-evaluation of my entire approach to railing support.
Research confirms that proper post spacing is crucial for strength; the complete guide to railing systems emphasizes that spacing typically shouldn’t exceed 4 feet for residential decks. Why? Because the longer the span, the more stress the railing system endures, risking failure and collapse. So, today, we’re going to walk through the vital reasons why you should never push beyond that 4-foot limit and how to do it right.
Are all railing posts created equal, or is 8 feet really pushing its luck?
Once I realized I was cutting corners with post spacing, my project suffered in silence—until a strong gust of wind revealed my oversight. The wobbling was embarrassing, and more importantly, unsafe. If you’ve ever faced similar issues, know that proper post spacing isn’t just a design choice; it’s a matter of safety and longevity. Ensuring your railing supports are correctly spaced can prevent accidents and save money on future repairs. In the next sections, I’ll guide you through the why and how, so your deck remains beautiful, sturdy, and secure for years to come.
If you’ve encountered wobbling or instability in your railing, don’t ignore it—reach out for expert advice here. Now, let’s get into the details that will make your deck safer and more durable.
Measure Twice, Mark Once
Start by determining the ideal post spacing based on your deck’s design and local building codes. Use a tape measure and a carpenter’s pencil to mark the spots where each post will sit, ensuring they are no more than 4 feet apart. For my recent project, I laid out the entire perimeter on the ground, double-checked measurements, and adjusted for any irregularities in the ledger or framing.
Use a String Line for Alignment
Stretch a chalked string tightly between the outer edge markers to ensure straight, perfectly aligned posts. This step prevents crooked lines that can compromise both aesthetics and safety. During my last build, I ran the string along the marked points, and it revealed some slight deviations which I corrected before digging. Accurate alignment is crucial for uniform railing installation and structural integrity.
Prepare the Post Holes Correctly
Dig holes at the marked spots using an auger or post-hole digger, keeping the depth at least 36 inches for stability. Use a level to check the verticality of each hole, making adjustments as needed. I learned this the hard way when a post leaned slightly due to uneven holes, leading to wobbling. Precise hole preparation ensures strong anchoring and prevents future sagging.
Set Posts with Concrete or Gravel
Pour a 6-inch layer of compacted gravel or mixed concrete into each hole before setting the post. Use a level to verify vertical alignment as you fill. During a recent project, I used quick-setting concrete and ensured each post was plumb within minutes, avoiding costly adjustments later. Proper stabilization provides the support needed for long-term stability, especially against wind and daily use.
Check and Adjust Regularly
Once all posts are set, revisit each one with a level and measuring tape to confirm correct spacing and alignment. Small realignments early on prevent bigger issues down the line. I recommend doing this after the concrete has cured for 24 hours, giving you time to make minor tweaks before proceeding to railing installation or decking.
By following these precise steps, you create a deck that’s not only visually appealing but also safe and durable for years to come. Proper post spacing isn’t just a technical requirement; it’s the backbone of a high-quality outdoor living space.
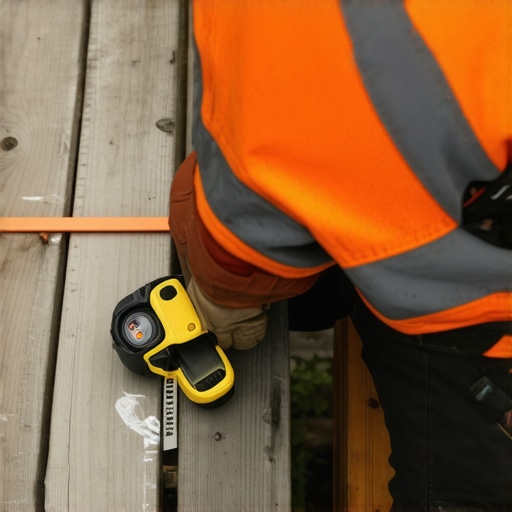 When it comes to outdoor spaces, many homeowners and even seasoned builders often fall prey to common misconceptions, especially regarding pergolas, deck layouts, composite decking, and railing systems. Let’s dig deeper into the nuances that are frequently overlooked but play a critical role in the longevity, safety, and aesthetic appeal of your project.
One prevailing myth is that heavier-duty materials automatically equate to better durability. In reality, selecting the right fasteners and understanding the subtle differences between types of composite decking can make a significant difference. For instance, while composite boards are praised for low maintenance, their expansion and contraction in response to temperature changes require precise installation techniques, like leaving proper gaps, to prevent warping over time. For expert insights on longevity, check out the composite decking secrets.
A common trap in pergola design is disregarding proper bracing. Many assume that aesthetic overrule structural necessity, but inadequate bracing can lead to wobbling or even collapse, especially during storms. With recent trends leaning towards more open and airy pergolas, it’s essential to incorporate diagonal bracing in both directions, something overlooked for the sake of style. For a comprehensive look at modern designs, visit pergola inspiration.
In deck layout, the mistake of using standard 16-inch spacing between joists seems trivial but is surprisingly common. Modern building codes increasingly advocate for 12-inch spacing for areas with high load or frequent foot traffic. This subtly increases safety and prevents board sagging, giving your deck a lasting, professional finish. For advanced tips on structure, see joist tapping secrets.
When it comes to railing systems, many overlook the importance of securing posts correctly, especially on sloped terrains. Using only surface-mounted bolts can lead to wobbling or unstable handrails. Instead, embedding posts with proper foundation and shimming to ensure plumbness is crucial. This might seem like a detail, but it’s the difference between a safe, comfortable outdoor space and one prone to accidents. For guidance, visit railing system selection.
Now, consider the advanced question: How does the site’s microclimate influence material choice and fastening techniques? Experts suggest that high humidity and salt exposure demand corrosion-resistant fasteners and materials with lower thermal expansion coefficients. Ignoring these can lead to premature deterioration, especially in coastal regions. For a deeper understanding, consult studies like those from the NRCS.
Don’t fall for the trap of assuming all design choices are merely aesthetic. Every detail, from proper post spacing to bracing and material selection, impacts safety and durability. If you want to elevate your backyard with a structure that lasts, consider partnering with experienced builders who understand these nuances. Feel free to reach out here.
Have you ever fallen into this trap? Let me know in the comments.
Maintain Your Outdoor Structures with Precision Instruments
Staying ahead in deck and pergola maintenance means investing in the right tools. I personally rely on a high-quality digital moisture meter to regularly check wood dehydration, preventing early rot and warping. These devices give me instant readings of moisture content, guiding me when applying protective sealants or deciding if areas need more ventilation. A trusted model I use is the Tramex MRH600, renowned for its accuracy in outdoor wood assessments.
How do I keep my materials in prime condition over time?
Consistency is key. To prolong your project’s life, schedule seasonal inspections with a good digital level and torque wrench. A level helps verify railing and post plumbness, while a torque wrench ensures all fasteners stay tight, particularly after harsh weather. For example, I use the Craftsman torque wrench set, which maintains precision under varying conditions, thereby avoiding loose fittings that could lead to dangerous wobbling.
Power tools make quick work of regular upkeep
My go-to power tool is a cordless impact driver paired with stainless steel drill bits. These allow me to tighten or replace fasteners on composite decking or railing systems efficiently. I’ve learned from experience that investing in a model with brushless motors, like the Makita XDT13, offers longer battery life and more sustained power, saving me hours during maintenance sessions. Additionally, a good pressure washer with adjustable settings helps remove dirt and mold without damaging surfaces, especially important for preserving composite decking’s appearance.
Where should I focus my efforts for long-term results?
Prioritize sealing and caulking vulnerable joints and seams before winter. Using advanced polyurethane sealants, like Sikaflex, can provide a flexible, weather-resistant barrier that withstands temperature swings. Regular application of such sealants, combined with vigilant inspection for cracks, guards against water infiltration and wood rot, extending your structure’s lifespan significantly. Remember, a small investment here prevents costly repairs later. Check out these longevity tips for composite decks.
Scaling Up Your Maintenance Routine
When your outdoor space grows or becomes more complex, automated solutions like smart sensors become invaluable. I plan to integrate moisture and temperature sensors connected to my smartphone, allowing me to receive alerts when conditions threaten structural integrity. This proactive approach enables swift intervention, preventing minor issues from escalating. In the future, expect the evolution toward drone inspections, especially for hard-to-reach pergola rafters or elevated decks, making routine maintenance safer and more efficient.
For now, try implementing a visual inspection schedule with your impact driver and moisture meter. Regular attention to detail today ensures that your deck and pergola will remain safe and beautiful for years. If you’re interested in advanced tools or specific maintenance strategies, reach out here for expert advice.
Unseen Lessons That Reshaped My Approach
- The importance of meticulous planning over shortcuts: I once thought saving a few inches on post spacing wouldn’t matter, but it taught me that attention to detail in dimensions ensures safety and durability, preventing costly mistakes down the line.
- How patience outperforms speed in construction: Rushing through measurements or misaligning posts might save time initially but can compromise the entire project’s integrity. Taking the extra moment to double-check pays dividends.
- The value of understanding materials deeply: Realizing that composite decking expands and contracts with temperature changes led me to design with expansion gaps, ensuring a long-lasting, warp-free deck.
- Listening to expert advice and community experiences: Feedback from seasoned builders and online forums highlighted pitfalls I would never have known from books alone, emphasizing the power of shared knowledge.
- Prioritizing safety over aesthetics when in doubt: A beautifully designed railing is pointless if it isn’t secure. I learned that foundational strength is the backbone of a stunning outdoor space.
Navigate Your Next Steps with Confidence
If you’re serious about elevating your outdoor projects, investing in precise tools and trusted resources pays off. For example, using quality fasteners and windowing for proper drainage can dramatically extend your deck’s lifespan. Check out these composite decking secrets to optimize material performance, or explore innovative design ideas to make your space truly stand out.
Your Next Step Toward Crafted Excellence
Building or renovating an outdoor space isn’t just a task—it’s an opportunity to create a haven that combines safety, function, and beauty. Remember, every detail matters, especially when it comes to post spacing, bracing, and material choices. Your dedication now will reward you with years of enjoyment and peace of mind. Keep pushing your limits, learn from every misstep, and don’t hesitate to seek out expert advice when needed. Your dream outdoor retreat is within reach—start today!
What has been your biggest lesson or surprise during your outdoor projects? Share your story below, and let’s grow our skills together!