
I remember the exact moment my pride turned into a nagging itch. It was 6:00 PM, the sun was low, and I was finally sitting on my brand-new $12,000 deck. I had used the latest durable solutions for modern outdoor living, but as the light hit the boards at a sharp angle, I saw them. Bright, sickly-green stripes of pressure-treated lumber screaming through every gap. It looked terrible. I felt like I had bought a designer suit and worn neon gym socks. I had focused so much on the surface that I forgot the foundation of the aesthetic.
Stop the Green Stripe from Ruining Your View
When you transition to composite, you’re usually looking for a high-end, seamless look. The problem is that composite boards are designed to expand and contract, meaning those 3/16-inch gaps are mandatory. Those gaps are windows. If your framing is light-colored pine or green-tinted treated wood, it creates a high-contrast visual mess that draws the eye downward instead of across the beautiful grain. By painting the tops and sides of the joists black, you create a “shadow line” effect. The substructure effectively disappears into the darkness, making the deck boards appear to float. It’s a professional secret that distinguishes a “good” deck from a magazine-quality masterpiece. Beyond aesthetics, you might also be looking at why your deck joists need tape to prevent rot to protect that lumber, but if you don’t address the color first, you’ll regret it every sunny afternoon.
Will this extra step actually make a difference?
I get it. You’re tired, your back hurts, and you just want to get the decking down. You might think the gaps are too small to notice. I thought the same thing during my first big build. I told myself, “Nobody will ever look down there.” I was wrong. The contrast is what kills you. According to the pros at Fine Homebuilding, light-colored joists act as a reflector, bouncing light back up through the gaps and highlighting the structural “skeleton” of the deck. Painting them black absorbs that light. It’s the difference between your composite decking looks like plastic or looking like a solid, premium floor.
My expensive lesson in skipping the small stuff
Early in my building journey, I skipped this step on a multi-level project because I was behind schedule. Two weeks later, the client called. They didn’t complain about the railing or the stairs; they asked why the “green wood” was so visible. I ended up spending two days with a long-handled brush trying to paint between the gaps of an already-installed deck. It was a nightmare. It was messy, inefficient, and the coverage was spotty at best. That was the day I realized that five minutes of rolling black paint onto the joist tops before the boards go down saves hours of frustration later. Have you ever finished a project only to realize one small detail was dragging the whole thing down? Let’s make sure that doesn’t happen with your deck. Today, we’re diving into the simple process of “blacking out” your frame so your deck looks as expensive as it actually was. [IMAGE_PLACEHOLDER]
Grab a Gallon of Flat Black Exterior Stain
First, forget about high-gloss or expensive oil-based paints. You want a flat black exterior stain. Stain is better than paint here because it soaks into the wood fibers rather than sitting on top, which prevents peeling. If your paint peels off the top of the joist, it’ll eventually flake and collect in the gaps of your low-maintenance composite decking, creating a new kind of visual mess. I usually buy the cheapest “oops” can of dark stain I can find at the local hardware store, as long as it is truly dark and matte.
Roll the Joists Before the Boards Go Down
Efficiency is everything when you are staring at forty joists and a ticking clock. Use a 4-inch “weenie” roller with a medium nap. You do not need to paint the entire 2×10 joist—just the top three inches. This creates enough of a “shadow box” that even from a low angle, the green wood remains invisible. 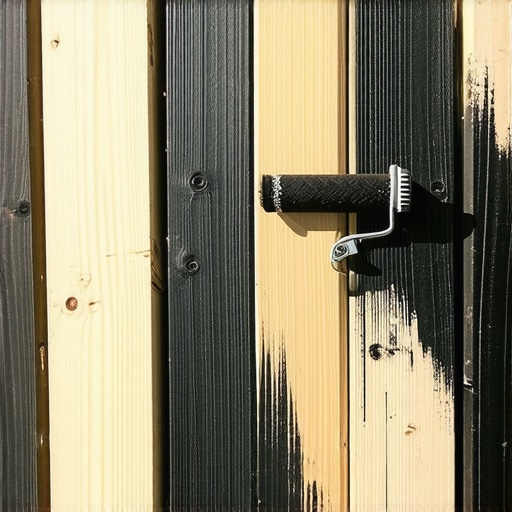 I learned the hard way about the dangers of over-spraying. On a job back in 2019, I thought I would be clever and use a black rattle-can to speed things up. It was a breezy Tuesday. Within ten minutes, I had not just blacked out the joists; I had also applied a fine mist of black dots to the homeowner’s brand-new white vinyl siding. That $6 can of spray paint cost me $400 in cleaning supplies and a very awkward afternoon of scrubbing on my hands and knees. Now, I stick to the roller. It is cleaner, and it forces you to look at each joist closely. While you are down there, it is the perfect time to check for crowns and dips. Using the string line trick for leveling deck joists before decking at this stage is vital because pressure-treated wood still warps under composite decking, and no amount of black paint can hide a wavy floor.
Protect the Frame While You Are At It
Painting the tops of your joists is for your eyes, but protecting them is for your wallet. Once the stain is dry—usually in about thirty minutes in the summer sun—you should apply butyl joist tape. It might seem redundant to paint and then tape, but the tape only covers the very top horizontal surface. The black stain handles the vertical sides of the joist that are visible through the gaps. You have likely heard why your deck joists need tape to prevent rot, and doing both steps ensures the frame lasts as long as the 25-year boards you are laying over it.
Don’t Stop at the Joists
If your deck design includes a staircase, the “blackout” method is even more critical. Because you are often looking up at stairs from a yard, the substructure is fully exposed. Paint the stringers black before installing the treads and risers. If you are building a more complex structure, like a sanctuary-style pergola nearby, you can use similar dark-stain accents to tie the entire backyard aesthetic together. And while the frame is the focus now, eventually, you will need to address the ground. Consider the best way to hide ugly concrete deck footings with stone to finish the professional, bottom-up transformation.Many DIYers and even some pros assume that if you spend top dollar on materials, the deck is invincible. But here is the hard truth: hidden fasteners are often the weak link in an otherwise perfect build. While they offer a clean, screw-free surface that defines innovative deck design ideas for 2025, they can be a liability in high-traffic zones. In my experience, using standard clips on a main walkway or staircase is a mistake. Over time, the lateral force of foot traffic causes the boards to creep. I have seen projects where the boards shifted significantly over a single summer because the builder relied solely on clip friction. This is exactly why hidden fasteners fail on high-traffic areas. For stairs, I always suggest the hidden clip trick for no-visible-screw stairs, which involves specific blocking to lock the boards in place without sacrificing the aesthetic.
Do your railing tensioners put too much stress on your posts?
This is a question most people do not ask until they see their corner posts leaning inward. High-tension cable systems are incredibly popular for a modern railing look, but they exert hundreds of pounds of pull. According to structural safety standards discussed by the North American Deck and Railing Association (NADRA), improper bracing on end posts is the leading cause of cable system failure. If you do not use the hidden bracing move for rock-solid corner posts, your cables will eventually go slack. This is often why your cable railing sagged after only one winter—it is usually not the cable stretching, but the wood frame compressing under the load. 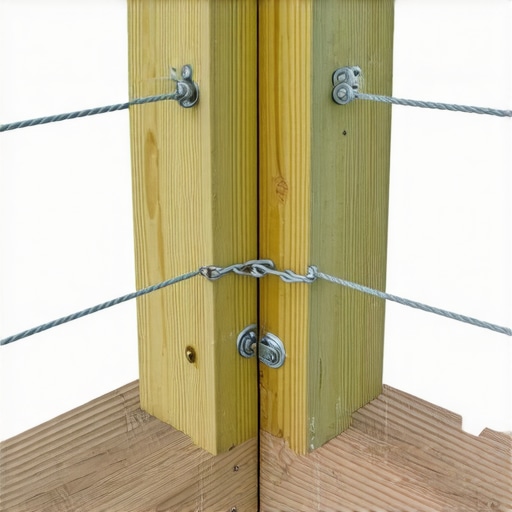
The Dark Board Expansion Trap You Did Not See Coming
Everyone loves the look of deep mahogany or charcoal boards, but why dark composite boards need extra expansion space is a lesson usually learned through a loud ‘pop’ in July. Dark colors absorb significantly more thermal energy. On a 90-degree day, a dark capped-composite board can reach 160 degrees. If you did not leave enough room at the butt joints, the boards will crown or, worse, snap the hidden fasteners right out of the joists. This is why hidden fasteners pop up in extreme summer heat. I once had to go back to a site and trim every board end because the deck had expanded so much it was pressing against the house siding and blocking the sliding door. To prevent this, focus on composite decking secrets for longevity like gapping based on the ambient temperature during installation. And if you do end up with a few scuffs during this heavy-duty adjustment, you can learn how to fix scuffs on dark composite boards with a heat gun rather than replacing the whole plank. Have you ever fallen into this trap? Let me know in the comments.
How do I maintain my composite deck for twenty years?
Maintenance is where the “low-maintenance” promise of composite often gets misunderstood. It doesn’t mean “zero maintenance.” The secret to longevity isn’t a special chemical; it is keeping the drainage paths clear. Every autumn, organic matter like pine needles and leaf dust settles into the gaps you worked so hard to create. If that material stays there, it holds moisture against your joists. Even with joist tape, constant moisture is an enemy. I recommend a dedicated stiff-bristled gap brush or even a pressure washer on a very low setting to clear those channels. This is part of the essential composite decking secrets for longevity that most homeowners overlook until they smell mildew in July.
Stop Using a Metal Hammer for Adjustments
When you are trying to seat a stubborn board into a hidden fastener clip, the temptation to use a framing hammer is massive. Don’t do it. A single missed strike with a metal head will leave a shiny, compressed silver mark on your expensive boards that no heat gun can fully erase. I always carry a 16-ounce white-head rubber mallet. Using a rubber mallet for seating composite boards allows you to apply persuasive force without marring the cap layer. It’s a small tool investment that prevents a very expensive mistake. 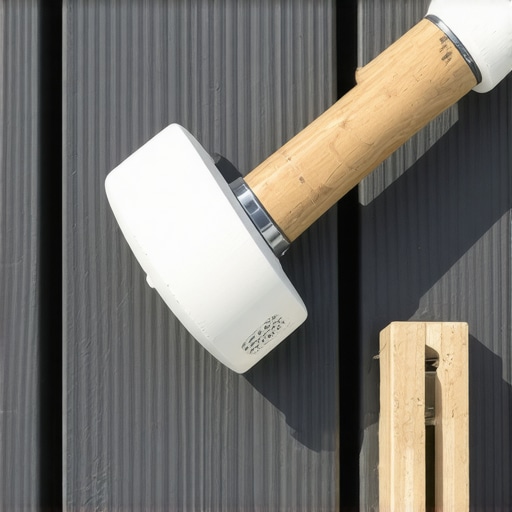
Avoid the Bleach Trap at All Costs
When the inevitable green algae spots appear in shaded corners, your first instinct might be to grab a jug of laundry bleach. This is a catastrophic error for composite materials. Sodium hypochlorite can break down the UV stabilizers in the capping material, leading to premature fading and a chalky residue. You should never use bleach on composite decks. Instead, look for an oxygen-based cleaner or a solution specifically pH-balanced for capped composites. According to the Trex Technical Installation Guide (Section: Care and Cleaning), using unauthorized cleaning agents can actually void your fade and stain warranty. Stick to the manufacturer-approved list to keep your investment protected.
The Hidden Threat of Debris Build-up
Beyond the surface, you need to worry about what is happening underneath. I’ve seen decks where the owner was meticulous about the top, but leaf rot between deck boards had created a compost pile on top of the beams. This trapped heat and moisture, causing the wood to stay saturated. If you want a frame that lasts thirty years, you need airflow. I predict that in the next five years, we will see more “smart” substructures with integrated moisture sensors, but for now, your best tool is a simple leaf blower used once a month.
Look Ahead to the Future of Decking
We are moving toward a world where decks are treated more like outdoor rooms than wooden platforms. I expect to see a surge in durable solutions for modern outdoor living that include factory-integrated lighting and heating elements hidden right in the boards. As these systems become more complex, your foundation—the blacked-out, taped, and leveled frame we’ve discussed—becomes even more critical. If your frame fails, your high-tech features go with it. Take the afternoon to apply that black stain and tape your joists. You’ll thank yourself every time you look down through those perfectly clean, dark gaps. If you’re ready to take your project to the next level, try implementing the hidden blocking move on your next stair stringer install; it’s the hallmark of a true master builder.
Hard-Won Secrets from the Joist Tape Trenches
After years of building, I realized the most expensive materials can’t save a project if the basics are ignored. First, never underestimate how much pressure-treated wood turns gray faster than you think, which makes that initial blackout stain even more vital to prevent a weathered look from peeking through your gaps. Second, always prioritize structural integrity over pure aesthetics; implementing the joist tape secret for doubling your decks life is a small investment that pays off for decades. Finally, remember that composite moves—it is a living, breathing material that needs space to expand and contract, or it will eventually buckle and fight back against its own fasteners.
The Master Builder Toolbag for a Flawless Finish
To get that high-end look, I rely on a few specific items that distinguish a DIY job from a master craft. I never step onto a job site without a 16-ounce white-head mallet; using a rubber mallet for seating composite boards is the only way to avoid permanent surface marring. I also swear by the string line method for perfectly level deck surfaces to catch crowns in the joists before the first board is ever laid down. For the blackout effect, a simple gallon of flat black exterior stain and a 4-inch weenie roller are all you need to transform the look of the gaps and create that floating-floor illusion.
Bring Your Backyard Masterpiece to Life
Your deck is more than just a collection of boards and screws; it is the stage for your future summer barbecues and quiet morning coffees. By taking these extra steps to hide the framing and protect the wood, you are ensuring that your low-maintenance composite decking remains a source of pride rather than a list of nagging regrets. Don’t be afraid to take the slow route on these final details—your future self will thank you every time the sun hits those boards at a sharp angle and all you see is a perfect, seamless surface. Are you planning to paint your joists black, or are you still on the fence about the extra effort? Let me know in the comments!