
I still remember the smell of damp earth that started wafting from behind my kitchen cabinets about three years after I finished my masterpiece deck. I was so proud of those cedar planks. But one afternoon, I noticed the baseboards under the sink felt soft, almost like soggy toast. When I finally worked up the courage to cut into the drywall, I didn’t find a plumbing leak. I found a literal highway of rot leading straight back to the ledger board outside. I had made the classic rookie error: I trusted a bead of caulk to do the job of proper metal flashing. Today, we are going to fix that.
Why Your Ledger Board Is a Stealthy Water Funnel
Most of us focus on the pretty parts of composite decking or picking out the perfect railing systems, but the most dangerous part of your deck is where it touches your house. If you do not use the drip edge trick for protecting deck ledger boards, gravity will eventually win the war against your home. Rain hits the siding, runs down the wall, and if it finds even a hairline gap at the ledger, it gets sucked behind the house wrap through capillary action. From there, it is a straight shot into your rim joist and kitchen floor.
Wait, can a tiny gap really rot out my entire kitchen?
It sounds like an exaggeration until you are staring at a five-figure repair bill for structural remediation. Many homeowners assume that since the deck is outside, the water stays outside. However, according to the International Association of Certified Home Inspectors, improper ledger flashing is a primary driver of catastrophic structural decay because it traps moisture against the house sheathing with nowhere to dry. I personally learned this the hard way by skipping the ledger gap fix that prevents house siding rot. I thought flush was better, but flush without flashing is just a recipe for a moldy sandwich. Have you ever noticed a weird musty smell near your back door after a heavy rainstorm?
Stop the Rot Before It Reaches the Cabinets
We are going to solve this today by looking at how to redirect that water. You do not necessarily have to tear the whole deck down, but you do need to understand the ledger flashing mistake that causes interior house mold so you can spot it before the soft floor stage begins. I want to help you avoid the mistake I made where I had to choose between buying a new grill and replacing my entire kitchen subfloor. It all starts with a piece of metal and a basic understanding of physics.
Strip Back the Siding for a Clean Surface
To fix the problem at the source, you have to get aggressive with your siding. Think of your house siding as a raincoat; if you tuck the raincoat into your pants, your legs get soaked. The same thing happens if your flashing isn’t tucked behind the house wrap. I always peel back at least two courses of siding above the ledger board to expose the underlying sheathing. This gives you enough room to work without fighting the materials. While you are there, it is the perfect time to implement the ledger gap fix that prevents house siding rot. By creating a slight breathing room between the board and the house, you ensure that any moisture that does get in has an escape route rather than sitting in a stagnant, rotting pool.
Install Z-Flashing to Divert Every Drop
The real hero of this story is the metal Z-flashing. It acts like a tiny, rigid umbrella for your ledger board. You want the top flange of the ‘Z’ to go up under the house wrap, the middle section to cover the top of the ledger, and the bottom lip to kick out over the front edge. I remember a project where I tried to save ten minutes by using a flat piece of aluminum I had lying around. I bent it by hand, but it didn’t have that crucial downward kick. Two years later, I saw water stains on the rim joist. Now, I only use pre-bent galvanized or stainless steel. This is just as important as choosing the right composite decking secrets for longevity. If the skeleton of the deck fails, it doesn’t matter how pretty the surface boards look.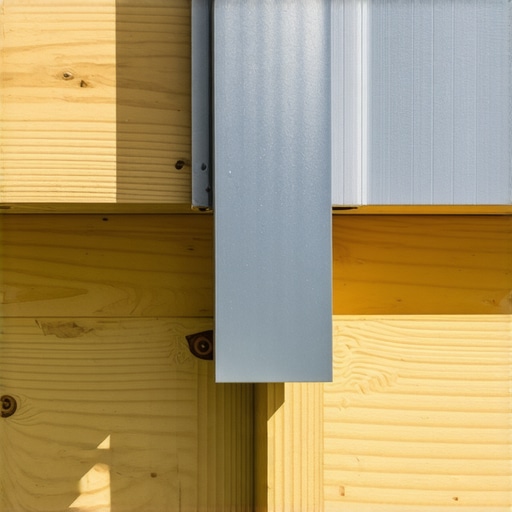
Add a Layer of Armor with Joist Tape
Before you even think about laying down your first board, you need to protect the horizontal surfaces of your framing. Gravity makes water sit on top of joists, and every screw hole is a potential entry point for rot. This is why your deck joists need tape to prevent rot. I apply a butyl-based flashing tape over the top of the ledger and every single joist. It seals around the fasteners, creating a waterproof gasket. I once skipped this on a small landing, thinking it was ‘overkill’ for a five-foot space. Within four seasons, the tops of those joists were soft enough to poke a screwdriver through. It is a cheap insurance policy that can double the life of your frame.
Use the Garden Hose to Prove You Are Safe
Never trust your eyes alone; trust the water. Once your flashing is in and before the siding goes back on, grab your hose. I call this the garden hose test for proper deck water runoff. Spray the wall above the ledger for five full minutes. Then, go into your crawlspace or basement with a high-powered flashlight and look for the slightest glisten of moisture. If it’s bone dry, you’ve won. If you see even a bead of water, you’ve found a path that would have eventually destroyed your home. This simple step is what separates a weekend DIYer from a pro who builds decks that last thirty years. If you are also planning a shaded area, remember that the 10 degree miter cut that stops pergola water traps follows this same logic: never give water a flat place to sit and think.I’ve heard it a thousand times: ‘I’m going with composite because I never want to touch it again.’ Here is the uncomfortable truth: that ‘maintenance-free’ tag is largely a marketing fairy tale. While you won’t be sanding and staining every May, you are trading those chores for a different set of technical challenges. Most homeowners don’t realize that low maintenance composite decking still requires a rock-solid, well-ventilated substructure. If you ignore the framing, you are essentially putting a Ferrari engine in a rusted-out chassis. I’ve seen expensive installations fail because the builder didn’t understand why your pressure treated frame is pulling your composite apart. Wood and plastic react to the sun in fundamentally different ways.
Hidden Fasteners Aren’t Always the Upgrade You Think
We all love the clean, screw-free look, but I’ve become the bearer of bad news for many clients who insist on them for every square inch. In my experience, why hidden fasteners fail on high traffic areas usually comes down to the constant micro-vibrations and the extreme temperature shifts that occur throughout the day. According to the North American Deck and Railing Association (NADRA), composite boards can expand and contract by significant margins—sometimes up to 1/16 of an inch for every 10 degrees of temperature change. If your deck is in direct sun, those hidden clips become tiny pry bars working against your joists. I’ve gone back to jobs where I had to explain why hidden fasteners pop up in extreme summer heat, and it is never a fun conversation.
Does choosing dark colors actually ruin your summer afternoons?
It might. I always warn people that why dark composite boards need extra expansion space isn’t just about the aesthetics; it is about the thermodynamics of your backyard. A dark grey or chocolate board can reach 150 degrees in the July sun. Not only does this scorch bare feet, but it also accelerates the warping of the pressure-treated lumber underneath. 
Don’t Let Your Railing Become a Winter Liability
Another nuance people miss involves the tension in modern systems. If you’ve been looking at railing systems for safety and style, you probably love the minimalist look of cable rails. However, there is a technical reason why your cable railing sagged after only one winter. It is rarely the cable’s fault; it is usually because the corner posts weren’t reinforced to handle the hundreds of pounds of lateral pull. Without the hidden bracing move for rock-solid corner posts, your sleek modern look will turn into a wavy mess by March. Have you ever fallen into this trap where you chose aesthetics over structural physics? Let me know in the comments below.The secret to a deck that doesn’t creak or wobble ten years down the road isn’t just about the materials; it is about the diagnostic tools you use during the build. I never step onto a job site without a high-quality moisture meter and a sharpened ice pick. Before you lay your expensive boards, you need to conduct the structural vulnerability assessment for checking deck joist rot. Even if the wood looks fine on the surface, moisture can be trapped deep within the grain. According to the American Wood Protection Association (AWPA) Standard U1, wood used for deck framing must meet specific retention levels for Ground Contact (UC4A) to withstand the relentless moisture of an outdoor environment. If your lumber doesn’t meet these specs, or if you are building over an old frame, you are building on borrowed time. I always use the ice pick test for checking joist strength on older decks before I even consider a resurfacing project. If that pick sinks in more than a quarter-inch with light pressure, that joist is a liability, not an asset.
The Tool Belt Essentials for a Pro Finish
When it comes to the actual install, I have found that why you should use a rubber mallet for seating composite boards is one of those small details that prevents the micro-fractures which lead to surface peeling later. Using a standard hammer can mar the finish of a capped composite board, creating an entry point for dirt and mold. It is also why I swear by the simple jig for drilling straight baluster holes. Precision is the enemy of maintenance; the more exact your holes and cuts, the fewer places water can hide and cause internal rot. #IMAGE_PLACE_HOLDER_D#
How do I keep my composite deck looking brand new for decades?
The answer is simpler than most people think, but it requires discipline. You have to be proactive about debris. I have seen composite decking secrets for longevity that focus on expensive chemical cleaners, but honestly, the best thing you can do is prevent organic buildup. Use a leaf blower once a week to clear the gaps between boards. If leaves sit there and rot, they create a tannin-rich tea that can stain even the best capped composites. Also, double down on protection during the build by using the joist tape secret for doubling your decks life. It prevents the tops of the joists from becoming a sponge every time it rains.
What the Future of Decking Looks Like
Looking ahead, I predict we are going to see a massive shift toward aluminum framing systems and carbon-fiber reinforced composites. As the price of high-quality pressure-treated lumber fluctuates and its lifespan stays relatively short compared to modern decking materials, the industry is moving toward buy-once structural solutions. We are also seeing smarter integrations where railing systems include built-in sensors for load and tension. For now, your best move is to get hands-on and audit what you have. Go grab an ice pick today and poke around your existing ledger board. If it feels like soft cheese, you know exactly what your next project needs to be.
The Hardest Lessons I Learned After 20 Years in the Dust
Building a deck is easy; building a deck that survives a decade of seasonal expansion is the real craft. My biggest ‘lightbulb moment’ came when I realized that most failures aren’t caused by cheap boards, but by trapped moisture that has nowhere to evaporate. If you are browsing for innovative deck design ideas that elevate your homes curb appeal, remember that the most beautiful structure is the one that stays standing. I’ve also learned that cleanliness is structural—regularly applying the secret to preventing leaf rot between deck boards will do more for your frame than any chemical sealer ever could. Lastly, never underestimate the power of a single missing flashing piece; a $10 roll of metal can truly save a $10,000 kitchen floor.
The Gear That Separates Rookies from Pros
If you want to build like a professional, your toolbox needs more than just a circular saw and a drill. I personally never start a joist layout without a roll of high-quality butyl-based protection. Utilizing the joist tape secret for doubling your decks life is the single most cost-effective upgrade you can make for any substructure. Beyond that, I recommend keeping a copy of the NADRA deck safety checklist handy—it’s a professional-grade resource that takes the guesswork out of structural integrity. I also swear by a long-reach moisture meter to check the health of my rim joists every spring. These tools transform your work from a weekend project into a legacy.
Build for the Memories Not Just the Resale Value
Don’t let the technical details overwhelm the vision of your perfect outdoor space. Whether you are adding a simple platform or looking into pergola designs that turn your garden into a sanctuary, the effort you put into the foundation today pays off in decades of worry-free sunsets. Your journey into high-end deck design is just beginning, and the best way to learn is to pick up the tools and start with a solid plan. Have you ever found a surprise rot spot or a wobbly post during a routine check? Let me know about your deck repair wins or woes in the comments below!