
I will never forget the evening I hosted our first summer block party. I had spent weeks perfecting our backyard setup, sweeping the boards and arranging the outdoor seating. My guests arrived, drinks in hand, and immediately walked out onto the beautiful cedar platform. Right there, clashing violently with my carefully planned aesthetic, were two massive, neon-blue recycling bins and a battered black trash can overflowing with garbage. The smell was bad, but the visual was worse. It was a total design disaster. I realized then that no matter how much effort you put into beautiful innovative deck design ideas for 2025, a couple of plastic waste bins will ruin the entire vibe in seconds. Today, I am going to show you exactly how to design a gorgeous, hidden trash can enclosure directly into your layout so you never have to suffer through that embarrassment.
The Ugly Truth About Outdoor Waste Management
We spend thousands of dollars on high-end materials, selecting the perfect color palette and researching custom railing systems for safety and style. Yet, we almost always treat our household waste as an afterthought. Early in my DIY journey, I made the classic mistake of simply building a cheap, freestanding plastic box and pushing it into the far corner of my yard. Not only did it look incredibly tacky, but local raccoons treated it like an all-you-can-eat buffet. According to animal behavior experts at the National Wildlife Federation, trash bins left unsecured in suburban backyards are the number-one attractant for unwanted nocturnal pests. Incorporating a secure, heavy-duty enclosure directly into your structure is not just about aesthetics; it is a necessity for keeping your backyard peaceful and sanitary. When you commit to a built-in solution, you protect your home while maintaining a seamless visual flow.
Are built-in trash enclosures actually worth the extra framing effort?
You might be wondering if it is worth the extra lumber and cutting to integrate this feature into your actual build. I used to be skeptical too. However, integrating the storage space under your deck footprint utilizes otherwise dead space, especially if you are working with a low-profile build. By using matching fascia boards or the same materials as your low maintenance composite decking, the enclosure completely disappears into the overall structure. It looks like a deliberate design element rather than an ugly utility zone. Have you ever had your beautiful outdoor gathering ruined by the sight or smell of exposed garbage cans? Let me know in the comments below, because I know I can’t be the only one who has fought this battle!
Step-by-Step Framing for an Integrated Trash Bay
To build a truly integrated waste enclosure, you must treat the structural frame like an extension of your deck joists. Think of this process like framing a window into a load-bearing wall; you cannot simply cut out a section of your structure without reinforcing the surrounding members. To achieve a rock-solid finish, you should use the double rim joist secret for rock solid deck edges. This provides the rigid support required to hang a heavy door and prevents the entire enclosure from sagging over time. Start by blocking out a 30-inch by 48-inch footprint between your main joists, which easily accommodates two standard 32-gallon rolling bins. I remember my first attempt at this on a project in Maryland; I skipped the double-rimming step because I was in a rush. Within six months, the heavy access door began to drag against the fascia, ruining the alignment and forcing me to rebuild the entire framing layout.
Keep Your Under-Deck Structure Safe from Hidden Rot
When you drop an enclosure below the deck level, you naturally create a moisture trap. Water drains through the deck boards directly onto the top of your trash enclosure lid. To prevent this, you must apply heavy-duty joist tape over your framing lumber. For the ultimate protection, implement the flash and tape method for protecting deck joists before you install any finish boards. This keeps standing water from rotting the support frame, especially around the hinges and latches where water loves to collect. Use a 2-degree slope on the top hatch of your enclosure so rain runs away from the main deck structure rather than pooling on top of the lids.
Choose Hardware That Survives Heavy Everyday Use
Do not use standard indoor cabinet hinges for an outdoor gate. The constant exposure to humidity, rain, and heavy trash bags will snap cheap screws in a single season. I highly recommend heavy-duty, powder-coated stainless steel strap hinges. Just like you should never use indoor fasteners for structural work, you must ensure you understand why you should never use indoor screws for outdoor railing or utility hardware. Secure all hinge plates with rugged structural connector screws that bite deep into your pressure-treated blocking.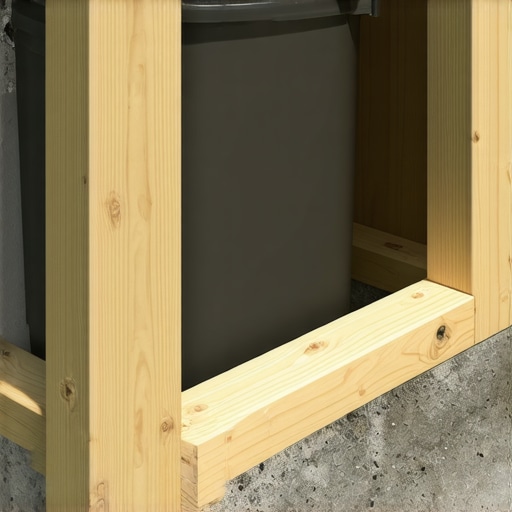
Fascia Matching and Venting Secrets for a Clean Look
The goal is to make the enclosure invisible when closed. To do this, run your perimeter fascia boards continuously across the face of the enclosure door. Maintain a consistent 3/16-inch gap between the door and the stationary framing. If you are working with composite materials, apply the pvc glue trick for gap free composite miter joints on the corners of your door trim. This keeps the seams incredibly tight and prevents the composite boards from warping away from the frame when exposed to direct afternoon sunlight.
Allow Proper Airflow to Prevent Odor Buildup
While we want the enclosure to look completely sealed, trapping trash smells inside a dark, hot wooden box is a recipe for disaster. You must allow for airflow without letting pests inside. Cut a horizontal register slot near the bottom of the back panel and cover it with heavy-gauge galvanized steel mesh. This creates a natural chimney effect, pulling cool air from under the deck and venting warm air out of the top micro-gaps, keeping your deck smelling fresh even in the middle of July.
Why Traditional Framing Wisdom Fails in Modern Deck Design
Most builders will tell you that standard joist spacing and traditional deck layouts are foolproof. In my years of custom building, I have learned that this cookie-cutter advice is exactly what ruins high-end projects. While standard code-compliant framing keeps a structure standing, it completely ignores the micro-movements of modern composite materials and the physical toll of everyday utility features. We are taught to treat a deck as a static platform, but it is actually a dynamic system that expands, contracts, and breathes. If you treat your framing as a simple grid without accounting for dedicated utility zones and localized weight distribution, you are setting yourself up for structural failure.
Why do so many composite decks warp near the structural framing?
The answer lies in how we manage thermal expansion. Standard framing wisdom says to tight-butt your boards against the rim joists. However, composite boards expand exponentially more along their length than wood. If you do not leave a precision gap, the boards will buckle upward. This is precisely why your composite decking is warping at the joists. According to a study by the Forest Products Laboratory on synthetic wood polymers, composite materials can expand up to 1/32 of an inch per running foot in direct sunlight. Failing to build a floating breaker board or ignoring these micro-expansion zones is the most common advanced mistake I see in modern backyard builds.
The Hidden Danger of Mitered Corners on High-Traffic Areas
Everyone loves the look of a clean, mitered picture-frame border. It is the hallmark of a premium deck design. But here is my contrarian take: mitered corners are a massive trap for high-traffic zones, especially near heavy structures like custom integrated trash bays or outdoor kitchens. In climates with wide temperature swings, those beautiful 45-degree cuts will inevitably open up, leaving a jagged, uneven gap that collects dirt and trips up guests. Instead of traditional miters, I now exclusively use butt-jointed borders with a solid perimeter trim. This keeps the joints tight and structurally sound for decades. Have you ever fallen into this trap and watched your perfect mitered corners pull apart after a single winter? Let me know in the comments below, and let’s troubleshoot your deck issues together!
Keeping Your Built-In Deck Enclosures Functioning Like New
Building your hidden trash bay with the right structural support is only half the battle. If you want your custom integration to last as long as your premium composite decking, you must establish a simple maintenance routine. Over the years, I have seen beautiful projects fall apart because the homeowner ignored the moving parts of their custom utility zones. The constant swinging of heavy access doors and the vibration of rolling bins will eventually loosen standard fasteners if you do not keep an eye on them. I personally use a quick quarterly inspection routine to ensure everything remains perfectly aligned and functional. I check the torque on all structural screws and make sure the door gaps remain even so the fascia boards never rub against each other during seasonal temperature shifts.
How do I maintain my integrated deck features over time?
To keep your integrated trash enclosure and storage bays operating smoothly, you should lubricate the heavy-duty gate hinges at least twice a year. I highly recommend using a dry-film Teflon lubricant spray rather than standard wet WD-40, because wet lubricants attract wood dust and pollen, turning into a sticky paste that grinds down your hardware. If you notice any slight sagging in your access door, do not wait for it to scrape your trim. Use a specialized $20 bracket that fixes wobbly railing posts fast to reinforce the internal framing corner of your gate, keeping it perfectly square. For those who used wood components inside the bay, perform a simple water bead test annually to check if the interior framing needs a fresh coat of sealer.
The Precision Tools I Never Build Without
When you are working on advanced integrations like hidden bays, precision is your best friend. A standard tape measure is fine for rough framing, but for tight fascia gaps and seamless miter matching, I rely on digital angle finders and laser levels. According to the technical guide published by the American Wood Council, even a 1/16-inch variance in structural leveling can translate to a noticeable door sag once you hang heavy composite cladding. That is why I use a self-leveling green-beam laser level to establish my reference lines before mounting any hinges. To ensure consistent spacing between my door panels and the main deck trim, I use physical spacing shims rather than eyeing the gaps. If you are struggling with keeping your lines perfectly straight across the entire front face of your deck, I highly recommend using the string line secret for perfectly level railing runs to align your fascia panels. This guarantees that your hidden door remains completely flush with the surrounding structure, preserving the invisible look.
Where Smart Backyard Design is Heading Next
Looking forward, the trend of hiding functional utilities is only going to grow. Homeowners no longer want to look at plastic bins, garden hoses, or outdoor equipment. I predict we will see a massive rise in automated, motorized deck panels and smart-locking utility zones that integrate directly with home security systems. If you are planning a backyard upgrade this year, do not settle for a basic, empty platform. I encourage you to try incorporating at least one advanced integration, like a hidden trash bay or a built-in storage bench, into your layout. If you need help mapping out the structural framing or selecting the right materials for your project, do not hesitate to contact us today to discuss your vision.
Integrating hidden utilities into your backyard setup is the ultimate way to elevate your outdoor space. No one wants their hard work overshadowed by unsightly plastic bins or messy waste areas. By planning ahead and using the right structural techniques, you can make your trash storage completely disappear.
The Hardest Lesson I Learned About Custom Deck Framing
When I first started designing custom backyards, I assumed standard framing layouts were indestructible. I quickly learned that ignoring localized weight distribution and micro-movements is the fastest way to ruin a high-end project. Here is the insider wisdom I acquired after years of trial and error:
- Never underestimate composite expansion: Standard wood framing rules will fail you if you do not account for thermal movement. This is exactly why your composite decking is warping at the joists when installed without proper thermal gaps.
- Avoid complex mitered joints in heavy-use zones: While beautiful, tight 45-degree cuts will inevitably pull apart under heavy foot traffic or temperature swings. Over time, I realized why mitered corners are a mistake for high traffic decks and now favor solid, butt-jointed perimeter borders.
- Protect the framing skeleton early: Moisture is a silent killer under deck-level hatches. Using high-quality joist tape and sealing your lumber ensures your structural base outlasts the composite cladding.
The Custom Builder Toolkit for Seamless Integrations
To achieve professional-grade results on your integrated builds, you need more than just a hammer and a saw. These are the specific tools and resources I personally rely on for every custom project:
- Self-Leveling Green-Beam Laser: Vital for establishing dead-accurate reference lines across wide spaces. To get your utility doors and railings perfectly aligned, combine this with the string line secret for perfectly level railing runs.
- Dry-Film Teflon Lubricant: Unlike standard wet lubricants that attract abrasive sawdust and pollen, dry Teflon sprays keep your hidden hinges swinging smoothly without gumming up the hardware.
- Heavy-Gauge Galvanized Steel Mesh: The only reliable way to vent your trash bay to prevent summer odor buildup while keeping persistent rodents out.
Take Control of Your Backyard Aesthetic Today
It is time to stop letting ugly, neon-blue recycling bins dictate the vibe of your beautiful outdoor gatherings. Incorporating a hidden trash bay is one of the most rewarding upgrades you can make to your layout. When you combine smart functionality with premium innovative deck design ideas for 2025, you create a seamless sanctuary that feels both luxurious and practical. Do not be afraid to tackle this advanced framing upgrade on your next project—your guests, and your peace of mind, will thank you.
Have you ever struggled with keeping ugly trash cans out of sight during a backyard party? Let me know in the comments below, and let’s troubleshoot your design ideas together!