
I stood there with a lukewarm coffee in one hand and a spirit level in the other, staring at forty feet of expensive black aluminum that looked… well, like a gentle mountain range. It wasn’t just slightly off; it looked like the railing was trying to perform a slow-motion wave for the neighbors. My wife came out, took one look at my Saturday’s hard work, and didn’t even have to say a word. I had spent hours on those railing systems only to realize I’d built a permanent monument to my own overconfidence. I thought I was being precise, but I was following the wrong guide. I was measuring up from the deck boards at every single post, assuming my frame was perfect. It wasn’t. It never is. That was the day I stopped trusting my tape measure and started trusting a piece of nylon string.
Stop Trusting Your Eyes and Start Trusting the String
The biggest mistake I made early on—and one I see DIYers make every single weekend—is assuming that if your composite decking is flat, your railing will be too. It’s a trap. Joists crown, frames settle, and even the best 5-shim trick for leveling out-of-square deck frames won’t save you if you don’t have a global reference point. When you measure 36 inches up from the deck at every post, you aren’t building a level railing; you’re building a railing that mimics every dip and hump in your substructure. To get that professional, magazine-quality look, you need to ignore the floor and look at the horizon. This is where the string line comes in. It provides a single, unyielding straight line that doesn’t care if your rim joist is sagging by an eighth of an inch.
Why Your Fancy Laser Level Might Be Lying to You
Is a three-hundred-dollar laser actually better than a piece of twine? Not always. While I love a good gadget, trying to see a red or green beam on a sunny Tuesday afternoon is an exercise in frustration. Plus, a laser only gives you a point, not a physical guide you can bump your brackets against. According to the structural guidelines at the American Wood Council, even a minor 1/4-inch deviation over a long span can compromise the visual integrity and perceived safety of a structure. A string line, stretched tight enough to play like a guitar string, gives you a physical
Snap a Line and Trust the Physics
To get started, you need to abandon the idea of measuring up from the floor at every interval. Instead, go to the two ends of your railing run and install your corner or end posts first. Once these are rock-solid—ideally using the hidden bracket trick for perfectly rigid railing posts—drive a small screw into the outside face of each post at exactly the height you want your top rail to sit. This is your baseline. I once worked on a wrap-around porch where the homeowner insisted we use a 4-foot level for the whole 60-foot run. By the time we hit the third corner, we were two inches off. Physics doesn’t care about your good intentions; a cumulative error of 1/16th of an inch per post will ruin the look of even the most expensive railing systems.
The Secret to Zero Sag Over Long Spans
Once your screws are set, tie off a high-visibility nylon string. Don’t just snug it; you want to pull it until it sings. Think of it like a guitar string. If there is any visible ‘belly’ or dip in the middle of that string, your entire railing will look like it’s melting. To combat this on longer decks, I often use a mid-point support block—just a scrap piece of wood cut to the exact height—to prop the string up and ensure it stays perfectly true. This is especially vital when working with composite decking, which can have slight surface variances that trick your eyes into thinking the line is crooked when it isn’t.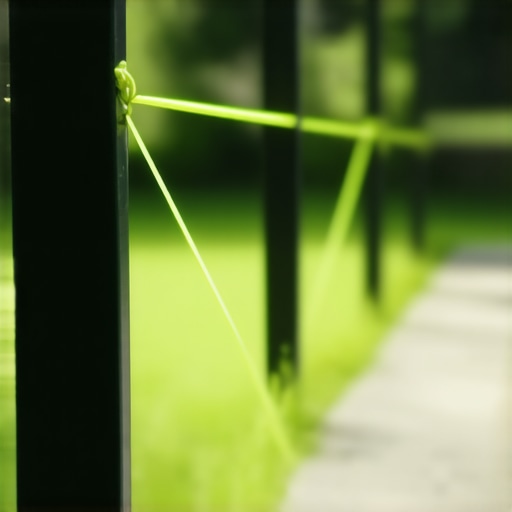
Why Your Post Placement Dictates Everything
With the string line tight, you can now set your intermediate posts. Instead of guessing, you align the top of each post to sit exactly one-eighth of an inch below that string. Why the gap? Because if a post actually touches the string, it might push it up, throwing off every subsequent post in the line. I remember a particularly humid July morning where I was rushing to finish a project featuring custom railing systems. I let one mid-span post nudge the string up just a hair. I didn’t notice until I stepped back at the end of the day and saw a distinct ‘hump’ in the silhouette. I had to back out eight lag bolts and start over. Now, I always use a thin spacer—like a heavy guitar pick—to check the gap between the post top and the line.
Stop Eyeballing the Brackets
The final phase of the ‘meat’ is bracket installation. Most people mark their bracket holes using a tape measure from the deck surface, but we already established that the floor is a liar. Instead, use a story pole—a scrap piece of 2×4 with your bracket heights clearly marked. Hold the story pole against each post and align the top mark with your string line. This ensures that even if your double rim joist secret for rock-solid deck edges has a slight wave, your brackets will remain in a perfectly straight horizontal plane. It turns a frustrating game of ‘find the level’ into a simple process of ‘match the marks.’ When you finally drop those rails into the brackets, they should click into place like Lego bricks, with zero tension and a horizon line that looks like it was drawn with a ruler.Most DIYers think that once the string line is gone and the brackets are in place, the hard part is over. They grab an impact driver and crank those screws down until the plastic cries for mercy. But here is the contrarian truth: if you make everything perfectly tight in the middle of a 90-degree July afternoon, you are setting yourself up for a winter of popping sounds and warped rails. When you’re working with low-maintenance composite decking and matching railings, you aren’t just building a structure; you’re managing a material that responds to the environment. Composite expands and contracts far more than pressure-treated wood. According to research by the Forest Products Laboratory, wood-plastic composites can expand up to 1/16th of an inch per 10 linear feet for every 30-degree temperature change. If you bottom out your rail inside the bracket without leaving a small breathing gap, that rail will have nowhere to go when the sun hits it. This is why I always apply the expansion gap rule that stops boards from buckling to my railing spans as well.
Can Your Railing Actually Pass a Real-World Safety Inspection?
It is one thing to have a railing that looks straight; it is another to have one that is actually safe. A sophisticated mistake I often see involves the 4-inch sphere rule. Building codes, such as those outlined in the International Residential Code (IRC), require that a 4-inch sphere cannot pass through any part of the railing. However, the nuance most people miss is that this rule applies under load. If you use cheap, thin-walled balusters, they might look fine at rest, but when a 200-pound force is applied (the code standard), those balusters might flex just enough to allow that sphere through. This is the structural reason your deck feels bouncy or unsafe even when the hardware is brand new. Tightening your tensioners correctly is key, especially if you are using the tensioner secret for tight cable railings to ensure the system remains rigid over time. 
The Hidden Danger of the Post Sleeve Crush
When you are installing railing systems for safety and style, you are often sliding a decorative sleeve over a structural 4×4 post. The trap here is over-tightening the bracket screws through the sleeve. If there is a hollow gap between the sleeve and the wood post, the screw will pull the sleeve inward, creating a permanent, ugly dimple in the material. I have seen high-end projects ruined by these crush marks. To avoid this, I use small PVC spacers or even stacked washers to fill the void behind the sleeve. It ensures the bracket is rock-solid without deforming the finish. It is the same level of detail you would use for the PVC glue trick for gap-free composite miters. Also, remember that dark materials absorb more energy; why your black aluminum railing gets too hot to touch is often the same reason it expands so aggressively in the summer. Have you ever fallen into this trap where you thought you were done, only to see a mystery warp or a crushed sleeve a month later? Let me know in the comments—I have likely made the same mistake twice.Maintenance isn’t just about a bucket and a brush; it’s about having a system that respects the chemistry of your materials. I’ve learned the hard way that treating composite like pressure-treated wood is the fastest way to void a warranty. I never step onto a job site without my favorite 6-inch speed square and a dedicated impact driver that features adjustable torque settings. Why the torque control? Because when you’re working with high-end railing systems, one over-driven screw can strip the aluminum or crack the composite sleeve, leaving you with a permanent wobble. Using the simple tool for making sure your railing posts are plumb is just the start; you need a maintenance kit that includes a high-quality soft-bristle brush and a non-acidic cleaner.
How do I maintain my deck and railing system over time?
The secret is consistency rather than intensity. You should perform the 15-minute deck inspection every homeowner should do at least twice a year. During this check, I look specifically for loose fasteners and signs of debris buildup in the gaps. If you notice organic matter sitting in the grooves, clear it out immediately to prevent mold. And whatever you do, remember why you should never use bleach on your composite deck; it can eat away at the UV inhibitors and leave your boards looking chalky and aged long before their time. According to the North American Deck and Railing Association (NADRA), over 40 million decks in the U.S. are over 20 years old and need attention. Staying ahead of the curve with composite decking secrets and longevity tips ensures yours isn’t one of the statistics. #IMAGE_PLACE_HOLDER_D#
The Future of Outdoor Living is Smart and Cool
Looking ahead, the industry is moving toward smarter materials. I’m already seeing a massive shift toward infrared-reflective pigments in boards. This is why why capped polymer composite stays cooler than wood-plastic and will soon become the standard for any sunny backyard. We’re also seeing more integrated tech, like low-voltage lighting built directly into the rail post caps. If you’re tired of losing hardware, check out why your aluminum railing post caps keep falling off and consider upgrading to a screw-down system. I challenge you to go out this weekend and try the ‘torque-limit’ method on one loose post. Don’t just crank it; set your driver to a medium-low setting and feel the difference when the fastener seats perfectly without crushing the material. Your deck will thank you in ten years.
Lessons From the String Line That Changed Everything
After years of building, I’ve realized that the difference between a ‘good enough’ DIY job and a professional-grade installation comes down to a few hard-won lightbulb moments. First, never underestimate the power of cumulative error; if you are off by a hair on post one, you will be off by an inch on post ten. This is why I always lean on the simple tool for making sure your railing posts are plumb before even thinking about the top rail. Second, remember that your deck is a living structure. I have seen beautiful railing systems buckle simply because the installer ignored the expansion gap rule that stops boards from buckling. Finally, don’t just build for aesthetics; build for the 200-pound load test required by code. A railing isn’t just a decoration; it is a life-saving barrier that must withstand real-world pressure.
My Reliable Toolkit for a Flawless Finish
If you are serious about getting that magazine-quality look, there are three resources I never step onto a job site without. I always carry a high-visibility nylon string because it is the only truth-teller on a sunny afternoon when lasers fail. I also swear by a dedicated impact driver with adjustable torque settings; this prevents you from stripping out hardware on custom railing systems. For those aiming for the ultimate view, I recommend checking out the stainless cable trick for views that never get blocked. Lastly, I always verify my progress against the North American Deck and Railing Association (NADRA) safety standards to ensure the project meets professional expectations.
Create a Sanctuary That Lasts Decades
Building a deck is about more than just screws and boards; it is about creating a sanctuary for your family and friends. When you take the time to dial in those small details—from perfectly level rails to applying composite decking secrets and longevity tips—you are investing in years of worry-free relaxation. Don’t be intimidated by the physics of the string line or the precision of the brackets. Every professional started exactly where you are: staring at a pile of materials and a dream. Have you ever struggled with a railing that looked like a gentle mountain range once you stepped back? Let me know your biggest DIY hurdle in the comments below!