
I remember the exact moment I realized I’d messed up. It was a Saturday evening, the sun was hitting the composite decking just right, and my neighbor pointed at the railing. “Hey,” he said, “is it supposed to jiggle like that?” My heart sank. I’d spent three days on those cables. I stood there, sweat stinging my eyes, as I watched him lean against the middle cable only for it to sag like a wet noodle. It was mortifying. I had invested in custom railing systems for safety and style, yet my deck looked like a poorly strung tennis racket. This wasn’t just an aesthetic fail; it was a safety hazard. I’d missed the “secret” of sequential tensioning, a mistake that nearly ruined the look of my rustic mountain deck. Today, I’m breaking down how you can avoid my early failure and get that professional, rock-solid finish. Have you ever stepped back from a DIY project only to realize the most important detail was the one you completely whiffed on? Let me know in the comments if you’ve ever dealt with “the sag.”
Why Your Cables Sag Even When They Feel Tight
I used to think that tensioning was about brute force. I grabbed my pliers and cranked until my knuckles turned white. Big mistake. I actually ended up bowing my end posts, which is a nightmare to fix. According to the International Association of Certified Home Inspectors (InterNACHI), guardrails must withstand a 200-pound concentrated load, which is impossible if your cables are loose enough to act like a trampoline. Brute force doesn’t guarantee safety; technique does. You need to understand how to tension cable railings without specialized expensive tools to get the balance right. It’s about the sequence, not just the torque. If you start at the top and work down, you’re setting yourself up for failure. The secret lies in a “center-out” approach that distributes the load evenly across the entire post. This prevents the top rail from crushing under the cumulative pressure of ten tightened wires.
Is expensive tensioning hardware actually the only way to get a pro look?
Many homeowners assume they need to drop a mortgage payment on high-end turnbuckles to get results. I certainly did. My first attempt involved the priciest kits I could find, yet I still ended up with cables that felt flimsy. The truth is, even the best stainless cable trick for views won’t save you if your framework isn’t rigid. I learned the hard way that if your posts aren’t anchored with something like the hidden bracket trick for perfectly rigid railing posts, no amount of tensioning secret-sauce will keep those lines straight. You’re fighting a losing battle against physics if your foundation is soft. We are going to solve that today by looking at the mechanics of the tensioner itself.
The Center-Out Strategy That Saves Your Posts
Think of your railing posts like a longbow. If you pull only from the top, the wood or metal starts to curve inward under the immense cumulative strain. I learned this the hard way on a project back in 2021 while trying to finish a mountain cabin deck before a storm rolled in. I went top-down, thinking I was being efficient. By the time I reached the tenth cable, the first one I’d tightened was sagging again because the post had bowed significantly. To fix this, you have to follow a staggered sequence. Start with the middle cable, then move to the one just above it, followed by the one just below the middle. You are essentially sandwiching the tension toward the center of the post. This prevents the top rail from crushing under the pressure and ensures that your railing system for every deck remains structurally sound.
Get Your Alignment Right Before the First Pull
Before you even touch a wrench, you need a perfectly straight path for the wire. I always use the drill guide hack for centered baluster holes to make sure my entry and exit points are identical. If those holes are even an eighth of an inch off, the cable will bind against the side of the post, creating a false sense of tension. You’ll think it’s tight, but the moment someone leans on it, the cable will ‘pop’ into place and go slack. Once your holes are clean, thread all your lines and hand-tighten the nuts until they just touch the washer. This is your baseline. I once skipped the hand-tightening phase and ended up with a ‘stair-step’ look where some cables were clearly tighter than others. It looked amateur, and I had to start the whole process over.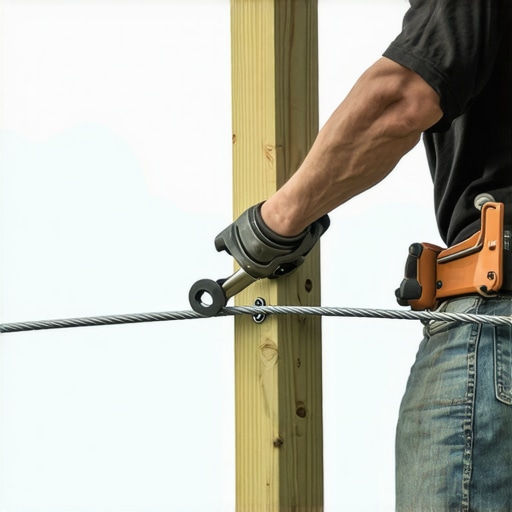
Ditch the Guesswork with the Deflection Test
How do you know when to stop turning the wrench? There is a fine line between a safe guardrail and a snapped fitting. A pro-level trick I use involves a simple 4-inch block of wood. According to most building codes, a 4-inch sphere shouldn’t be able to pass through the cables. I tension each line until I can’t pull the cable more than 3 inches away from its center point using moderate hand pressure. This is much more reliable than trying to ‘feel’ the torque. If you find your posts are still leaning even with the staggered method, you might need to look at the simple tool for making sure your railing posts are plumb to re-verify your verticality.
The Final Snug and the Ping Test
Once every cable is at the 3-inch deflection mark, go back through the sequence one last time for a final ‘snug.’ I like to give each cable a literal pluck, like a guitar string. They should all have a similar ‘ping’ sound. If one sounds like a low thud, it’s loose. This level of detail is what separates a DIY job from something that looks like it belongs in a magazine for innovative deck design ideas. Remember, you aren’t just building a fence; you’re building a structural safety barrier. If you’ve done it right, those cables should stay taut for years, even as the wood settles or the seasons change.
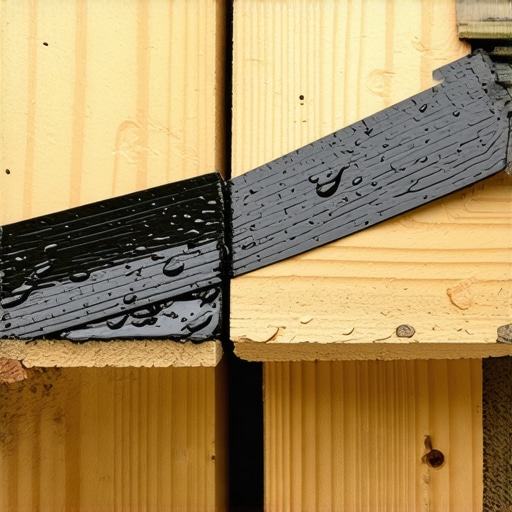
Most DIYers—and even some pros I’ve worked with—believe the common myth that ‘sturdier is always better.’ We throw more lumber at the problem, thinking a massive, dense frame is the key to longevity. But here is the contrarian truth: an overbuilt frame with zero airflow is a silent death sentence for your structure. When you sister joists together without a gap or fail to protect the horizontal surfaces, you create what I call a ‘moisture sandwich.’ Water gets trapped between the wood members, and because it’s shielded from the sun and wind, it never dries out. I’ve seen 2×10 pressure-treated beams rot through in less than five years because the builder thought they were being ‘extra safe’ by doubling up everything without using the flash and tape method for protecting deck joists. Real expertise isn’t about the amount of wood; it’s about managing water shed.
Stop Building ‘Tank’ Frames That Trap Moisture
If you aren’t thinking about how water exits your frame, you’re building a ticking time bomb. The ‘Oops’ factor here is assuming that pressure-treated wood is invincible. In reality, modern treatments only penetrate the outer shell. Every time you drill a hole for a railing post or a cable fitting, you’re exposing the raw, untreated core of the timber. This is why the drainage move that saves your deck from mold is so critical—you have to create a path for that internal moisture to escape. Without it, the structural integrity of your composite decking system is compromised before the boards even fade. Have you ever fallen into this trap where your ‘sturdy’ build actually caused more problems? Let me know in the comments.
Will Seasonal Temperature Swings Actually Snap Your Cable Fittings?
This is a question I get from homeowners who live in climates with volatile weather. The American Wood Council’s structural guides and various metallurgical studies on 316 stainless steel highlight a fascinating conflict: wood expands with humidity, while metal expands with heat. If you tension your cables to the max on a crisp, 40-degree spring morning, the summer afternoon sun can cause the metal to expand while the drying wood shrinks. This creates a massive shift in tension that can pull lag screws right out of soft cedar or even warp a thin post. This is precisely why 6×6 posts look better than 4x4s on any outdoor structure—they have the mass to resist these microscopic tugs-of-war without bowing.
Don’t Let Thermal Expansion Buckle Your Boards
The final nuance most people miss is the ‘Barefoot Test’ vs. structural movement. Many high-end composites are designed to look like wood, but they behave like plastic. If you butt your boards tight against a wall or each other without following the expansion gap rule that stops boards from buckling, the summer heat will turn your flat surface into a series of rolling waves. This isn’t just an aesthetic issue; it puts immense stress on your hidden fasteners. If you’ve noticed your boards popping up, it’s likely not a screw failure, but a physics failure. Understanding the structural reason your deck feels bouncy and how to fix it often starts with giving your materials room to breathe. Let’s dig deeper into how these small gaps actually preserve the ‘rock-solid’ feel you spent so much money to achieve.
I’ve spent thousands of dollars on tools over the last decade, and I can tell you that the difference between a frustrating weekend and a smooth build usually comes down to two specific items in my bag. I don’t care about brand loyalty as much as I care about torque and precision. For any railing job, I strictly use a high-torque impact driver rather than a standard drill. A drill will strip those expensive stainless steel fasteners the moment it hits resistance, but an impact driver uses rapid-fire pulses to seat the screw without chewing up the head. I also never step onto a job site without a dedicated 12-inch speed square. It’s not just for cutting; I use it to verify that every single post in my low-maintenance composite decking layout is perfectly perpendicular to the ledger. If you’re off by even half a degree at the house, you’ll be off by three inches by the time you reach the outer rim joist.
Why Your Pressure Washer is Actually Your Deck’s Worst Enemy
I see it every spring: homeowners dragging out the 3000-PSI power washer to ‘clean’ their deck. Please, stop. Even if you have high-end boards, high-pressure water can delaminate the protective cap or force moisture into the core through the fastener holes. I’ve seen boards literally ‘fuzz up’ because the high-pressure stream tore the wood fibers apart. Instead, I stick to a soft-bristle brush and a pH-neutral cleaner. People always ask me why you should never use a pressure washer on composite, and my answer is always the same: you’re trading five minutes of convenience for five years of board life. According to the North American Deck and Railing Association (NADRA), a huge percentage of deck failures are linked to structural decay that was accelerated by improper cleaning and neglected inspections. I always recommend performing the 15-minute deck inspection every homeowner should do once a year to catch these issues before they become dangerous.
#IMAGE_PLACE_HOLDER_D#
How do I keep my deck looking brand new for twenty years?
The secret isn’t a magic chemical; it’s consistency. I treat my deck like a car. You wouldn’t let salt and dirt sit on your paint for six months, so don’t do it to your composite decking. I make it a point to clear the gaps between boards at least twice a year. If those gaps get plugged with organic debris, they trap moisture against the joists, leading to the exact rot problems we discussed earlier. As we look toward the future, I see pergola trends crafting shade elegance in your outdoor space moving toward fully integrated smart systems. We are already seeing pergolas with rain sensors that automatically close louvers and deck lighting that adjusts based on the sun’s position. The ‘dumb’ deck is becoming a thing of the past. I want you to grab a high-quality flashlight this weekend and check your ledger board for any signs of water staining—it’s the one tip that could save your entire project from a catastrophic failure later.
The Expensive Hard Truths I Learned on the Job
After years of building, I realized that more hardware isn’t a substitute for a rigid frame. If your posts aren’t anchored properly using the hidden bracket trick for perfectly rigid railing posts, even the most expensive cable kit will eventually sag. You can’t out-tighten a weak foundation. Another lightbulb moment was the realization that tensioning is a dynamic process. I now return to every job site six months later for a ‘re-ping’ because wood settles and metal moves. Also, I’ve learned that the biggest threat to your composite decking isn’t heavy foot traffic; it’s the microscopic trapped water in those ‘overbuilt’ joist sandwiches.#IMAGE_PLACEHOLDER_1#
My Go-To Gear for a Bulletproof Build
I trust my high-torque impact driver more than any other tool for choosing railing systems for safety and style. It prevents the nightmare of stripped stainless steel heads. I also swear by ledger flashing tape; it’s a tiny investment that prevents the kind of rot that ends a deck’s life prematurely. For layout, a 12-inch speed square is non-negotiable. I use it to ensure every joist is square to the ledger, which prevents those agonizing gaps when you get to the final board. Finally, I always keep a bottle of pH-neutral cleaner handy to avoid the temptation of using a pressure washer, which is why you should never use a pressure washer on composite.
Stop Planning and Start Building Your Oasis
Your backyard is meant to be lived in, not just maintained. By focusing on drainage and proper tensioning today, you ensure that your custom railing systems for safety and style stay as crisp and secure as the day you installed them. Take the leap, follow the physics, and build something that lasts for decades.
Have you ever had a railing post start to lean or wiggle after a few seasons? Let me know in the comments how you fixed it!