
I remember the first time I sat on my newly finished composite deck, ready to soak in the valley sunset, only to realize I was essentially looking at the world through a picket fence. Those chunky wood balusters I chose? They weren’t just sturdy; they were a total vision killer. I had spent weeks obsessing over innovative deck design ideas, yet I missed the most obvious detail: the view itself. It felt like buying a Ferrari and then realizing the windshield was tinted 90% black. That frustration led me down a rabbit hole of tension systems, and honestly, it changed how I think about outdoor living entirely. Today, I am going to show you why a simple switch to stainless cable is the ultimate trick for a view that never feels blocked.
Stop Letting Your Railing Steal the Sunset
If you are currently planning a project, you are probably torn between different railing systems. I made the mistake early in my career of thinking ‘sturdy’ meant ‘bulky.’ It doesn’t. When you use the tension cable move, the hardware virtually disappears into the horizon. I once built a beautiful wrap-around deck for a neighbor using 4×4 cedar posts and heavy pickets. By noon the next day, they were asking if they could cut the pickets out because they couldn’t see their own garden anymore. It was a costly, painful lesson. Cable railing isn’t just a ‘modern’ look; it’s a functional necessity for anyone who actually wants to enjoy their surroundings. It is about creating that seamless transition from your low-maintenance composite decking to the natural beauty beyond your property line. Have you ever felt like your deck was closing you in rather than opening you up? Drop a comment and tell me about your railing frustrations.
Does Stainless Cable Actually Live Up to the Hype?
You might be worried that thin wires won’t feel safe or that they will sag over time. I get it. I was a skeptic too until I realized that 316-grade stainless steel—the stuff used in marine environments—has a tensile strength that puts traditional wood to shame. According to the Specialty Steel Industry of North America, stainless steel is preferred for its high strength-to-weight ratio, which is exactly why we can use such thin diameters without sacrificing safety. The real trick isn’t just buying the wire; it’s knowing how to tension cable railings without specialized expensive tools. If you do it right, those lines stay tight and invisible for decades. I have seen plenty of DIY jobs where the cables look like wet noodles after one winter, usually because the installer ignored the hidden bracket trick for rigid posts. We are going to dive into the exact layout strategies that make this work, so you don’t end up with a wobbly, unsightly mess. The goal is a railing that is strong enough to lean on but thin enough to ignore.
Get Your Posts Rock Solid Before the First Wire
Before you even touch a spool of cable, you have to address the physics of tension. I once worked on a lakefront project where I rushed the framing, thinking standard 4×4 posts were enough. As I started tightening the strands, I watched in horror as the end post began to bow inward like a medieval hunting bow. It was an amateur mistake that cost me a full day of teardown. To avoid this, you must use the blocking trick that stops railing post wobble. You need extra structural blocking under the deck boards to tie that post into the joists, not just the rim joist. If you are working with wood, I highly recommend the hidden bracket trick for perfectly rigid railing posts to ensure that when you crank the tension, the frame doesn’t budge an inch. Think of your railing like a guitar; if the neck is flimsy, it’ll never stay in tune.
The Secret to Holes That Actually Line Up
Nothing ruins the look of a cable system faster than ‘stair-stepping’ holes that aren’t perfectly level across the run. If your holes are off by even an eighth of an inch, the cable will catch the light and highlight every single flaw in your craftsmanship. This is where you skip the freehand approach and use the drill guide hack for centered baluster holes. I use a simple jig clamped to the post to ensure every pass-through is laser-straight. It’s the difference between a high-end architectural feature and something that looks like a DIY disaster. 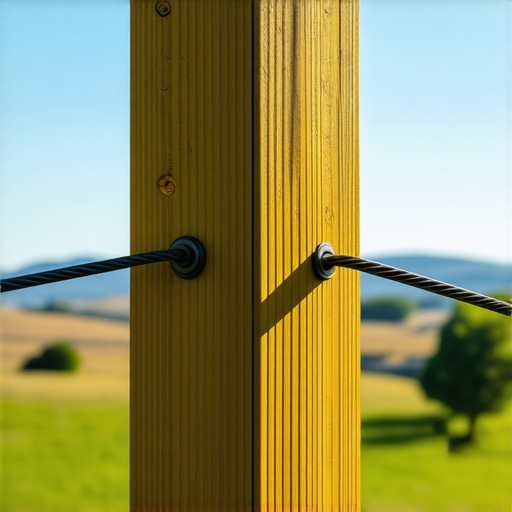
Tighten it Down Without Breaking the Bank
You will see professional kits that cost thousands of dollars, but you can achieve a pro-level finish by knowing how to tension cable railings without specialized expensive tools. The trick is starting from the center and working your way out to the top and bottom. This distributes the load evenly across the post. If you tighten the top cable first, you’re likely to pull the post out of plumb before you even get to the bottom strand. I always keep a small scrap of low-maintenance composite decking nearby to use as a spacer while I work, ensuring the distance between the deck surface and the first cable meets local safety codes perfectly.
Keep Your Hardware Hidden and Clean
When you are finalizing your railing systems, the goal is to make the hardware invisible. I prefer using internal tensioners that sit inside the post rather than bulky turnbuckles on the outside. It keeps the lines clean and prevents the ‘industrial warehouse’ vibe. If you are building on a deck with composite decking, make sure your drill bits are sharp to prevent melting the plastic cap-stock. A clean entry and exit for every cable is what separates a deck that looks good from a deck that looks expensive.
Once you have nailed the sleek look of your cable railing, the next mistake I see is people assuming the decking itself requires zero thought just because it is composite. We have all heard the sales pitch: ‘Install it once and never touch it again.’ In my experience, that is a dangerous myth that leads to expensive failures. If you treat your high-end boards like they are indestructible, you are going to be disappointed when they start to warp or lose their luster. To keep your project looking like a pro-build, you need to understand the nuances of material behavior that go beyond a basic installation guide.
The Maintenance-Free Lie That Leads to Mold
Everyone says composite is maintenance-free, but that is a half-truth at best. While you will not be sanding and staining every two years, you cannot just ignore the surface. I have seen many homeowners skip the wet sand test and then wonder why their deck feels like a slip-and-slide after a light rain. More importantly, I have seen people ruin their warranty by reaching for a pressure washer. I cannot stress this enough: why you should never use a power-washer on composite boards is because high pressure can etch the cap-stock, creating microscopic pits where organic matter gets trapped. Once mold takes hold in those pits, it is a nightmare to remove. Instead, stick to a simple cleaning routine using the vinegar and water mix that cleans composite better than chemicals to keep the surface breathable and bright.
Why Your Hidden Fasteners Are a Repair Nightmare
I know the allure of a seamless surface without visible screws. It is a staple of innovative deck design ideas, but hidden fasteners come with a massive ‘oops’ factor that most DIYers ignore. If a single board in the middle of your deck gets damaged by a dropped charcoal chimney or a heavy piece of furniture, you are in trouble. Because of how these clips interlock, why hidden fasteners can be a maintenance nightmare becomes clear the moment you try to replace one board and realize you have to disassemble the entire run. To mitigate this, I always use the double joist trick for perfectly flush picture frame borders, which allows you to break the deck into smaller, more manageable sections that can be serviced independently if disaster strikes. Have you ever fallen into this trap where a ‘clean look’ made a simple fix impossible? Let me know in the comments.
Why Does Composite Decking Move More Than Natural Wood?
This is the advanced nuance that separates the pros from the amateurs. While natural wood mostly shrinks as it dries out, composite decking is heavily influenced by thermal expansion. According to the North American Deck and Railing Association (NADRA), improper gapping is one of the leading causes of ‘crowning’ and structural stress in modern decks. Composite boards expand and contract along their length quite significantly. If you do not know how to stop composite deck boards from expanding into your siding, the boards will eventually bottom out against the house and start to buckle. This is exactly why your composite boards are crowning and how to fix it; you must account for the ambient temperature during installation and leave the precise gap required for your specific board brand.  Combining these composite decking secrets with proper framing is the only way to ensure your ‘forever deck’ actually lasts more than a few seasons without the boards popping up or rubbing your siding raw.
When I first started, I spent half my day chasing a bubble in a manual level, only to realize my entire frame was off by nearly an inch across twenty feet. I learned the hard way that string lines are for the birds when you are working alone. Now, I never set a post without using the level and laser method for setting pergola heights alone. A high-visibility green beam laser isn’t just a luxury; it is the only way to ensure your pergola design inspiration doesn’t turn into a slanted eyesore. If your frame isn’t perfectly square from day one, every subsequent step—from the cable tension to the board gapping—will be a fight against physics. I also swear by the jig i use for consistent deck screw depth because nothing screams ‘amateur’ like screws buried at different depths across your beautiful modern composite decking. 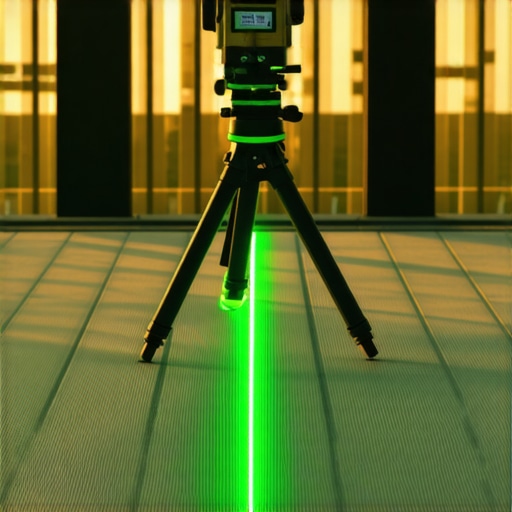
How can I keep my deck and pergola looking new for years?
Maintenance isn’t just about cleaning; it is about proactive inspection. Every spring, I perform the 10-minute flashlight test for finding hidden ledger rot. You are looking for soft spots where the deck meets the house, which is the number one cause of structural failure. For your overhead structures, remember that water is the silent killer. I always recommend the 15-degree cut that keeps water off your pergola beams. This simple architectural detail ensures that rain shed off the top rather than pooling and inviting rot into the grain. According to the American Wood Council (AWC) in their ‘Design for Code Acceptance #6,’ proper moisture management at the ledger and beam connections is the single most important factor in extending the life of an external wood structure. If you notice a dip in your walking surface, don’t ignore it; learn the simple way to fix a sagging deck beam before the stress causes a permanent fracture in your joists.
Prepare for the Smart Deck Revolution
As we look toward the future, outdoor living is moving far beyond just ‘boards and beams.’ I am seeing a massive shift toward integrated tech. We are talking about automated louvered roofs and innovative deck design ideas for 2025 that include built-in sensor-driven lighting. The trend is moving away from static structures toward ‘living’ spaces that adapt to the weather. If you are building today, run extra conduit now—even if you don’t have the budget for the electronics yet. You will thank me in three years when you want to add motorized shades or high-end sound systems without tearing up your low-maintenance composite decking. My best advice? Start small but build with the future in mind. Grab a laser level and check your current ledger for rot this weekend—it is the best thirty minutes you will ever spend on your home.
Hard Truths from a Decade of Building Decks
Over the years, I have realized that even the most innovative deck design ideas mean nothing if the foundation isn’t flawless. One major lightbulb moment for me was realizing that thermal expansion is not just a theory; it is a relentless force that will buckle your boards if you do not respect the gaps. I have also seen that ignoring the drainage move that saves your deck from mold is the fastest way to turn a high-end project into a maintenance nightmare. Finally, always remember that your railing is the ‘frame’ for your outdoor view—choosing the wrong style is like putting a thick wooden frame around a delicate watercolor painting.
Tools That Actually Save You Time and Money
If you want to achieve professional results, you have to stop relying on standard tape measures for everything. I never start a build without my high-visibility green beam laser; it is the only way to ensure pergola designs that turn your garden into a sanctuary are actually square and level. I also rely heavily on the NADRA (North American Deck and Railing Association) safety manuals to stay current on structural requirements. For the deck frame itself, I always keep a box of specialized structural screws on hand to avoid the 3-inch screw mistake that ruins composite joists, which is a common DIY error that compromises long-term stability.
Take the Leap and Start Your Build
The jump from scrolling through Pinterest to actually digging your first footer is the hardest part of the entire process. As you look toward innovative deck design ideas for 2025, keep in mind that every masterpiece started as a rough sketch and a pile of lumber. Be patient with your learning curve, stay diligent with your measurements, and do not be afraid to tackle the technical details head-on. Your future self, relaxing in the shade of your new pergola, will be incredibly glad you took the time to do it right. Have you ever started a deck project and realized halfway through that you were missing a crucial tool? Let me know your biggest ‘oh no’ moment in the comments below!