
I’ll never forget the morning I climbed a ladder to hang some string lights and watched a chunk of my expensive cedar beam crumble like a dry muffin right in my hand. I had spent three weekends building what I thought was a masterpiece, but I made a rookie mistake: I left the beam ends perfectly square. That flat surface acted like a sponge, soaking up every morning dew and autumn drizzle until the core was nothing but mush. It was a heart-wrenching realization that led me to the one framing secret I now swear by: the 15-degree drip cut.
Stop Letting Rain Rot Your Pergola From the Inside Out
When water sits on a flat horizontal surface, it doesn’t just evaporate; it migrates. It finds the end grain—the ‘straws’ of the wood—and sucks moisture deep into the structure where the sun can’t reach it. Most folks try to solve this with gallons of expensive sealant, but the real fix is simple geometry. By adding a slight 15-degree bevel to the ends of your rafters and beams, you’re giving gravity a clear path to pull water away. I used to think the cedar vs pressure treated debate for pergola beams was the only thing that mattered for longevity, but I’ve seen pressure-treated wood rot just as fast when the ends aren’t cut to shed water properly. It’s a tiny detail that separates a five-year structure from a legacy piece that stays rock solid for decades.
Does a Tiny Angle Truly Stop the Rot?
You might be thinking, ‘Is 15 degrees really enough to move the needle?’ or ‘Is this just some carpenter’s superstition?’ I get it. I was skeptical too until I performed the garden hose test for proper deck water runoff on my own project. On a flat cut, the water wraps around the bottom and clings to the wood. On a beveled cut, it reaches the lowest point and drops off cleanly. The USDA Forest Products Laboratory confirms that excessive moisture is the primary driver of fungal decay in outdoor wood structures. This isn’t just about ‘style’—though it does look sharp—it’s about protecting your wallet. Have you ever noticed dark staining or soft spots on the ends of your outdoor beams? Let me know in the comments, because catching it early is half the battle. If you’re still in the planning phase, browsing pergola designs that turn your garden into a sanctuary is the fun part, but you have to account for the ‘boring’ structural stuff too, like why most diy pergolas fail the uplift test in storms.
Grab Your Speed Square and Set the 15-Degree Mark
The transition from a ‘good’ pergola to a ‘forever’ structure starts with your layout tool. To get this right, you don’t need a degree in engineering; you just need a standard speed square. Lay your beam flat on your sawhorses and hook the square against the top edge. Pivot the square until the 15-degree mark on the ‘common’ scale aligns with the edge of the wood. This isn’t just an aesthetic choice; it’s the sweet spot where the angle is steep enough to break surface tension but subtle enough to maintain the beefy look of the timber. I remember the first time I tried to eyeball these cuts on a massive 16-foot beam. I was lazy and didn’t use a guide, and by the third rafter, my angles were wandering like a lost hiker. The result was a wavy roofline that looked amateur. Now, I use a sharp carpenter’s pencil for every single mark because a thick lead line can actually hide a 1/16th-inch error that compounds across the length of the structure. While you’re dialing in your layout, it’s also the perfect time to use the string line trick for perfectly plumb pergola beams to ensure your posts are ready for the weight of these newly prepped timbers.
Support the Drop to Avoid Splintering
When you’re making these bevel cuts, especially on heavy 2x10s or 6x6s, gravity is your enemy. As the saw blade nears the end of the cut, the weight of the waste piece—the ‘offcut’—will want to pull away. If you don’t support it, the wood will snap before the blade finishes, leaving a nasty, jagged splinter right on the bottom edge where you want the water to drop off. On a project last summer, I ruined a beautiful piece of clear-grade cedar because I didn’t have my roller stand set up. The splinter took a chunk of the finished face with it. Now, I always have a helper hold the offcut or use a scrap block to keep it level with the saw bed. This ensures the point of the bevel is sharp and clean. Think of this sharp point as a drip edge on a roof; it needs to be crisp to force the water to let go. Once those cuts are clean, you might also consider the shingle trick for protecting the top of your deck beam if your pergola is integrated into a larger deck system, providing that extra layer of defense against the elements.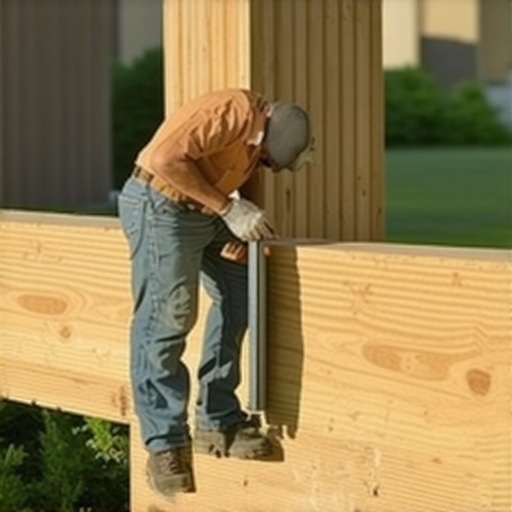
Seal the End Grain Before the Beam Goes Up
Cutting the angle is only half the battle; the newly exposed end grain is like an open wound for the wood. End grain is essentially a bundle of straws designed to suck up liquid. Even with a 15-degree slope, some moisture will inevitably linger. Before you hoist that beam into place, you must flood that end grain with a high-quality wood preservative or wax-based sealer. I prefer a clear paraffin-based solution that soaks deep into the fibers. If you’re working with a hybrid design, remember that composite decking secrets: longevity tips for a lasting deck usually focus on thermal expansion, but for real wood beams, moisture is the undisputed king of destruction. Don’t wait until the structure is assembled to apply your finish. It is ten times easier to dip the ends into a bucket of sealer while the beams are still on the ground than it is to try and brush it on from the top of a twelve-foot ladder.
Don’t Fight Gravity Alone
Managing heavy beams while trying to maintain precision is a recipe for a trip to the urgent care clinic. If you’re tackling this solo, utilize the level and laser method for setting pergola heights alone. This allows you to mark your cut lines at a comfortable working height and ensures that when the beams finally meet the posts, they sit perfectly level. In my early days, I used to try and ‘muscle’ beams into place, only to find my beautiful 15-degree cuts were sitting crooked because the posts weren’t perfectly plumb. Precision at the ground level saves your back and your pride. I’ve found that combining these geometric tricks with the joist tape secret for doubling your decks life on any horizontal mating surfaces creates a virtually impenetrable barrier against rot, ensuring your pergola remains the centerpiece of the garden for decades rather than just a few seasons.Most homeowners gravitate toward composite because they’re tired of the ‘stain and seal’ cycle. They’ve been sold the dream of a maintenance-free life, but here is the cold, hard truth: composite decking isn’t maintenance-free; it’s just ‘different-maintenance.’ I’ve seen beautiful installs ruined because someone thought they could treat it like wood. For example, why you should never use a power washer on composite boards is a lesson usually learned the expensive way when the high-pressure stream shreds the protective capping. But the real expertise isn’t in the cleaning; it’s in the thermal physics. Unlike wood, which expands with moisture, composite expands with heat. If you don’t account for this, how to stop composite deck boards from expanding into your siding becomes your top Google search by mid-July when your boards start bucking like a bronco.
The ‘Maintenance-Free’ Myth is Costing You Money
Beyond the boards themselves, the biggest ‘oops’ I see is ignoring the substructure. People spend $15,000 on premium decking but put it on a frame that’s already half-shot or improperly prepped. In my experience, why your pressure treated frame is pulling your composite apart happens because the wet pressure-treated (PT) lumber shrinks as it dries, while the composite stays stable. This creates massive tension on your fasteners. If you’re building a pergola atop this deck, the structural reason your pergola is leaning could very well be the instability of a poorly planned deck frame underneath.
Why does my composite deck feel like a trampoline?
This is the most common complaint I hear from people who switched from cedar to high-end synthetics. They followed the standard 16-inch-on-center joist spacing, yet the floor feels ‘spongy.’ The North American Deck and Railing Association (NADRA) emphasizes that structural integrity starts with the substructure, not the finish. Most composite boards are less rigid than natural timber—a phenomenon called ‘creep’ where the material slightly deforms under constant load or heat. To get that rock-solid feel, I always recommend 12-inch joist spacing for composite, especially on stairs or if you’re planning on how to build a deck around a hot tub without cutting joists. If you stick to the old-school 16-inch rule, you’ll likely find why your composite deck feels spongy between joists becomes a permanent nuisance.
Stop the Hidden Fastener Failures Before They Start
Another trap is the ‘hidden fastener’ obsession. Sure, they look clean, but why hidden fasteners fail on wide profile boards is a reality when the boards start to cup. I’ve transitioned back to color-matched face screws for the perimeter and transition boards because they provide a mechanical lock that clips just can’t match. This is especially true in areas with high temperature swings. Have you ever noticed your boards shifting or ‘walking’ out of place during a heatwave? Let me know in the comments, because I’ve found a few tricks to pin them down without ruining the aesthetic. Before you commit to a color, do the wet sand test for choosing the right composite texture. It’s a simple pro move to ensure your ‘sanctuary’ doesn’t become a slip-and-slide after a summer rain. This level of planning is what separates a DIY weekend project from innovative deck design ideas that elevate your home’s curb appeal for years to come. 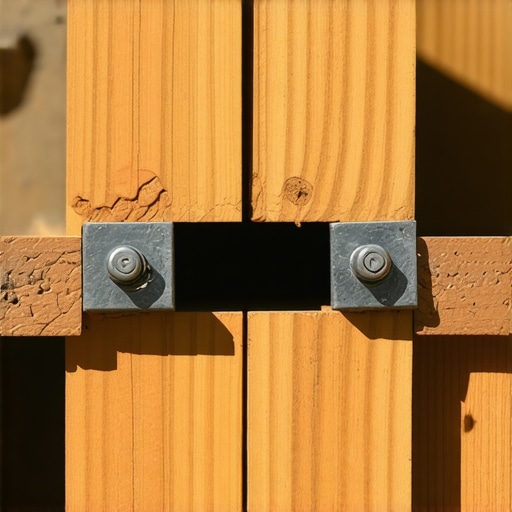 After years of fighting with boards that won’t line up and railings that feel like cooked spaghetti, I’ve realized that your finish is only as good as the tools you trust. I’m not talking about the big table saw in your garage. I’m talking about the small, specialized gear that prevents those 2 a.m. ‘did I screw that up?’ wake-up calls. For instance, I stopped eyeballing my hardware depth years ago. Now, I rely heavily on the jig I use for consistent deck screw depth. Why? Because on a premium project, a single screw head driven too deep creates a mushroom of plastic that looks like a miniature volcano. It’s an eyesore you can’t unsee once the sun hits it. When it comes to those dark, modern boards that everyone loves in composite decking trends: durable solutions for modern outdoor living, standard graphite pencils are useless. I always keep a silver welder’s pencil in my pouch—it’s the pencil trick for marking dark composite boards that actually lets you see your cut line in the midday sun. And if you’re struggling with how to hide the ugly seams in long composite deck runs, my secret weapon is a simple bow-wrench. It forces bowed boards into submission so your gaps stay tight and professional.
How do I maintain my composite deck and pergola over time?
Maintaining these structures isn’t about working harder; it’s about working smarter. For composite, put down the pressure washer. I’ve seen expensive boards ruined in seconds by a high-pressure nozzle. Instead, I swear by the vinegar and water mix that cleans composite better than chemicals. It’s gentle enough for the protective cap but tough enough on mold. If you find a mystery mark after a BBQ, try the soap and sponge fix for oil stains on composite decking before reaching for heavy solvents. For your pergola, your biggest job is the ‘Flashlight Audit.’ Every spring, grab a high-lumen LED and use the 10-minute flashlight test for finding hidden ledger rot. Catching a failing flashing early is the difference between a hundred-dollar repair and a massive structural failure. Looking ahead, I see the industry shifting toward ‘smart’ outdoor spaces. We’re already seeing integrated sensors that can detect moisture levels in your framing or automated louvers on pergolas that react to rain. But no matter how high-tech we get, the physics of water and gravity remain the same. The American Wood Council (AWC) ‘Design for Code Acceptance’ documents consistently prove that detailing—like our 15-degree drip cuts—is the most effective way to manage the life cycle of wood structure. 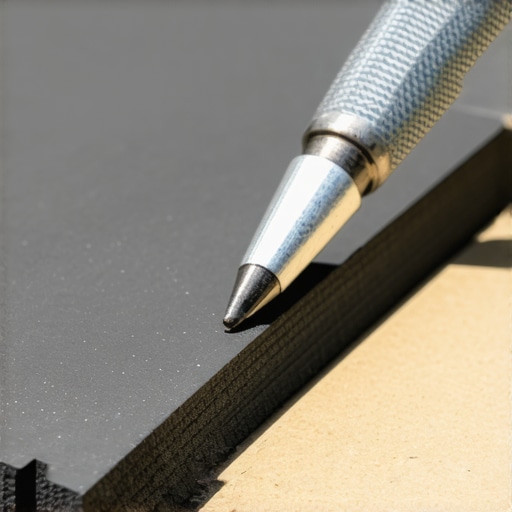 I want you to try one thing this weekend: even if you’re not building a full deck, go out and perform the ice pick test for checking joist strength on older decks or check your railings using the flashlight hack for finding railing bracket alignment. Knowing the state of your structure is the first step to innovative deck design ideas that elevate your home’s curb appeal and ensuring your sanctuary actually lasts.
The Hardest Lessons Learned from Decades of Deck Building
I spent years thinking the surface was the most important part of a project, but I was wrong. The real value is hidden in the bones of the structure. If you don’t account for how your pressure treated frame is pulling your composite apart, those expensive boards will eventually warp as the timber dries and shrinks at a different rate than the synthetic capping. Precision isn’t just about making things look pretty; it’s about physics. Water always wins if you don’t give it an exit strategy, which is why I now consider the 2-degree slope rule for drainage under second story decks a non-negotiable step for any build involving a dry-zone. High-end materials can’t mask poor geometry. Even the most stunning railing systems for safety and style will feel flimsy if the blocking behind the rim joist wasn’t secured with structural screws.
Build Like a Pro with These Trusted Resources
To move from a DIY hobbyist to a seasoned builder, you need more than just a hammer. I rely on a few specific standards and tools for every project. First, the NADRA (North American Deck and Railing Association) safety guides are my go-to for ensuring every connection meets code. Second, while tape is great, you must understand why your deck joists are rotting underneath the tape if the wood was already saturated before application. Finally, I never start a layout without my high-contrast speed square—it’s the only way to consistently nail those drip-cut angles. For those just starting their journey, looking at pergola designs that turn your garden into a sanctuary provides the visual roadmap you need to stay motivated during the tough framing stages.
#IMAGE_PLACEHOLDER_E#
Create an Outdoor Sanctuary That Stands the Test of Time
Outdoor living is about more than just adding square footage to your home; it’s about creating a space for memories that won’t be interrupted by costly repairs. By applying composite decking secrets: longevity tips for a lasting deck and respecting the natural behavior of your materials, you are building a legacy. Don’t be afraid to take the extra ten minutes to seal a cut or check a level. Those minutes are what determine whether your deck lasts ten years or thirty. Your future self will thank you every time you step out onto a solid, beautiful floor. What is the biggest challenge you’ve faced with wood rot or board expansion? Let me know in the comments below!