
I remember sitting on my back porch last summer, admiring the way the vines were finally starting to take hold of my cedar pergola. I had my feet up and a cold glass of lemonade in hand, and then I saw it. At first, I thought my eyes were playing tricks on me, but the vertical post on the far left was definitely not vertical. It was tilting just a few degrees, like a tired marathon runner looking for a wall to lean on. My heart sank because I had spent three weekends building that thing, and here it was, threatening to fold like a house of cards. If you have noticed your overhead rafters looking a bit wavy lately or if your whole structure sways when the wind picks up, you are not alone. It is a terrifying realization, but I promise we can fix this before your backyard centerpiece becomes a pile of firewood.
Stop Your Pergola From Slowly Tilting Toward the Neighbors Yard
Listen, a leaning pergola is usually screaming at you about a lack of lateral strength. When I built my first one, I was obsessed with [pergola design inspiration from modern to classic looks](https://deckforgebuilders.com/pergola-design-inspiration-from-modern-to-classic-looks) but I completely ignored the physics of what was holding it up. I thought that heavy beams and thick posts were enough to keep it standing through sheer willpower. I was wrong. Gravity is patient, and wind is persistent. We are going to look at exactly why those posts are shifting, from the way your footings were poured to the fasteners you chose. We will solve the ‘sway’ problem once and for all by looking at the skeleton of your structure.
Is it actually worth the effort to fix a minor lean?
You might be tempted to ignore a half-inch tilt, thinking it just adds character. To be honest, that is the exact mistake I made early on. I skipped adding support because I thought they looked too busy and ruined the minimalist vibe I was going for. But here is the kicker: according to the American Wood Council, structures without proper lateral bracing can fail exponentially once they move out of plumb. A small lean increases the torque on your joints, which pulls the fasteners loose, which increases the lean. It is a nasty feedback loop. I eventually learned that [why your pergola needs knee braces](https://deckforgebuilders.com/why-your-pergola-needs-knee-braces) is not just a suggestion; it is a structural necessity for anything taller than a dog house. I also failed to use [the string line trick for perfectly plumb pergola beams](https://deckforgebuilders.com/the-string-line-trick-for-perfectly-plumb-pergola-beams) during the initial set, which meant I was starting with a disadvantage I didn’t even know I had. Have you ever walked out after a storm and felt like your pergola moved an inch to the left? If you are seeing gaps where the beams meet the posts, or if you can literally push the structure and watch it rock, we need to talk about [the steel bracket move for high wind pergolas](https://deckforgebuilders.com/the-steel-bracket-move-for-high-wind-pergolas) and how it can save your investment. Many homeowners find that [why most diy pergolas fail the uplift test in storms](https://deckforgebuilders.com/why-most-diy-pergolas-fail-the-uplift-test-in-storms) is the same reason theirs is currently leaning: a lack of rigid connection points at the base and the corners. Today, I am going to show you how to pull that structure back into alignment and lock it down so it never moves again.To get that leaning giant back in line, we need to apply some mechanical advantage. I once tried to muscle a leaning cedar pergola back into place by hand after a particularly nasty spring storm. It didn’t budge. I ended up using a heavy-duty ratchet strap, often called a come-along, attached to my truck’s hitch. It was terrifying hearing the wood groan, but it taught me that you can’t fight physics with just your shoulders; you need a system.
Pull the structure back to plumb with a come-along
First, you need to loosen the fasteners at the base of the tilting posts. If you don’t, you are just fighting the resistance of the existing screws or bolts, and you’ll likely snap the wood. Once they are loose, anchor your ratchet strap to a solid point—like a nearby tree or a vehicle—and slowly apply tension to pull the pergola back toward the vertical. While you are doing this, use [the level and laser method for setting pergola heights alone](https://deckforgebuilders.com/the-level-and-laser-method-for-setting-pergola-heights-alone) to ensure you aren’t just shifting the problem from one side to the other. You want that bubble perfectly centered. 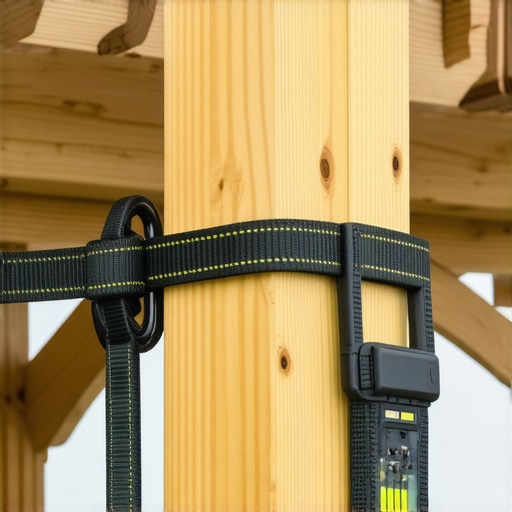
Trust the 3-4-5 triangle for a square roof
A pergola that leans is often a pergola that has ‘racked,’ meaning it has turned from a rectangle into a parallelogram. Even if your posts look straight, your rafters might be skewed. I always recommend using [the 3-4-5 triangle move for squaring up a new deck frame](https://deckforgebuilders.com/the-3-4-5-triangle-move-for-squaring-up-a-new-deck-frame) and applying it to your overhead beams. Measure three feet on one beam, four feet on the perpendicular beam, and the diagonal between those two points must be exactly five feet. If it isn’t, your structure is still under stress. This is often where [the cedar vs pressure treated debate for pergola beams](https://deckforgebuilders.com/the-cedar-vs-pressure-treated-debate-for-pergola-beams) comes into play; cedar is lighter and easier to pull back into square, whereas pressure-treated lumber can be stubborn once it has warped in the sun.
Beef up your hardware where it matters most
Once the structure is plumb and square, you cannot just tighten the old screws and hope for the best. This is the moment for [the hidden bracing move for rock solid corner posts](https://deckforgebuilders.com/the-hidden-bracing-move-for-rock-solid-corner-posts). You need to install diagonal knee braces at every corner. These braces act as the hypotenuse of a triangle, providing the lateral stability that prevents the ‘sway’ you feel when you push on a post. If your pergola is on a concrete pad, check your base anchors. Many people ask [how to anchor a pergola without digging massive holes](https://deckforgebuilders.com/how-to-anchor-a-pergola-without-digging-massive-holes), but if those anchors have wiggled loose, that is your primary failure point. Upgrade to heavy-duty wedge anchors and consider [the steel bracket move for high wind pergolas](https://deckforgebuilders.com/the-steel-bracket-move-for-high-wind-pergolas) to lock the post-to-beam connection. Standard toenailing with screws is never enough for a structure this heavy. By adding these rigid connection points, you ensure that the next time the wind howls, your pergola stays as still as a mountain.Most DIYers assume that if a structure is heavy, it is stable. I used to think that doubling up on hardware was the ultimate insurance policy. However, the North American Decking and Railing Association (NADRA) points out that most deck failures are not due to a lack of wood, but rather the failure of the connection points or the decay of the hidden substructure. If you have been following composite decking secrets longevity tips for a lasting deck, you know the boards last forever, but the frame usually does not. I have seen countless pergolas and decks that look beautiful on top but are structurally compromised underneath because the owner prioritized aesthetics over the physics of wood-to-metal contact.
Why does your high-end composite deck feel like a trampoline?
One of the most common mistakes I see in modern builds is sticking to the standard 16-inch on-center joist spacing for composite boards. While code might allow it, why your composite deck feels like a trampoline usually comes down to the fact that composite material is far more flexible than natural wood. If you want that rock-solid feel, you need to drop your spacing to 12 inches on-center. It costs a bit more in lumber, but it prevents that spongy bounce that makes a $20,000 deck feel cheap. Most people think they are saving money by using fewer joists, but they are actually sacrificing the premium feel of the material they just spent a fortune on.
Stop trusting your pressure-treated frame to stay still
Here is the contrarian truth: your frame is actually working against your beautiful finish. Why your pressure-treated frame is pulling your composite apart is a result of moisture cycles. The wood frame shrinks and expands significantly, while the composite only reacts to temperature. This creates a tug-of-war that can snap hidden fasteners or cause unsightly warping. I always use the joist tape secret for doubling your decks life to keep water out of the grain, which stabilizes the wood and protects those critical connections. Have you ever fallen into this trap and seen your perfectly spaced gaps disappear by mid-July? Let me know in the comments. 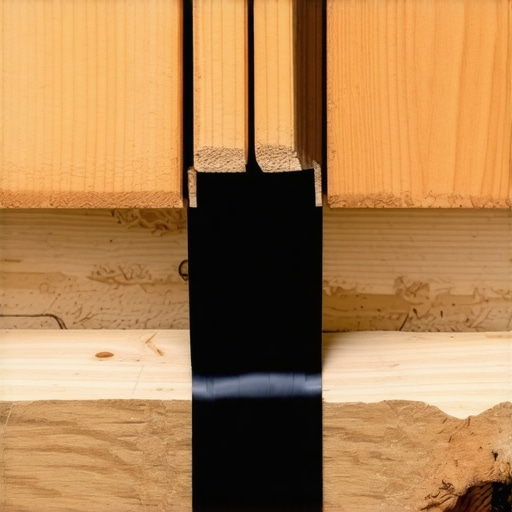
Avoid the fastener trap that splits your joists
Also, beware the 3-inch screw mistake that ruins composite joists. Using standard wood screws in composite often leads to mushrooming or splitting the top of the joist, which creates a pocket for rot. It is these small, invisible technicalities that separate a weekend project from a lifetime investment. If you are refining your plan, take a look at innovative deck design ideas that elevate your homes curb appeal to ensure your structural upgrades match your aesthetic goals. Remember, a pergola or deck is only as strong as its weakest bracket, and usually, that bracket is failing because of a nuance most homeowners ignore until the structure starts to sway.I have spent far too many afternoons crawling under floorboards with a headlamp to ignore the reality that your tools determine your results. If you are still eyeball-leveling your boards or guessing the depth of your fasteners, you are leaving the door wide open for structural failure.
The specific gear that saves my back and my boards
When I am working with expensive materials, I do not leave anything to chance. For example, I used to struggle with inconsistent screw depths that would either leave a trip hazard or sink so deep they caused the board to mushroom. Now, I never start a project without the jig i use for consistent deck screw depth. It is a simple tool, but it ensures every single fastener is set exactly to the same millimeter, which is crucial for the finished look. Another non-negotiable for me is a high-quality heat gun. You might think that is for paint stripping, but how to fix scuffs on dark composite boards with a heat gun is a professional secret that has saved me from replacing entire planks after a furniture-moving mishap. I also keep a set of specialty clamps on hand; specifically, the clamp and lever move for straightening bowed 2x10s is the only way to deal with the inevitable warp you find in pressure-treated lumber from the big-box store.
How do I keep my outdoor retreat looking new for a decade?
Maintenance is not about a massive weekend of scrubbing once a year; it is about the small, technical checks. According to the International Association of Certified Home Inspectors (InterNACHI), the majority of deck collapses occur because of ledger board failure or post-rot that went unnoticed. I perform what I call a ‘Structural Physical’ every spring. I start with the ice pick test for checking joist strength on older decks to ensure the wood is still dense and healthy. If the wood feels like soft butter, we have a problem. For the surface, I have learned the hard way that chemicals are the enemy. I always tell my clients why you should never use bleach on composite decks—it can actually break down the UV inhibitors in the plastic. Instead, I rely on the vinegar and water mix that cleans composite better than chemicals for a streak-free finish that does not void your warranty. If you have cable railings, do not forget to check the tensioners; avoiding 3 mistakes that make your cable railing sag every winter will keep your view sharp and your safety intact. 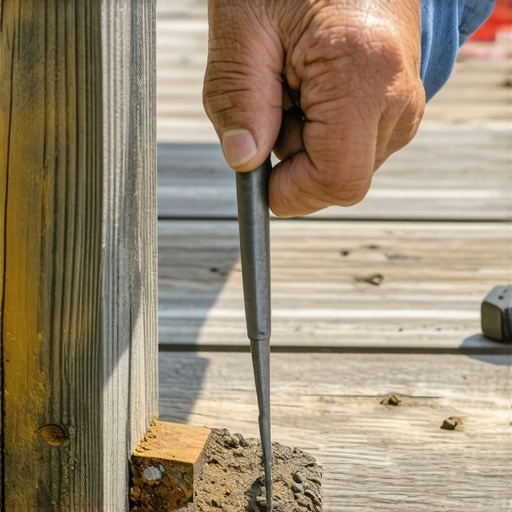
The future of decking is smarter than you think
Looking ahead, the industry is moving away from purely passive structures. I predict that within the next five years, we will see integrated smart sensors embedded directly into the joists to monitor moisture levels and wood movement in real-time, alerting homeowners to rot before it is visible. We are already seeing a shift toward more complex geometries, like using the pencil and string hack for perfectly curved deck corners to break away from the ‘boring rectangle’ mold. If you want to stay ahead of the curve, stop thinking about your deck as a static object and start treating it as a high-performance machine. I challenge you to go out this weekend and perform the ‘ice pick test’ on your oldest support post—it takes two minutes and could save you thousands in future repairs.
The Hard Truths I Learned While Battling My Own Backyard Lean
One of the biggest ‘lightbulb moments’ I had was realizing that over-engineering isn’t an ego thing; it is an insurance policy. I once thought that because a post was buried three feet deep, it couldn’t possibly move. I was wrong. Soil shifts and wood breathes. I also learned that the smallest gap in your ledger board can lead to a nightmare of rot; that is why the ledger board error that causes house leaks is the first thing I check on every inspection. Another realization: the weight of your structure is your enemy during a storm but your friend during a party. If you don’t account for the lateral forces, that weight becomes a giant pendulum. Finally, I stopped trusting my eyes. Even if it looks straight, it usually isn’t. Using the string line trick for leveling deck joists before decking changed the way I feel about my walking surfaces forever.
#IMAGE_PLACEHOLDER_E#
The Gear That Makes My Projects Bulletproof
If you want to move from ‘weekend warrior’ to ‘backyard pro,’ you need to stop guessing. My first recommendation is the NADRA (North American Decking and Railing Association) safety manuals; they are the gold standard for structural checklists. For actual construction, I swear by the specialized fasteners that prevent ‘mushrooming’ in composite. I also frequently use the shingle trick for protecting the top of your deck beam to keep moisture from sitting on horizontal surfaces. For those tricky angles, I never leave the shop without my laser level and a heavy-duty come-along. If you are looking for aesthetic ideas that don’t compromise strength, check out pergola design inspiration from modern to classic looks to see how pros hide their structural reinforcements behind beautiful trim.
Take Back Your Outdoor Space Before It Slips Away
Building or fixing a pergola is more than just a home improvement project; it is about creating a safe harbor for your family. Don’t let a little sway or a minor lean discourage you from enjoying your backyard. With the right bracing and a focus on physics, you can turn a structural headache into a rock-solid sanctuary that lasts for decades. Your dream pergola is waiting for you to give it the support it deserves. Have you ever felt your pergola move during a high wind, or noticed a gap opening up in your beam connections? Let me know in the comments below!