
I remember standing on my brand-new deck last summer, holding a cold lemonade and feeling a strange sense of annoyance. My wife called it over-analyzing, but I knew better. I’d spent weeks researching composite decking secrets and picking the perfect grain, yet every time I looked at the corners, those massive, galvanized carriage bolts stared back at me like industrial acne on a luxury retreat. It didn’t matter how much I spent on the boards if the structural guts looked like a construction site leftover. That was the moment I realized that high-end deck design isn’t just about the floorboards; it’s about the jewelry—the hardware. Today, I’m going to show you how to swap that utilitarian clutter for a look that screams custom craftsmanship using copper caps. [image-placeholder]
Stop Letting Silver Bolts Ruin Your Curb Appeal
I’ll admit it: I made a classic rookie mistake during my first build. I thought I could just paint the bolt heads to match the wood. Total disaster. Within one season, the paint flaked off, leaving a crusty mess that looked worse than the original galvanized steel. If you’ve ever wondered why your post bases are rusting, you know that moisture is the ultimate enemy of exposed metal. Copper caps solve two problems at once: they shield the wood from the rot-inducing pooling of water on top of posts and they provide a warm, metallic contrast that actually gains character as it patinas. Plus, if you followed my advice and realized why 6×6 posts look better than 4x4s, you have even more surface area to protect and beautify. The process is remarkably simple, but it requires a bit of foresight to ensure the hardware is recessed enough for the cap to sit flush against the timber. It is the difference between a project that looks finished and one that looks truly professional.
Do copper caps actually stay on in high winds?
This was my biggest fear. I didn’t want to be chasing expensive bits of metal across the yard after every thunderstorm or worrying about them becoming projectiles. But when you seat them correctly—usually with a dab of high-quality exterior adhesive or a discreet stainless steel pin—they aren’t going anywhere. Interestingly, the Copper Development Association notes that copper’s durability in architectural applications is measured in centuries, not years, because the metal develops a protective oxide layer that naturally seals it from the elements. This makes it far superior to plastic or painted alternatives that degrade under UV exposure. Have you ever looked at your finished deck and felt like something was missing even though the boards were perfect? Tell me about your hardware headaches in the comments. We’re about to take this from contractor basic to an architectural masterpiece by focusing on these small but mighty details.
Prepping Your Timber for the Perfect Hardware Hide
Before you even touch a piece of copper, you have to address the structural metal that is likely standing in your way. On my last build, I assumed the 6×6 posts were perfectly flat after I finished the framing. I was wrong. I had one carriage bolt head sitting just an eighth of an inch too high. When I tried to tap the copper cap into place, the soft metal immediately buckled, creating a permanent dent that caught the light like a sore thumb. It was a fifty-dollar mistake that taught me a valuable lesson: the timber must be prepped to accept the jewelry. Think of your post cap like a tailored suit; if the body underneath is lumpy, the suit won’t hang right.
Clear the Path for a Flush Fit
Start by inspecting every single connection point where a beam meets a post. If you are using heavy-duty hardware to avoid the simple way to fix a sagging deck beam, your bolt heads are likely protruding. You need to use a spade bit or a Forstner bit to countersink these bolts at least a quarter-inch deeper than the wood surface. This ensures that when the pyramid-shaped interior of the copper cap slides down, it doesn’t bottom out on a steel bolt. While you are at it, do a quick check for level. Even a slight tilt in the post can make the cap look crooked from the street, ruining the symmetry of your innovative deck design ideas. 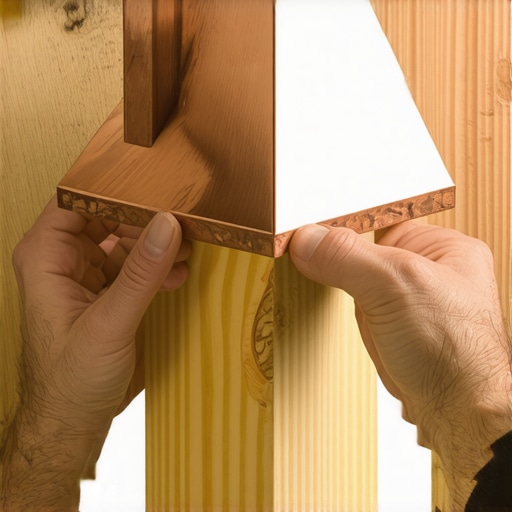
The Countersink Move You Can’t Skip
If you find a bolt that is already tightened and can’t be easily recessed, do not reach for the hammer to force the cap. Instead, use a chisel to create a small relief notch in the wood around the bolt head. This is the same level of detail required for the notched rafter secret for a pergola that never wobbles. By removing just a sliver of wood, you allow the cap to sit firmly on the post shoulders. This prevents moisture from sneaking underneath and starting the rot process, which is a key part of the 15-minute deck inspection every homeowner should do.
Securing the Metal Without Ugly Screws
Most people make the mistake of driving a big galvanized nail through the side of a beautiful copper cap. It looks terrible and it causes a reaction between the two different metals. To avoid the frustration of why your railing post caps keep blowing off, you need a bond that is invisible but permanent.
The Adhesive Dab Technique
I prefer using a high-quality, exterior-grade construction adhesive. Place a small bead—about the size of a marble—on each of the four top corners of the wooden post. Don’t put it in the center; you want the air to be able to escape so the cap doesn’t ‘hydroplane’ on the glue. Press the cap down firmly and hold it for thirty seconds. This creates a suction-like bond that handles high winds better than any mechanical fastener. This attention to stability is just as important as knowing why your railing balusters are rattling and the 5-minute fix; it’s about eliminating the little noises and movements that make a deck feel cheap.
Managing the Natural Patina Glow
Once the caps are on, you have a choice: let them age into a classic Verdigris green or keep them shining. If you want that bright penny look, you’ll need to spray them with a clear UV-resistant lacquer before installation. However, most homeowners find that the natural transition from bright orange to deep bronze is what makes the project feel authentic. It’s a design choice that parallels the secret to making composite decking look like real wood—it’s all about embracing the textures and tones that look like they belong in nature rather than a factory floor.
Why Everyone Is Wrong About Tightening Your Deck Bolts
Most DIYers think that a deck is only as strong as how hard you can crank the wrench. They believe that if the wood isn’t groaning under the pressure of the bolt, it’s loose. In my experience, this is the quickest way to kill a post. When you over-tighten hardware, you crush the wood fibers beyond their elastic limit. According to research by the Forest Products Laboratory, once these fibers are crushed, they lose their ability to shed water and instead act like a sponge, pulling moisture directly into the heart of the timber. This structural damage is often the structural reason your deck feels bouncy and how to fix it later on. By using copper caps, you aren’t just adding ‘jewelry’; you are creating a protective umbrella that prevents this moisture-wicking process from ever starting.
Can hidden fasteners actually shorten the life of your boards?
It sounds like a contradiction. We’re told that hidden clips are the gold standard for composite decking secrets, but there is a massive trap here for the unwary. If you don’t account for the thermal expansion of the material, those ‘hidden’ clips can become tiny saws. As the boards expand and contract in the sun, they rub against the metal clips. If you haven’t mastered the expansion gap rule that stops boards from buckling, you’ll find your expensive boards clicking and popping within two seasons. This is why I often argue that why hidden fasteners can be a maintenance nightmare if the substructure isn’t perfectly level. 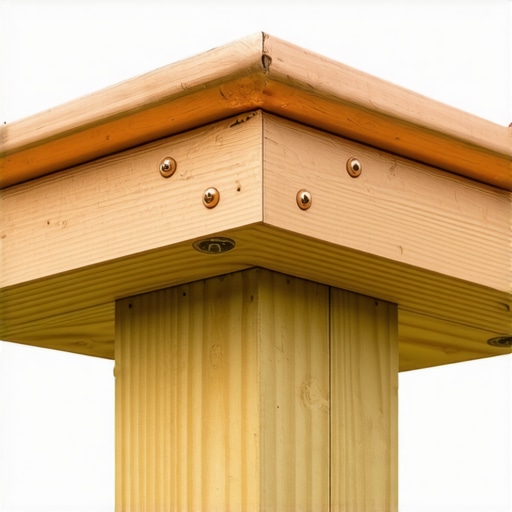
The Moisture Trap Most Professionals Ignore
The biggest ‘oops’ factor I see in the field involves the space between the post cap and the timber. People assume that because the cap is there, the wood is safe. But if you don’t use the flashing tape move that doubles the life of your joists on the top of the post before the cap goes on, you can actually create a terrarium. Humidity gets trapped under the copper, and without airflow, the wood begins to soft-rot from the top down. Have you ever fallen into this trap where a ‘protective’ feature actually caused more damage? Let me know in the comments. To avoid this, ensure your adhesive dabs are spaced to allow for minimal air exchange. This level of detail is what separates a standard backyard platform from innovative deck design ideas for 2025. Whether you are dealing with why composite decks are the better choice for high-traffic areas or a traditional cedar build, the goal is always the same: keep the water moving away from the wood. If you’re ready to get started on your own custom build, feel free to contact us for a consultation.
Why My Impact Driver Is the Only Tool I Trust for Finish Work
For years, I used a standard cordless drill for everything from framing to the final hardware. I thought I was being efficient, but I was actually sabotaging my own work. When you are installing high-end hardware or dealing with why your deck screws are snapping in cold weather, a drill just doesn’t have the finesse. I switched to a dedicated impact driver with three-speed torque control, and it changed everything. The rapid-fire internal striking mechanism allows you to seat a screw with surgical precision without stripping the head or, worse, cracking the timber. If you are working on the notched rafter secret for a pergola that never wobbles, that controlled power is the difference between a snug fit and a split beam. I personally swear by the brushless models because they don’t overheat during those long July afternoons when you’re trying to finish a hundred-square-foot section of railing. 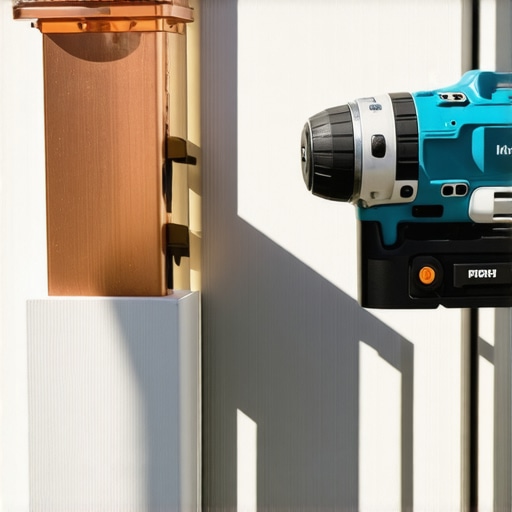
How Can I Keep My Deck Looking New for Decades?
Maintenance isn’t a once-a-year chore; it’s a seasonal rhythm. The most common question I get is how to handle the inevitable grime. My first rule: why you should never use a pressure washer on composite cannot be overstated. High pressure can etch the surface of even the highest-quality boards, creating microscopic pits that trap mold and dirt. Instead, I use a soft-bristled deck brush and a pH-neutral cleaner. According to the National Design Specification (NDS) for Wood Construction, the withdrawal capacity of fasteners is drastically reduced when wood is subjected to repeated wetting and drying cycles. To combat this, I always double-check the drip edge hack for preventing deck rim joist rot. By ensuring water flows off the rim and away from the house, you protect the ‘guts’ of your deck while the copper caps and boards handle the surface. For those with overhead structures, keep an eye out for how to fix a pergola rafter that is starting to twist before the movement stresses your main posts.
The Future of Smart Outdoor Living
Looking ahead, I predict we are moving toward ‘living decks’ that integrate sensors directly into the subframe. We are already seeing moisture sensors that can alert a homeowner to a leak behind the ledger board before it becomes a structural disaster. We’re also seeing a shift toward bio-based composites that use recycled carbon fibers for even more stability. This evolution makes the 15-minute deck inspection every homeowner should do even more critical as we move from simple wood platforms to complex architectural systems. If you want a pro-level result this weekend, go grab a moisture meter and check the top of your posts; if the reading is over 19%, it’s time to install those copper caps and apply some flashing tape. For more advanced structural advice, feel free to contact us and let’s talk about your next project.
What Experts Won’t Tell You About Weatherproofing Timber
After years of building, I’ve realized that the most expensive copper cap in the world won’t save a post that was cut poorly. Here are a few lightbulb moments from my career that changed how I approach every build.
- The Sacrificial Washer: If you aren’t using copper hardware, always place a thin rubber or EPDM washer between dissimilar metals. It prevents galvanic corrosion that eats through finishes in coastal environments.
- Sound is Structural: A deck that looks good but squeaks feels cheap to the touch. I learned early on that the stringer notch hack for squeak-free deck stairs is just as vital as the visible jewelry on top of your posts.
- The Shadow Test: Always check your hardware placement at late afternoon. Long shadows reveal every slight misalignment or tilt in a post cap that you simply won’t notice under the high noon sun.
The Essential Kit I Carry for Every High-End Build
If you want to move beyond basic DIY and achieve architectural-grade results, these are the specific tools and resources I personally rely on for every project.
1. Digital Moisture Meter: This is non-negotiable. Never install a cap or apply a sealer until the wood is below 19% moisture content. It’s the only way to ensure your custom work doesn’t trap rot-inducing humidity inside the timber.
2. 12-Inch Speed Square: Most homeowners use the standard 6-inch version, but the larger 12-inch square allows you to mark 6×6 posts for copper caps with one single, continuous stroke, ensuring the base is perfectly level for the hardware.
3. Material Comparison Guides: Before starting, I always review the latest durability data. Understanding how to maximize outdoor living with low-maintenance composite decking compared to traditional wood allows you to pick hardware that matches the lifespan of your boards.
Take the Leap and Upgrade Your View
Your deck is more than just a collection of boards and bolts; it’s an extension of your home where sunsets are watched and memories are made. Don’t let the fear of a complex installation stop you from adding those professional touches that elevate the space. Whether you are learning how to select the perfect railing system for every deck or simply swapping out utilitarian bolts for elegant copper, every small detail contributes to a space that feels intentional. If you ever get stuck or want a professional second opinion on your structural plans, you can always contact us for guidance. Have you ever started a deck project and realized halfway through that you forgot a tiny structural detail? Let me know in the comments below!