
I remember the first major deck project I tackled back in the summer of 2012. I had spent weeks obsessing over the innovative deck design and picked out the perfect composite decking boards. It looked like a magazine cover. But then, the first dry spell hit in August. Every single time I stepped on the second tread, the stairs let out a piercing, wood-on-wood shriek that echoed across the yard. It was humiliating. I tried driving extra screws into the treads, but that just led to the classic 3-inch screw mistake that splits joists and does absolutely nothing to stop the noise. I realized then that my ‘perfect’ build was missing a fundamental secret of stair geometry.
The Science Behind Why Your Stairs Scream at You
The primary reason for those annoying noises isn’t actually your choice of wood or the age of the structure; it is friction. When you simply rest a stair tread on top of a flat-cut stringer, you create a massive surface area where wood can rub against wood. As the seasons change, the wood expands and contracts. According to the American Wood Council, wood can shrink significantly across its grain as it loses moisture, and even a fraction of a millimeter of gap is enough to create a resonance chamber for squeaks. This is especially true if you are wondering why your deck stairs squeak only when it is dry. Today, I am going to walk you through a specific notching technique that isolates the pressure points and locks your treads in place so they stay silent for the next twenty years.
Is this extra effort actually worth your time?
You might be looking at your circular saw and wondering if you really need to add another hour of precision cutting to your weekend. I get it. We all want to get to the part where we are relaxing under our pergola with a cold drink. But let me tell you from experience: fixing a squeak after the railing systems are already installed is a nightmare. This hack is about building it right the first time so you never have to tip-toe out to the grill at night. Have you ever built something that looked beautiful but sounded like a haunted house the moment you stepped on it? I’d love to hear your DIY horror stories if you reach out to us. We’ve all been there, and that is exactly why this professional secret is such a game-changer.
Carve Out the Noise with a Simple Relief Cut
The secret to a silent staircase isn’t about using more screws; it’s about reducing the contact area where the tread meets the stringer. Think of it like a pair of high-performance brake pads—if they aren’t aligned perfectly, they squeal. When you install composite decking treads directly onto a flat stringer, you have several square inches of friction surface. By creating a ‘relief notch,’ you effectively remove the middle section of the stringer’s horizontal bearing surface, leaving only two small points of contact at the front and back. This ensures that the weight of the person walking is concentrated on stable points rather than shifting across a flat, uneven board.
Get Your Marks Right the First Time
Precision starts with your layout. Use a framing square to mark your standard rise and run, but before you reach for the saw, you need to account for the thickness of your material. If you’re working with darker materials, I always recommend using the pencil trick for marking dark composite boards to ensure your lines are visible under the glare of the sun. Mark a secondary line approximately 1/8th of an inch below the main bearing surface, spanning about 60% of the middle of the run. This is the area you will remove to prevent the wood-on-wood rubbing that leads to that dry-weather shriek.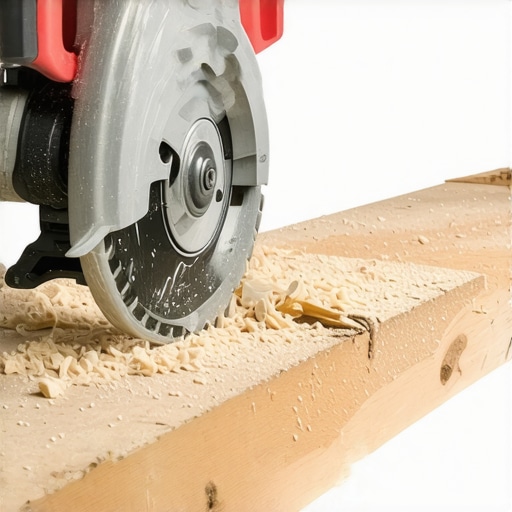
The Precision Cut that Saves Your Sanity
Once your lines are marked, use a circular saw to cut the main rise and run, but stop just shy of the corner to avoid over-cutting and weakening the stringer. Finish the corner with a handsaw. Now, for the relief notch: set your saw blade depth to just 1/4 inch and make a series of ‘kerf cuts’ across that middle 60% of the horizontal run. Knock the slivers out with a chisel. You aren’t trying to remove structural integrity here; you are simply creating a valley. I remember a project back in 2018 where I was rushing to beat a thunderstorm. I skipped the relief notches on a massive set of stairs. It looked great for exactly three days. Once the humidity dropped, the stairs sounded like a frantic tap dancer was living under the treads. I had to rip up the boards, which was a nightmare because I hadn’t yet learned how to hide stair railing hardware with custom trim blocks properly back then. I spent two days fixing a mistake that would have taken twenty minutes during the initial cut.
Secure the Treads Without the Squeal
With your relief notches carved, it’s time for assembly. Before you lay the tread down, apply a bead of high-quality subfloor adhesive to the two remaining contact points on the stringer. This adhesive acts as a gasket, filling any microscopic gaps that might develop as the wood dries out. When you drive your fasteners, ensure you are using the flashing tape move that doubles the life of your joists to protect the top of the stringer from rot. For the ultimate stability, I often use the simple bracket move for rock-solid stair headers to make sure the entire stringer assembly can’t rack or shift. By isolating the pressure to the front and back of the tread and ‘gapping’ the middle, you’ve eliminated the primary physics-based cause of stair noise.But stair noise is just the tip of the iceberg when it comes to structural nuances that most builders overlook. It’s easy to get lured into the idea that paying for low-maintenance composite decking means you’re done with work forever. But here is the professional truth: low maintenance does not mean no maintenance. I’ve seen homeowners drop thirty thousand dollars on a build only to watch it fail within five years because they believed the marketing over the physics. One of the biggest mistakes involves the substrate. People assume the plastic-capped boards are the star of the show, but why pressure treated wood still needs maintenance under composite is a conversation most contractors avoid until the rot sets in. If the frame fails, the expensive boards go with it. Have you ever fallen into this trap of focusing on the surface while the foundation suffered? Let me know in the comments.
Will your deck feel like a trampoline if you follow the manual?
The installation manuals for many big-box brands say sixteen-inch on-center spacing is fine for joists. Technically, it meets the minimum code. But if you want a premium feel, sixteen inches is a mistake. According to the North American Deck and Railing Association (NADRA), composite materials lack the natural structural stiffness of cellulose-heavy hardwoods like Ipe. On a hot July day, those sixteen-inch spans will soften slightly as the internal resins reach higher temperatures, and you’ll find yourself wondering why your composite deck feels like a trampoline. I always build to twelve inches on-center for any high-end project. It adds about twenty-five percent more lumber to the budget, but it is one hundred percent of the reason the deck feels like a solid interior floor rather than a bouncy castle.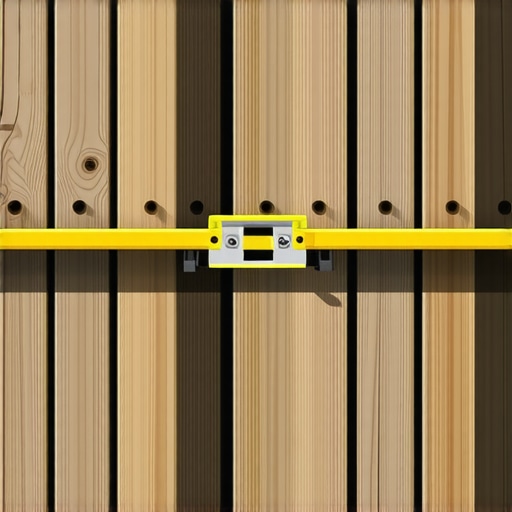
The Hidden Trap of Hidden Fasteners
Everyone wants a clean, screw-free surface, but why hidden fasteners can be a maintenance nightmare is a lesson usually learned the hard way. In areas with high tree canopy or heavy debris, those tiny gaps between boards get packed with organic matter that acts like a sponge. Without a way to easily back out a screw to clean the joist tops, you’re left with a pressure washer—and why you should never use a pressure washer on composite is something I cannot stress enough. You will etch the protective cap and ruin your warranty in seconds. If you use hidden clips, you must commit to an annual leaf-blower routine to keep those gaps clear, or you are inviting rot into your joists regardless of how ‘waterproof’ your boards are.
Science Matters More Than Aesthetics
Finally, do not ignore the sun when planning your innovative deck design. You have to account for thermal movement in ways wood doesn’t require. Wood expands mostly in width; composite expands significantly in length. If you do not follow the expansion gap rule that stops boards from buckling, your beautiful mitered corners will look like an accordion by next summer. Even the color of your railing systems matters for more than just looks. If you’ve ever wondered why your black aluminum railing gets too hot to touch, it’s because you haven’t considered the thermal mass of the material. It’s these small, scientific nuances that separate a DIY weekend project from a legacy build that actually adds value to your home.If you want to move beyond the basics of assembly, you need to talk about the gear that actually makes the job precise. I never step onto a job site without a dedicated board-straightening tool, like a BoWrench. When you are dealing with high-end composite decking, you cannot just force a board to be straight like you can with wet pressure-treated pine. These boards have a memory, and if you fight them, they will eventually win. By using a specialized lever, you can keep your gaps consistent without marring the edges of the material. I also swear by using a dedicated jig for your rails. Using the drill guide hack for centered baluster holes ensures that your railing systems look like they were installed by a laser-guided robot rather than a guy with a tape measure and a prayer.
How do I keep my outdoor space looking new for decades?
Maintenance isn’t about a weekend-long scrubbing session once every five years; it is about the micro-habits. I recommend a simple biannual ritual. Every spring and fall, perform the 15-minute deck inspection every homeowner should do to catch issues like loose ledger bolts or debris buildup. According to the Simpson Strong-Tie ‘Deck Connection and Fastening Guide,’ over 60% of deck failures are due to poor structural connections at the ledger board or the stairs. If you catch a small bit of corrosion early, you save yourself a five-figure renovation later. Also, do not forget the hidden enemies. Even if you used the flash and tape method for protecting deck joists, you still need to ensure that your gutters are not dumping water directly onto the frame. This proactive approach is the secret to making composite decking look like real wood for its entire lifespan without the actual wood-rot headache.#IMAGE_PLACE_HOLDER_D#
The Shift Toward Smart Structures
Looking ahead, I see the industry moving toward ‘active’ outdoor living. We are already seeing the integration of low-voltage lighting and sensor-controlled pergola louvers that respond to rain. In the next five years, expect to see composite materials with embedded thermal sensors that alert you to structural stress or excessive heat. This is why I always tell my clients that why you need a 3d model before buying a single deck board is more important than ever—it allows you to map out where these technical components will live before you close up the framing. My advice? Try the 12-inch joist spacing on your next project. It is the single biggest ‘pro’ move you can make to ensure the deck feels premium for the next thirty years. Don’t settle for the bare minimum; build something that actually lasts.
What Two Decades of Decking Taught Me About Moving Wood
Over the years, I’ve learned that a deck is a living organism that breathes with the seasons. My biggest lightbulb moment was realizing that you can’t fight physics; you have to work with it. If you try to pin a board down without respecting the expansion gap rule that stops boards from buckling, the sun will eventually win. I’ve also come to accept that low maintenance is a promise about the finish, not the frame. Even the most beautiful composite decking can’t save a joist that hasn’t been protected. Finally, never underestimate the power of the first impression. Innovative deck design isn’t just about the layout; it’s about how the stairs feel underfoot when a guest first walks up. If it feels solid and sounds silent, you’ve already won half the battle.
The Gear That Always Lives in My Tool Box
I don’t believe in buying every gadget at the hardware store, but there are three things I won’t build without. First is a BoWrench or similar board-straightening lever. You need this to keep those gaps uniform without damaging the boards. Second is a high-grade polyurethane subfloor adhesive—it’s the ‘silent partner’ in every staircase I build. Lastly, I’ve moved away from sketching on napkins. I now insist on seeing why you need a 3d model before buying a single deck board. It saves hundreds of dollars in wasted material and ensures the railing systems line up perfectly with the structural posts. I trust these tools because they’ve saved my reputation on more than one occasion.
#IMAGE_PLACEHOLDER_E#
Build Something That Still Feels New in 2045
The goal isn’t just to finish a project this weekend; it’s to create a space where you’ll be hosting graduation parties and summer cookouts ten or twenty years from now. By focusing on these small professional secrets—like relief notches and tighter joist spacing—you are building a legacy. Don’t be afraid to take the extra time to get the details right. When you follow these composite decking secrets for longevity, you aren’t just building a platform; you’re creating a sanctuary. You have the knowledge now to go beyond the basic manual and build something truly exceptional. Have you ever completed a deck build only to realize you missed a small structural detail like those relief notches? Let me know about your DIY wins and ‘oops’ moments below.