
I was nursing a lukewarm cup of coffee on a Tuesday morning when I looked out at my deck and saw something was missing. Not the furniture, not the grill—just a single, lonely post looking naked against the gray sky. My expensive pyramid cap was gone. I eventually found it three houses down, nestled in a neighbor’s hydrangea bush like a lost treasure. It’s a frustrating, recurring headache for many of us who take pride in our outdoor curb appeal, and it feels like a personal insult from Mother Nature herself. We spend thousands on high-quality railing systems, carefully choosing the perfect aesthetic, only to have a stiff breeze turn our finishing touches into dangerous projectiles. Today, I’m going to share exactly why those caps are failing and how you can lock them down without ruining the look of your wood or low-maintenance composite decking. [image placeholder]
The Neighborhood Scavenger Hunt You Never Asked For
I’ll admit it: early in my DIY journey, I made the classic mistake of thinking that “gravity and a snug fit” were enough. I figured if I had to use a rubber mallet to get them on, they certainly weren’t going anywhere. I was wrong. Very wrong. High winds create a surprising amount of aerodynamic uplift. Once a tiny pocket of air gets under that lip, your cap becomes a wing. If you’ve noticed your composite decking looks great but the railings feel unfinished because half the caps are missing, you are not alone. Have you ever spent a Saturday morning hunting for your deck parts in the woods or your neighbor’s yard? Tell me I’m not the only one who has had to do the walk of shame to retrieve a copper pyramid!
Is a Loose Cap Actually Worth the Worry?
You might think, “It’s just a piece of plastic or metal, what’s the big deal?” But beyond the annoyance of replacing them, exposed post tops are a slow-motion disaster for your deck’s structure. According to the American Wood Council, the end-grain of a post is its most vulnerable point, absorbing water significantly faster than the sides, which leads to internal rot that you can’t see until it is too late. The cap isn’t just jewelry; it’s a helmet. Leaving a post exposed is like inviting every rainstorm to start a rot colony right in the heart of your framing.
Why Standard Friction Fits Fail Every Time
The fundamental problem is that most manufacturers design caps to be “one size fits most,” but seasonal expansion is a physical reality that doesn’t care about a manufacturer’s specs. Your wooden posts shrink in the dry cold and swell in the humidity. This constant movement gradually works the cap loose, breaking whatever friction seal you thought you had. If you’re struggling with this, looking into the copper cap trick for a more permanent solution can save your posts from a premature death. We need to stop relying on hope and start using mechanical bonds that can withstand the local micro-climates our decks endure daily.
Stick With Silicone for a Flexible Hold
The most reliable way to keep a cap in place without visible screws is using a high-quality exterior silicone sealant. I’m not talking about the cheap caulk you find in the bathroom aisle; you need a 100% silicone product rated for extreme temperatures. Think of silicone as a rubber gasket rather than a hard glue. It allows the cap and the post to expand and contract at different rates without breaking the seal. I remember my first high-end build where I used expensive solar caps. I didn’t want to drill into them, so I used a generic construction adhesive I had lying in my truck. Two days later, a thunderstorm rolled through, and I found a $60 solar cap smashed against a stone retaining wall. The adhesive had cured too hard, and when the wood post expanded from the rain, it simply sheared the bond. If you want your composite decking secrets longevity tips for a lasting deck to actually work, you have to account for that movement. Apply a small bead to the inside of the cap corners, press it down, and wipe away the squeeze-out immediately. 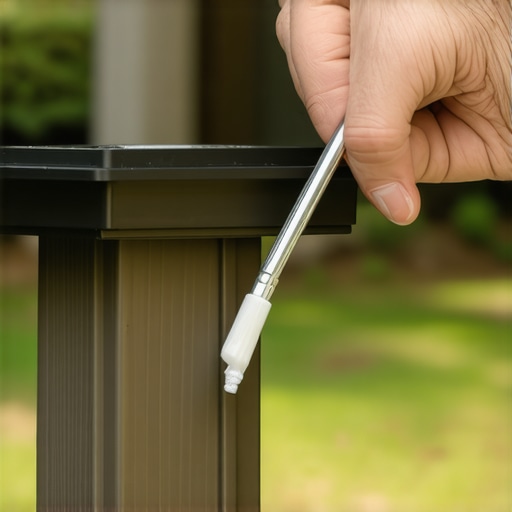
Go Mechanical for High Wind Zones
If you live on the coast or in a valley where the wind howls, a bead of silicone might not cut it. In these cases, you need a mechanical fastener. Many high-end railing systems come with pre-drilled holes on the sides of the caps. If yours don’t, you can carefully drill a pilot hole through the side of the cap flange. Use a stainless steel trim screw—it has a tiny head that disappears into the metal or wood. This is similar to using the simple jig for drilling straight baluster holes; precision prevents the material from cracking. One screw on opposing sides is usually enough to anchor the cap against the strongest updrafts. I’ve seen homeowners try to screw straight through the top of the cap, which is a disaster for waterproofing and looks terrible. Always go through the side into the post meat.
Prep the Post Surface First
You can have the best adhesive in the world, but it won’t stick to a layer of sawdust or old finish. Before you even think about the cap, take a damp rag and wipe the top of the post clean. If you are dealing with a wooden post that has already started to weather, a quick hit with 80-grit sandpaper will expose fresh fibers for the adhesive to grab. This is especially important if you’ve already noticed why your railing bracket keeps snapping in the cold; moisture and debris are the enemies of a secure deck. If you are working with a post that seems wobbly, you might also want to look into the blocking trick that stops railing post wobble before you finalize the decorative touches. A solid cap on a shaky post is like putting a silk tie on a pig—it doesn’t fix the underlying problem. While you’re up there, check for level. If the post top is cut at an angle, the cap won’t sit flush, creating a gap for water to pool. A quick trim to square it up ensures the cap does its job as a protective helmet for the wood grain.
Why Heavy Post Caps Still Fly Away
Most homeowners assume that if a post cap is heavy—say, a solid cast-iron or thick copper piece—it will stay put through sheer weight. I’ve seen $200 custom caps sitting in a ditch because of this assumption. The reality is that the “chimney effect” inside a hollow post or the natural vibration of the deck frame acts like a slow-motion ejector seat. A study by the Forest Products Laboratory indicates that wood movement across its grain is roughly 40 times greater than along its length. This means your post is constantly expanding and pushing against the rim of that cap. If you don’t provide a way for the post to breathe or use a flexible fastener, the cap is essentially being “walked” off the top. Integrating the copper cap trick for extending post life is about more than just looks; it is about engineering for movement. One major “oops” factor I see with pros and DIYers alike is the reaction between fasteners and wood treatment. If you’re using those beautiful railing systems on a pressure-treated frame, you cannot use standard zinc-plated screws. The high copper content in modern ACQ-treated wood eats zinc for breakfast. Within two seasons, your screw head will snap off, leaving the cap to the mercy of the wind. This is why I always insist on 305 or 316-grade stainless steel. It’s a small price to pay for a deck that stays together.
Can you actually over-tighten a post cap and cause rot?
It sounds counterintuitive, but yes. If you crank down on those side screws too hard, especially on low-maintenance composite decking, you can crack the flange or, worse, create a pressure point that traps moisture. This trapped water leads to “wicking” where the wood end-grain acts like a straw, pulling water up into the post. According to the North American Decking and Railing Association (NADRA), moisture management at the post-to-cap interface is the most overlooked part of stunning deck design strategies. You want the cap to be secure, but not so tight that it acts like a seal-less gasket. 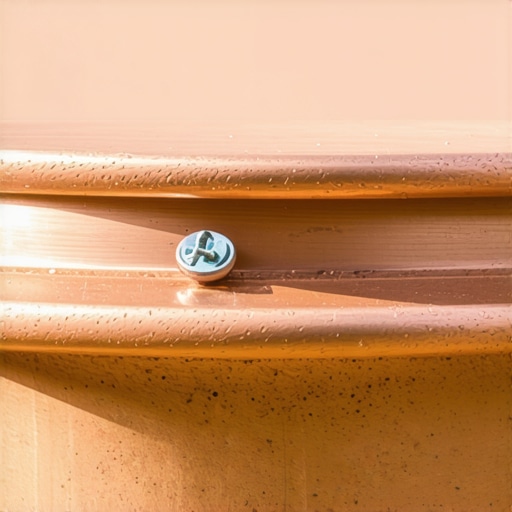 I often see people trying to fix a loose cap by stuffing it with construction adhesive. Don’t do it. Construction adhesive dries brittle. When the sun hits your deck, the temperature of a metal cap can soar to 140 degrees while the wood underneath stays cool. This thermal differential will shatter a brittle bond in weeks. This is why your composite decking secrets longevity tips must always include a mention of high-flex silicone. It’s the only thing that moves with the seasons. Another nuance often missed is the alignment of the post-top itself. If your cut isn’t perfectly square, you’re fighting a losing battle. Using the simple jig for drilling straight baluster holes logic to ensure your tools are square to the material is vital. Even a three-degree tilt on the post top creates a gap that the wind loves to exploit. Have you ever fallen into this trap and found your expensive solar caps shattered on the driveway? Let me know in the comments.
Why Your Impact Driver is Actually Your Best Friend
When I’m out there scaling up from a single post cap to a full-scale renovation, I ditch the standard drill for an impact driver. If you have ever stripped a screw head while trying to secure a bracket, you know the frustration. I personally use a brushless 18V impact driver because the internal hammers allow for much higher torque without the bit slipping out of the screw head. This is critical when you are using the jig I use for consistent deck screw depth. If you drive a screw too deep into composite, you create a mushrooming effect that looks amateur. If it’s too shallow, it’s a trip hazard. A driver with a ‘decking mode’—which slows down the RPM as the screw seats—is the secret to that pro-level finish. According to the AWC’s National Design Specification (NDS) for Wood Construction, the specific gravity of your post species drastically changes how well a screw holds over time. This is why I always check my torque settings before hitting the lumber; a cedar post requires a much gentler touch than a dense Southern Yellow Pine. 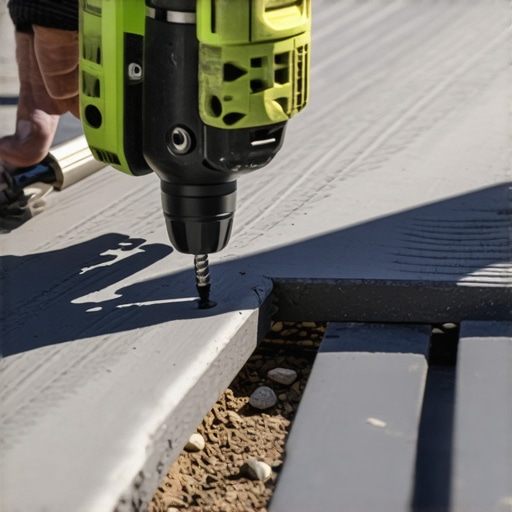
Give Your Deck a Yearly Health Check
Maintaining the structural integrity of your build isn’t just about the visible parts. Every spring, I do a ‘walk-around’ that feels more like a forensic investigation. I look at the connection points of my the joist tape secret for doubling your deck’s life to ensure no water is bypass-wicking into the frame. If you notice any standing water, it means your slope is off. I also check the tension on my railing cables and the tightness of my pergola anchors. If you’ve been following the latest pergola trends crafting shade elegance in your outdoor space, you know that larger spans are becoming popular, but those long beams are prone to checking (splitting) if they aren’t properly sealed. I use a clear, paraffin-based end-cut solution on any exposed grain to prevent those splits from growing into structural cracks.
How do I maintain my composite deck without ruining the finish?
The biggest mistake I see is the ‘pressure washer hero’ move. Please, put the power washer away. I’ve seen $15,000 decks ruined in twenty minutes because a high-pressure stream etched a permanent scar into the plastic capping. Instead, I stick to the vinegar and water mix that cleans composite better than chemicals. It’s gentle enough for the boards but acidic enough to kill mold spores. If you have stubborn grease from the grill, a soft-bristled brush and a little dish soap are all you need. This is a primary reason why you should never use a power washer on composite boards; the damage to the UV-resistant outer shell is irreversible. I recommend doing this deep clean twice a year—once before the summer hosting season and once before the first snow hits to prevent organic debris from rotting against the boards.
The Shift Toward Smart Outdoor Structures
I’m predicting that by 2026, we’re going to see a massive shift toward ‘smart’ decking. We are already seeing the integration of hidden moisture sensors inside the joist cavities and lighting systems that adjust based on the ambient temperature. Imagine a deck that alerts your phone if the ledger board begins to pull away from the house. While we wait for those high-tech solutions to become affordable, the best thing you can do right now is invest in high-quality mechanical fasteners and moisture barriers. Go grab a roll of butyl joist tape before your next repair—it’s the one thing you’ll never regret installing. It creates a waterproof gasket around every screw, which is the ultimate insurance policy for your framing.
The Hardest Lessons I Learned Managing Post Cap Uplift
After years of building, I’ve realized that a post cap isn’t just a lid; it’s a dynamic part of the structure. I used to think a tight fit was enough, but now I know that wood movement is relentless. If you don’t account for the seasonal expansion, even the most expensive railing systems will eventually fail. Another lightbulb moment was realizing that drainage is just as important as the seal itself; trapping water is actually worse than letting it get wet. Lastly, always prioritize 305 or 316-grade stainless fasteners, because the chemical reaction between zinc and treated lumber is the silent killer of outdoor builds.
My Go-To Toolkit for a Secure Deck Perimeter
To get professional results, you need the right supplies in your bucket. I never start a cap installation without a tube of 100% high-flex silicone, which handles the heave of summer humidity. I also rely on the joist tape secret to create a secondary moisture barrier on the post-end grain before the cap even goes on. For drilling, I use the simple jig for drilling straight baluster holes to ensure my side-mounting screws go in perfectly horizontal, preventing any unsightly angled heads. Finally, keep a basic 80-grit sanding block handy to prep those weathered post tops for better adhesive grab.
Take the Stress Out of Your Next Storm
You’ve invested time and money into creating a beautiful outdoor space, and you deserve the peace of mind that comes with a job done right. By moving away from friction fits and embracing mechanical and flexible bonds, you’re not just saving a few dollars on replacement caps—you’re protecting the very skeleton of your deck. Whether you’re working with classic timber or low-maintenance composite decking, these small details are what separate a DIY project from a professional-grade masterpiece. Now, I want to hear from you. Have you ever had to hunt down a missing post cap after a big storm? Let me know your story in the comments below!