
I’ll never forget the sound of my neighbor Dave’s laughter echoing across the fence back in 2014. I had just finished what I thought was a masterpiece—a massive cedar pergola that looked like it belonged in a magazine. But as a moderate summer gust rolled through, the whole 12×12 structure shimmied like a bowl of Jell-O. Dave didn’t even say hello; he just pointed and shouted, “Hey, is that a pergola or a swing set?” It was embarrassing, but it was the best thing that ever happened to my building career. I had relied on expensive screws and blind hope, but I had ignored the basic physics of lateral movement. That wobbly disaster taught me that if you don’t lock your wood together, the wind will eventually do it for you—and you won’t like the result.
Stop the Sway Without Those Ugly Diagonal Braces
The biggest mistake I see homeowners (and even some pros) make is trying to solve a wobble by just throwing more hardware at the joints. They think a few extra six-inch lag bolts will freeze the wood in place forever. I made that exact mistake early on, and let me tell you, wood always wins. Over time, wood shrinks and expands, which causes those screw holes to widen just enough to let the sway back in. If you’ve ever wondered why your pergola shakes when the wind blows, it’s almost always because the connections rely solely on the friction of a fastener rather than the strength of the timber itself. To build something that truly lasts, you have to move beyond mechanical fasteners and embrace the notched rafter. By “housing” the rafter into the beam, you create a physical wood-on-wood barrier that prevents the beam from twisting and the rafter from sliding. It transforms your structure from a collection of sticks into a singular, rigid unit. When you combine this with smart finishing, like the 15-degree cut that keeps water off your pergola beams, you aren’t just building for stability; you’re building for a lifetime.
Is notched framing actually worth the extra effort?
I get asked this all the time by DIYers who are looking at a pile of lumber and a very short weekend. The extra hour spent with a jigsaw and a chisel can feel daunting when you’re looking for quick pergola design inspiration. However, the structural reality is undeniable. According to the American Wood Council’s Span Tables and Wood Construction Guides, notched joinery significantly increases the lateral load resistance of a frame compared to face-mounted or toe-screwed connections. I used to think that understanding why your pergola needs knee braces was the only way to stop the shimmy, but I’ve found that a deep, clean notch provides a level of “racking” resistance that braces alone can’t match. It’s the difference between a structure that stands on its legs and one that is integrated into its foundation. Have you ever felt that sickening “give” in a post when you leaned against your outdoor structure? It’s a common fear, and honestly, it’s a valid one if you’ve skipped the notches. So, are you ready to stop building swing sets and start building structures that don’t budge?
Prepare Your Beams for a Rock-Solid Foundation
Before you even touch a saw, you have to look at the bones of your project. If you start with thin, flimsy posts, no amount of joinery will save you from the shimmy. I’ve learned that why 6×6 posts look better than 4x4s on any outdoor structure isn’t just about the aesthetics; it’s about having enough “meat” to cut a significant notch without weakening the post itself. You want a massive shoulder for those beams to sit on so the weight of the roof is transferred directly through the timber rather than hanging on a few bolts.
Master the Depth of Your Rafter Notches
The goal is to “house” the rafter. For a standard 2×8 rafter, I usually aim for a 1.5-inch deep notch in the beam. This provides a physical cradle. Think of it like a puzzle piece; once it’s in, it can’t slide left or right even if the screws failed. When you’re marking these out, use a sharp carpenter’s pencil—not a fat construction crayon. Accuracy matters when you’re aiming for a friction fit that prevents lateral swaying.
Cut With Precision to Lock Everything Together
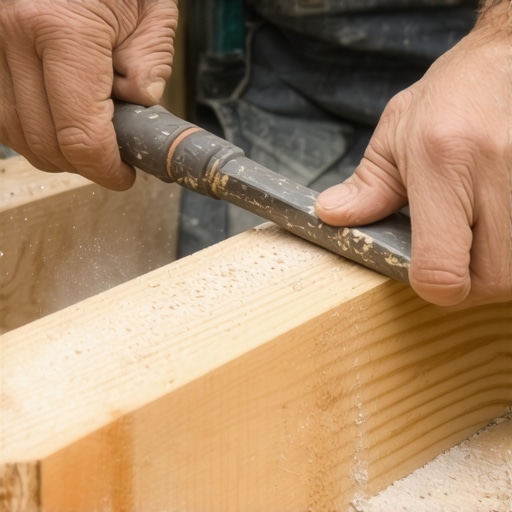
To get the cleanest notch, set your circular saw blade depth to exactly the depth of your notch. Don’t try to clear the whole space at once. Instead, make several “relief cuts” every quarter-inch within the marked area. This looks like a series of thin fins. Once those cuts are made, a light tap with a hammer will snap them right off. Use a wide wood chisel to scrape the bottom flat. If the bottom of the notch is bumpy, the rafter won’t sit level, and you’ll end up with a roofline that looks like a mountain range. It’s a satisfying process that yields a professional “clunk” when the rafter finally drops into place. If you rush this part, you risk splitting the grain, which often leads to the simple way to fix a sagging deck beam down the road.
Avoid the Frustration of a ‘Drunk’ Structure
Back in 2018, I ignored the secret to a perfectly square deck frame while setting the rafters for a custom garden project. I figured I could “eye-ball” the squareness since the posts were already set in concrete. Big mistake. Halfway through the install, the rafters started drifting like a shopping cart with a bad wheel. I had to unscrew twenty connections and restart from scratch just to get the lines straight. Always pull your diagonals before you commit to the first rafter. If the corner-to-corner measurements aren’t identical, your rafters will never sit flush in those notches you worked so hard to cut.
Reinforce for High-Wind Zones
Even with the best joinery, if you live in a coastal area or a windy valley, you need a little insurance. I always recommend the steel bracket move for high wind pergolas. These are hidden fasteners that pull the rafter down into the notch from the inside, so you don’t see ugly silver plates on the exterior. It’s the belt-and-suspenders approach to building that keeps you from worrying during a storm. Finally, remember to protect those end grains from moisture. Using the 15-degree cut that keeps water off your pergola beams ensures that rain doesn’t pool in your new notches, which is where rot usually starts its dirty work. Building smart is just as important as building strong.
Most homeowners switch to composite decking because they are tired of the constant cycle of sanding and staining. They buy into the marketing that it is completely maintenance-free, but here is the contrarian truth: composite actually requires more attention to the skeleton underneath than wood does. I have seen thirty-thousand-dollar decks feel like a trampoline because the builder treated the synthetic boards exactly like traditional wood planks. The biggest mistake is assuming the framing rules stay the same. While you are looking for composite decking trends, do not forget the physics of the substructure. The ‘oops’ factor I see most often is the expansion gap. Wood shrinks as it dries, but composite expands as it heats up. If you do not use the cardboard spacer trick for consistent board gaps, you will end up with boards that buckle and pop when the summer sun hits them. I once visited a project where the homeowner ignored the manufacturer’s gap specifications, and by July, the boards had crowned so badly they were tripping hazards.
Does a 16-inch joist span really work for modern composite?
While the International Residential Code (IRC) technically allows 16-inch on-center spacing for many materials, the North American Deck and Railing Association (NADRA) points out that synthetic decking is significantly less rigid than wood. In my experience, if you want that high-end, rock-solid feel, you should drop down to 12-inch centers. This is the primary solution for why your composite deck feels like a trampoline. That bouncy, hollow sensation is almost always a framing issue, not a board quality issue. Implementing the framing move that stops deck boards from bouncing early in the build saves you from a decade of regret. 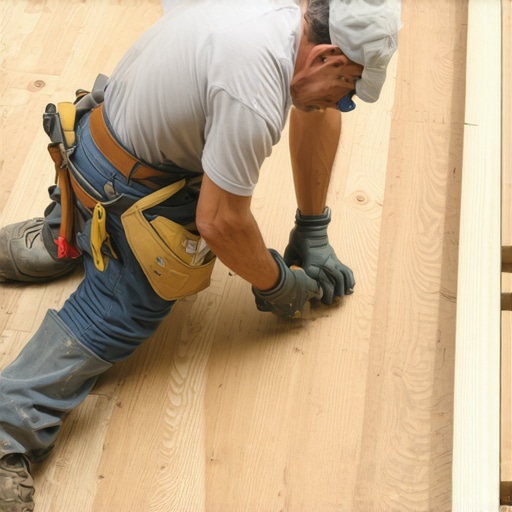 Another hidden trap involves the railing system. Everyone focuses on the post caps, but they forget the internal structural support. Without the blocking trick that stops railing post wobble, a composite post sleeve is just a decorative shell. You need to tie that post into the framing with heavy-duty structural lag bolts. This is where learning how to identify high-quality capped decking from the cheap stuff becomes critical, as the density of the core determines how well it holds up to long-term hardware stress. Finally, never ignore the thermal reality of your materials. Dark colors are beautiful in a catalog, but you must understand why black composite decking burns your feet and how to fix it before you commit to a dark charcoal palette. You can mitigate this with better airflow or specific capped polymer brands, but you cannot fight the laws of heat absorption. Have you ever fallen into this trap where you prioritized looks over the structural or thermal reality? Let me know in the comments.
Stop Relying on Your Grandpa’s Bubble Level
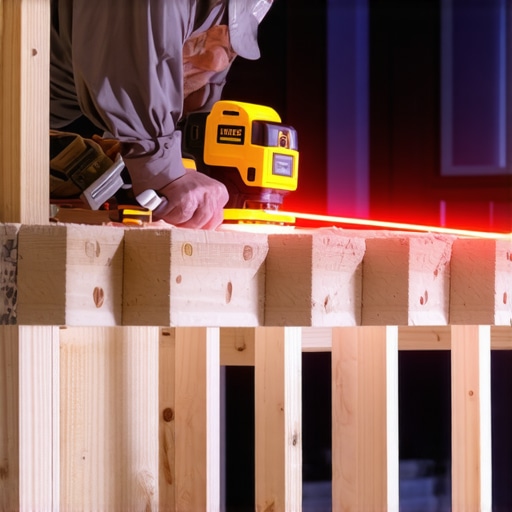
If you’re still squinting at a green vial to check if your posts are straight, you’re building for the 1990s. Precision is the enemy of rot and sway. I finally bit the bullet and invested in a self-leveling 360-degree laser, and it changed everything. When you use the simple tool for making sure your railing posts are plumb, you aren’t just making things look pretty; you’re ensuring that the load is distributed exactly where the engineer intended. One specific piece of documentation I live by is the Simpson Strong-Tie Deck Connection and Fastening Guide (F-DECKRP24). It highlights that even a half-inch deviation in fastener placement on a ledger board can reduce its load capacity by nearly 30%. That is the difference between a safe party and a structural failure. If you want a deck that lasts thirty years, you need to measure in sixteenths of an inch, not “close enough.”
How do I keep my outdoor retreat looking brand new over time?
Maintenance is where most homeowners fail because they think “low maintenance” means “no maintenance.” To protect your investment, you need composite decking secrets and longevity tips for a lasting deck. My golden rule is simple: why you should never use a pressure washer on composite. High pressure can etch the surface of even the highest-quality boards, creating microscopic pores that trap mold. Instead, I always stick to the vinegar and water mix that cleans composite better than chemicals for general dirt. If you’ve had a BBQ mishap, the soap and sponge fix for oil stains on composite decking is your best friend. Consistency is key; a quick scrub every spring prevents the organic buildup that leads to permanent discoloration.
Future-Proof Your Space with Tech and Style
Looking ahead, the trend is moving toward “living-room-ification” of the outdoors. We aren’t just building platforms; we are building environments. This means planning for upgrades like the low voltage lighting trick for highlighting deck levels during the framing stage, not as an afterthought. I’m also seeing a massive surge in people wanting to how to retrofit a privacy screen onto an existing pergola as suburban lots get smaller. If you want to maintain your view while adding a modern edge, the stainless cable trick for views that never get blocked is the way to go. In the next few years, expect to see more integrated smart sensors that detect moisture levels in the substructure. For now, take one small step this weekend: grab a gallon of white vinegar and give your boards a gentle scrub. You’ll be amazed at how much life it breathes back into the grain.
The Hardest Lesson I Learned While Chasing the Perfect Backyard
Looking back at a decade of sawdust, the most profound realization I had wasn’t about a specific tool, but about the ‘memory’ of the materials themselves. Wood remembers where it grew, and composite remembers the temperature it was pressed at. I used to fight these materials, trying to force them into submission with sheer hardware volume. Eventually, I learned that you have to build with the movement, not against it. If you don’t account for the way heat affects your layout, you’ll eventually see why your deck boards are popping up at the ends and realize that nature always has the final say. My biggest ‘lightbulb moment’ was finally accepting that a pergola is a living thing that breathes with the seasons, and a composite decking surface is essentially a massive thermal battery. I also learned that how to stop composite deck boards from expanding into your siding is a conversation you need to have during the framing stage, not after the final screw is driven. It’s these small, invisible considerations that separate a project that looks good for a photo from one that stays rock-solid for twenty years. Finally, I realized that modern railing systems aren’t just safety cages; they are the architectural ‘eyeliner’ of the deck that defines the entire aesthetic.
The Resources That Keep Me from Making Thousand Dollar Mistakes
I don’t expect you to memorize every span table or expansion coefficient, but I do recommend keeping a few ‘truth sources’ in your digital back pocket. I personally rely on the North American Deck and Railing Association (NADRA) for updated safety standards; they provide the statistical proof for why certain framing techniques fail while others thrive. For the day-to-day grit of building, I swear by the simple effectiveness of the vinegar and water mix that cleans composite better than chemicals. It’s cheap, safe, and works better than the high-priced stuff you see in big-box stores. I also highly recommend the Fine Homebuilding archives for deep-dives into flashing and ledger board waterproofing—the stuff that happens behind the scenes to prevent rot. These tools and sources aren’t just for pros; they are for any homeowner who wants to ensure their deck design is as safe as it is beautiful.
Stop Thinking About Resale Value and Start Building for Tuesday Nights
We often get so bogged down in the ‘resale value’ of our home improvements that we forget we are the ones who have to live in them first. While a high-quality build certainly adds value, the real ROI is the feeling of walking out into a space that feels like a natural extension of your home. When you apply the secret to making your deck feel like a living room, you stop seeing it as a platform of wood and start seeing it as a sanctuary. Whether you are choosing the right composite decking for its durability or refining your deck design for a better view, remember that you are building the backdrop for your future memories. Your outdoor space should be the easiest part of your home to enjoy, not a source of maintenance stress. Go ahead and take that first step toward your retreat; you have the knowledge now to maximize outdoor living with low maintenance composite decking and build something that truly lasts. Have you ever completed a build only to realize you forgot one tiny structural detail that changed everything? Let me know in the comments below!