
I still remember the first ‘professional’ deck I built back in 2012. I was so proud of my 45-degree mitered corners on the outer picture frame. It looked like high-end furniture, smooth and seamless. But by the time the second Fourth of July barbecue rolled around, those perfect joints had turned into jagged, gaping maws that swallowed dropped car keys and tripped up my neighbors. It was embarrassing. If you’re planning a space where kids will run, dogs will skid, and heavy patio furniture will be dragged around, you need to understand why those pretty miters are a ticking time bomb. Today, I’m going to share how I learned the hard way that ‘pretty’ doesn’t always mean ‘practical,’ and I’ll show you the framing secrets that actually survive real-life wear and tear. [IMAGE_PLACEHOLDER]
The Day I Learned My Lesson About 45-Degree Cuts
When I first started out, I thought I knew better than the old-timers who suggested butt joints. I wanted that sleek, modern look. But here is the reality: why composite decks are the better choice for high-traffic areas often comes down to how the material handles movement, not just the surface finish. According to the USDA Forest Products Laboratory, thermal expansion and moisture changes can cause boards to move more than you’d ever expect—sometimes up to a quarter-inch or more. When you have two boards meeting at a 45-degree angle, they aren’t expanding in the same direction. They’re fighting each other. I once tried the PVC glue trick for gap-free composite miters to save a failing job, but even that was just a band-aid.
Is the mitered look actually worth the eventual repair bill?
You might see these gorgeous photos on social media and think I’m just being a cautious ‘Helpful Neighbor’ type. But those photos are usually taken the day the crew finishes. They don’t show you the deck three years later after a heavy winter. High-traffic areas put localized stress on the fasteners holding those miters together. Eventually, the boards pull away, leaving sharp edges and ugly gaps. Have you ever walked onto a deck and noticed the corners looked like they were trying to run away from each other? I’d love to hear if you’ve faced this frustrating issue!
Why High Traffic and Miters Just Don’t Mix
The constant vibration of foot traffic accelerates the failure of the fasteners. Every time you walk near a corner, you’re applying leverage that wants to pry that miter apart. For a truly durable build, I’ve moved away from flashy miters toward innovative deck design ideas for 2025 that prioritize structural integrity. One of my favorite methods now is the double joist trick for perfectly flush picture frame borders. This gives you plenty of ‘meat’ to screw into and allows for simple butt joints that won’t open up like a shark’s mouth. If you’re looking for longevity tips for a lasting deck, you have to start by accepting that wood and composite need room to breathe. When you respect the expansion gap rule that stops boards from buckling, you’re building a deck that stays beautiful for decades, not just a single season. We’re about to get into the nitty-gritty of how to layout your frame to avoid these pitfalls entirely.
Build a Skeleton That Handles the Weight
The bread and butter of a deck that lasts 25 years isn’t the expensive boards you see on top; it’s the skeleton you build underneath. To avoid those gaping miter joints I mentioned, you have to master the double joist trick for perfectly flush picture frame borders. Instead of asking one 2×10 to hold the ends of your field boards and your decorative border, you install a second joist right next to the first one. This gives you a massive three-inch-wide landing zone for your fasteners. I remember a project back in 2018 where the client wanted a complex “weighted” look with heavy stone planters. By using the double rim joist secret for rock-solid deck edges, we created a frame so stiff it didn’t budge an eighth of an inch when those 400-pound planters were dropped into place. 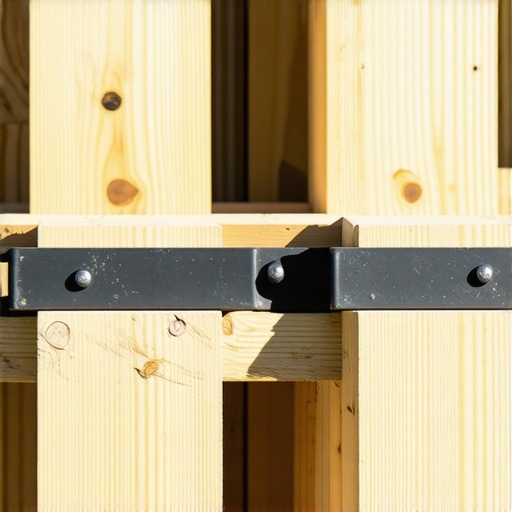
Protect Your Investment Before the Boards Go Down
If you are using pressure-treated lumber for your frame, you’re dealing with a material that is essentially a sponge. Even if you maximize outdoor living with low-maintenance composite decking on top, the wood underneath is still vulnerable to rot at the screw holes. This is where the flashing tape move that doubles the life of your joists comes in. You peel and stick a butyl-based tape over the top of every joist. It seals around the shank of the deck screw, preventing water from seeping into the wood. It’s a tedious extra hour of work, but it’s the difference between a deck that lasts fifteen years and one that stays solid for thirty.
Stop Fighting Thermal Expansion
Composite boards are amazing, but they behave more like plastic than wood. When the sun hits a dark deck, those boards want to grow. If you don’t respect the expansion gap rule that stops boards from buckling, your deck will eventually look like a series of waves. I once saw a DIY build where the homeowner butted the boards tight against the house in mid-July. By January, the boards had shrunk so much there was a one-inch gap you could lose a smartphone in. Always use a dedicated spacer; the spacer trick for consistent gaps in wood decking works just as well for composite to ensure that your lines stay straight and your drainage remains clear.
Kill the Squeak in Your Stairs
There is nothing that ruins a high-end feel faster than a squeaky staircase. Most people just nail two stringers and call it a day, but why your deck stairs need more than two stringers becomes obvious the moment more than one person walks up at the same time. I always use the stringer notch hack for squeak-free deck stairs which involves a bead of subfloor adhesive on the notched part of the stringer before the tread goes down. This prevents the wood-on-wood friction that creates that annoying chirping sound every time you go to fire up the grill.
Secure Your Railings Like a Pro
Finally, let’s talk about the wobble. A railing post that moves even half an inch feels dangerous. Instead of just bolting through the rim joist, I always install the $20 bracket that fixes wobbly railing posts fast. These tension ties connect the post directly to the floor joists, creating a continuous load path that makes the railing feel like it’s part of the foundation. Whether you are going for the modern farmhouse deck black railings and light wood look or a classic white vinyl, that structural connection is non-negotiable for safety.Let’s talk about a lie we’ve all been told: that composite decking is ‘zero maintenance.’ It’s the industry’s favorite buzzword, but in my twenty years of building, I’ve found it’s a dangerous half-truth. If you ignore the substructure, you’re just putting a Ferrari body on a rusted-out Ford Pinto frame. Many homeowners don’t realize why pressure-treated wood still needs maintenance under composite until they see their joists rotting beneath perfectly fine boards. It’s a tragedy that’s easily avoided with the right mindset. Another common mistake is how people view pergolas. We usually think of them as an extension of the house, but I’ve become a firm believer that the ledger-free pergola why freestanding is often better is the way to go for most yards. Attaching a heavy timber structure to your home’s rim joist introduces a massive point of failure for water intrusion and flashing issues. By keeping it freestanding, you eliminate the risk of rotting out your house’s foundation. Plus, you can use the hidden bracket hack for invisible pergola connections to keep the look clean without compromising the seal of your siding. 
How does thermal expansion vary across different composite brands?
This is where even the pros get tripped up. You might read a manual that says to leave an 1/8-inch gap, but if you live in a climate with 40-degree temperature swings in a single day, that’s not enough. Research by the North American Deck and Railing Association (NADRA) highlights that PVC-based boards and wood-plastic composites react differently to heat. This is exactly why your composite decking is expanding more than the manual says; it’s not just the temperature, it’s the material density and the overall length of the run. I’ve seen boards buckled three inches high because the builder treated every brand with a one-size-fits-all approach. Then there’s the bleach trap. When your deck gets a little green, the instinct is to grab a jug of Clorox. Stop right there. Why you should never use bleach on your composite deck comes down to the chemical reaction with the UV inhibitors. You’ll kill the algae, but you’ll also turn your high-end investment into a brittle, chalky mess in just two seasons. Finally, if you’re seeing hair-line fractures at the bottom of your railing, you’re not alone. I often get calls about why your railing post sleeves are cracking at the base. It usually isn’t a manufacturing defect; it’s almost always over-tightened fasteners that didn’t allow for the plastic to move when the temperature dropped. Have you ever fallen into this trap or noticed a gap you couldn’t explain? Let me know in the comments!After two decades in the dirt, I’ve realized that the difference between a ‘good’ builder and a ‘great’ one is often just the contents of their tool trailer. I’m not talking about shiny drills, but rather the precision instruments that ensure the structure is sound before the first board is even cut. For example, I stopped guessing my layouts years ago. Today, I tell everyone that why you need a 3d model before buying a single deck board isn’t just about the pretty pictures; it’s about identifying catch-points and joist interference that you simply can’t see on a 2D sketch. When I’m scaling a project—moving from a simple rectangle to a multi-level masterpiece—I reach for my impact driver over a standard drill every time. The torque control prevents the heads of high-end screws from stripping, which is a nightmare when you’re working with capped polymers. I also live by a few old-school geometry tricks that never fail. Even with a laser, I always double-check the frame using the 3-4-5 rule for squaring your deck frame every time. It’s basic physics: if your frame isn’t square from day one, every single composite board you lay will magnify that error until your last row looks like a lopsided mess. 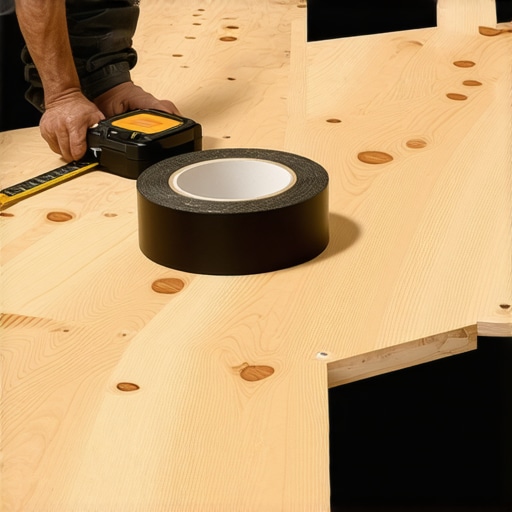
How do I maintain my deck over time?
Many of my clients think they can just ignore the deck once it’s built, but ‘low maintenance’ is not ‘no maintenance.’ You need a routine. Every spring, I perform what I call the 15-minute deck inspection every homeowner should do. I’m looking for loose hardware or any signs that the structural reason your deck feels bouncy and how to fix it might be developing, usually due to settling footings or loosened ledger bolts. According to technical documentation from Simpson Strong-Tie, specifically their Deck Connection and Fastening Guide, lateral load connections are the most frequently overlooked safety element in older decks. If those brackets are rusting or missing, you’ve got a major safety liability on your hands. If your deck has started to lose its luster after five or six years, don’t panic. Learning how to restore the color of a faded composite deck can save you thousands compared to total replacement. For those with wood sections, I always recommend the simple spray test to see if your wood deck needs sealing. If the water doesn’t bead up, the wood is thirsty and vulnerable. I predict that in the next few years, we’re going to see a massive shift toward ‘smart’ outdoor spaces where sensors detect moisture levels in the substructure. Until then, we rely on our eyes and the right habits. I strongly encourage you to grab a roll of joist tape for your next project; it’s the single most effective pro secret I can offer for doubling your deck’s life.
3 Hard-Earned Truths That Changed My Framing Strategy Forever
Looking back at my early mistakes, I realized that the most expensive deck you will ever build is the one you have to repair twice. First, I learned that aesthetics must always bow to physics; a gorgeous corner does not mean a thing if the thermal expansion rips it apart by year three. Second, I realized that the most important parts of a deck design are the things you will never see once the party starts—like the ledger flashing and the hidden joist hangers. Third, I discovered that the ‘standard’ way is often just the fastest way, not the best. Using the joist tape secret for doubling your decks lifespan was a total game-changer for me because it shifted my focus from just finishing the job to ensuring the skeleton survived the elements. [IMAGE_PLACEHOLDER]
My Personal Survival Kit for the Next Project
I do not start any build without a few non-negotiable resources. I always check the latest NADRA bulletins for safety updates, especially regarding lateral loads. For anyone moving from sketches to reality, I can’t recommend stunning deck design strategies enough to help visualize the flow of the space. I also rely heavily on Simpson Strong-Tie for hardware specs because their engineering is the gold standard for deck safety. If you are adding a vertical element, definitely look into pergola design inspiration from modern to classic looks to see how weight distribution affects your footing requirements. These aren’t just ‘tools’—they are the insurance policy for your hard work.
Your Backyard Legacy Starts Under the Boards
Building a deck is more than just a home improvement project; it is about creating a stage for the next twenty years of your family’s life. When you take the time to respect the materials and follow the structural rules we have discussed, you are not just a DIYer—you are a craftsman. Don’t be afraid to take it slow and obsess over the details that matter, from the framing to choosing railing systems for safety and style. Your future self will thank you when those boards stay flat and those stairs stay silent for decades to come. Have you ever seen a mitered corner open up into a ‘shark mouth’ after a hard winter? Let me know your biggest deck building frustration in the comments!