
I remember the exact moment I realized I’d messed up my first major DIY project. I was hauling a heavy cooler up a set of wide stairs I’d built for a neighbor, and as I hit the middle of the tread, the wood groaned and dipped significantly. It wasn’t just a sound; it was a physical sensation of failure. I had used exactly two stringers, spaced 36 inches apart, because the guy at the big-box store told me that was ‘standard.’ He was wrong, and I felt like a total amateur. If you’ve ever walked up a flight of steps and felt like you were on a diving board, you know exactly what I’m talking about. That [image_placeholder_1] [structural reason your deck feels bouncy and how to fix it](https://deckforgebuilders.com/the-structural-reason-your-deck-feels-bouncy-and-how-to-fix-it) is almost always a lack of mid-span support. Today, I want to save you from that same embarrassment and show you why the ‘bare minimum’ is a dangerous game to play with your outdoor living space.
Stop the Staircase Trampoline Effect once and for all
When I started out, I focused on the flashy stuff—the [modern pergola designs](https://deckforgebuilders.com/pergola-design-inspiration-from-modern-to-classic-looks) and the high-end [composite decking secrets](https://deckforgebuilders.com/composite-decking-secrets-longevity-tips-for-a-lasting-deck). I ignored the skeleton underneath, and that’s a mistake that can haunt a builder for years. Most people think that as long as the wood isn’t rotting, the stairs are fine. But if your treads are sagging, they’re putting massive stress on your fasteners. Eventually, those [deck screws will snap in cold weather](https://deckforgebuilders.com/why-your-deck-screws-are-snapping-in-cold-weather) or the wood will split under the pressure of foot traffic. The truth is, most decking materials—especially modern composites—actually require more support than traditional pressure-treated lumber. According to the International Residential Code (IRC) section R311.7, the load capacity of stair treads must be sufficient to support the weight, and for many high-performance materials, that means a maximum span of only 12 inches between stringers.
Is a third stringer really worth the extra labor?
I get the skepticism. Lumber isn’t cheap these days, and cutting stringers is easily the most tedious part of any build. You might be wondering if you can just ‘get away’ with two. Trust me, I’ve been there, and the answer is a hard no. But once you feel the difference of a staircase with stringers spaced at 12 or 16 inches on center, you’ll never go back to the shaky alternative. It makes the entire structure feel permanent and high-end. Plus, if you’re planning on adding [custom railing systems for safety](https://deckforgebuilders.com/transform-your-outdoor-space-custom-railing-systems-for-safety-and-style), you need a solid foundation so the posts don’t wiggle every time someone leans on them. Have you ever felt that unsettling ‘give’ under your feet when climbing a set of outdoor stairs? It’s a common problem, but fortunately, it’s one with a very straightforward fix that starts with how you frame the skeleton before you ever lay down a board.Whenever I’m teaching a new guy how to frame, I tell them that the stairs are where your reputation lives or dies. People might not notice a slightly uneven board on the main deck, but everyone notices a step that feels like it’s going to give way. The first real step is getting your rise and run absolutely perfect. If you’re building for composite decking trends durable solutions for modern outdoor living, you have to account for the thickness of the board—usually around 1 inch—and ensure your bottom step isn’t awkwardly short compared to the rest. I learned this the hard way on a lakeside cabin project back in 2019. I had already installed the beautiful composite decking secrets longevity tips for a lasting deck only to realize the bounce was unbearable. I ended up spending four hours on my back in the mud, retrofitting a third stringer into an existing frame using a hydraulic jack and a sledgehammer. It was a miserable afternoon that could have been avoided with fifteen minutes of extra prep work and another $40 in lumber.
Get the math right before you touch the saw
Before you even pick up the circular saw, you need a layout that respects the material. If you’re using high-end boards, the spacing between stringers shouldn’t exceed 12 inches on center. This is especially true for why capped polymer composite stays cooler than wood plastic, which can be more flexible than standard pressure-treated pine. Use a framing square with stair gauges to mark your stringers. It’s like using a template for stunning deck design strategies—consistency is the only way to avoid a trip hazard. Every riser must be within 3/8 of an inch of every other riser, or someone is going to catch a toe and take a tumble.
Precision cuts keep the stairs quiet
When you finally start cutting, don’t over-cut the interior corners. I see guys do this all the time to make the triangle fall out easier, but it weakens the throat of the stringer significantly. Use a hand saw to finish the cut instead of your circular saw. To take it a step further, the stringer notch hack for squeak free deck stairs involves adding a bead of construction adhesive to the top of the stringer before the tread goes down. This prevents the wood-on-wood or wood-on-composite friction that creates those ghostly squeaks every time you walk up at night. 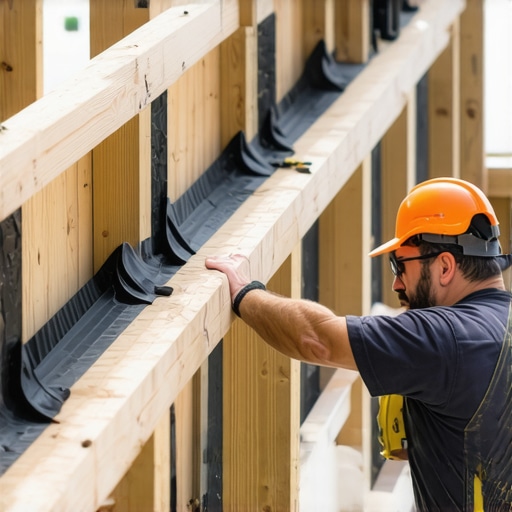
Seal the wood to prevent rot before it starts
Once those stringers are cut, you’ve exposed the raw, untreated heart of the wood. This is where most stairs fail after five or six years. I swear by the flashing tape move that doubles the life of your joists. Applying a butyl-based tape to the top of every stringer prevents water from sitting in the grain and rotting the wood from the inside out. While you’re at it, make sure the bottom of your stairs rests on a solid pad, not just the dirt. Learning how to stop your deck stairs from sinking into the grass by using a concrete landing or buried 4x4s will ensure that your precision math doesn’t get ruined by the house settling or the ground shifting over time.
Beef up the connection point
The most common point of failure isn’t the stringer itself, but where it meets the deck. Relying on just a few toe-nails is a recipe for disaster. I always use the double rim joist secret for rock solid deck edges to give myself a massive, stable surface to bolt into. Using specialized stair stringer connectors—those metal brackets that look like little hangers—is the difference between a set of stairs that lasts 20 years and one that starts pulling away from the house after the first heavy snow season.Let’s talk about the myth of the perfect hidden fastener. Most homeowners insist on them for stunning deck design strategies because they want that clean, screw-free look. But here is the contrarian truth: hidden fasteners can actually be a maintenance nightmare. If a single board in the middle of your deck gets damaged—maybe a charcoal ember drops or a heavy planter scrapes it—replacing it with hidden clips is like trying to solve a Rubik’s cube while blindfolded. You often have to pull up half the deck just to reach that one board. This is why hidden fasteners can be a maintenance nightmare for those who value long-term flexibility over initial aesthetics.
The thermal expansion trap most pros ignore
Then there is the thermal expansion trap. Most people treat composite like wood, but it behaves more like plastic. A 20-foot board can grow or shrink significantly depending on the temperature. If you don’t follow the expansion gap rule that stops boards from buckling, your expensive deck will look like a roller coaster by July. This phenomenon of why your composite decking is expanding more than the manual says is a real problem that even seasoned installers miss. According to technical documentation from the North American Deck and Railing Association (NADRA), failing to account for the ambient temperature of the boards during the moment of installation is the leading cause of structural aesthetic failure in composite projects. 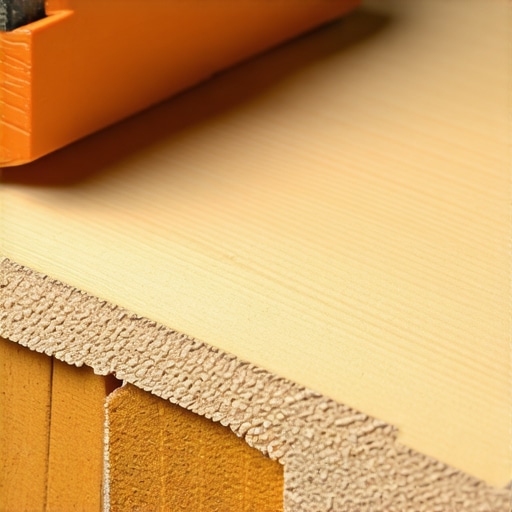
Does your board spacing account for the 100-degree swing?
This is the nuance that separates the weekend warriors from the true experts. If you’re installing on a 50-degree morning, you need a completely different gap than on a 90-degree afternoon. I’ve seen beautiful composite decking trends durable solutions for modern outdoor living ruined because the installer gapped them tight in the winter, only for the boards to heave when the summer sun hit. To fix this, I always use the PVC glue trick for gap free composite miters on the corners to keep things locked in place while allowing the long runs to breathe.
Stop building cages around your view
Another common oops factor involves the railing. Many people pick a style based on a catalog photo without considering the actual view from their favorite patio chair. If you choose the wrong color or baluster thickness, you’re basically building a cage around your vista. I always recommend checking out how to choose a railing color that doesnt block your view before committing to a material. And if you’re leaning toward cable for that minimalist look, remember why your cable railing sagged over winter—it’s usually a lack of internal bracing in the end posts, not an issue with the cable itself. Have you ever fallen into this trap where a high-end feature ended up causing more work down the road? Let me know in the comments.
I used to think that a standard toolbox and a healthy dose of optimism were enough to build a legacy, but I was wrong. Building a high-end outdoor space that doesn’t just look good today but stays rock-solid for twenty years requires a shift in mindset from ‘handyman’ to ‘precision engineer.’ One of the biggest shifts I made was realizing why you need a 3D model before buying a single deck board. It’s not just a digital toy; it’s a way to foresee structural conflicts between joists and railing posts before you ever fire up a saw. This prevents that awkward moment where you realize your main support beam is right where your stair stringer needs to land.
Stop guessing and start modeling your project first
In the field, I rely on a specific set of tools that most weekend warriors overlook. For instance, the simple tool for making sure your railing posts are plumb—a dedicated post-level—is non-negotiable. While a standard four-foot level is great, a post-level straps directly to the wood and reads two planes at once, ensuring your custom railing systems for safety and style are perfectly vertical without the constant repositioning. It’s these small efficiency gains that allow you to scale from a simple platform to a complex, multi-level sanctuary. According to the American Wood Council’s Design for Code Acceptance (DCA) 6, ensuring proper lateral load connections is just as critical as the vertical load, and having the right impact driver with a depth-setting nosepiece ensures you never over-drive a screw and compromise the wood’s integrity.

How do I keep my composite deck looking brand new for decades?
Maintenance is where the real experts separate themselves from the amateurs. Most homeowners assume ‘low maintenance’ means ‘no maintenance,’ but that is a dangerous fallacy. I always advise my clients to perform the 15 minute deck inspection every homeowner should do every spring. Look for debris trapped in the gaps, as moisture retention here is the leading cause of mold. And please, why you should never use bleach on your composite deck cannot be overstated; harsh chemicals can break down the UV-inhibitors in the cap layer, leading to premature fading. Instead, a simple soap and water scrub keeps the surface pristine without the chemical damage.
Predicting the next decade of outdoor construction
Looking forward, I see a massive trend toward ‘living’ structures. We are moving away from static wood boxes and toward integrated environments. Think of pergola trends crafting shade elegance in your outdoor space that include automated louvers and built-in sensors. We are already seeing materials that are more thermally stable, but the next frontier is fully integrated lighting and heating systems built directly into the composite boards. If you want to stay ahead of the curve, start by perfecting the flash and tape method for protecting deck joists today. It’s a low-cost, high-impact technique that ensures your skeleton lasts as long as your high-tech boards. I strongly encourage you to try using a dedicated drill guide on your next railing install to see just how much a little precision can change the entire feel of your home. It’s these pro-level habits that turn a DIY project into a professional-grade masterpiece.
What a Decade of Deck Failures Taught Me
After years in the field, I’ve realized that most issues don’t stem from a lack of effort, but from a ‘good enough’ mindset that ignores the science of materials. For instance, understanding why your composite decking is warping at the joists usually leads back to basic spacing errors made during the framing stage. I also learned that while wood has its charms, why ipe wood is the only real competitor to high end composite is due to its incredible density; if you want that level of performance from composite, you have to support it with precision engineering. My biggest lightbulb moment was realizing that over-building isn’t an expense—it is insurance against the physical sensation of a bouncy, amateur deck.
The Gear I Actually Use Every Day
If you are serious about moving beyond basic DIY, you need tools that prioritize accuracy over speed. I never start a project without reviewing the permit checklist what most diyers forget to ask to ensure my structural plans exceed local codes. For the actual assembly, I rely on a high-quality impact driver with torque control and always consult a guide on how to select the perfect railing system for every deck before I buy my first post. These resources, combined with the North American Deck and Railing Association (NADRA) technical bulletins, are what I trust to keep my builds safe and stylish.
#IMAGE_PLACEHOLDER_E#
Turn Your Vision into a Structural Masterpiece
Building something with your own hands is one of the most rewarding ways to improve your home and your quality of life. When you see those composite decking trends durable solutions for modern outdoor living come to life in your own yard, every hour spent measuring and cutting feels worth the effort. Don’t be intimidated by the technical details we have covered; simply take it one stringer and one board at a time. Your backyard is more than just a platform of wood and plastic—it is a sanctuary where your family will gather for years to come. Take pride in the skeleton underneath, and the rest will follow. Are you planning a simple single-level platform or a complex multi-level deck for your next project? Let me know in the comments below!