
I’ll never forget the sinking feeling I had last April. I was standing on my back deck, coffee in hand, watching a light drizzle soak into the wood. Instead of the water forming those satisfying little beads, it just… vanished. The wood turned dark and thirsty immediately. I’d spent the previous summer ignoring the dull gray finish, telling myself it was just ‘weathered charm.’ That mistake cost me dearly when I realized the moisture had already started inviting rot into my structural posts. I ended up having to research the structural reason your deck feels bouncy and how to fix it because I let it go too far. [image placeholder]
Stop Guessing Before You Buy More Stain
You don’t need a degree in forestry to know if your outdoor space is at risk. Whether you have a sprawling multi-level structure or a cozy 12×12 deck with a grill and table, the physics of wood remain the same. Moisture is a silent killer. According to experts at the USDA Forest Products Laboratory, wood decay fungi thrive once the moisture content hits a specific threshold, often hidden deep within the grain where the eye can’t see. If your wood is absorbing water like a sponge, you’re essentially hosting a party for rot. Today, I’m going to show you the Water Bead Test. It’s the same trick I use before I even think about grabbing a power washer or a brush. It saves money, prevents why your deck boards are popping up at the ends, and gives you total peace of mind.
Is a Simple Splash Really Enough to Trust?
I get the skepticism. In a world of high-tech moisture meters and expensive contractor consultations, flicking a few drops of water onto a board feels a bit too ‘old-school’ to be reliable. But here’s the reality: wood is porous by nature. A sealant’s only job is to create a hydrophobic barrier. If that barrier is gone, the water moves in. I once made the classic rookie move of staining over a deck that was still technically sealed in patches, and the result was a peeling, blotchy nightmare that looked like a bad sunburn. Knowing exactly where your protection stands is the first step toward transforming your home with stunning deck design strategies that actually last. Have you ever felt like you were just throwing money at stain every year without seeing results? Let’s figure out if you actually need to work this weekend or if you can just kick back and enjoy the sun.To start the Water Bead Test, grab a glass of room-temperature water and head to the areas of your deck that get the most sun or foot traffic. These spots usually fail first. Pour about a tablespoon of water onto the wood. If the water forms distinct, rounded beads that sit on top of the surface for more than a few minutes, your sealant is still doing its job. You can spend your weekend doing something else. However, if that water turns the wood dark and disappears within thirty seconds, your fibers are wide open to the elements. This is the exact moment where composite decking secrets start looking very attractive to homeowners who are tired of the maintenance cycle. 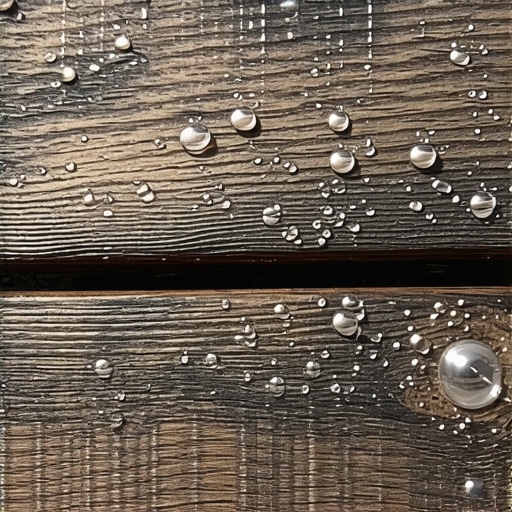
Test Your Deck Protection in Ten Seconds
When you see that water soak in, resist the urge to run to the hardware store for the first bucket of ‘deck restorer’ you see. You have to prep. I learned this the hard way three years ago. I thought I could skip the specialized cleaner and just use a high-powered pressure washer to ‘blast’ the dirt off. I got too close with the nozzle and ended up shredding the wood fibers, leaving the surface feeling like a fuzzy peach. I spent the next two days on my hands and knees with an orbital sander fixing my ‘time-saving’ shortcut.
Clean Every Fiber Before the Brush Touches Wood
Proper prep means using a dedicated deck cleaner that breaks down mold and graying UV-damaged cells without destroying the lignin that holds the wood together. While you have the boards exposed, this is the perfect time for a deeper check-up. Look at your structure. Is there water pooling? Implementing the 2-degree slope trick for proper deck water runoff ensures that your new sealant won’t have to work overtime against standing puddles. If you find your joists are starting to look soft, you might need to look into the flashing tape move that doubles the life of your joists before you cover everything back up.
Lock Out Moisture with a Proper Seal
When it is finally time to apply the product, the method matters as much as the brand. If you have a large area, use a pad applicator on a pole for the main boards and a high-quality natural bristle brush for the gaps. Never apply stain in direct midday sun; the heat will flash-dry the surface before the oils can penetrate the grain, leading to that peeling mess I mentioned earlier. You want a cool, overcast day with at least 48 hours of dry weather ahead. For those with intricate features, like a custom pergola, remember that the best way to hide electrical wires in your pergola rafters should be planned before you start applying oil everywhere. If your wood feels unstable or gives too much under your weight, you might be dealing with more than just surface wear; check if there is a structural reason your deck feels bouncy to ensure your hard work is not going onto a failing frame.Even if you pass the bead test, there is a nuance most people overlook once they upgrade to higher-end materials.
The ‘Zero Maintenance’ Myth Can Actually Rot Your Frame
Everyone says switching to composite means you can throw away your brushes forever, but in my experience, that’s where the real trouble starts. While the boards themselves won’t rot, they are incredibly dense and trap moisture against the wooden joists beneath them. If you haven’t used the joist tape secret for doubling your decks lifespan, you’re essentially creating a greenhouse for mold between the deck and the frame. A study by the North American Deck and Railing Association (NADRA) suggests that nearly 40 million decks in the U.S. are over 20 years old and potentially unsafe because homeowners focus on the surface aesthetics while the structural skeleton decays. This is exactly why pressure treated wood still needs maintenance under composite layers. 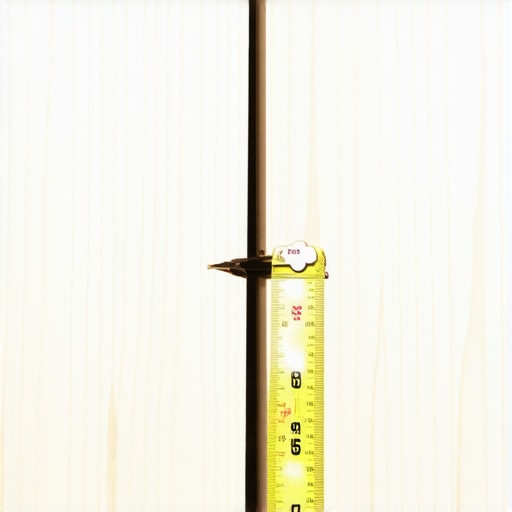
Why Does Your ‘Lifetime’ Deck Still Warp?
I often get asked why expensive boards start looking wavy after just one season. The ‘trap’ is thermal expansion. Wood expands across its width, but composite expands primarily in length. If you ignore the expansion gap rule that stops boards from buckling, those boards will have nowhere to go when the July sun hits them except ‘up.’ This results in why your composite decking is expanding more than the manual says, often pulling hidden fasteners right out of the wood. To maximize outdoor living with low maintenance composite decking, you have to respect the physics of the material.
Don’t Ignore the Structural Sway in Your Railing and Pergolas
It’s not just the floorboards that trip people up. When it comes to railing, the most common mistake is over-tightening. People think they’re making the system ‘rock solid,’ but in reality, they’re just stripping the structural integrity of the post. I’ve seen countless DIYers wonder why your railing post sleeves are cracking at the base only to realize they didn’t account for the material’s need to breathe and shift. Similarly, with pergolas, the ‘trap’ is assuming a standard notch is enough. I always recommend the notched rafter secret for a pergola that never wobbles to avoid that dreaded sway that develops over time. If you’re building stairs, don’t settle for the bare minimum; understanding why your deck stairs need more than two stringers is a lesson usually learned after the first bouncy, unsafe step. Have you ever fallen into this ‘maintenance-free’ trap or noticed your boards shifting with the seasons? Let me know in the comments below.I’ve learned that the secret to a deck that looks brand new ten years later isn’t just about the initial build; it’s about the systems you put in place to manage it. Before I even pick up a saw, I spend hours in a digital environment. I’ve found that why you need a 3D model before buying a single deck board isn’t just for aesthetics—it’s about calculating the exact load-bearing requirements so your structure doesn’t sag under pressure. I personally use software to visualize the joist layout and identify potential water traps before they ever manifest in reality.
How do I maintain my deck over time?
Consistency beats intensity every single time. I follow a strict seasonal checklist because catching a loose bolt in May is much cheaper than replacing a ledger board in October. I always recommend performing the 15-minute deck inspection every homeowner should do at the start of every spring. This routine is backed by the American Wood Council’s (AWC) Prescriptive Residential Wood Deck Construction Guide (DCA 6), which emphasizes that hardware corrosion and fastener withdrawal are the leading causes of structural failure. By looking at your connectors once a year, you’re essentially insurance-proofing your investment. If you’re still in the planning phase, make sure you look into the complete guide to choosing railing systems for safety and style to ensure your maintenance needs align with your lifestyle. 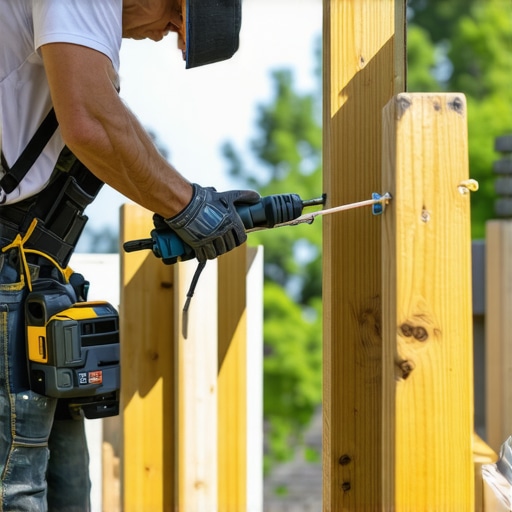
Tools that separate pros from DIYers
If you want those perfectly straight lines you see in magazines, you need more than just a good eye. I never install a railing without using the drill guide hack for centered baluster holes. It’s a specialized tool that prevents your balusters from looking like a crooked set of teeth. Similarly, I rely on the string line secret for perfectly level railing runs because even the best laser levels can struggle in bright midday sun. These small precision tools ensure that your transform-your-home-with-stunning-deck-design-strategies don’t get ruined by sloppy execution. Scaling your outdoor space doesn’t mean just adding more square footage; it means making the space more functional. I’ve started recommending the addition of a cocktail rail to almost every project. Integrating the cocktail rail hack for easier outdoor entertaining is a simple modification where you place a deck board on top of the railing, but it creates instant serving space for guests. When you’re thinking about long-term results, small ergonomic choices like this matter as much as the joist tape. Looking ahead, I see a massive shift toward smart outdoor spaces. We are moving toward integrated sensors that can alert you to moisture levels within your joists or automated shade systems. Keeping up with pergola trends crafting shade elegance in your outdoor space means preparing for a future where your deck is as technologically advanced as your living room. I challenge you to try just one of these advanced layout techniques on your next project; the difference in the final results is night and day.
The Truth About ‘Zero Maintenance’ Promises
One of the most valuable lessons I’ve learned is that a beautiful surface can mask a failing skeleton. Many homeowners fall into the trap of thinking high-end materials are invincible, but I’ve found that why pressure treated wood still needs maintenance under composite is the single most ignored factor in deck longevity. In my early days, I assumed the boards would protect the frame, but moisture finds a way. Another ‘lightbulb moment’ came when I realized that structural stability affects how long your finish lasts; implementing the simple blocking move that stops your deck from shaking prevents the microscopic movements that eventually crack sealant or pop fasteners. True expertise isn’t just about the top layer—it is about managing the environment underneath the boards.
My Essential Toolkit for Lasting Outdoor Structures
If you want to move beyond basic DIY, you need resources that the pros use. I personally rely on the American Wood Council’s DCA 6 guide, which is essentially the structural blueprint for safe residential decks. For physical tools, I never start a railing project without the drill guide hack for centered baluster holes; it ensures every post and spindle looks factory-perfect. I also recommend keeping a digital log of your builds. Before you buy materials, understanding why you need a 3D model before buying a single deck board can save you hundreds in wasted timber and incorrect hardware. These resources shift your work from ‘guessing’ to ‘engineering.’
Turn Your Vision Into a Lasting Reality
Your outdoor space should be a sanctuary, not a source of constant anxiety. Whether you are deep into a new project or just trying to extend the life of an aging structure, consistency is your best friend. By performing the 15-minute deck inspection every homeowner should do each spring, you catch the small issues before they become structural failures. Investing in high-quality composite decking and proper flashing techniques means you’ll spend your summers relaxing rather than sanding. You have the knowledge to protect your investment—now it’s time to head outside and get started. What was the most surprising thing you discovered during your last water bead test? Let me know in the comments below!