
I’ll never forget the morning after that first big April thunderstorm. I stepped out onto my brand-new cedar deck, coffee in hand, expecting a pristine sanctuary. Instead, I found a series of miniature, stagnant lakes right outside my sliding door. Those puddles weren’t just an eyesore; they were a death sentence for my wooden substructure. I had spent weeks obsessing over how to select the perfect railing system, but I’d ignored the one thing gravity never forgets: water wants to stay exactly where you let it sit. I made the classic rookie mistake of thinking “perfectly level” was the hallmark of a master builder. It isn’t. In fact, building a deck that is dead-level is the fastest way to invite mold, rot, and a very expensive teardown.
Why You Should Never Build a Perfectly Level Deck
When I first started out, I thought my spirit level was my best friend. If that bubble was dead center, I was happy. But after watching the water pool against my house’s siding, I realized that I’d essentially built a very shallow bathtub. Whether you are leaning into composite decking trends or sticking with traditional lumber, water management is your first priority. The 2-degree slope trick is the ultimate drainage move that saves your deck from mold. By creating a subtle pitch away from the house—specifically about a quarter-inch of drop for every foot of length—you ensure that rainfall actually leaves the party instead of overstaying its welcome. This is especially critical if you are implementing stunning deck design strategies where the boards run parallel to the house. Without that slight angle, surface tension keeps water trapped in the gaps. According to research from the USDA Forest Products Laboratory, wood that maintains a moisture content above 20% is significantly more susceptible to decay-causing fungi. A level deck in a rainy climate is almost guaranteed to hit that threshold. Have you ever noticed water sitting for hours on your boards after a light drizzle, or is yours draining away like it should?
Is a Sloped Deck Actually Noticeable Underfoot?
This is the number one fear I hear from homeowners: “Won’t I feel like I’m sliding off my chair?” The short answer is no. A 2-degree slope is virtually imperceptible to the human inner ear when you’re walking or sitting. You won’t feel like you’re on the Titanic. What you *will* notice is that your composite decking secrets for longevity actually work because the joists underneath aren’t sitting in a constant swamp. It’s the same principle as the drainage secret for decks built close to the ground where airflow is limited. If you don’t get the water off the top, the bottom never stands a chance. I once saw a gorgeous build where the owner forgot this trick; within three years, the ledger board had rotted so badly it nearly pulled away from the house. We’re going to make sure that never happens to you by walking through how to set your footings to hit that perfect, subtle pitch. [image-placeholder]
Start Your Slope Right at the Ledger Board
The magic happens at the very beginning of the frame. Think of your ledger board as the anchor for your entire drainage strategy. To get that subtle 2-degree pitch, you need to set your ledger slightly higher than your outside beam. I like to think of it like a slide; if it’s flat, the water isn’t going anywhere. While you are there, don’t skip the flashing tape move that doubles the life of your joists. It’s the ultimate backup plan for when water inevitably tries to seep behind that board. In my early days, I once rushed a ledger install on a rainy Tuesday in Seattle, and because I didn’t verify the height difference between the house-side and the post-side, the water just sat against the siding for a week. The cleanup was a nightmare.
Calculate the Drop Without a Math Degree
You don’t need a calculator to get this right. The industry standard is a quarter-inch of drop for every foot of length away from the house. If you are building a 12-foot deck, your outer rim joist should sit exactly 3 inches lower than the ledger. This ensures that even during a heavy downpour, the surface tension is broken and gravity takes over. This is especially vital when you’re dealing with composite decking secrets for longevity because, unlike wood, composite doesn’t “drink” the water—it just lets it sit there to grow slime. If you are working in tight spaces, remember the drainage secret for decks built close to the ground where you need that pitch even more because there is less wind underneath to dry things out. 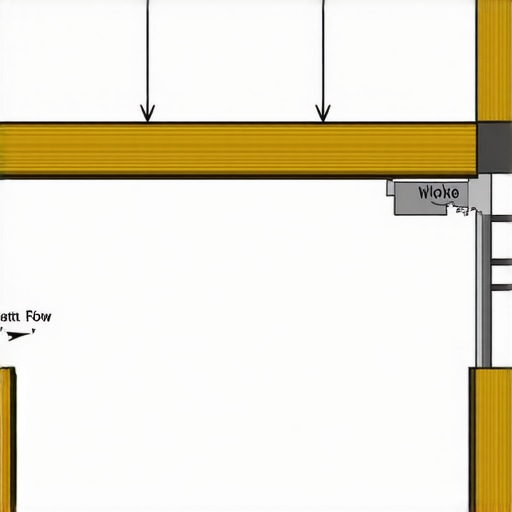
Fixing the Wonky Railing Problem
Here is where most DIYers lose their minds. If your deck is sloped, your railing posts will naturally want to lean out at the same angle. You’ll end up with a railing that looks like it’s trying to escape the house. The fix is the shim trick for leveling a railing on a sloped deck. You use thin stainless steel or plastic shims under the base of the post bracket on the “downhill” side. This brings the post back to a perfect 90-degree vertical while the floor beneath it stays sloped for drainage. I remember a project back in 2019 where I forgot this step. I stepped back to look at my work and the entire railing system looked like a row of drunk sailors. It took me four hours of unscrewing and re-leveling to fix it.
Check Your Joists for Consistency
Before you even think about laying your boards, run a string line from the ledger to the rim. If one joist is “proud” or higher than the others, it creates a dam. Water will pool behind that one high joist, no matter how good your overall slope is. This is where the 5-shim trick for leveling out-of-square deck frames comes in handy. You want a smooth, uninterrupted plane for that water to ride all the way to the edge. If you’re worried about how the stairs will meet the ground, remember the stringer notch hack for squeak-free deck stairs to ensure your transition from the sloped deck to the level ground is seamless and silent.Most homeowners and even some contractors believe that 16 inches on center is the gold standard for joist spacing because it has been the norm for pressure-treated lumber for decades. However, if you are following composite decking trends, sticking to that old rule is a mistake that will cost you the ‘premium’ feel of your project. Composite material is naturally more flexible than timber. I’ve walked on dozens of high-end installs that felt like a bouncy castle because the framing wasn’t stiff enough; this is exactly why your composite deck feels like a trampoline. For a truly solid, high-end feel, I always recommend 12 inches on center for any low-maintenance composite decking project. It’s a bit more lumber upfront, but it’s the difference between a deck that feels like a floor and one that feels like a diving board. 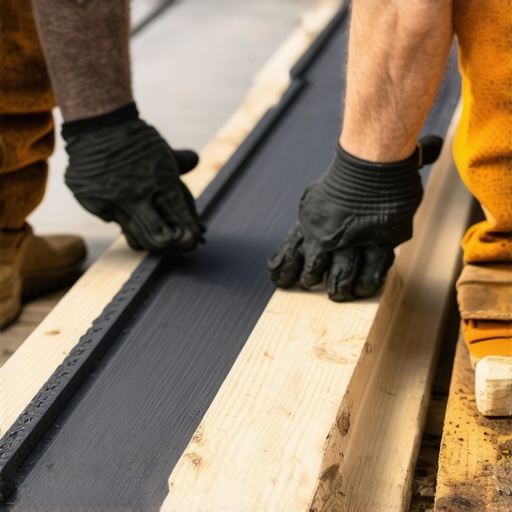
Will my dark composite boards actually burn my feet in July?
This is the most common question I get when discussing innovative deck design ideas for 2025. Many people believe all composite is a heat-trap, but the nuance lies in the chemistry of the boards. While older wood-plastic composites could get dangerously hot, modern technology has changed the game. This is why capped polymer composite stays cooler than wood-plastic alternatives. According to the International Association of Certified Home Inspectors (InterNACHI), synthetic decking can reach temperatures significantly higher than the surrounding air, but capped polymer versions are specifically engineered with heat-reflective pigments. If your deck gets full sun, choosing the wrong material can make your outdoor space unusable for half the day. Another trap to avoid is the hidden fastener obsession. While they create a beautiful, screw-free surface, why hidden fasteners can be a maintenance nightmare becomes clear the moment a single board in the middle of your deck gets damaged. Replacing it often requires ‘unzipping’ the entire deck from the edge inward. When planning your pergola designs that turn your garden into a sanctuary, never bolt the structure directly to the decking surface without dedicated support posts running through to the frame. Failing to do this is almost always the structural reason your pergola is leaning after a few seasons. Finally, you must account for the way composite moves. Unlike wood, which shrinks as it dries, composite expands and contracts lengthwise with the temperature. If you don’t master the expansion gap rule that stops boards from buckling, the boards will eventually push against your rim joists and cause permanent structural warping. Have you ever fallen into this trap or noticed your deck boards ‘wandering’ during a heatwave? Let me know in the comments.
Once you’ve mastered the slope and the framing, the difference between a ‘DIY look’ and a professional finish often comes down to the specialized gear you keep in your truck. I used to think a standard cordless drill and a hammer were enough, but after stripping my hundredth specialized screw, I realized that the 3-inch screw mistake that ruins composite joists usually starts with using the wrong driver. I now swear by a high-torque impact driver with a dedicated depth-setting bit. This ensures every fastener sits exactly 1/16th of an inch below the surface, which is vital if you want to avoid those ugly ‘mushroom’ bumps around your screw holes.
How do I maintain composite decking and railings for the long haul?
Maintenance is where the ‘low-maintenance’ promise of composite is actually tested. While you won’t be sanding and staining every two years, you can’t just ignore it. My biggest rule? Put the power washer away. I’ve seen homeowners permanently etch swirl marks into their expensive boards because they didn’t realize why you should never use a pressure washer on composite. Instead, I use a soft-bristle brush and a pH-neutral soap like Dawn or a dedicated deck cleaner. According to technical bulletins from the American Wood Council (AWC), specifically the DCA 6 guidelines, checking your hardware connections annually is non-negotiable. I set a calendar reminder every October to do a 15-minute deck inspection every homeowner should do. I’m looking for loose ledger bolts or any signs that my cable railing sagged over winter. It’s much easier to tighten a tensioner in the fall than to replace a warped post in the spring.

The Scribe Tool and the Digital Model Advantage
If you really want to elevate your home’s curb appeal, you have to nail the transitions. I never start a cut near a stone foundation without using a professional scribe tool. This allows you to mirror the jagged edge of the stone onto your deck board for a gap-free fit. It’s much cleaner than trying to hide the gap between your deck and the house with a glob of caulk or a piece of trim that doesn’t quite match. For complex layouts involving pergola designs that turn your garden into a sanctuary, I’ve shifted entirely to 3D modeling software before I buy a single board. Seeing the shadows and the structural intersections in a digital space is why you need a 3d model before buying a single deck board—it prevents those ‘uh-oh’ moments when a rafter blocks a window view. Looking forward, I predict we will see more ‘smart’ integration where these models link directly to CNC cutting services for perfect, factory-notched beams.
Try This Pro Strategy Today
Don’t wait until your deck feels ‘spongy’ to look underneath. This weekend, grab a flashlight and check your joists for any signs of water staining. If you see dampness, it’s time to implement the flashing tape move that doubles the life of your joists. It is the cheapest insurance policy you can buy for your outdoor living space.
I used to think that building a deck was all about getting things perfectly square and perfectly level. It took one soggy spring to realize that ‘level’ is actually the enemy of longevity. If you want to avoid the pitfalls of stagnant water and early rot, you have to embrace the science of the slope.
The Real Reason My First Deck Failed Within Five Years
The hardest lesson I ever learned in this business was that water never sleeps. Even if you use the most expensive composite decking trends, water will find a way to sit in the gaps if you haven’t planned for it. My biggest lightbulb moment came when I stopped measuring for ‘straightness’ and started measuring for ‘flow.’ Here are three things I wish I knew earlier:
- Gravity is your best quality control: If you pour a cup of water on your frame and it doesn’t immediately run toward the yard, you haven’t finished your pitch.
- The ledger is a dam: Without that 2-degree slope, the ledger board acts as a collection point for debris and moisture, which is why most deck collapses happen at the house connection.
- Airflow is just as vital as drainage: Even a sloped deck needs air to move underneath. This is especially true for low-maintenance composite decking where the underside can become a greenhouse for mold if trapped in a moist, level environment.
The Only Tools You’ll Ever Need for a Pro Finish
I’ve wasted thousands of dollars on gadgets that ended up in the bottom of a toolbox, but these four items are the ones I never leave the shop without. First, a high-quality scribe tool is non-negotiable for how to scribe deck boards to an uneven stone foundation—it’s the difference between a gap-free transition and a messy bead of caulk. Second, I always run the deck joist tape test on every build; I trust butyl tape to seal my screw holes because it’s the only thing that truly stops joist rot. Third, when it comes to the finishing touches, deciding how to choose between round and square balusters becomes much easier when you use a digital modeling app to see the visual weight of each option before you buy. Finally, never underestimate the power of a dedicated depth-setting driver bit to prevent those ugly mushroom bumps in your composite surface.
Build Your Sanctuary One Board at a Time
Starting a major outdoor project can feel overwhelming, but remember that every master-built structure began as a simple frame and a single measurement. Whether you are adding the cocktail rail hack for easier outdoor entertaining or browsing pergola design inspiration from modern to classic looks, the goal is the same: to create a space that lasts for decades, not just a few seasons. By mastering the subtle 2-degree slope and prioritizing moisture management, you aren’t just building a platform; you’re crafting a legacy of outdoor living. Your future self—relaxing on that dry, rot-free deck—will thank you for the extra effort you put into the drainage today. Have you ever checked your own deck with a level to see if you have that crucial quarter-inch drop? Let me know what you found in the comments below!