
I still remember the sinking feeling in my chest back in 2018. I had spent three grueling days framing what I thought was a gorgeous cedar backyard retreat, only to step back, squint, and realize my main structural posts looked like the Leaning Tower of Pisa. They were off by just half an inch at the base, but by the time they reached nine feet high, they were visibly crooked. It looked terrible, and worse, my rafters wouldn’t sit flat. I had relied on a cheap, warped bubble level. Since then, I have learned that the secret to a professional structure isn’t high-tech lasers or expensive gadgets; it is gravity. In this guide, I will show you exactly how to use a plumb bob for perfect pergola posts so you never have to suffer through the embarrassment of a crooked build. We are going to get your posts dead-vertical on the very first try.
The Hidden Danger of the ‘Good Enough’ Bubble Level
I used to think my standard hand level was my best friend. But when you are erecting tall vertical structures like a custom pergola design, a standard 24-inch spirit level is shockingly easy to misread. If you are off by a tiny fraction of a millimeter over two feet, that error multiplies dramatically as you go higher. Before you know it, your entire roof structure is under twisting stress, which is a prime reason why your pergola rafters are sagging prematurely. A plumb bob, however, never lies because gravity never changes. According to architectural physics standards published by the American Society of Civil Engineers, gravity-based plumbing remains the most fail-safe reference line available to builders, untouched by digital calibration errors or temperature fluctuations. By using this simple weighted string, you create an absolute vertical line that lets you anchor your posts with complete confidence. It is a game-changer whether you are setting heavy timber or trying to keep your railing posts perfectly upright.
Is a Basic Plumb Bob Actually Better Than a Modern Laser Level?
You might be skeptical. Why use a tool designed in ancient Egypt when you can buy a self-leveling cross-line laser at the local hardware store? The truth is, bright sunlight washes out laser lines completely outdoors, making them almost impossible to see on a clear day. A physical string line with a heavy solid-brass weight can be seen clearly in any lighting conditions, and it won’t run out of battery mid-afternoon. Have you ever stood back from a project you spent days on, only to realize the uprights look slightly askew? Drop a comment below and let me know your worst DIY alignment disaster!
Step-by-Step Guide to Perfect Post Alignment
To get your uprights perfectly plumb, think of your setup as a physical pendulum that halts only when it points directly to the center of the earth. I remember building a heavy timber pergola in 2021 where I tried to shortcut this process by holding a spirit level with one hand while holding a heavy drill with the other. The drill slipped, I bumped the post, and by the time I drove the fasteners home, the post was tilted outward. Since that day, I always rig up a hands-free rig. Here is exactly how to execute this flawlessly on your own site.
Set Up Your Overhanging Batter Board
You cannot hang a weighted line directly against the face of a rough post because the wood’s natural bowing and surface imperfections will push the string out of line. Instead, you need to create a temporary overhanging arm. Take a scrap piece of 2×4 and screw it horizontally to the top of your post, letting it extend about six inches out from the wood’s face. Drive a small screw partially into the underside of this overhang exactly four inches away from the post surface. This is your reference offset anchor.
Hang and Calibrate Your Weighted Line
Tie your nylon string securely around the screw on your overhanging board. Unroll the line downward until your solid-brass weight hangs about three to four inches above your deck surface or patio floor. If you let it hit the ground, the friction will ruin the reading. To keep wind from blowing your line around, place a bucket of water directly underneath the weight and submerge the tip of the plumb bob in the water. The liquid acts as a natural shock absorber, stopping the swing instantly while maintaining a perfect gravity reference.
Measure Your Offsets Top and Bottom
Now, pull out your tape measure. Measure the distance from the string to the face of your timber post at the very top, right beneath your overhanging 2×4. It should be exactly four inches. Next, measure the distance from the string to the post at the very bottom. If the bottom measurement is four and a half inches, your post is leaning away from the string. Gently tap the post base or adjust your temporary bracing until the bottom measurement matches the top measurement down to the sixteenth of an inch. Repeat this process on an adjacent face of the post to ensure it is vertical in both directions before securing it. This offset technique is also incredibly useful when you need to align structural supports before choosing railing systems for your deck.
Secure Your Post with Temporary Bracing
Once both faces read identical offset numbers, lock the timber in place. Screw diagonal 2×4 braces to the post at chest height and anchor them to heavy stakes driven into the ground. Never rely on the permanent post base to hold your alignment while you assemble the roof rafters. Keeping things rigid now prevents structural shifting later, ensuring your rafters lay flat and eliminating the extra stress that causes premature sagging in your overhead timber beams.
The Thermal Expansion Myth That Ruins Modern Builds
Most DIY enthusiasts and general contractors believe that once a post is plumb and locked in, the hard work is over. But there is a major, hidden nuance that almost everyone misses: structural materials do not remain static. While gravity is constant, your building materials are in a perpetual state of motion. A common industry myth is that solid timber only warps from moisture, leading many builders to overlook the kinetic reality of composite and plastic-polymer alternatives. In my experience, failing to account for the physical shifting of your framing elements is the fastest way to ruin a beautiful project.
For example, if you are integrating modern elements like composite boards or custom handrails, you have to plan for thermal movement. If you anchor your posts and deck boards with zero room to breathe, the entire framework acts like an over-tensioned bow. Over time, this constant pressure will actually pull your perfectly plumb posts out of alignment. If you want your project to stand the test of time, you need to understand the relationship between thermal expansion and your structure’s overall stability. I highly recommend reading up on why your composite decking is expanding more than the manual says to avoid these costly shifting issues.
Why Does Your Flawlessly Straight Post Still Look Crooked From the Yard?
Here is an advanced nuance that even seasoned carpenters occasionally overlook: the optical illusion of vertical alignment. A post can be perfectly vertical according to your gravity-fed plumb line, but because of surrounding sloped landscapes, uneven patio slabs, or the natural grade of your yard, your eyes will play tricks on you. According to a structural engineering study published by the Forest Products Society, human visual perception is heavily influenced by horizontal baselines. If your concrete patio slopes away at a standard two-degree angle for drainage, a perfectly upright post will actually appear to lean to the untrained eye.
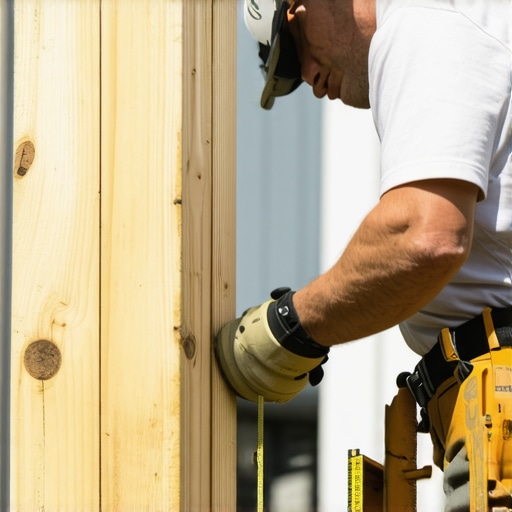
To combat this optical illusion, seasoned builders use a technique called ‘perceptual balancing.’ Before you tighten the final bolts on your heavy-duty brackets, step back at least thirty feet and look at the structure as a whole. Sometimes, adjusting a post by a mere sixteenth of an inch—well within acceptable structural tolerances—can harmonize the build with the natural slope of your property. If you are mounting your structure directly onto concrete, you also need to account for water pooling around the anchors. Make sure you understand why your post bases are rusting and the fix to prevent your foundation from deteriorating beneath your feet.
Have you ever fallen into this trap and realized your perfectly level project looked completely crooked from your kitchen window? Let me know in the comments below! If you are planning a larger renovation, remember that aligning your posts is just the first step. You also have to think about how your uprights tie into your handrails and balusters. Take some time to research how to select the perfect railing system for every deck so that your safety barriers complement your perfectly aligned vertical supports instead of fighting against them.
My Personal Toolkit for Forever-Straight Structures
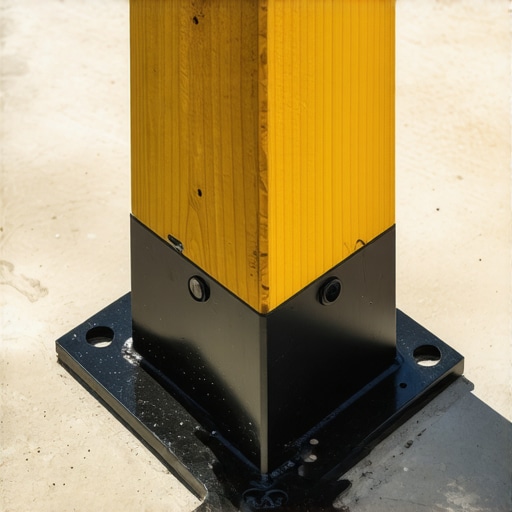
Getting your posts perfectly vertical is a massive victory, but keeping them that way over a decade of changing seasons requires the right hardware. Through trial and error, I have stopped relying on standard structural screws for critical framing joints. Instead, I heavily rely on heavy-duty, powder-coated steel connector plates specifically designed for timber framing. Specifically, I use the Simpson Strong-Tie Outdoor Accent connectors. They provide the rigid, non-yielding connection that standard toe-nailing or basic screws simply cannot match. If you want to make your setup process even simpler, using the hidden brackets that make pergola installation faster will save your sanity and protect your alignment during the initial raise.
In the near future, I predict we will see smart-bracket technology integrated into residential builds. Imagine structural post bases with built-in micro-tensioners or alignment sensors that alert your smartphone if a structural shift exceeds two millimeters. Until those high-tech days arrive, relying on physical heavy-gauge steel is your absolute best defense against the natural twisting forces of outdoor timber.
How do I maintain post alignment over time?
Even the most rugged structural lumber will experience moisture absorption and drying cycles. This constant expansion and contraction puts immense pressure on your foundation and connections. To maintain your alignment, you must inspect your hardware annually. I recommend using a torque wrench to check the tightness of your post-to-bracket bolts every spring. Wood fibers compress over time, which can loosen your connection points and introduce subtle wobbles. Keeping those bolts properly tensioned ensures that your pergola designs remain as safe and stable as the day you built them.
Furthermore, pay close attention to water management at the base of your uprights. If water pools around your brackets, it can soften the wood or rust the fasteners. According to the timber engineering guidelines from the American Wood Council, ensuring a minimum one-inch standoff distance between the post base and the concrete surface is critical to preventing fungal decay and structural shifting. If you are integrating safety barriers into your design, make sure to read about how to select the perfect railing system for every deck to ensure your safety barriers are anchored just as securely as your main posts. I highly challenge you to go outside this weekend, drop a weighted line next to your oldest backyard structure, and measure the offset. You might be surprised by what has shifted, and tightening those base bolts today can prevent a costly rebuild tomorrow.
The Three Plumbing Realities That Changed My Construction Career
Over the past decade of building outdoor living spaces, I have realized that the line between a professional-grade installation and a sloppy DIY job comes down to details you cannot see with a casual glance. First, never assume your lumber yard delivered perfectly straight timbers. Even if you establish a perfect gravity line, a natural twist in a 6×6 post can throw off your measurements if you only measure from one corner. Always take your offset measurements from the center line of the post face rather than the edges. Second, concrete has a mind of its own. When pouring footings, the chemical curing process generates heat and slight shifting; if you anchor your posts too early, that curing tension can pull your frame out of alignment. Lastly, remember that your overhead framing relies entirely on this foundation. If your vertical posts are even slightly out of plumb, you will struggle when it is time to calculate why your pergola roof needs a slope even for a flat look, resulting in uneven water pooling and eventual rot.
My Absolute Go-To Tools for Perfect Alignment
To consistently achieve dead-vertical accuracy without losing your mind on site, I highly recommend stocking your toolbox with these specific, field-tested items:
- Solid Brass 16-Ounce Plumb Bob: Avoid light steel options. A heavier solid brass weight resists wind interference much better and drops to a steady state far quicker.
- Braided Nylon String (Neon Green or Orange): Avoid twisted cotton line, which stretches under tension and frays easily. Braided nylon provides high visibility and a perfectly uniform thickness for exact measurements.
- Simpson Strong-Tie Outdoor Accents: These heavy-duty structural connectors ensure that once you use your plumb line to find the sweet spot, your timbers are locked in place permanently with zero room to warp or twist.
- Adjustable Spring Clamps: These are lifesavers when you are working alone and need to hold your temporary horizontal overhanging board in place before screwing it down permanently.
Bring Your Dream Structure to Life With Absolute Confidence
Now that you have the knowledge, the techniques, and the tool list, there is nothing standing between you and a flawless backyard build. Do not let the fear of a crooked post hold you back from transforming your outdoor space. Take your time, trust the physics of gravity, and enjoy the physical process of building something with your own two hands. By mastering the plumb line, you are ensuring that your custom pergola design inspiration translates into a safe, permanent masterpiece that your family will enjoy for decades.
Have you ever completed an outdoor project only to realize it looked slightly tilted from your kitchen window? Let me know in the comments below, and let’s troubleshoot your alignment challenges together!