
I was sitting on my patio last summer, cold drink in hand, feeling pretty proud of the DIY sanctuary I had built. Then I saw it. One of the main 2×8 rafters had developed a slight, undeniable curve right in the center. It looked tired. Worse, it looked like it was giving up. I had spent weeks researching pergola designs that turn your garden into a sanctuary, but I completely missed the mark on structural span limits. It is a gut-punch moment when you realize your weekend masterpiece is slowly succumbing to gravity. The weight of the wood, combined with a few hanging baskets I thought were ‘light,’ had finally won the battle. [image: sagging-pergola-repair]
That Ugly Middle Dip Isn’t Just a Visual Problem
When rafters start to bow, most of us try to ignore it. We tell ourselves it adds ‘character’ or that it is just the wood ‘settling.’ Trust me, I have been there. My first big mistake was overestimating the strength of a single beam over a long span without enough mid-point support. According to the American Wood Council’s Span Tables, even high-quality lumber has strict limits on how far it can stretch before deflection becomes a structural hazard. If you leave it, that sag becomes a permanent ‘set’ in the wood, making it nearly impossible to straighten later without replacing the whole stick. Today, I am going to show you exactly how to shore up those beams and why they started drooping in the first place. Whether you are dealing with wet-heavy timber or you are planning on building a retractable shade system that adds extra weight, you need a frame that does not flinch.
Is it actually cheaper to just tear the whole thing down?
I hear this from neighbors all the time. They see a sag and think the wood is ‘rotted’ or ‘ruined.’ Most of the time, it is just overworked. You do not need a bulldozer; you need leverage and a bit of ‘sistering.’ Unless you have got deep structural rot, shoring up is a fraction of the cost of a full replacement. Have you noticed a dip in your beams that keeps you up at night? Send me a message or let me know if you are stuck—I have seen it all.
Stop the Sag Before Your Rafters Snap
The first step is understanding ‘creep.’ This is the technical term for how wood deforms under a constant load over time. If you did not use the hidden bracket hack for invisible pergola connections or failed to account for the ‘live load’ of snow or heavy vines, the fibers in the wood literally stretch and stay that way. You might also find that using hurricane ties even in low-wind areas can provide some lateral stability, but for a sag, we need vertical reinforcement. We are going to talk about jacking, sistering, and how to add support without ruining your backyard aesthetic.
Push the Wood Back Before You Bolt It
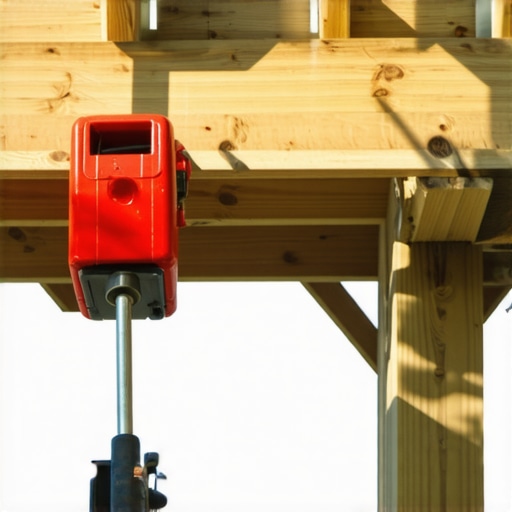
You cannot simply attach a straight board to a curved one and expect the old one to straighten out. Gravity always wins that tug-of-war. Instead, you need to reset the rafter. Think of it like orthodontic braces; you are applying pressure to force the material back into its correct alignment. I remember working on a cedar pergola in my brother’s yard where the main beam had dipped nearly three inches. I used a standard automotive bottle jack and a 4×4 post as a temporary deadman support. By slowly cranking the jack—about a quarter-turn every ten minutes to let the wood fibers adjust without snapping—I got the beam back to a perfect level. If you do this too fast, you will hear a sickening crack that sounds like a dry twig snapping, and at that point, you are looking at a full teardown.
Double Up with the Sistering Method
Once the rafter is jacked back to level, the most effective fix is sistering. This involves sandwiching the sagging beam with a new, identical piece of lumber. It is the same logic used in the double rim joist secret for rock-solid deck edges. You want to coat the mating surfaces with a high-quality exterior wood glue and then through-bolt them every 16 inches. Do not just use nails; they will pull out over time as the wood swells and shrinks. I use 1/2-inch galvanized carriage bolts. When I did this on my own patio, I offset the bolts in a zig-zag pattern to prevent splitting the grain along a single line. This creates a composite beam that is significantly stiffer than the original single member.
Add Mid-Point Bracing to Kill the Sway
Sometimes the sag is not just about the vertical weight; it is about lateral movement. If your rafters are rolling or twisting, they lose their structural integrity. To stop this, you need to install solid blocking between the rafters. This is very similar to the simple blocking move that stops your deck from shaking when you walk. By placing short blocks of the same material between your rafters at the mid-span, you force all the boards to work together as a single unit. It effectively transfers the load across the entire structure rather than letting one weak beam shoulder the burden. I once skipped blocking on a small 10×10 build because I thought it looked too busy, and within two seasons, the outer rafters had twisted so badly the shade slats were falling out.
When Wood Alone Is Not Enough
If you are dealing with an extreme span—say, anything over 14 feet for a 2×8—you might need to introduce metal. A flitch plate is a piece of steel bolted between two wooden beams. While it sounds industrial, it is a lifesaver for maintaining a slim profile without adding a bulky 2×12 beam that ruins your pergola design inspiration. You can hide the steel by using a slightly smaller plate and cladding the outside with thin cedar or trim. If you are worried about aesthetics, you can always use how to hide the structural hardware on your pergola techniques to keep the heavy-duty stuff out of sight. For those using modern materials, remember that composite decking secrets for longevity often apply to structural wood too—keep the water out of those bolt holes with a bit of silicone or joist tape to prevent internal rot where you have reinforced the beam.
Most people assume that if a 2×8 works, a 2×12 must be ‘safer.’ That is not always true. In my experience, adding massive weight to a frame without checking the footing’s load-bearing capacity is a recipe for disaster. We often focus so much on the beams that we forget the ground beneath them. When you are looking for innovative deck design ideas for 2025, remember that weight is your enemy as much as gravity. Adding excessive lumber adds ‘dead load’ that can cause your piers to sink, leading to that same dip you were trying to avoid.
Can your existing frame actually handle the switch to composite?
This is the most common mistake I see in the field. Homeowners want to maximize outdoor living with low-maintenance composite decking, but they assume the old wood frame is up for the task. Here is the contrarian truth: composite is significantly heavier and less ‘stiff’ than traditional pressure-treated lumber. According to data from the North American Deck and Railing Association (NADRA), composite decking can weigh up to 2.5 pounds per linear foot, which adds a massive constant load to your structure. If your joists are spaced at 24 inches on center—which was common in many older builds—your expensive new boards will feel like a trampoline. You really need 12-inch or 16-inch spacing to prevent that spongy feel.  The ‘Oops’ factor usually hits about six months after installation. I call it the ‘Thermal Creep.’ People often ignore why your composite decking is expanding more than the manual says and jam the boards tight against the house. In the summer heat, that material has nowhere to go but up. It will buckle, warp, and pull screws right out of the wood. This is exactly why your hidden fasteners are popping up in heat; the DIYer missed the required expansion gap. If you are making the switch, do not skip the joist tape secret for doubling your decks lifespan. Because composite traps moisture against the top of the joists longer than wood does, those wooden supports can actually rot faster under ‘low maintenance’ decking if they are not protected. I have seen perfectly good-looking composite decks that were structurally compromised within seven years because the owner forgot to seal the joist tops. It is these tiny details—the hidden nuances—that separate a weekend hobbyist from a pro. Have you ever fallen into this trap or noticed your deck boards ‘wandering’ in the sun? Let me know in the comments; I’d love to help you troubleshoot it before you reach for the crowbar.
Precision Tools Make for Proud Owners
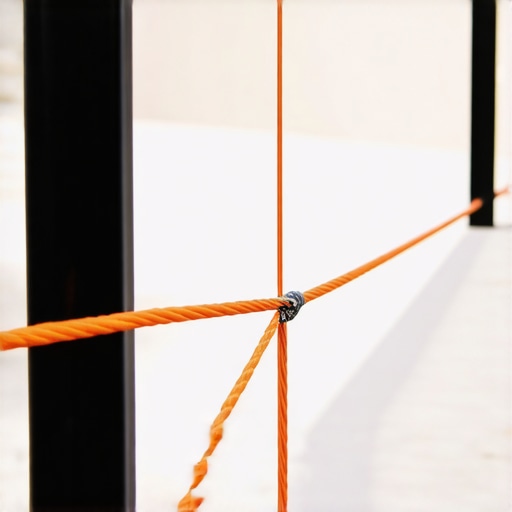
I spent years relying on a four-foot bubble level until I realized that over a twenty-foot span, even a tiny sixteenth-of-an-inch error at the start becomes a glaring disaster by the end. If you want railings that actually look professional, you have to embrace the string line secret for perfectly level railing runs. I personally use a high-visibility mason’s line pulled so tight it hums when you pluck it. This ensures your posts aren’t just level individually, but perfectly aligned as a group. For those dealing with modern kits, I also swear by the 20 bracket that fixes wobbly railing posts fast; it is a small investment that saves you from that annoying ‘give’ when someone leans on the rail.
How do I keep these systems working for decades?
Maintenance isn’t just about a spring cleaning; it is about checking the skeleton. While everyone focuses on the surface, I am looking at the fasteners. The American Wood Council (AWC) notes in their technical guide, the DCA 6 – Prescriptive Residential Wood Deck Construction Guide, that the compatibility between your pressure-treated chemicals and your screw coatings is the primary factor in long-term structural failure. This is why I always preach composite decking secrets for longevity like using joist tape and ensuring your hardware is G185 galvanized or stainless steel. If you are still rocking a wood surface, perform the simple spray test to see if your wood deck needs sealing every autumn. If the water does not bead, your protection is gone.
Stop Snapping Bits When You Hit Metal
When I moved into installing modern railing systems for safety and style, I realized my standard wood bits were useless against aluminum and steel. I wasted fifty dollars on cheap bits before learning the secret to drilling through metal railing posts without breaking bits: step bits and low-speed, high-torque pressure. It is about heat management. If the bit gets too hot, it loses its temper and becomes duller than a butter knife. I also recommend keeping the best under deck storage ideas for small tools in mind so your specialized gear is always within reach when a bolt needs tightening.
Smart Decks are the Future of Living
Looking ahead, I see the industry shifting toward ‘living structures.’ We are not just building static boxes anymore. We are integrating deck lighting that matches your landscape design with smart-home sensors that can retract your pergola canopy the moment a gust of wind is detected. The tech is getting smaller and more affordable, meaning the ‘smart deck’ will likely be standard for most homes by 2026. My challenge to you? Do not wait for a full renovation. Grab a roll of butyl tape this weekend and seal your most exposed joists—it is the single cheapest way to prove you are a pro-level homeowner.
Hard-Won Truths from My Backyard Blunders
Gravity never takes a day off. Even if your beams look laser-straight on day one, wood is a biological material that breathes, moves, and reacts to every season. My biggest takeaway over the years? Overbuilding is infinitely cheaper than rebuilding. Spending an extra fifty dollars on a second support beam or heavier brackets now will save you thousands of dollars and weeks of labor five years down the road when things start to shift.
Moisture is also far more patient than you are. It isn’t just about the rain you see; it’s about the humidity trapped in the tiny gaps between your sistered boards. If you don’t seal those points of contact, you’re just creating a high-rise for rot. Lastly, trust your gut—if a span feels ‘bouncy’ or a beam looks ‘tired,’ it probably is. #IMAGE_PLACEHOLDER_E# Ignoring it won’t make it go away; it just makes the eventual fix more dangerous and expensive.
The Gear That Saved My Structural Sanity
I don’t go into a repair job without a few non-negotiables. First, a heavy-duty bottle jack is your best friend for any structural reset. It provides the slow, controlled pressure needed to move lumber without snapping fibers. Second, I always keep a high-visibility mason’s line in my bag to employ the string line secret for perfectly level railing runs. A four-foot level is fine for a picture frame, but for a long-distance deck run, the string never lies.
Third, never underestimate the power of protection. Using the joist tape secret for doubling your decks lifespan is the single most important step for anyone moving from wood to composite. Finally, swap out those standard screws for 1/2-inch galvanized carriage bolts when you’re reinforcing beams; the mechanical grip of a through-bolt is the only thing that truly stops a sag from returning.
Build for the Next Twenty Years
Your backyard should be a sanctuary, not a project that keeps you awake during a windstorm. Whether you are correcting an old mistake or starting fresh with innovative deck design ideas that elevate your homes curb appeal, the secret is in the skeleton. Focus on the structural integrity that no one sees, and the beauty that everyone notices will take care of itself. Take the time this weekend to check your footings, tighten your bolts, and maybe finally push that sagging rafter back where it belongs. You’ve got the tools and the knowledge—now go build something that lasts. Have you noticed a suspicious dip in your main support beam lately? Tell me about your ‘sag’ story in the comments below!