
I remember the exact moment I realized my under-deck organization was a total disaster. It was a humid Tuesday, and I was trying to adjust a few wobbly railing posts that had been nagging at me for weeks. I reached into the dark, spider-web-filled abyss beneath my stairs for my favorite cordless impact driver, only to pull out a cold, slimy handful of wet leaves and a rusted-out screwdriver I thought I’d lost in 2022. It was gross, it was frustrating, and honestly, it was a little embarrassing for someone who prides themselves on a clean workshop. That moment of defeat was my lightbulb moment. I realized that the square footage under my deck shouldn’t be a graveyard for expensive equipment, but rather a high-functioning extension of my garage. Today, we are going to fix that for you too.
Stop Letting Your Tools Rot in the Dark
We spend thousands of dollars on innovative deck design ideas and high-end low-maintenance composite decking, but we often treat the space underneath like a forgotten junkyard. I used to be the king of this. My biggest mistake early on was thinking a few “weatherproof” plastic totes from a big-box store would solve everything. Fast forward six months, and those bins were cracked from temperature swings, filled with internal condensation, and hiding a family of very angry spiders. According to a study by the International Association of Certified Home Inspectors (InterNACHI), improper storage and moisture buildup in crawlspaces or under-deck areas are the primary reasons for premature metal corrosion and deck substructure rot. If you have been throwing your gardening trowels and drill bits into a pile and hoping for the best, we need to change your strategy. We are going to turn that wasted space into a dry, organized zone for your hardware.
Is Under-Deck Storage Actually a Good Idea or Just a Recipe for Rust?
Look, I get it. You are probably worried that the dampness is going to eat your tools alive regardless of what fancy shelf you build. I felt that same skepticism. However, the reality is that the area under your deck is prime real estate, especially if you have an elevated structure. By implementing the right drainage and ventilation, we can create a “tool zone” that keeps your gear within arm’s reach while you’re working on your pergola design or checking your railing balusters. Have you ever reached for a tool under your deck and pulled back something covered in mystery-slime or thick rust? I want to hear your horror stories. Let’s dive into the practical ways to claim that space back and ensure your small tools survive the seasons.
Stop the Rain Before You Start the Rack
The biggest hurdle for under-deck storage isn’t the space; it’s the moisture. If you don’t address the water coming through the gaps in your boards, your tools will be sitting in a vertical car wash every time it rains. Before I even think about hooks or shelves, I look at the substructure. Just like you wouldn’t build a house without a roof, you shouldn’t build a storage zone without a drainage plan. I highly recommend applying the joist tape secret for doubling your decks lifespan right at the start. This prevents water from sitting on the wood and rotting the very beams you’re about to hang your gear on. Once those joists are protected, you need to think about where that water goes. Using the 2-degree slope trick for proper deck water runoff is essential for ensuring that any under-deck ceiling system you install actually moves the water away from your tools and toward your yard.
Shield the Joists and Redirect the Drip
I learned the hard way that even a ‘dry’ space under a deck can be humid enough to kill a power tool’s battery. To combat this, I started using the drip edge hack for preventing deck rim joist rot to keep the perimeter of my storage zone bone-dry. It’s like a raincoat for your frame. If you are working with an older structure, take ten minutes to learn the best way to stain the underside of an elevated deck. Sealing that wood from below significantly cuts down on the ambient moisture that causes that ‘musty basement’ smell in your outdoor storage.
Build a Vertical Shop Where You Least Expect It
Now, let’s talk about the actual layout. I treat the space between the joists like individual ‘cabinets.’ Instead of a big messy box on the ground, use the height. I once spent an entire Saturday mounting high-strength magnetic tool strips directly to my joists, thinking I was a genius who had outsmarted the system. Then, a massive summer storm hit. Because I hadn’t checked my drainage, water pooled above the magnet, seeped through the screw holes, and the humidity caused the adhesive to fail. I woke up to a ‘clang-clatter’ and found fifty screwdrivers scattered in the wet dirt. It was a mess, but it taught me that mechanical fasteners and waterproof bins are the only way to go.
Keep Your Hardware Off the Dirt
To avoid the fate of my ‘magnetic screwdriver rain,’ I now use heavy-duty PVC bins that slide into tracks mounted directly to the bottom of the joists. This keeps everything at eye level and, more importantly, off the ground where moisture and pests congregate. If you are worried about the weight, remember that the structural reason your deck feels bouncy and how to fix it often comes down to joist spacing; as long as your deck is built to code, it can easily handle the weight of your hand tools and gardening supplies. While you’re under there, check your footings—seeing why your post bases are rusting and the fix can save you a massive headache later. By treating the underside of your deck with the same care you give your innovative deck design ideas, you turn a wasted mud-pit into a legitimate outdoor workshop.Everyone tells you to buy the most expensive, rubber-sealed containers you can find to keep your gear safe. I am here to tell you that in most cases, that is a complete waste of money—and potentially a death sentence for your power tools. In my experience, a ‘waterproof’ bin in a high-humidity outdoor environment often becomes a terrarium. Moisture enters the moment you open that lid on a humid afternoon, and because the seal is so tight, it never escapes. I’ve seen more rust inside ‘sealed’ boxes than on open-air shelves. Instead of trying to fight nature with plastic gaskets, I focus on airflow. The National Association of Home Builders (NAHB) points out that improper ventilation in enclosed deck spaces is a leading cause of localized humidity spikes that can exceed 90%. I prefer using ventilated PVC racks that keep items off the ground but allow the breeze to move through. Even why your pressure-treated wood still needs maintenance under composite comes down to this: moisture is inevitable, so management is better than total blockage.
Avoid the Trap of Screwing Directly Into Your House Ledger
The biggest ‘oops’ factor I see with DIY under-deck storage is people getting over-eager with their drill. They find that solid piece of wood against the house—the ledger—and start lag-bolting heavy shelving units directly into it. This is a massive mistake. Every hole you poke into that ledger without industrial-grade sealing is a highway for water to reach your home’s rim joist. I have seen beautiful innovative deck design ideas ruined because a storage shelf caused a leak that rotted the house frame from the inside out. This is why I always tell homeowners that why your deck flashing is more important than the decking itself. If you must mount storage near the house, use a freestanding frame or ensure you are using the flashing tape move that doubles the life of your joists to seal every single fastener. 
Why Does My Storage Still Feel Damp Even With a Ceiling?
If you have installed an under-deck drainage system and your tools still feel ‘soft’ or damp, you are likely dealing with ground-source moisture. Most people forget that the dirt under your deck is constantly ‘breathing’ out water vapor. Even with a perfect roof above your head, that rising vapor gets trapped against the underside of the deck boards. To solve this, I recommend a heavy-duty vapor barrier on the ground—essentially a thick pond liner covered in gravel. It’s a trick I learned while researching the 2-degree slope trick for proper deck water runoff; if you don’t stop the water from below, the water from above is only half the battle. This keeps the ambient air dry enough that your low-maintenance composite decking won’t develop underside mold.
The Structural Math Most DIYers Forget
Finally, be careful about how much weight you are hanging from those joists. While most decks are built to handle significant ‘live loads’ (like a party full of people), they aren’t always designed for several hundred pounds of hardware hanging from the center of a span. If you notice your deck starting to dip or feel ‘mushy,’ you might be over-taxing the frame. Check out the structural reason your deck feels bouncy and how to fix it before you commit to a full wall of heavy tool cabinets. Have you ever fallen into this trap of over-sealing your storage or overloading your joists? Let me know in the comments.
Keep the Rust Monsters Away from Your Gear
After you have handled the drainage and the weight limits, the real battle begins: the daily grind of humidity and dust. I keep a dedicated ‘maintenance bucket’ right by my under-deck workbench. It isn’t filled with hammers, but with solutions. My secret weapon is Boeshield T-9, a paraffin-based lubricant developed by Boeing for aircraft components. Unlike standard oils that attract sawdust and turn into a sticky sludge, this stuff dries to a clean, waxy film. I spray it on every hinge of my folding workbench and every steel surface of my clamps. If you are investing in low-maintenance composite decking for the top, don’t neglect the steel below. A quick wipe-down twice a season ensures your tools won’t seize up just when you need to adjust some railing systems for safety. I also keep a small cordless leaf blower nearby. Five seconds of blowing out the ‘shop’ area prevents the organic debris that holds moisture and starts the rot cycle. 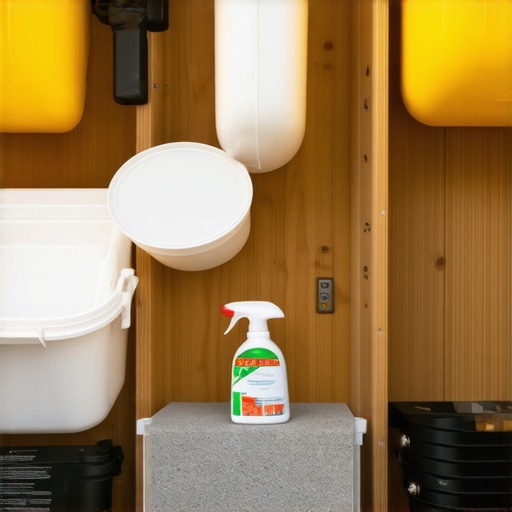
How do I keep my under-deck workshop functional for years?
Consistency is the key to longevity. Every spring, I perform a ‘hardware audit.’ I check the structural integrity of my hanging racks and look for any signs of white rot on the joists. According to the American Wood Protection Association (AWPA) Standard U1, any wood in ‘ground contact’ or high-moisture environments requires a specific level of preservative retention that most standard deck boards don’t have. This is why I always check the joist tape secret for doubling your decks lifespan; it provides a physical barrier where chemicals alone might fail over a decade of exposure. If I see any standing water or ‘sweating’ on the wood, I know my ventilation is failing, and I’ll add a small, solar-powered fan to the mix.
The Future of Smart Under-Deck Storage
I predict that within the next five years, we are going to see ‘smart’ outdoor storage integrated directly into innovative deck design ideas. We’re already seeing DIYers install Govee humidity sensors that ping their phones if the under-deck area gets too damp. Imagine a system that automatically triggers a vent fan when the dew point hits a certain threshold. Whether you are building pergola designs that turn your garden into a sanctuary or just a simple place to store your mower, the tech is catching up to the craftsmanship. For now, focus on the basics. I challenge you to go under your deck this weekend and clear out just one square yard of junk. Install one set of sliding PVC bins and see how it changes your workflow. You’ll be surprised how much faster your projects go when you aren’t hunting through a pile of leaves for a lost wrench.
Hard Lessons from the Dark Side of the Deck
I’ve spent a lot of time crawling in the dirt so you don’t have to. The biggest lightbulb moment I ever had wasn’t about the tools themselves, but about the ecosystem beneath the boards. First, airflow is your best friend. A sealed box in a damp environment isn’t a safe; it’s a slow cooker for rust. I now prioritize breathable racks over ‘waterproof’ tubs every single time. Second, the ground is alive. If you don’t use a vapor barrier, you are fighting an uphill battle against rising humidity that will eventually affect even your innovative deck design ideas that elevate your homes curb appeal. Finally, remember that your deck is a moving, breathing structure. It expands and contracts with the seasons, so whatever storage system you install needs to have a little ‘give’ built into it.
The Short List of Gear I Trust for Damp Areas
If you are serious about setting up a workspace that lasts, there are a few things I never go without. I always keep a copy of the 15-minute deck inspection every homeowner should do on my workbench to remind me to check the structure twice a year. For hardware, I strictly use stainless steel or hot-dipped galvanized fasteners for any racks or bins—never use standard interior screws. I also swear by heavy-duty 40-mil pond liners as ground vapor barriers because they are puncture-resistant and keep the ‘earth smell’ away. When planning your layout, consider how it interacts with other features like pergola designs that turn your garden into a sanctuary, ensuring your tool access doesn’t disrupt your aesthetic flow.
Stop Dreaming and Start Reclaiming Your Space
Your outdoor gear deserves better than a plastic tote and a prayer. By focusing on smart drainage, vertical storage, and consistent maintenance, you are doing more than just tidying up—you are protecting your investment and making your DIY life infinitely easier. Whether you are maintaining a complex setup or just curious about how to maximize outdoor living with low-maintenance composite decking, the area under your feet is the final frontier of home organization. Go down there, clear the cobwebs, and take back your yard. #IMAGE_PLACEHOLDER_E# Have you ever lost a tool to the ‘under-deck abyss’ and found it years later? I want to hear about your weirdest finds in the comments below!