
I remember the smell first. Damp, earthy, and expensive. I’d just spent weeks researching the perfect grey-wash composite decking, imagining the summer barbecues and the ‘oohs’ and ‘aahs’ from the neighbors. I didn’t realize that underneath that $80-a-plank beauty, my house was slowly drinking every rainstorm. I made the classic rookie mistake: I thought the pretty stuff was what mattered. I ignored the flashing. Three years later, I wasn’t hosting a party; I was prying off expensive boards to replace a structural beam that felt like wet bread. It was a $5,000 lesson in physics and humility. Today, I want to make sure you never have to smell that rot on your own property. We are going to dive into the one structural element that actually determines if your deck lasts thirty years or five.
The Fifty-Dollar Part That Saves Your Entire Investment
Putting all your budget into the surface is like buying a Ferrari and never changing the oil. You see, the decking is just the skin. The flashing—that thin, unassuming strip of metal or vinyl—is the immune system. When I built my first DIY project, I focused so much on deck design strategies that I treated flashing as an afterthought. I figured a few extra tubes of caulk would do the trick. I was wrong. Water is patient. It finds the gap between your deck and your house, sits there, and eats your rim joist for breakfast. To avoid this, you need to master the drip edge hack and ensure water is directed away from the house. According to the International Association of Certified Home Inspectors, the ledger board connection is the most common point of failure in deck collapses, almost always due to moisture-induced decay.
Is this ‘hidden’ step just extra work for nothing?
Some of you might be thinking that modern treated lumber can handle a little moisture. That’s a dangerous gamble. Even if you use the flashing tape move on your joists, the ledger—where the deck meets your home’s siding—remains the highest-risk zone. If you skip proper Z-flashing here, you aren’t just risking your deck; you’re risking the structural integrity of your house’s wall. Have you ever noticed a soft spot or a strange bounce on a deck that otherwise looks brand new? Let me know in the comments, because that’s usually the first warning sign that the ‘invisible’ parts are failing. We’re about to break down exactly how to seal this up so your composite decking longevity isn’t cut short by a rotten frame.
Apply a waterproof shield to every joist
To get this right, you start with the skeleton. Think of your joists as the ribs of your outdoor living space. Even though you are likely using pressure-treated lumber, that chemical treatment only goes so deep. When you drive a screw through a composite decking board into the joist, you are creating a tiny straw for water to enter the wood’s core. This is where the joist tape secret for doubling your decks lifespan comes into play. I remember building a 12×20 deck for a client during a particularly swampy spring. I spent six hours just applying butyl tape to every single joist, making sure it overhung the edges slightly. The client thought I was overcharging for ‘fancy stickers.’ Two years later, a main water line burst near the foundation, soaking the deck frame for a week. When I went back to inspect it, the joists were bone dry under the tape while the neighbors’ untreated frames were already showing signs of fungal bloom. You are essentially creating a waterproof cap for every piece of lumber. This is vital because why pressure-treated wood still needs maintenance under composite is a reality most homeowners ignore until the boards start to sag. 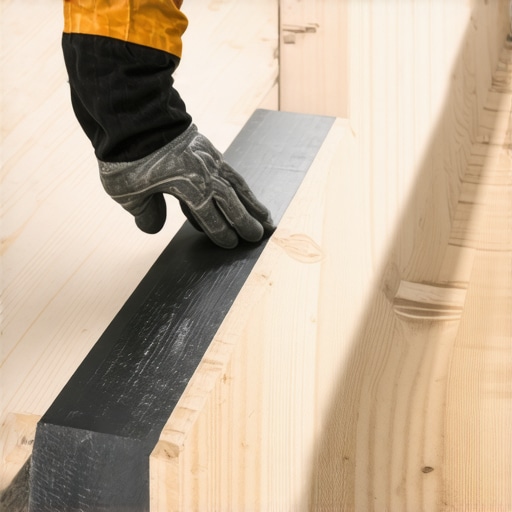
Lock down the ledger so it never pulls away
The ledger board is the most critical point of failure. If water gets behind it, the wood will eventually turn to mulch, and the bolts will pull right out of your house wall. You need to use high-quality Z-flashing that tucks under your house wrap and over the top of the ledger. If you are dealing with a masonry exterior, don’t just wing it; use the ledger bolt hack for brick veneer houses to ensure a gap-free, structural connection. I always double-check the slope here as well. Using the 2-degree slope trick for proper deck water runoff ensures that any moisture hitting that ledger area is immediately pulled away by gravity rather than pooling against your siding.
Stop the bounce and keep the frame square
A deck that lasts thirty years should feel like a concrete slab, not a trampoline. Once your protection layers are in place, focus on the structural math. Use the 3-4-5 rule for squaring your deck frame every time before you tighten a single bolt. If the frame isn’t square, your decking gaps will look like a staircase by the time you reach the outer rim. To eliminate that annoying vibration when people walk, implement the simple blocking move that stops your deck from shaking when you walk. By installing solid wood blocks between the joists in a staggered pattern, you transfer the load across the entire frame. This rigidity is especially important when you finally move on to the finish work and need to how to select the perfect railing system for every deck, as a shaky frame will eventually cause your railing posts to loosen and rattle.
Why ‘No Maintenance’ is a Dangerous Myth
Everyone tells you that once you switch to low maintenance composite decking, your work is done. In my experience, that’s exactly when the real technical challenges begin. Most contractors treat composite like wood, but it’s actually a thermal engine. While wood shrinks across its grain, composite expands and contracts linearly—along its length. I’ve seen twenty-thousand-dollar decks look like a roller coaster because the installer didn’t realize why your composite decking is expanding more than the manual says. If you live in a climate with 40-degree temperature swings, those boards are moving more than you think.
How much space does a board actually need to breathe?
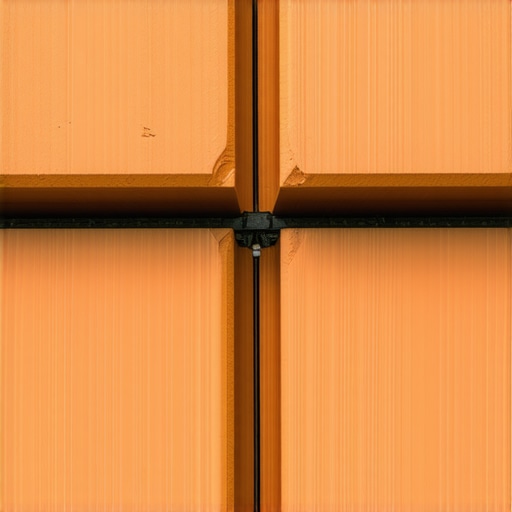
The trap most DIYers fall into is the ‘tight miter’ obsession. We all want those seamless corners, but without the pvc glue trick for gap-free composite miters, the summer sun will turn your beautiful joins into a buckled mess. According to the North American Deck and Railing Association (NADRA), thermal movement is one of the most underestimated forces in deck failure, often leading to why your hidden fasteners are popping up in heat. You have to strictly follow the expansion gap rule that stops boards from buckling to allow the material to migrate safely. Have you ever fallen into this trap? Let me know in the comments.
Does your joist spacing match your lifestyle?
Here is another nuance people miss: the surface determines the skeleton. If you’re planning on adding heavy ceramic pots or a high-end railing system, standard 16-inch centers might not cut it. I always recommend checking the joist spacing secret for decks with heavy ceramic planters before you lay the first board. If the frame is too flexible, those ‘indestructible’ composite boards will eventually develop a permanent sag that no amount of cleaning can fix. Similarly, when adding shade, I often suggest the ledger-free pergola why freestanding is often better to avoid putting rotational torque on your house’s rim joist. It’s about thinking three steps ahead of the weather and the weight to ensure your composite decking secrets for longevity actually hold up over time.
I’ve learned that the difference between a contractor and a craftsman isn’t just the quality of the wood—it’s the precision of the prep. Before I even think about ordering a pallet of boards, I live in a virtual world. I’m convinced that why you need a 3d model before buying a single deck board is the most underrated advice in the industry. I personally use SketchUp with specific plugins to calculate every cut. Seeing the clash between a stair stringer and a window well on a screen is free; seeing it after you’ve poured footings is a nightmare. This level of planning allows you to move from generic builds to innovative deck design ideas for 2025 that include integrated lighting and multi-level zones.
Precision tools that changed my workflow
For the build itself, I’ve ditched the old-school bubble level for a rotary laser. When you are trying to master the string line secret for perfectly level railing runs, having a laser line that doesn’t sag under its own weight is a game-changer. I also swear by a dedicated hidden fastener tool. It ensures that every board is spaced perfectly for that expansion gap we talked about, without me having to fumble with plastic spacers every six inches. If you are doing your own railings, don’t just ‘eyeball’ the height; use a jig to ensure your custom railing systems are code-compliant and rock-solid from day one.

How do I maintain my composite deck over time?
Maintenance is where most people get lazy, and it’s where your investment either matures or dies. The first rule: why you should never use bleach on your composite deck is because it can actually break down the UV inhibitors in the plastic capping, leading to premature fading. I recommend a simple pH-neutral soap and a soft-bristle brush twice a year. If you live in a cold climate, you need to be careful with the hardware you use for clearing the paths. I’ve seen shovel blades gouge deep into boards, which is why I always share the best way to handle snow removal on composite decks: use a plastic shovel and always push parallel to the grain. According to the Simpson Strong-Tie Deck Connection and Fastening Guide, checking your lateral load connectors annually is vital because the movement of the house and the deck can cause mechanical fasteners to loosen over time.
The future of outdoor living is getting smarter
Looking ahead, I see a massive shift toward ‘Smart Decks.’ We are moving beyond just pretty boards into systems that include built-in moisture sensors under the fascia and solar-integrated pergola trends that adjust their louvers based on the sun’s position. The technology is catching up to our desire for a truly effortless outdoor room. If you want to keep your deck in top shape right now, I challenge you to perform the 15 minute deck inspection every homeowner should do this weekend. Focus specifically on your post bases—if you see even a hint of orange, check out why your post bases are rusting and the fix before a cosmetic issue becomes a structural crisis.
The Harsh Truths I Learned While Tearing Up Rotten Joists
I’ve spent thousands of hours on jobsites, and if there is one thing I’ve learned, it’s that the most expensive board on the market can’t save a poorly planned frame. My lightbulb moment came when I realized that a deck isn’t a static object; it is a living, breathing structure that fights the elements every day. First, never underestimate the power of airflow. If you wrap your deck too tight with skirting without proper ventilation, you’re creating a sauna that will rot your substructure from the inside out. Second, trust the math over your eyes—always use a laser to verify your levels because a quarter-inch dip is where the water pools and the mold begins. Finally, remember that composite decking secrets aren’t about the plastic; they are about how you manage the wood underneath it.
The Gear That Actually Earned a Permanent Spot in My Truck
When you are moving from a standard build to high-end deck design strategies, your toolkit needs to evolve. I personally swear by the Stabila Rotary Laser; it’s the only way to ensure your beam heights are perfect across a twenty-foot span. For the finish work, I never start a project without a Camo Marksman Pro jig. It guarantees that perfect expansion gap we discussed while keeping your fasteners completely invisible. For those looking to add shade, I always point people toward the Simpson Strong-Tie Pergola Planner software before they look for pergola design inspiration. It handles the structural load calculations that most DIYers (and some pros) tend to ignore, ensuring your structure won’t lean after the first heavy snow. These tools are the difference between a deck that looks good for a season and one that remains a masterpiece for a generation.
#IMAGE_PLACEHOLDER_E#
Your Backyard Deserves a Foundation as Strong as Your Vision
Building a deck is more than just a home improvement project; it’s about creating a space where memories are actually made. Whether you are installing a sleek railing system to capture a sunset view or meticulously gapping your boards for thermal expansion, every small detail contributes to a legacy of quality. Don’t be intimidated by the technicality of the process. Take it one joist, one flash, and one board at a time. Your future self—the one sitting on that deck five years from now with a cold drink and zero repair bills—will thank you for the extra effort you put in today. If you find yourself stuck on a specific structural detail or need a hand bringing your vision to life, feel free to reach out through our contact page. We are here to help you get it right the first time.
Have you ever run into an unexpected issue with board warping or joist rot on an old project? Let me know in the comments below, I’d love to help you troubleshoot it.