
I stood there with a heavy impact driver in my sweaty palm, looking at the beautiful red brick of my home and feeling like an absolute fraud. I’d spent weeks dreaming of a wrap-around porch, but every time I looked at those bricks, I saw a ticking time bomb. You see, a few years prior, I’d helped a buddy bolt a ledger directly into his brick siding with simple expansion anchors. Three seasons later, we found a crack in the mortar wide enough to fit a credit card, and the whole deck was pulling away. It was a terrifying wake-up call. Brick veneer isn’t structural. It’s basically a heavy curtain. If you treat it like a foundation, you’re asking for a disaster. Today, I’m going to show you exactly how to bypass that brittle exterior and lock your deck into the actual bones of your home.
Stop Bolting Your Deck Directly to the Brick
The biggest mistake I ever made was assuming that because a brick feels solid, it can hold up a thousand-pound deck frame. It can’t. In fact, the International Association of Certified Home Inspectors explicitly states that ledger boards should never be supported by brick or stone veneer because the veneer is not designed to support lateral or vertical loads. That realization changed everything for me. I needed a way to bypass the skin and get to the structural rim joist. This is where the ledger bolt hack comes in. We’re going to talk about using specialized tension ties and structural spacers that transfer the weight to the actual house frame, keeping your brick pristine and your family safe. Before you start drilling holes, I always recommend doing a 10-minute flashlight test for finding hidden ledger rot on any existing structures to see what you’re up against. Using the right hardware isn’t just about code; it’s about sleeping at night when a summer storm hits.
Will This Hack Actually Damage My Home’s Integrity?
The fear is real. You don’t want to create a path for water to get behind that brick and rot out your framing. I learned the hard way that skipping the proper flashing is a recipe for a five-figure repair bill later. But once you master the flashing tape move that doubles the life of your joists, you’ll realize that a solid, sealed connection is actually the best way to protect your home. If the idea of drilling through your brick still makes your stomach churn, you might want to look into a ledger-free pergola or a freestanding deck design instead. But if you’re set on that attached look, we’re going to do it the right way today. Have you ever noticed your current deck pulling away from the house, even just a fraction of an inch? If so, you need to pay close attention to the structural spacers we’re about to discuss.
Find the Rim Joist Before You Drill Anything
I learned the hard way that you can’t just eyeball the height of your ledger from the outside. I once drilled a pilot hole into a kitchen island because I miscalculated the floor joist height relative to the exterior. To do this right, go into your basement or crawlspace. Measure down from the top of the foundation wall to the center of your rim joist. Transfer that measurement to the exterior brick. You want your bolts to bite into the thickest part of that rim joist, not the subfloor or the sill plate. If you miss, you’re just creating an entry point for termites. Getting this alignment right is the first step in executing any innovative deck design ideas for 2025.
Bridge the Gap with Structural Spacers
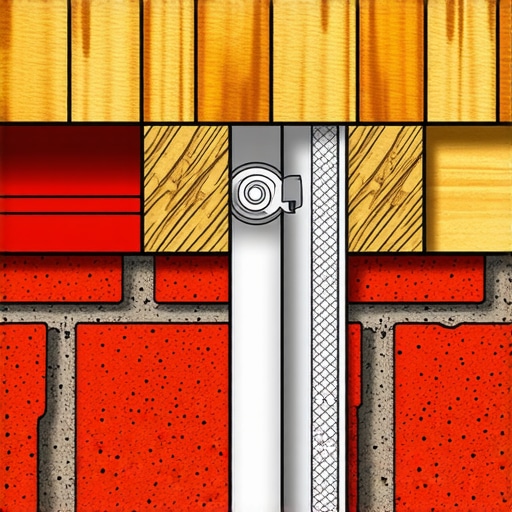
Think of your brick veneer like a sheet of glass. If you tighten a heavy bolt directly against it, the pressure will eventually crack the mortar or the bricks themselves. You need structural spacers—essentially specialized metal tubes that sit in a hole bored through the brick—which allow the bolt to tighten the ledger directly against the wood house frame. The brick is just along for the ride and carries no weight. I remember the first time I used these on a job in a windy valley; the deck felt remarkably stiffer immediately. It eliminated that slight sway that often leads to the structural reason your deck feels bouncy. You’ll need a diamond-tipped hole saw to get through the brick cleanly. Take it slow; if you rush, you’ll blow out the back of the brick and lose your tight seal.
Seal the Connection with the Flash and Tape Method
Once those holes are drilled and the spacers are in, water becomes your primary enemy. Gravity wants to pull rain down the brick, behind your ledger, and straight into your rim joist. I always use the flash and tape method for protecting deck joists to create a multi-layered defense. Start by applying a high-quality flashing tape over the house wrap where the ledger will sit. Then, use a Z-flashing that tucks under the siding and over the top of the ledger. I once skipped the tape on a small landing and three years later, I could poke a screwdriver through the rotting rim joist. Never again. If you’re also adding a sanctuary-style pergola, apply these same sealing principles to the support posts to ensure the wood remains dry and structural.
Why Lateral Load Connections are Non-Negotiable
Gravity isn’t the only force trying to pull your deck down. Lateral loads—the force of people walking, dancing, or wind blowing—want to pull the deck away from the house horizontally. Modern building codes require tension ties. These are long threaded rods that go from your deck joists, through the ledger and brick, and connect to a joist inside your house. It’s like a structural hug for your home. Without them, even the best low-maintenance composite decking won’t save the structure if the frame detaches from the wall. I’ve seen decks where the owner used a double joist trick for borders but ignored the tension ties, and the whole thing eventually skewed four inches out of square. Take the extra hour to install the ties; it is the difference between a lifetime deck and a dangerous liability.
I stood there with a heavy impact driver in my sweaty palm, looking at the beautiful red brick of my home and feeling like an absolute fraud. I’d spent weeks dreaming of a wrap-around porch, but every time I looked at those bricks, I saw a ticking time bomb. You see, a few years prior, I’d helped a buddy bolt a ledger directly into his brick siding with simple expansion anchors. Three seasons later, we found a crack in the mortar wide enough to fit a credit card, and the whole deck was pulling away. It was a terrifying wake-up call. Brick veneer isn’t structural. It’s basically a heavy curtain. If you treat it like a foundation, you’re asking for a disaster. Today, I’m going to show you exactly how to bypass that brittle exterior and lock your deck into the actual bones of your home.
Stop Bolting Your Deck Directly to the Brick
The biggest mistake I ever made was assuming that because a brick feels solid, it can hold up a thousand-pound deck frame. It can’t. In fact, the International Association of Certified Home Inspectors explicitly states that ledger boards should never be supported by brick or stone veneer because the veneer is not designed to support lateral or vertical loads. That realization changed everything for me. I needed a way to bypass the skin and get to the structural rim joist. This is where the ledger bolt hack comes in. We’re going to talk about using specialized tension ties and structural spacers that transfer the weight to the actual house frame, keeping your brick pristine and your family safe. Before you start drilling holes, I always recommend doing a 10-minute flashlight test for finding hidden ledger rot on any existing structures to see what you’re up against. Using the right hardware isn’t just about code; it’s about sleeping at night when a summer storm hits.
Will This Hack Actually Damage My Home’s Integrity?
The fear is real. You don’t want to create a path for water to get behind that brick and rot out your framing. I learned the hard way that skipping the proper flashing is a recipe for a five-figure repair bill later. But once you master the flashing tape move that doubles the life of your joists, you’ll realize that a solid, sealed connection is actually the best way to protect your home. If the idea of drilling through your brick still makes your stomach churn, you might want to look into a ledger-free pergola or a freestanding deck design instead. But if you’re set on that attached look, we’re going to do it the right way today. Have you ever noticed your current deck pulling away from the house, even just a fraction of an inch? If so, you need to pay close attention to the structural spacers we’re about to discuss.
Find the Rim Joist Before You Drill Anything
I learned the hard way that you can’t just eyeball the height of your ledger from the outside. I once drilled a pilot hole into a kitchen island because I miscalculated the floor joist height relative to the exterior. To do this right, go into your basement or crawlspace. Measure down from the top of the foundation wall to the center of your rim joist. Transfer that measurement to the exterior brick. You want your bolts to bite into the thickest part of that rim joist, not the subfloor or the sill plate. If you miss, you’re just creating an entry point for termites. Getting this alignment right is the first step in executing any innovative deck design ideas for 2025.
Bridge the Gap with Structural Spacers
Think of your brick veneer like a sheet of glass. If you tighten a heavy bolt directly against it, the pressure will eventually crack the mortar or the bricks themselves. You need structural spacers—essentially specialized metal tubes that sit in a hole bored through the brick—which allow the bolt to tighten the ledger directly against the wood house frame. The brick is just along for the ride and carries no weight. I remember the first time I used these on a job in a windy valley; the deck felt remarkably stiffer immediately. It eliminated that slight sway that often leads to the structural reason your deck feels bouncy. You’ll need a diamond-tipped hole saw to get through the brick cleanly. Take it slow; if you rush, you’ll blow out the back of the brick and lose your tight seal.

Seal the Connection with the Flash and Tape Method
Once those holes are drilled and the spacers are in, water becomes your primary enemy. Gravity wants to pull rain down the brick, behind your ledger, and straight into your rim joist. I always use the flash and tape method for protecting deck joists to create a multi-layered defense. Start by applying a high-quality flashing tape over the house wrap where the ledger will sit. Then, use a Z-flashing that tucks under the siding and over the top of the ledger. I once skipped the tape on a small landing and three years later, I could poke a screwdriver through the rotting rim joist. Never again. If you’re also adding a sanctuary-style pergola, apply these same sealing principles to the support posts to ensure the wood remains dry and structural.
Why Lateral Load Connections are Non-Negotiable
Gravity isn’t the only force trying to pull your deck down. Lateral loads—the force of people walking, dancing, or wind blowing—want to pull the deck away from the house horizontally. Modern building codes require tension ties. These are long threaded rods that go from your deck joists, through the ledger and brick, and connect to a joist inside your house. It’s like a structural hug for your home. Without them, even the best low-maintenance composite decking won’t save the structure if the frame detaches from the wall. I’ve seen decks where the owner used a double joist trick for borders but ignored the tension ties, and the whole thing eventually skewed four inches out of square. Take the extra hour to install the ties; it is the difference between a lifetime deck and a dangerous liability.
Stop Believing the Maintenance Free Composite Myth
Let’s dig deeper into the most common nuance I see missed: the substructure trap. Everyone tells you that composite is maintenance-free, but here is the contrarian truth—your deck is only as maintenance-free as the pressure-treated wood underneath it. I’ve seen homeowners drop $20k on premium boards only to have the frame rot out in 12 years because they didn’t realize why pressure-treated wood still needs maintenance under composite. When you switch to composite, you actually increase the risk of moisture being trapped between the board and the joist. If you don’t use joist tape, you’re essentially wrapping your frame in a plastic blanket that holds water. The North American Deck and Railing Association (NADRA) estimates that millions of decks in the US are past their useful life, often because the surface looks fine while the skeleton is crumbling.
Why Does My New Deck Feel Like a Trampoline?
If you’ve followed the standard 16-inch on-center spacing for your joists and your composite deck still feels springy, you’ve fallen into a common engineering trap. Composite material is significantly more flexible than natural wood. While 16 inches is code-minimum, true pros know that composite decking secrets for a high-end feel always involve 12-inch joist spacing. This extra support eliminates the ‘bounce’ and prevents the dreaded ‘barefoot test’ failure where the boards feel soft underfoot in the summer heat. Additionally, watch out for the 3-inch screw mistake that ruins composite joists; using fasteners that are too aggressive can split the wood grain of your frame, leading to premature failure and ‘popping’ fasteners during seasonal shifts.
The Hidden Bracket Trick for Solid Railings
The biggest ‘oops’ factor in deck building is the railing post. Most DIYers simply lag-bolt the post to the rim joist and call it a day. Within two seasons, that post will wiggle. To get a truly professional, rock-solid feel, you need to use the hidden bracket trick for perfectly rigid railing posts. This involves internal blocking and structural tension brackets that tie the post into the joist system, not just the perimeter board. It’s the difference between a railing that ‘looks’ safe and one that can actually stop a fall. Have you ever fallen into the trap of focusing only on the pretty boards while ignoring the skeleton? Let me know in the comments below.
Get These Specific Tools Before You Ruin a Board
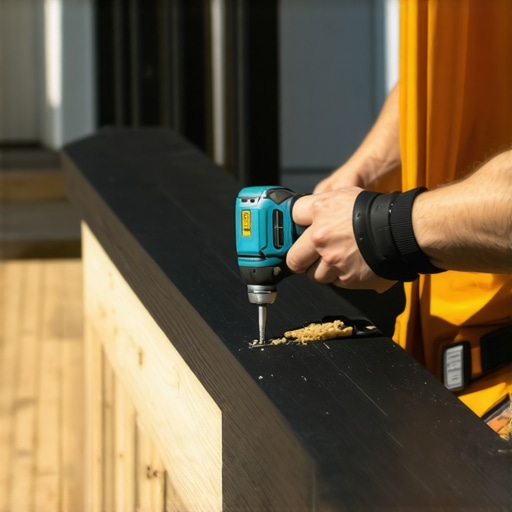
I’ve wasted more money on ruined composite boards than I’d like to admit because I thought my standard wood-working tools were ‘good enough.’ For instance, if you’re installing a complex railing system, stop trying to eyeball the spacing. I always use a dedicated drill guide hack for centered baluster holes. It’s a ten-dollar plastic jig that prevents your bit from walking across the sleek surface of an aluminum or composite rail. Another non-negotiable is a high-quality impact driver with adjustable torque settings. When you’re dealing with the 3-inch screw mistake that ruins composite joists, you need to feel exactly when the head seats. If you overdrive a screw into a composite board, you create a ‘mushroom’ of plastic that looks amateur and traps water. I also highly recommend looking at technical manuals from the American Wood Council, specifically their DCA 6 guide, which provides the gold standard for deck construction details that many local codes haven’t even caught up to yet.
How do I maintain my composite deck and railing over time?
People often ask me if they can just set it and forget it. The short answer is no. While you don’t have to sand and stain, you do have to manage the environment. I’ve seen beautiful decks ruined because the owner thought they could blast away pollen with a high-PSI machine. I will tell you right now: why you should never use a pressure washer on composite is because it opens the ‘pores’ of the plastic-wood blend, inviting mold to live permanently inside the board. Instead, use a soft-bristle brush and a specialized composite cleaner twice a year. When winter hits, be careful with your shovel. I’ve seen deep gouges from metal edges that can’t be sanded out. Stick to the best way to handle snow removal on composite decks, which usually involves a plastic shovel with no metal wear strip.
The Future of Outdoor Living is Smart and Modular
Looking ahead, I predict we are moving away from ‘flat’ decks and toward integrated outdoor ‘rooms.’ We are already seeing composite decking trends that incorporate low-voltage lighting and hidden heating elements directly into the boards. This is why I tell every client that why you need a 3d model before buying a single deck board is no longer optional. A 3D model allows you to visualize where your wire runs will go before you lock down the ledger. If you want to scale your project later—maybe adding a sanctuary-style pergola or a full outdoor kitchen—you need to have the structural ‘bones’ planned out from day one. I challenge you to try this: before you buy your next batch of lumber, download a basic modeling tool and ‘build’ your deck virtually. It will reveal every mistake before it costs you a dime. If you’re ready to stop guessing and start building a structure that lasts forty years, start with the substructure details we’ve covered today.
What 15 Years of Rotting Joists Taught Me About Longevity
If there is one thing I’ve learned from tearing down more decks than I’ve built, it’s that the invisible parts are the only ones that matter after a decade. I’ve seen homeowners focus entirely on the aesthetics of railing systems while their rim joists were turning into mulch. Here is what I wish I’d known from day one:
- Skeleton First, Style Second: Your substructure is a living thing. If you treat it like an afterthought, your deck will eventually reflect that neglect.
- Water Always Wins: Unless you use the flashing tape move that doubles the life of your joists, gravity and rain will eventually find a way in.
- Expansion Gaps are Non-Negotiable: Composite boards can move up to 1/4 inch depending on the sun. Give them room to breathe or they will buckle your frame.
The Gear I Grab Before Every Build
You don’t need a warehouse of tools, but you do need the right ones for a professional finish. I never start a project without referencing the AWC DCA 6 guide; it’s the structural bible that keeps your home safe and legal. For the actual labor, I swear by a dedicated impact driver with depth control to avoid the 3-inch screw mistake that ruins composite joists. Finally, if you are planning a complex layout, please use a 3d model before buying a single deck board. Seeing the structure virtually helps you catch alignment issues with your sanctuary-style pergola or stairs before they become expensive physical errors.
#IMAGE_PLACEHOLDER_E#
Turn Your Backyard Into Your Best Room
Building a deck isn’t just about adding square footage; it’s about creating a sanctuary where you actually want to spend your Saturday afternoons. Whether you’re leaning into composite decking trends or sticking with classic timber, the pride of doing it right—knowing every bolt is secure and every joist is protected—is what makes the effort worth it. With the right deck design strategies, you aren’t just building a platform; you’re building a legacy for your home. Have you ever discovered a hidden structural issue while trying to make a cosmetic upgrade? Let me know in the comments below!