
I walked out onto my brand-new deck last summer, beverage in hand, ready to bask in the glory of a job well-done. The sun had just slipped behind the tree line, and I flipped the switch on my new deck design. Suddenly, I felt like I was standing on a stage under a spotlight, while the rest of my yard was swallowed by an abyss. My beautiful maples were invisible, and the flower beds I’d spent all spring weeding were gone. It was a classic rookie moment. I realized right then that a deck doesn’t end at the railing; it’s part of a whole ecosystem.
Stop Treating Your Deck Like an Island After Dark
We often put so much heart into choosing composite decking for its durability or debating the perfect railing color that we forget about the transition from wood to grass. If your deck is glowing bright white while your garden is pitch black, you’ve created a visual wall. It feels small. It feels disconnected. My goal today is to help you bridge that gap using light as your paintbrush. We’re going to talk about layers, color temperatures, and how to avoid the airport runway look that plagues so many DIY projects. I’ll admit, early in my journey, I made a massive mistake. I bought high-output floodlights because I thought more light equals more safety. Boy, was I wrong. Not only did it blind my neighbors, but it also made the deck feel cold and uninviting. The International Dark-Sky Association points out that improperly shielded outdoor lighting can actually create deeper shadows, making it harder to see where you’re walking. Today, we’re fixing that by matching your deck’s glow to the natural rhythm of your landscape.
Is All This Wiring Really Worth the Effort?
You might be sitting there thinking, “I just want to see my burger on the grill, do I really need a master plan?” I get it. Wiring can be a headache, and nobody wants to deal with transformers that keep blowing or cables snaking across the lawn. But here’s the truth: when you align the lighting on your pergola with the uplighting on your prize oaks, the entire yard expands. It feels like an outdoor room rather than a platform stuck to the back of your house. Have you ever felt like your backyard setup looks amazing during the day but completely loses its vibe the second the sun goes down? Let me know, because I’ve been there, and it’s usually just a few small tweaks away from being fixed. We’re going to walk through the exact steps to sync your zones so your property looks like a cohesive, high-end resort without the high-end price tag.
Map Your Light Zones Before You Dig
To get that resort-style flow, you need to stop thinking about your deck as a single square and start seeing it as three distinct zones: the task zone, the perimeter, and the transition. The task zone is where you grill or eat—this needs clear, focused light. The perimeter is your railing system, which should be subtly marked, not flooded. Finally, the transition is the space where your low-maintenance composite decking meets the grass. Start by walking your yard at dusk with a high-powered flashlight. Shine it on your trees, then back toward the deck. This helps you identify which features actually deserve to be highlighted. Most people make the mistake of lighting up flat grass, which just looks like a green void. Focus your landscape lights on textures—the bark of an oak or the stone of a retaining wall—to create depth that complements the deck’s glow.
Hide the Clutter Inside Your Rafters and Posts
Nothing kills the vibe of a high-end pergola faster than a tangled mess of black wires zip-tied to the beams. If you are building new, you have the ultimate advantage: you can fish your wires through the hollow centers of your posts or carve small channels into the tops of rafters before they are installed. For existing structures, I recommend the best way to hide electrical wires in your pergola rafters, which involves using color-matched wire molding or tucking cables into the natural shadows of the wood grain. Think of your wiring like the plumbing in your house; it should do all the hard work while remaining completely invisible to the guests. 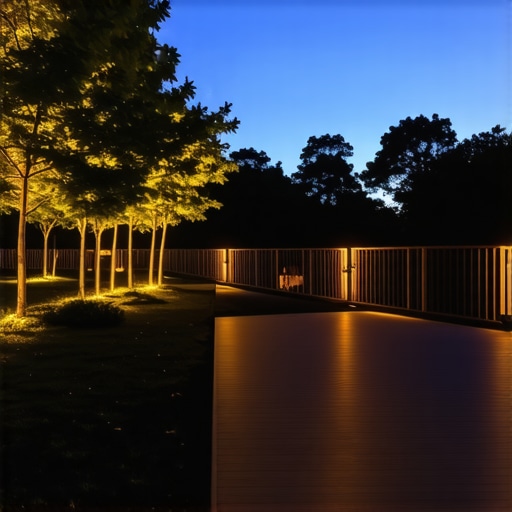
Stick to Warm Tones for a Natural Vibe
Consistency is the secret sauce. You want to aim for a color temperature of around 2700K to 3000K across all your fixtures. This is often called ‘warm white.’ I once worked on a project where the homeowner bought solar-powered stake lights for the garden that were a cool, bluish 5000K, while their deck had warm incandescent-style LEDs. At night, it looked like two different properties were fighting for dominance. When your light temperatures match, the eye doesn’t have to constantly adjust as you move from the deck to the fire pit. This creates a psychological sense of safety and calm. If you find your lights flickering or losing brightness at the end of a long run, it is likely a sign that your deck lighting transformer is undersized for the load. Always go for a transformer with 20% more capacity than your total wattage to avoid burnout.
Use the Every-Other-Step Rule for Safety
I remember my first big lighting project on my own home. I was so worried about people tripping that I installed high-intensity puck lights on every single riser of my deck stairs. Walking up those stairs felt like stepping onto a movie set under a spotlight—it was blinding and frankly, quite embarrassing. I eventually learned that less is more. For most residential stairs, lighting every second or third step is plenty to ensure safety without creating a ‘runway’ effect. Use a soft ‘eyebrow’ or hooded fixture that directs the light downward onto the tread, rather than outward into the eyes of the person walking up. This simple shift ensures that the light does its job—guiding the foot—without stealing the show from the rest of your landscape.
While the ‘every-other-step’ rule keeps you from tripping in the dark, there is a much bigger issue that most homeowners—and even some pros—completely ignore until it is too late. We have been told for years that choosing high-end materials means the deck will last forever. But here is the contrarian truth: your expensive boards are only as good as the skeleton underneath them. I have seen countless projects where the homeowner spent a fortune on 25-year-warranty low-maintenance composite decking, only to have the entire structure fail in ten years because the pressure-treated frame rotted away from the inside out.
Don’t Let Your Joists Rot While Your Boards Stay Shiny
The biggest ‘oops’ factor in modern deck design is the moisture trap. When you screw or clip a composite board directly onto a wooden joist, water gets trapped in that tight seam. It never dries out. According to experts at the USDA Forest Products Laboratory, constant moisture contact is the primary driver of fungal decay in structural lumber, even if it is chemically treated. This is why I always insist on the joist tape secret for doubling your deck’s lifespan. It creates a waterproof barrier that prevents the ‘black heart’ rot that eats your frame while the surface looks perfect. If you are building for the long haul, you have to realize that pressure-treated wood still needs maintenance under composite layers to keep the structure sound.
#IMAGE_PLACE_HOLDER_C#
Why Do Those Beautiful Mitered Corners Always Open Up?
If you have ever looked at a high-end deck and noticed the corners look like a gaping mouth, you have witnessed the ‘miter trap.’ Most people assume that if you cut a perfect 45-degree angle, it will stay that way. It won’t. Composite materials are essentially giant thermometers; they expand and contract significantly with the seasons. In fact, many DIYers are shocked to find why your composite decking is expanding more than the manual says during a record-breaking summer. For this reason, I frequently argue that mitered corners are a mistake for high-traffic decks or areas with extreme temperature swings. A simple ‘picture frame’ border with butt joints is much more forgiving and looks cleaner five years down the road. It’s these small, technical shifts that separate a ‘nice deck’ from a legacy structure. Have you ever fallen into this trap of prioritizing looks over physics? Let me know in the comments, because I’ve definitely learned these lessons the hard way.
The Secret to Rails That Never Shake
Finally, let’s talk about the ‘wiggle.’ Nothing makes a deck feel cheaper than a railing that moves when you lean on it. Most builders just bolt the post to the rim joist and call it a day, but that is a recipe for a wobbly system. Whether you are installing a railing system for safety and style or a custom pergola, the connection point is everything. I always use internal structural blocking—essentially extra wood inside the frame—to lock that post into the entire deck’s mass. When you combine that with the tensioner secret for tight cable railings, you get a perimeter that feels as solid as a concrete wall. It is the difference between a railing that just meets code and one that inspires absolute confidence when you are hosting a party. Don’t settle for the bare minimum; the magic is always in the hidden hardware.
I’ve spent too many hours squinting at paper sketches only to realize halfway through a build that the stairs were in the wrong place. That’s why I now swear by one rule: why you need a 3d model before buying a single deck board. Using software like SketchUp or professional-grade design tools isn’t just for architects anymore; it’s for anyone who doesn’t want to waste $2,000 on boards that don’t fit. Seeing how the shadows of your pergola will actually fall across your dining table at 6 PM is a game-changer. It takes the guesswork out of deck design and ensures your flow works before you ever pick up a saw.
How do I maintain my outdoor living space without losing my weekends?
The biggest myth about ‘low-maintenance’ materials is that they are ‘no-maintenance.’ If you want your yard to stay looking like a resort, you need a system. First, stop the scrub brush madness. I tell everyone: why you should never use bleach on your composite deck. Bleach is an oxidizer that can actually break down the pigments in your boards, leading to a washed-out look. Instead, use a pH-neutral deck soap and a soft-bristled brush once every six months to clear away pollen and organic debris. If you have glass panels, you know the struggle of water spots. I found that why your glass railing always looks dirty and the fix usually comes down to applying a hydrophobic coating—the same kind you use on your car windshield—to make the rain bead right off. These composite decking secrets and longevity tips aren’t hard, they just require a bit of foresight.
The Specialized Tools That Actually Save Your Back
When I’m on a job site, there are three tools I never leave in the truck. The first is a high-torque impact driver. If you are still using a standard drill for deck screws, you are inviting wrist fatigue and stripped heads. The second is a dedicated hidden fastener tool. Using one is the secret to making composite decking look like real wood because it eliminates those unsightly surface screws that scream ‘DIY.’ Finally, get yourself a laser level. Trying to square a 20-foot frame with a 4-foot bubble level is a recipe for a slanted deck. The American Wood Council’s DCA 6 guidelines emphasize the importance of precise structural connections, and you just can’t get that precision by eyeballing it.  Looking ahead, I predict we’re going to see a massive shift toward ‘smart decks’ where sensors built into the joists can alert you to moisture buildup or structural shifts before they become dangerous. For now, focus on the basics. I challenge you to go out this weekend and try the ‘water bead test’ on your boards—if the water doesn’t bead and instead soaks in, it is time for a deep clean and a fresh seal.
Hard Lessons in Deck Design That Saved My Sanity
Looking back at my first few builds, I realize I spent way too much time worrying about the ‘jewelry’ and not enough about the ‘bones.’ One of the biggest lessons I learned is that a beautiful design is worthless if it shakes when you walk on it. I’ve seen homeowners skip the simple blocking moves that stop a deck from shaking, only to deal with a wobbly perimeter for the next decade. If you want a result that feels high-end, you have to prioritize the invisible details. Another lightbulb moment was realizing that how to select the perfect railing system for every deck isn’t just about the color—it’s about how that railing interacts with your specific view and wind patterns. Finally, remember that your deck is a living entity; it expands, it breathes, and it needs a bit of grace in the joints to survive the seasons without warping.
What Every Serious Builder Needs in Their Pocket
I don’t just rely on my gut anymore; I rely on tools that remove the ‘maybe.’ If you’re diving into a complex project, start with these three resources. First, check out the pergola trends crafting shade elegance in your outdoor space to see how modern hardware and design aesthetics can simplify your life. Second, get a decent 3D modeling app; seeing your shadow lines and traffic flow before you cut wood is non-negotiable. Third, always have a copy of the DCA 6 Prescriptive Residential Wood Deck Construction Guide—it is the industry bible for ensuring your structure is safe. These aren’t just suggestions; they are the safeguards that keep your weekend project from becoming a liability.
Stop Planning and Start Building Your Oasis
Building an outdoor space is one of the most rewarding things you can do for your home. It’s where your kids will run around, where you’ll host your best summer BBQs, and where you’ll finally find a moment of peace after a long week. Don’t let the technical details paralyze you. Whether you’re looking into ways to elevate your backyard innovative deck design ideas for 2025 or just fixing a few loose boards, the most important step is simply getting started with a solid plan. Your future self, sitting on that deck with a cold drink, will thank you for the effort you put in today. #IMAGE_PLACEHOLDER_E# Have you ever started a project only to realize you completely forgot about the lighting until the very last second? Let me know in the comments below!