
I stood there, coffee in hand, watching fifteen thousand dollars worth of composite decking slowly pull itself apart at the seams as the first frost of November hit. It was a gut-punch. I had spent weeks perfecting every cut, ensuring my 45-degree angles were so tight you couldn’t slide a razor blade between them. But as the temperature dropped, those miters opened up like a hungry alligator’s mouth. I realized then that I’d made a rookie mistake: I treated high-end plastic like it was old-growth cedar. Composite boards are a different beast entirely, and if you don’t account for their massive thermal expansion, your beautiful [picture frame borders](https://deckforgebuilders.com/the-double-joist-trick-for-perfectly-flush-picture-frame-borders) will eventually look like a jigsaw puzzle put together by a toddler. That morning was my lightbulb moment. I stopped relying on mechanical force and started looking into chemical bonding, which led me to the ‘PVC Glue Trick’ that changed my builds forever.
Stop Fighting Thermal Expansion and Start Fusing Your Joints
Most people think that adding more screws or heavy-duty brackets is the secret to keeping those corners tight. I made that exact mistake on my first few projects, thinking I could out-muscle the physics of plastic. I’d drive three or four screws into the miter at various angles, only to find that the material either snapped the screw heads off or wallowed out the holes over time. If you want your deck to maintain the look of [modern outdoor living trends](https://deckforgebuilders.com/composite-decking-trends-durable-solutions-for-modern-outdoor-living), you have to stop fighting the movement and start working with it. The key is to turn two boards into one single, continuous piece of material. By using a specific solvent welding technique, you create a bond that is actually stronger than the board itself. It’s the same logic behind [composite decking secrets for longevity](https://deckforgebuilders.com/composite-decking-secrets-longevity-tips-for-a-lasting-deck): you have to protect the integrity of the material before the elements get a chance to exploit the gaps. Today, I’m going to show you how to execute this bond perfectly so your miters stay locked from the hottest summer days to the dead of winter.
Does This Glue Method Actually Survive the Winter?
It’s natural to be skeptical. After all, we’ve been told for years that ‘nothing sticks to composite.’ But here is the thing: most high-quality composite decking is wrapped in a PVC-heavy cap stock. When you use the right PVC cement, you aren’t just gluing surfaces together; you are performing a solvent weld. This process chemically melts the surface layers, fusing them together at a molecular level. According to data from the American Society of Civil Engineers, a properly executed solvent weld in thermoplastic materials can achieve a tensile strength nearly identical to the base material. Have you ever walked out onto your deck in January and felt that pang of regret seeing those wide, ugly gaps in your corners? I certainly have, and it’s why I’ll never build another deck without this trick. If you’ve already mastered the [expansion gap rule that stops boards from buckling](https://deckforgebuilders.com/the-expansion-gap-rule-that-stops-boards-from-buckling), this welding technique is the final piece of the puzzle for a truly professional finish.
Get Your Angles Tighter Than You Think You Need
The biggest hurdle with composite is that it is essentially a very long, very heavy piece of plastic that wants to breathe. If you cut your miters at exactly 45 degrees on a 70-degree day, they will look perfect until the first cold snap. I’ve learned to ‘over-cut’ slightly to compensate for the board’s desire to pull away. Before you even touch the glue, ensure you are using the double joist trick for perfectly flush picture frame borders. This gives you a much larger surface area to fasten the ends of your boards, which is critical because if the subframe moves, the glue won’t save you. I once tried to skimp on the extra joist on a small landing, thinking the solvent would hold everything together. By February, the boards had pulled so hard they didn’t just gap; they actually twisted the single joist they were screwed into. Lesson learned: the glue creates the seal, but the frame provides the discipline.
Pick the Right Chemical Weapon for the Job
Not all composite is created equal. You have to identify high-quality capped decking from the cheap stuff before you start slathering on adhesive. The ‘PVC glue trick’ only works on capped composites or cellular PVC boards. If you’re working with a wood-plastic composite (WPC) that isn’t capped, the solvent won’t have any plastic to melt, and you’ll just end up with a sticky, failed mess. I prefer a medium-bodied clear PVC cement. It’s thick enough to stay where you put it but thin enough to seep into the micro-pores of the miter cut. Think of it like soldering pipes—the goal isn’t to create a layer of glue between the boards, but to melt the two faces so they become a single unit. 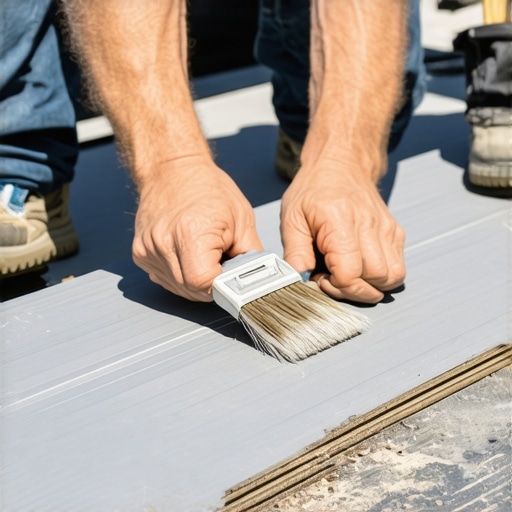
How to Weld the Corner Without Making a Mess
When you are ready to bond, cleanliness is your best friend. Even a tiny bit of sawdust from your miter saw will act as a barrier, preventing a true weld. I keep a clean rag and a bit of denatured alcohol handy to wipe the faces of the cut. Once they are clean, apply a thin, even layer of the PVC cement to both sides of the miter. You have about 30 to 60 seconds before it starts to ‘skin over,’ so work fast. When you push the boards together, you should see a tiny bead of glue squeeze out of the top. This is the moment of truth. On a project in late 2023, I got a bit overzealous and applied too much glue on a dark grey deck. The excess oozed out and partially melted the top texture of the board. I had to carefully shave it off with a razor blade once it cured. The trick is to wipe that squeeze-out immediately with a clean, dry cloth.
Pinning the Joint for Permanent Stability
Once the chemical bond is reacting, you need to lock the boards in place mechanically. This is where why your deck screws are snapping in cold weather becomes a relevant concern. Use high-quality 316-grade stainless steel trim screws to pin the miter. Drive two screws into each board about an inch back from the corner, angling them slightly toward the center of the joist. This acts like a clamp while the solvent weld cures. By combining the chemical fusion with proper mechanical fastening, you are effectively creating a solid ‘L’ shaped board at the corner. This setup resists the forces of the expansion gap rule that stops boards from buckling elsewhere on the deck, because the corners are now the strongest point of the entire perimeter. When you follow this process, you stop seeing your deck as a collection of loose parts and start seeing it as a unified, engineered structure.Most pros will tell you that hidden fasteners are the gold standard for a clean look, but I’m going to challenge that common wisdom. In my experience, why hidden fasteners can be a maintenance nightmare isn’t just about the installation time; it’s about the lack of lateral restraint. When you use clips, the board is technically floating. This allows the material to expand and contract freely along its entire length, putting immense pressure on those beautiful miters we just talked about. If you don’t ‘pin’ the boards correctly, those clips won’t stop the boards from walking away from each other over a three-year cycle. I’ve seen entire innovative deck design ideas ruined because the builder relied 100% on hidden hardware without understanding the physics of movement.
Stop Treating Composite Like It Is Just Plastic Wood
The biggest trap I see seasoned wood-builders fall into is the ‘over-fastening’ myth. With cedar or Ipe, more screws usually mean more stability. With composite, especially capped polymer versions, every hole you drill is a potential stress fracture point if not managed correctly. You have to account for the fact that why capped polymer composite stays cooler than wood-plastic also means it has a different thermal expansion coefficient. If you hard-fasten a 20-foot board at both ends without a center ‘anchor’ point, the board will eventually bow in the middle or snap the screws at the ends. This is the ‘Oops’ factor that leads to thousands in repair costs. I always tell my crew: we aren’t just building a floor; we are building a living, breathing skin for the house. 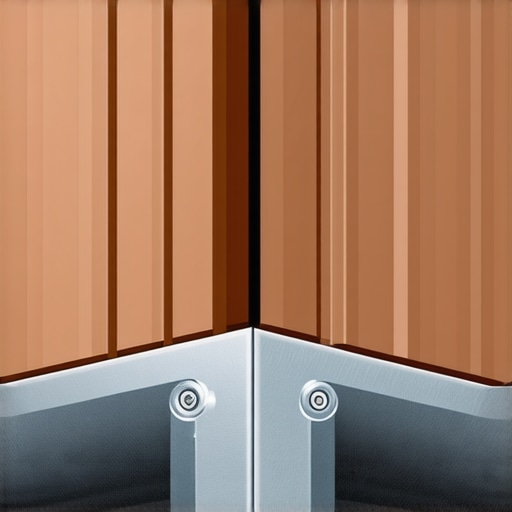
Why Does Your Deck Feel Bouncy Even With Tight Joist Spacing?
It is a question I get from homeowners who spent a fortune on high-end materials only to feel like they are walking on a trampoline. Usually, the culprit isn’t the boards—it’s the subframe interaction. If you have checked your spans and everything is to code, you might be dealing with the structural reason your deck feels bouncy and how to fix it. Most people forget that composite is much heavier than wood but has zero structural integrity of its own. It relies entirely on the joist being perfectly crowned. According to a study by the North American Deck and Railing Association (NADRA), nearly 50% of deck failures or performance issues stem from subframe degradation that was ignored during a ‘resurfacing’ project. If you are putting 25-year boards on a 10-year-old frame, you are building on a foundation of sand.
The Invisible Rot Hiding Under Your New Boards
One nuance that separates the masters from the amateurs is how they treat the top of the joists. Since composite boards trap more moisture against the wood than traditional planks, the joists stay wet longer. This is why I insist on the deck joist tape test does it actually stop rot—it absolutely does. Without that butyl barrier, your screws will eventually wallow out the wood as it softens, leading to the dreaded ‘creaking’ deck. If you want to maximize outdoor living with low-maintenance composite decking, you have to ensure the skeleton is as ‘low-maintenance’ as the skin. I once had to tear up a two-year-old deck because the builder didn’t use joist tape, and the constant expansion/contraction of the composite had literally ‘sawn’ through the top of the pressure-treated lumber. Have you ever fallen into this trap or noticed your deck boards shifting unexpectedly? Let me know in the comments.
The One Tool That Saves Your Back and Your Miters
After years of wrestling with boards that have a slight bow, I finally invested in a professional-grade deck board straightener. If you are still trying to kick boards into place with your boots or using a pry bar that leaves nasty dents in the capped edges, you are making it harder than it needs to be. I use a tool like the BoWrench because it allows me to lock the tension on a single board, freeing up both hands to drive screws or apply the solvent weld I mentioned earlier. This level of precision is exactly how you achieve those high-end architectural finishes. Sometimes, even with the best tools, you hit a stubborn spot where the friction is too much; that is when I employ the soap slippage method for pulling composite boards tight. It sounds low-tech, but a little bit of dish soap on the side of a joist can be the difference between a perfectly straight line and a visible wave in your deck surface.
How do I keep my deck looking brand new for twenty years?
The biggest threat to your investment isn’t the sun or the rain—it’s your choice of cleaning chemicals. I’ve seen homeowners destroy the UV-resistant cap of a ten-thousand-dollar deck in a single afternoon because they thought a heavy-duty bleach solution was the best way to kill mold. According to the TimberTech Technical Bulletin on Cleaning and Maintenance, high concentrations of sodium hypochlorite can actually cause the protective polymer layer to become brittle and lose its sheen over time. This is why you should never use bleach on your composite deck. Instead, I stick to pH-neutral cleaners and a soft-bristle brush. Maintenance isn’t just about cleaning, though; it’s about observation. I recommend performing the 15-minute deck inspection every homeowner should do at the start of every spring. Check the hardware, look for debris trapped in the gaps that could hold moisture, and ensure your drainage remains clear. 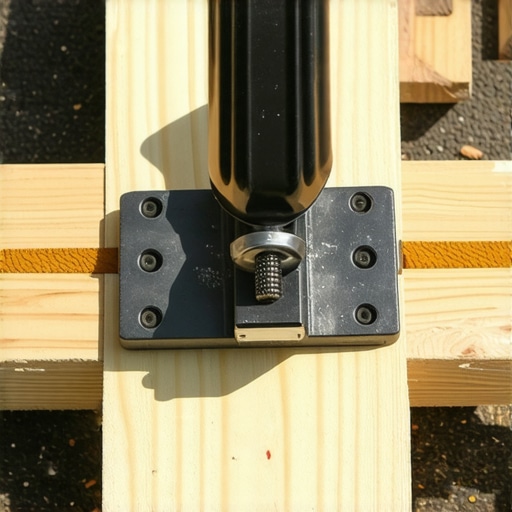
Smart Decking is the Next Big Thing
Looking ahead, I see the industry moving toward much more integrated outdoor environments. We are already seeing pergola trends crafting shade elegance in your outdoor space that involve automated louver systems and built-in sensors that close the roof when it detects moisture. In the next few years, I predict that composite materials will start incorporating better thermal dissipation technology, making even the darkest colors comfortable for bare feet in July. This evolution is why you need to elevate your backyard with innovative deck design ideas for 2025 that account for both technology and classic structural integrity. If you want a result that lasts, don’t just build for today; build for the tools and the climate of the next decade. My advice? Start using joist tape on every single build this weekend—it’s the smallest investment with the highest ROI in the business. Try it on your next corner joint and tell me you don’t see the difference in stability immediately.
Hard Truths I Learned While Watching My Deck Grow and Shrink
After years in the field, I’ve realized that the ‘perfect’ deck isn’t static; it’s a living thing. One of the biggest shifts in my mindset came when I stopped viewing gaps as a failure of my craftsmanship and started seeing them as a failure to respect the material’s physics. If you don’t account for how why wood-look composite often fails the barefoot test due to heat absorption, you’ll never get those miters to behave. I spent far too long trying to ‘pin’ boards into submission with extra screws, only to realize that a chemical weld is the only way to truly win the war against the seasons. Another lightbulb moment? Realizing that the underside of the deck is just as important as the surface. It sounds simple, but once you see a joist rot out from the inside while the composite on top looks brand new, you never skip the protection steps again.
The Gear That Actually Earned a Spot in My Truck
I don’t believe in buying every gadget on the shelf, but a few things have become non-negotiable for my builds. First is the BoWrench or a similar board straightener; it turns a two-man struggle into a one-man precision job. For the joints, I swear by a medium-bodied clear PVC cement—it’s the ‘secret sauce’ for that solvent weld we discussed. I also never step onto a job site without a roll of high-quality butyl tape. If you’re on the fence about the extra cost, the deck joist tape test does it actually stop rot proves that it’s the best insurance policy you can buy for your frame. Lastly, make sure you are using 316-grade stainless fasteners, especially if you live near the coast, because why your deck screws are snapping in cold weather often comes down to the brittleness of lower-grade metals under thermal stress. #IMAGE_PLACE_HOLDER_E#
Build Something That Looks Just as Good Ten Years From Now
Taking the extra hour to weld your corners and tape your joists might feel like overkill when you’re tired and the sun is setting, but your future self will thank you every time the temperature swings forty degrees. You have the tools and the techniques now to move beyond standard DIY results and create something truly professional. When you focus on composite decking secrets for longevity, you aren’t just building a platform; you’re creating a maintenance-free sanctuary for your family. Don’t be afraid to slow down and get those miters perfect—it’s the difference between a deck that lasts and a deck that lives on in your memory for all the wrong reasons. Go out there and maximize outdoor living with low-maintenance composite decking that stands the test of time. Have you ever struggled with a corner joint that just wouldn’t stay closed during the winter? Let me know your experiences in the comments below!