
I still remember the crisp autumn morning when my hand-built backyard oasis turned into an absolute disaster. I had spent weeks mapping out a beautiful deck design, carefully selecting premium pressure-treated lumber, and sweating over every joist measurement. But in a rush to finish the handrails before sundown, I grabbed a giant, half-used box of gold-colored interior drywall screws sitting in my garage. They looked sturdy, they drove into the wood like butter, and I saved a quick thirty bucks. Fast forward just eighteen months later: I leaned against the railing to watch the sunset, and with a sickening crack, the entire section gave way. The screws hadn’t just rusted; they had completely snapped in half inside the wood. I ended up flat on my back in the dirt, bruised in both my ribs and my pride.
The Hidden Danger Lurking in Your Toolbox
When you are deep in the zone of building a gorgeous outdoor retreat, it is incredibly tempting to use whatever fasteners you have on hand. We tell ourselves, “A screw is a screw, right?” Wrong. Indoor screws are designed for dry, climate-controlled environments and are usually made of brittle carbon steel with no corrosion-resistant coating. When they meet the relentless moisture, humidity, and corrosive chemicals found in modern pressure-treated wood, a destructive chemical reaction begins immediately. Today, I want to save you from making the exact same painful, costly mistake I made. We are going to dive into why cheaping out on fasteners is the fastest way to ruin your hard work, whether you are building a simple platform or installing complex railing systems.
Are specialty outdoor fasteners actually worth the extra money?
It is the question every budget-conscious DIYer asks when staring at the hardware aisle. Those green and bronze ceramic-coated structural screws can cost three times as much as standard interior fasteners, prompting many to wonder if it is all just a clever marketing gimmick. However, the reality is grounded in metallurgy. According to research from the American Wood Council, modern alkaline copper quaternary (ACQ) pressure-treated lumber is highly corrosive to bare steel and aluminum, requiring hot-dip galvanized or stainless steel fasteners to prevent rapid structural failure. Using indoor screws in these boards is essentially setting a slow-motion fuse on your entire structure. If you are investing your hard-earned money in premium composite decking or building an elegant backyard getaway, using the wrong fasteners guarantees your boards will warp, stain, and eventually pop loose. Have you ever tried to save a few pennies on hardware only to have it bite you in the end? Drop a comment below and let me know your worst DIY horror story!
Choosing the correct fastener is only half the battle; the real magic happens during installation. If you treat your hardware like an afterthought, even high-grade stainless steel can fail prematurely. Think of your fasteners as the ligaments in an athlete’s knee. They hold the bones together under extreme tension, shear forces, and unpredictable movements. When you are constructing intricate railing systems or anchoring a heavy pergola, those tiny pieces of metal bear thousands of pounds of cumulative pressure.
How to Install Exterior Screws Like a Pro
I learned this lesson the hard way during a summer build in 2019. I was rushing to install a gorgeous set of steps using premium cedar boards, and I skipped pre-drilling the end grains. I figured my high-torque impact driver would handle it easily. Within three seconds of driving the first heavy-duty structural screw, a loud pop echoed through the yard. I had completely split a beautiful, fifty-dollar piece of timber right down the middle. That messy mistake cost me a trip back to the lumber yard and taught me that patience saves money. Since that day, I never skip the fundamental steps of proper wood preparation.
Pre-drill near the edges to avoid split wood
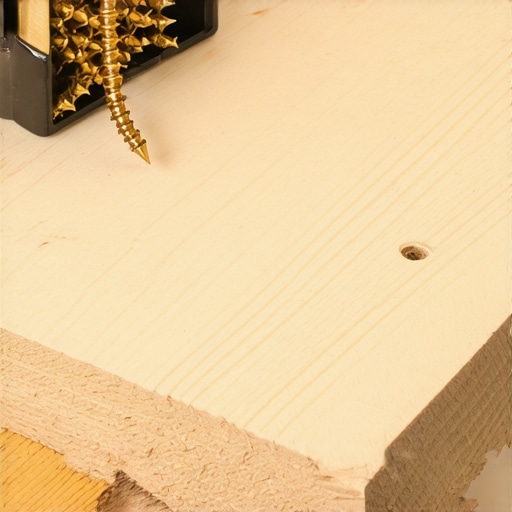
Always pre-drill your pilot holes when working within two inches of any board end or edge. The screw acts like a wedge, forcing wood fibers apart. Pre-drilling removes a small core of wood, allowing the threads to bite cleanly without creating lateral pressure that splits the grain. This is especially vital when building a frame to support heavy composite decking, where structural integrity must remain uncompromised for decades.
Match your driver bits to prevent stripping
Never use a standard Phillips head screw for outdoor construction if you can avoid it. Phillips bits are designed to “cam out” (slip out of the screw head) under high torque to prevent over-tightening in factory settings. In deck building, this just leads to stripped screw heads and ruined drill bits. Instead, opt for Torx (star drive) or Robertson (square drive) fasteners. They offer positive engagement, meaning your driver bit locked into the screw head will not slip, giving you maximum control and preventing the protective ceramic coating on the screw from scratching off during installation.
Adjust your clutch to prevent overdriving
Driving a screw too deep is a recipe for rot. When a screw head is countersunk deep below the surface of a wood deck board, it creates a small cup. This cup acts like a tiny bucket, trapping water every time it rains. Over time, that pooled water seeps into the core of the timber, starting rot from the inside out. Set your drill clutch so the screw head sits perfectly flush with, or just one millimeter below, the surface of the wood. If you are working with composite materials, use specialized trapping screws that push mushroomed plastic fibers back down for a completely smooth finish.
While understanding screw types is a great foundation, the biggest mistakes I see nowadays happen on a conceptual level. Most homeowners—and even many general contractors—architect their outdoor projects based on outdated advice. We are told to focus entirely on the surface materials, but in my experience, what happens beneath and around those boards dictates whether your investment lasts five years or fifty.
The Great Composite Expansion Lie
Everyone says that composite decking is completely maintenance-free and dimensionally stable. You might have heard that unlike wood, it will not warp, shrink, or expand. This is a massive myth. While composite material does not absorb moisture the way pressure-treated southern yellow pine does, it is highly sensitive to thermal expansion. On a hot summer day, a twelve-foot composite board can expand by up to a quarter of an inch in length. If you butt these boards tight against your house siding or a post, they will have nowhere to go but up, resulting in unsightly buckling and warped joists.
To avoid this, you need to understand the physics of thermal movement. According to guidelines from the North American Deck and Railing Association (NADRA), failing to account for temperature swings during installation is one of the top three causes of premature residential deck failure. I always tell folks to study why your composite decking is expanding more than the manual says before they lay down their first row. If you install your deck on a chilly spring morning, those gaps need to be wider than if you are working in the blazing July heat.
Why are my railing posts still shaking despite using heavy-duty structural screws?
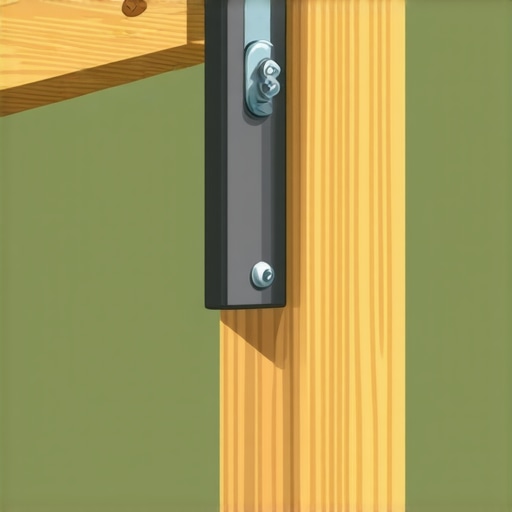
This is a sophisticated dilemma that plagues many DIY builders. You buy the most expensive structural screws, lock your wood posts into the inner rim joists, and yet the moment someone leans on the handrail, the whole system wobbles. The hidden nuance here is that wood fasteners alone cannot resist rotational force when installed through the face of a joist. Under lateral pressure, the wood fibers around the screw compress, creating microscopic play that turns into a massive sway at the top of a 36-inch post. To build truly solid railing systems, you must use structural tension ties or look into the $20 bracket that fixes wobbly railing posts fast to anchor those posts directly to the joist framing. Do not rely solely on the withdrawal strength of screws driven into end grain.
The Pergola Post Trap That Ruins Pristine Patios
Another classic trap involves adding a heavy shade structure like a pergola directly on top of your newly built deck or concrete patio. People assume that because a concrete pad feels solid, it can handle the concentrated downward load of a massive timber overhead. It cannot. Without proper footings extending below the frost line, the seasonal freeze-thaw cycle will push your pergola posts unevenly, twisting your gorgeous rafters and throwing your entire deck design out of alignment. Always plan your load paths from the very top of the structure all the way down to the undisturbed soil. Have you ever fallen into this trap or noticed your railings wobbling over time? Let me know in the comments below!
I used to think that once the last deck board was screwed down and the final post cap clicked into place, my job was completely finished. I was ready to throw away my work gloves and spend the next ten years doing nothing but sipping iced tea in the shade. But after witnessing how quickly sun, rain, and dirt can degrade even the most expensive materials, I realized that building a masterpiece is only half the battle. If you want your hard work to truly stand the test of time, you need a proactive preservation game plan and the exact right arsenal in your shed.
The Tools I Actually Use Every Single Season
I do not care what the flashy home improvement commercials tell you; you do not need a garage full of thousand-dollar specialized machinery to keep your outdoor structures in pristine condition. What you do need are a few highly specific, reliable pieces of gear. My absolute favorite weapon is a high-quality variable-pressure power washer paired with a wide-angle fan tip (specifically 40 degrees). Standard high-pressure tips will easily gouge cedar wood or scar the protective outer cap of expensive composite boards. I also keep a container of specialized composite deck cleaner on hand because simple dish soap will not cut through organic pollen stains or deep-set mold spores.
How do I maintain my backyard structures over time?
The secret is a biannual checklist that goes way beyond a simple sweep with a broom. Every spring and autumn, I grab my flashlight and crawl underneath my structure to inspect the joist hangers and the ledger connection. I use the simple spray test to see if your wood deck needs sealing to determine if my wood components are still repelling water. For those who chose synthetic materials, you are not entirely off the hook either; you still need to actively inspect your gaps to ensure pollen and debris have not built up, which is a major reason why your composite decking is expanding more than the manual says during extreme seasonal temperature shifts.

Where Outdoor Architecture is Heading Next
Looking ahead, the future of custom backyard builds is moving rapidly toward high-performance structural integration and hidden fastening systems. The days of seeing ugly, rusted screw heads peppered across a gorgeous floor are quickly coming to an end. Leading manufacturers are now prioritizing clip systems that allow wood and composite boards to breathe, slide, and shift naturally without buckling. We are also seeing a massive surge in pre-engineered aluminum framing systems, which completely eliminate the rot, warping, and crown issues associated with traditional pressure-treated lumber.
If you want your current project to look like a pro built it, stop treating your maintenance as an afterthought. I highly challenge you to head out to your backyard this weekend and try the simple water bead test on your wood surfaces, or check those critical post-to-beam connections on your patio. Taking just twenty minutes to audit your structure today can save you thousands of dollars in structural repairs down the road.
The Hardest Lesson I Learned About Deck Design and Heavy Pergolas
Over the years, I have realized that the most expensive mistakes are almost always invisible from the surface. When I first started experimenting with custom deck design, I focused entirely on the aesthetics of the timber and the color coordination. But after observing how structures age through brutal winters and blistering summers, my perspective shifted completely. Here are the core realizations that changed the way I build forever:
- The frame dictates the lifespan: Your beautiful composite decking will only look as flat and secure as the pressure-treated joists underneath it. If your framing moves, your expensive top boards will warp.
- Fasteners are structural, not cosmetic: Using sub-par hardware is a ticking time bomb. I now understand that choosing the wrong screw can lead to catastrophic failures, especially in load-bearing zones like stairs and perimeter beams.
- Water is the ultimate enemy: No matter what material you select, water must shed away from the house and structural connections. Minor details like incorporating a slight slope or protecting wood joints make or break a project.
My Personal Toolkit for Outdoor Building Success
I do not rely on guesswork anymore. Over decades of trial and error, I have curated a specific arsenal of references and physical tools that keep my backyard structures stable and safe. If you want to elevate your building game, these are the resources I trust completely:
- The IRC Wood Decks Prescriptive Construction Guide: This is my bible for structural spans and joist spacing to ensure everything meets safety codes.
- High-Tensile Structural Screws: I have completely retired standard lag bolts in favor of heavy-duty structural screws. They drive faster and hold tighter without requiring pre-drilling in thick timbers.
- A 2-Degree Level: I never build a flat surface truly flat. Using a specialized level helps me ensure there is always a slight pitch to prevent pooling water.
- Post-to-Beam Connectors: When anchoring a heavy timber pergola, I never rely on toenailing; structural steel connectors are non-negotiable for wind resistance.
Step Out of the Planning Phase and Build Your Dream Space
It is incredibly easy to get trapped in “analysis paralysis,” endlessly comparing wood species, analyzing different railing systems, and sketching layout options. But the truth is, the best way to learn is by doing. Armed with the right techniques, proper fasteners, and a commitment to protecting your structural frame, you can build an outdoor retreat that easily outlasts the mortgage. Do not let the fear of making a mistake keep you from starting. Plan carefully, use the proper hardware, and enjoy the process of crafting something beautiful with your own two hands.
Have you ever run into a structural issue or had a railing post start to wobble on your own project? Let me know in the comments below!