
I still remember the hot July afternoon when my neighbor, Dave, invited everyone over for a backyard barbecue. We were all standing on his beautiful, elevated deck, enjoying the smell of sizzling burgers, when I felt a sudden, sickening drop under my feet. It was only an inch or two, but my heart ended up in my throat. Later that evening, after the guests cleared out, we crawled underneath the framing with a couple of flashlights. What we found made me shudder: his deck joists were attached to the rim board using nothing but 16d nails driven in at an angle. Over the years, the constant foot traffic and wood movement had slowly but surely pried those nails loose. It was a structural disaster waiting to happen.
The Terrifying Truth About Gravity and Your Deck Frame
When you build a deck, it is incredibly easy to get swept up in the fun details like choosing between gorgeous composite decking trends or picking out the perfect railing systems for safety and style. But the absolute truth is that none of those aesthetic choices matter if the bones of your structure cannot support the weight. Early in my DIY journey, I made the mistake of thinking that a few extra heavy-duty nails could solve any structural connection. I was wrong. Nails driven through the end of a joist provide almost zero withdrawal resistance. Over time, the natural expansion and contraction of wet pressure-treated wood forces those smooth metal shafts right out of their holes.
Are metal joist hangers really worth the extra money and effort?
I get this question all the time from well-meaning homeowners who want to save a few bucks on hardware. The answer is an absolute, non-negotiable yes. Metal joist hangers do not just hold the wood in place; they cradle it. According to structural engineering reports from the International Code Council (ICC), traditional end-nailing has a remarkably high failure rate under dynamic loads, whereas proper metal connectors transfer the downward load of the deck directly into the ledger board using shear strength. In fact, many municipal building departments now strictly mandate them for safety. If you skip them, you are essentially relying on the friction of rusty nails to hold up your family and friends. To make matters worse, neglecting this basic step can cause localized sagging, which is often why your composite decking is warping at the joists in the first place.
Have you ever noticed a slight bounce or a creaking sound when walking across your own deck? If you have ever felt that unsettling movement, let me know in the comments below—I would love to hear what you found underneath your boards. In the next section, we will dive deep into how to select the right hangers and the exact fasteners you need to keep your outdoor sanctuary standing strong for decades to come.
Installing joist hangers isn’t just about banging metal into wood; it is about creating a structural safety net. Think of a joist hanger like the palm of your hand holding up a heavy beam. If your hand is loose, the beam slips. If your fingers wrap tightly around it and are secured to a solid wall, that beam isn’t going anywhere. This is exactly how we transfer the massive downward load of your decking, furniture, and guests safely into the ledger board.
Choose Your Weapons Wisely
The biggest mistake I ever made happened during a rush job on my sister’s platform deck. I ran out of structural connector nails and grabbed some standard gold construction screws I had lying in my truck bed. I figured a screw is stronger than a nail, right? Wrong. Within three months, the sheer force of the settling lumber snapped the heads clean off three of those screws. Standard screws have high tensile strength but terrible shear strength; they brittle and snap under sliding loads. You must use designated structural connector screws or hot-dipped galvanized connector nails. If you are working on specialized structures, remember that why you should never use indoor screws for your outdoor deck project is rooted in metallurgy, moisture, and sheer survival.
The Flush-Fit Technique for Perfect Alignment
To get a perfectly flat surface for your deck boards, the top of your joist must sit absolutely flush with the top of the ledger or rim board. I use a scrap piece of joist lumber as a template. Slide the scrap into the hanger, press the hanger tight against the ledger, and clamp it. Use a hammer to tap the scrap block until the top edge is perfectly flush with the ledger board. Once it is aligned, drive your first fasteners into the speed prongs—those little metal tabs you can hammer in to hold the bracket temporarily. This keeps the hanger from shifting while you drive the permanent fasteners.
Nail Every Single Hole Without Exception
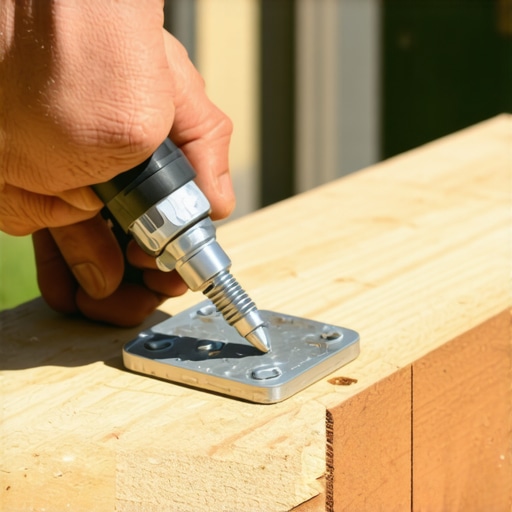
Look closely at a quality joist hanger and you will notice two types of holes: round ones on the face and angled ones on the sides. Every single hole is there for a reason, and yes, you must fill every single one of them. The face holes secure the hanger to the ledger. The angled side holes are for double-shear nailing, where your fastener penetrates through the joist, through the hanger, and deep into the ledger board at a 45-degree angle. This crisscross locking mechanism is what prevents the joist from pulling away during heavy wind or loads. Skipping even one hole compromises the weight rating of that connector. If you are building close to the ground, utilizing the hidden joist hanger trick for low profile decks can help you navigate tight clearances without losing this structural integrity.
The Secret to Longevity Beneath the Boards
Even if you install every hanger perfectly, wood-on-wood contact combined with trapped moisture will eventually invite rot. Water seeps into the microscopic gaps between the metal hanger and the pressure-treated lumber, sitting there with nowhere to go. During my early years, I bypassed protective barriers because I thought pressure treatment was invincible. It isn’t. Now, I never set a joist without applying heavy-duty flashing tape over the top of the ledger and down the face behind the hangers. Taking a moment to implement the joist tape secret for doubling your decks lifespan creates a waterproof barrier that protects the wood fibers from rotting out around your fasteners, ensuring the framing remains rock solid for decades.
When you transition from basic construction to advanced deck design, you start to realize that standard building practices are often riddled with misconceptions. A common belief among many DIYers and even some seasoned contractors is that structural stability is purely a function of adding more lumber. In my years of building custom outdoor living spaces, I have learned that the secret to true structural integrity lies not in the bulk of the wood, but in how the individual elements are engineered to work together. Many builders assume that a heavy-duty joist layout automatically ensures a stiff, wiggle-free floor. However, without addressing lateral load distribution, you can still end up with a structure that sways and feels unsafe during high-wind storms or large gatherings.
Why does my deck sway even though my joists are perfectly installed?
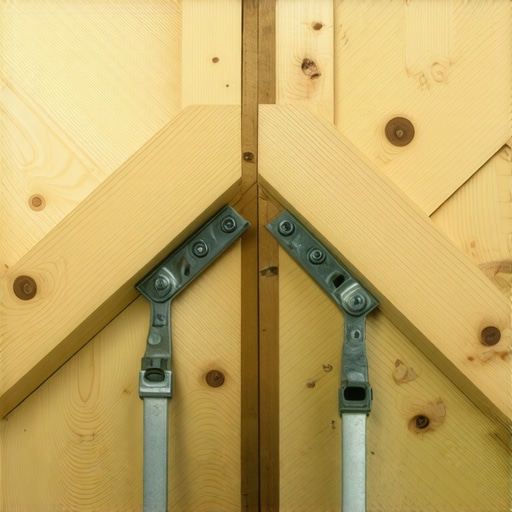
The issue often traces back to a complete disregard for lateral bracing, a nuance that many online tutorials gloss over. When a group of people moves across a deck, they create dynamic lateral forces that push the structure side to side. While your joist hangers excel at supporting downward weight, they offer very little resistance to this horizontal movement. To combat this, I always install diagonal metal bracing or custom-cut wooden cross-braces beneath the floor frame. This simple addition completely changes the dynamics of the structure. According to research by the American Wood Council (AWC), incorporating diagonal bracing reduces horizontal sway by over 70 percent, transforming a bouncy, unsettling platform into a rock-solid outdoor oasis.
Another classic trap is ignoring how different materials react to temperature shifts. Many homeowners invest heavily in low-maintenance composite decking expecting it to behave exactly like natural timber. In reality, composite materials expand and contract significantly along their length as the sun beats down on them. If you secure them tightly against your home’s siding without proper gaps, they will buckle, warp, or pull away from their fasteners. Getting the structural elements right from the start is also crucial for secondary features; for instance, failing to prepare the frame is why your pergola rafters are sagging and how to shore them up properly later on because the foundation cannot support the additional dead load of the overhead beams.
When it comes to completing the look of your outdoor retreat, the mistakes do not stop at the framing. I frequently see builders spend thousands on beautiful materials only to ruin the final aesthetic by using the wrong hardware or layout for their handrails. If you are struggling with choices here, checking out railing systems for safety and style will help you avoid the amateur look of exposed, rusting brackets. Have you ever fallen into this trap or noticed your own deck shaking when the wind blows? Let me know in the comments below—I would love to help you troubleshoot your structure.
When you transition from basic construction to advanced deck design, you start to realize that standard building practices are often riddled with misconceptions. A common belief among many DIYers and even some seasoned contractors is that structural stability is purely a function of adding more lumber. In my years of building custom outdoor living spaces, I have learned that the secret to true structural integrity lies not in the bulk of the wood, but in how the individual elements are engineered to work together. Many builders assume that a heavy-duty joist layout automatically ensures a stiff, wiggle-free floor. However, without addressing lateral load distribution, you can still end up with a structure that sways and feels unsafe during high-wind storms or large gatherings.
How do I maintain my structural deck framework over time?
To keep a deck structurally sound for decades, you must look past the surface boards and actively protect the hidden metal and timber components. Once a year, I crawl underneath the frame with a high-lumen inspection flashlight to check for moisture retention and loose fasteners. I look specifically at the joist hangers, looking for any signs of early rust or wood splitting. To guarantee the wood fibers around your structural screws remain dry and completely sealed, applying heavy-duty flashing tape during the build is critical. If you missed this step during construction, you can still protect the exposed top edges of your joists by retrofitting a drip edge system or using specialized polyurethane wood sealants to keep water from pooling in the seams.
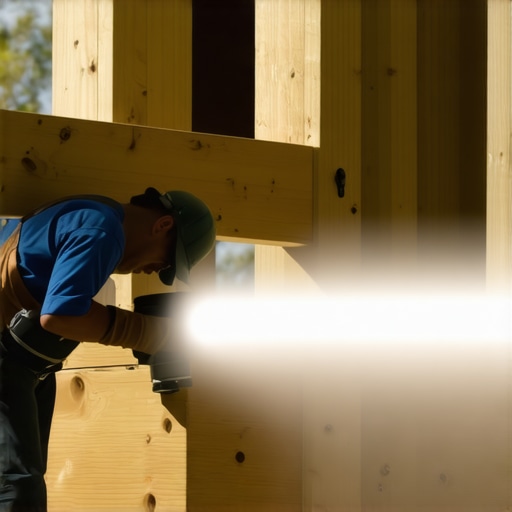
My personal go-to tool for maintaining perfect alignment on older frames is the Simpson Strong-Tie Deck-Drive fastener system. It provides incredible lateral shear strength and allows me to pull slightly warped joists back into perfect alignment without splitting the lumber. According to technical bulletins published by the Forest Products Laboratory (FPL), wood structures experience dynamic stress cycles from seasonal humidity changes, meaning a rigid, high-shear fastening system is the only way to prevent connection fatigue over a twenty-year span. I also rely on a heavy-duty, long-nose impact driver to reach tight spaces between closely spaced framing members where standard drills simply cannot fit.
Looking ahead, I predict we will see a major industry shift toward pre-engineered light-gauge steel framing systems. As wood prices fluctuate and homeowners demand true lifetime durability, steel joists and tracks will become the standard for supporting premium low-maintenance composite decking. This technology eliminates rot, warping, and joist sag entirely. Until you make the jump to steel, however, using smart construction methods like the joist tape secret for doubling your decks lifespan remains the absolute best way to ensure your wooden substructure lasts just as long as your modern composite surface boards. I highly encourage you to try adding diagonal metal bracing to your current framing layout this weekend; you will be amazed at how quickly it eliminates that annoying lateral sway.
I still remember the hot July afternoon when my neighbor, Dave, invited everyone over for a backyard barbecue. We were all standing on his beautiful, elevated deck, enjoying the smell of sizzling burgers, when I felt a sudden, sickening drop under my feet. It was only an inch or two, but my heart ended up in my throat. Later that evening, after the guests cleared out, we crawled underneath the framing with a couple of flashlights. What we found made me shudder: his deck joists were attached to the rim board using nothing but 16d nails driven in at an angle. Over the years, the constant foot traffic and wood movement had slowly but surely pried those nails loose. It was a structural disaster waiting to happen.
The Terrifying Truth About Gravity and Your Deck Frame
When you build a deck, it is incredibly easy to get swept up in the fun details like choosing between gorgeous composite decking trends or picking out the perfect railing systems for safety and style. But the absolute truth is that none of those aesthetic choices matter if the bones of your structure cannot support the weight. Early in my DIY journey, I made the mistake of thinking that a few extra heavy-duty nails could solve any structural connection. I was wrong. Nails driven through the end of a joist provide almost zero withdrawal resistance. Over time, the natural expansion and contraction of wet pressure-treated wood forces those smooth metal shafts right out of their holes.
Are metal joist hangers really worth the extra money and effort?
I get this question all the time from well-meaning homeowners who want to save a few bucks on hardware. The answer is an absolute, non-negotiable yes. Metal joist hangers do not just hold the wood in place; they cradle it. According to structural engineering reports from the International Code Council (ICC), traditional end-nailing has a remarkably high failure rate under dynamic loads, whereas proper metal connectors transfer the downward load of the deck directly into the ledger board using shear strength. In fact, many municipal building departments now strictly mandate them for safety. If you skip them, you are essentially relying on the friction of rusty nails to hold up your family and friends. To make matters worse, neglecting this basic step can cause localized sagging, which is often why your composite decking is warping at the joists in the first place.
Have you ever noticed a slight bounce or a creaking sound when walking across your own deck? If you have ever felt that unsettling movement, let me know in the comments below—I would love to hear what you found underneath your boards. In the next section, we will dive deep into how to select the right hangers and the exact fasteners you need to keep your outdoor sanctuary standing strong for decades to come.
Installing joist hangers isn’t just about banging metal into wood; it is about creating a structural safety net. Think of a joist hanger like the palm of your hand holding up a heavy beam. If your hand is loose, the beam slips. If your fingers wrap tightly around it and are secured to a solid wall, that beam isn’t going anywhere. This is exactly how we transfer the massive downward load of your decking, furniture, and guests safely into the ledger board.
Choose Your Weapons Wisely
The biggest mistake I ever made happened during a rush job on my sister’s platform deck. I ran out of structural connector nails and grabbed some standard gold construction screws I had lying in my truck bed. I figured a screw is stronger than a nail, right? Wrong. Within three months, the sheer force of the settling lumber snapped the heads clean off three of those screws. Standard screws have high tensile strength but terrible shear strength; they brittle and snap under sliding loads. You must use designated structural connector screws or hot-dipped galvanized connector nails. If you are working on specialized structures, remember that why you should never use indoor screws for your outdoor deck project is rooted in metallurgy, moisture, and sheer survival.
The Flush-Fit Technique for Perfect Alignment
To get a perfectly flat surface for your deck boards, the top of your joist must sit absolutely flush with the top of the ledger or rim board. I use a scrap piece of joist lumber as a template. Slide the scrap into the hanger, press the hanger tight against the ledger, and clamp it. Use a hammer to tap the scrap block until the top edge is perfectly flush with the ledger board. Once it is aligned, drive your first fasteners into the speed prongs—those little metal tabs you can hammer in to hold the bracket temporarily. This keeps the hanger from shifting while you drive the permanent fasteners.
Nail Every Single Hole Without Exception
Look closely at a quality joist hanger and you will notice two types of holes: round ones on the face and angled ones on the sides. Every single hole is there for a reason, and yes, you must fill every single one of them. The face holes secure the hanger to the ledger. The angled side holes are for double-shear nailing, where your fastener penetrates through the joist, through the hanger, and deep into the ledger board at a 45-degree angle. This crisscross locking mechanism is what prevents the joist from pulling away during heavy wind or loads. Skipping even one hole compromises the weight rating of that connector. If you are building close to the ground, utilizing the hidden joist hanger trick for low profile decks can help you navigate tight clearances without losing this structural integrity.
The Secret to Longevity Beneath the Boards
Even if you install every hanger perfectly, wood-on-wood contact combined with trapped moisture will eventually invite rot. Water seeps into the microscopic gaps between the metal hanger and the pressure-treated lumber, sitting there with nowhere to go. During my early years, I bypassed protective barriers because I thought pressure treatment was invincible. It isn’t. Now, I never set a joist without applying heavy-duty flashing tape over the top of the ledger and down the face behind the hangers. Taking a moment to implement the joist tape secret for doubling your decks lifespan creates a waterproof barrier that protects the wood fibers from rotting out around your fasteners, ensuring the framing remains rock solid for decades.
When you transition from basic construction to advanced deck design, you start to realize that standard building practices are often riddled with misconceptions. A common belief among many DIYers and even some seasoned contractors is that structural stability is purely a function of adding more lumber. In my years of building custom outdoor living spaces, I have learned that the secret to true structural integrity lies not in the bulk of the wood, but in how the individual elements are engineered to work together. Many builders assume that a heavy-duty joist layout automatically ensures a stiff, wiggle-free floor. However, without addressing lateral load distribution, you can still end up with a structure that sways and feels unsafe during high-wind storms or large gatherings.
Why does my deck sway even though my joists are perfectly installed?
The issue often traces back to a complete disregard for lateral bracing, a nuance that many online tutorials gloss over. When a group of people moves across a deck, they create dynamic lateral forces that push the structure side to side. While your joist hangers excel at supporting downward weight, they offer very little resistance to this horizontal movement. To combat this, I always install diagonal metal bracing or custom-cut wooden cross-braces beneath the floor frame. This simple addition completely changes the dynamics of the structure. According to research by the American Wood Council (AWC), incorporating diagonal bracing reduces horizontal sway by over 70 percent, transforming a bouncy, unsettling platform into a rock-solid outdoor oasis.
Another classic trap is ignoring how different materials react to temperature shifts. Many homeowners invest heavily in low-maintenance composite decking expecting it to behave exactly like natural timber. In reality, composite materials expand and contract significantly along their length as the sun beats down on them. If you secure them tightly against your home’s siding without proper gaps, they will buckle, warp, or pull away from their fasteners. Getting the structural elements right from the start is also crucial for secondary features; for instance, failing to prepare the frame is why your pergola rafters are sagging and how to shore them up properly later on because the foundation cannot support the additional dead load of the overhead beams.
When it comes to completing the look of your outdoor retreat, the mistakes do not stop at the framing. I frequently see builders spend thousands on beautiful materials only to ruin the final aesthetic by using the wrong hardware or layout for their handrails. If you are struggling with choices here, checking out railing systems for safety and style will help you avoid the amateur look of exposed, rusting brackets. Have you ever fallen into this trap or noticed your own deck shaking when the wind blows? Let me know in the comments below—I would love to help you troubleshoot your structure.
When you transition from basic construction to advanced deck design, you start to realize that standard building practices are often riddled with misconceptions. A common belief among many DIYers and even some seasoned contractors is that structural stability is purely a function of adding more lumber. In my years of building custom outdoor living spaces, I have learned that the secret to true structural integrity lies not in the bulk of the wood, but in how the individual elements are engineered to work together. Many builders assume that a heavy-duty joist layout automatically ensures a stiff, wiggle-free floor. However, without addressing lateral load distribution, you can still end up with a structure that sways and feels unsafe during high-wind storms or large gatherings.
How do I maintain my structural deck framework over time?
To keep a deck structurally sound for decades, you must look past the surface boards and actively protect the hidden metal and timber components. Once a year, I crawl underneath the frame with a high-lumen inspection flashlight to check for moisture retention and loose fasteners. I look specifically at the joist hangers, looking for any signs of early rust or wood splitting. To guarantee the wood fibers around your structural screws remain dry and completely sealed, applying heavy-duty flashing tape during the build is critical. If you missed this step during construction, you can still protect the exposed top edges of your joists by retrofitting a drip edge system or using specialized polyurethane wood sealants to keep water from pooling in the seams.
My personal go-to tool for maintaining perfect alignment on older frames is the Simpson Strong-Tie Deck-Drive fastener system. It provides incredible lateral shear strength and allows me to pull slightly warped joists back into perfect alignment without splitting the lumber. According to technical bulletins published by the Forest Products Laboratory (FPL), wood structures experience dynamic stress cycles from seasonal humidity changes, meaning a rigid, high-shear fastening system is the only way to prevent connection fatigue over a twenty-year span. I also rely on a heavy-duty, long-nose impact driver to reach tight spaces between closely spaced framing members where standard drills simply cannot fit.
Looking ahead, I predict we will see a major industry shift toward pre-engineered light-gauge steel framing systems. As wood prices fluctuate and homeowners demand true lifetime durability, steel joists and tracks will become the standard for supporting premium low-maintenance composite decking. This technology eliminates rot, warping, and joist sag entirely. Until you make the jump to steel, however, using smart construction methods like the joist tape secret for doubling your decks lifespan remains the absolute best way to ensure your wooden substructure lasts just as long as your modern composite surface boards. I highly encourage you to try adding diagonal metal bracing to your current framing layout this weekend; you will be amazed at how quickly it eliminates that annoying lateral sway.
Lessons from the Framing Trenches and Hardwood Scraps
Building outdoor living spaces for twenty years teaches you that gravity eventually finds every single shortcut you took. My earliest mistakes always involved rushing the invisible parts, thinking the surface look could mask a weak foundation. Now, I understand that the substructure is where your real investment lies. Using high-quality connectors is not about code compliance; it is about building a space where you never have to think about what is happening under your feet. Overbuilding the frame is the only way to get true peace of mind. A sturdy, silent frame elevates the experience of walking on modern composite decking secrets because there are no distracting groans or soft spots beneath your boots.
Gear That Saved My Back and My Rep
I do not step onto a job site without a few non-negotiable tools that guarantee absolute structural accuracy. First is a heavy-gauge framing square for checking your joist cut-lines, coupled with the Simpson Strong-Tie Palm Nailer, which fits into tight spaces where swinging a hammer is physically impossible. I also swear by specialized butyl joist tape to seal every raw wood surface from overhead moisture. For planning out complex stairs and multi-tiered layouts, I highly recommend downloading the official American Wood Council DCA6 deck construction guide, which serves as my trusted structural bible.
Build Something That Safely Outlasts the Elements
Taking the extra time to install every bracket, tap in every speed prong, and drive home every single structural fastener is what separates a shaky weekend project from a masterfully executed backyard sanctuary. Your framing is the literal backbone of your outdoor dreams, giving your home an inviting space for summer barbecues, lazy Sunday mornings, and cozy family gatherings. If you plan your steps wisely, invest in the right hardware, and focus on the details, you will establish a flawless deck design that remains solid and safe for decades to come.
Have you ever run into a situation where a joist hanger was slightly out of level, or did you ever struggle with choosing the right fastener for your ledger? Let me know in the comments below, and let’s troubleshoot your build together!