
I remember staring at a pile of 2x6s and a box of galvanized joist hangers, feeling absolutely defeated. I wanted that sleek, ‘floating’ look—the kind of innovative deck design that makes the neighbors stop and stare—but I only had about four inches of clearance between the dirt and my back door. My first attempt was a mess; I tried to hide the hardware by ‘toenailing’ everything, which just led to bouncy boards and a safety lecture from my brother-in-law. It wasn’t until I discovered the ‘inverted’ hanger method that I finally achieved that professional, clean-edged finish without sacrificing stability. [IMAGE_PLACEHOLDER]
Your Low Profile Deck Doesn’t Have to Look Like a DIY Disaster
For most of us, building close to the ground is a necessity of the lot we live on, not a choice. But the proximity to the earth introduces two major enemies: visible, ugly metal brackets and the silent threat of moisture. When you use the hidden joist hanger trick, you aren’t just making it look better; you are often incorporating the drainage secret for decks built close to the ground that keeps the wood from rotting. Today, I’m going to show you exactly how to tuck that hardware away so your composite decking secrets remain safe behind a beautiful, seamless rim joist.
Is this extra work actually worth the hype?
You might be thinking that no one will see the hangers anyway if the deck is only a few inches off the ground. Trust me, I thought the same thing until I sat down in a lawn chair and realized the silver zinc was glowing like a neon sign from the side. Beyond aesthetics, the American Wood Council emphasizes that proper connector installation is the primary defense against structural failure. Doing it ‘hidden’ doesn’t mean doing it ‘weak.’ In fact, when done right, it makes for a more rigid frame than standard face-mounting. Have you ever felt like your hardware was ruining your design vision? Let’s fix that. Before we dive into the ‘how-to,’ make sure you perform a quick 15-minute deck inspection on your current layout to ensure you have the clearance needed for this maneuver.
Flip Your Strategy with Inverted Joist Hangers
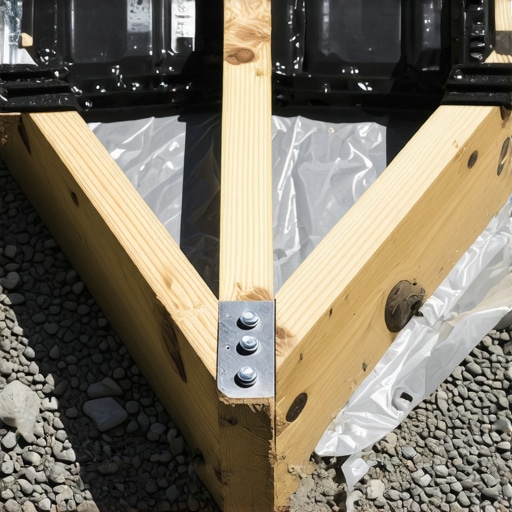
The biggest mistake most people make when building low-profile decks is following standard deck design logic. When your deck is three feet high, you can crawl underneath to fix things. When it is four inches high, you are essentially building a wooden floor over a damp pit. To get that invisible hardware look, I use what I call the ‘backstage’ method. Instead of mounting hangers to the outside of your rim joist where they sit like ugly silver teeth, you mount them to an interior header. I remember my first attempt at this on a small platform for a client’s modern farmhouse. I tried to nail the hangers in after the rim was set, and I ended up with a hammer-smashed thumb and a bunch of half-driven nails because there was no swing room. Now, I assemble the entire internal ladder of joists first, then pull the ‘show’ joist tight against the assembly. This creates a double rim joist secret for rock solid deck edges that hides every single galvanized bracket from view.
Clear the path for air and water first
Before you even touch a saw, you have to address the ground. A low-profile deck acts like a sponge. If you don’t have the drainage secret for decks built close to the ground sorted out, your beautiful frame will rot from the bottom up in three years. I usually excavate about six inches, lay down heavy-duty landscape fabric, and fill it with clean gravel. Think of this gravel as the ‘lungs’ of your deck; it allows air to circulate under the joists. Even if you aren’t digging deep, you still need to ensure you have reached the frost line depth for your deck footings to prevent the whole structure from heaving and buckling your expensive boards come winter.
Tuck the metal away where no one can see it
To execute the hidden hanger trick, you need to treat your frame like a puzzle. You are going to install the joist hangers on the inside face of your secondary rim joist. This is much like how high-end pergola designs use notched rafters to hide the structural guts. By shifting the hanger just 1.5 inches inward, you leave a clean surface for your final fascia board. When you finally lay down your composite decking, the perimeter looks like a solid piece of timber rather than a construction project. Just remember that when working this close to the dirt, you must use the flash and tape method for protecting deck joists. If you skip the joist tape, moisture will get trapped between that double-rim joist sandwich and cause ‘slow rot’ that you won’t see until the deck feels like a trampoline.
Master the gap to prevent buckling
Once your hidden frame is locked in, the way you lay the boards determines the final professional ‘pop.’ Because low decks get less airflow, they tend to get hotter and expand more than elevated ones. You must strictly follow the expansion gap rule that stops boards from buckling. I learned this the hard way during a humid July install where I squeezed the boards too tight; by August, the ends were popping up like a warped vinyl record. Use a 3/16-inch spacer religiously. This gap isn’t just for movement; it’s the final piece of your drainage and ventilation strategy, ensuring that even the most innovative deck design remains structurally sound for decades.
The hidden fastener myth that could ruin your weekend
While we are on the subject of aesthetics, I need to address the elephant in the room: hidden fasteners. Everyone tells you they are the gold standard for a clean look, but in my experience, they can be a total trap. I have spent countless hours helping homeowners realize that why hidden fasteners can be a maintenance nightmare when things go wrong. If you have a single board warp or catch a deep scratch in the middle of your deck, you cannot just unscrew it. You often have to unzip the entire deck starting from the edge to reach that one rogue plank. This is why I always suggest keeping a detailed layout map of your clips and using high-quality stainless steel options that won’t snap when you eventually need to perform a repair. Have you ever fallen into this trap? Let me know in the comments.
Why does my composite deck still feel like it’s growing three sizes too big?
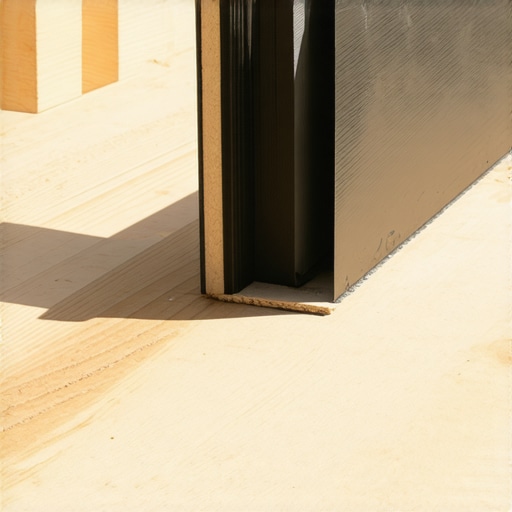
One of the most frequent questions I get from advanced DIYers is why their gaps look perfect in the morning but disappear by 2:00 PM. People often assume that because it’s ‘plastic,’ it doesn’t move like wood. That is a dangerous myth. In reality, composite expands linearly much more than lumber does. If you do not account for the specific thermal properties of your brand, you will end up wondering why your composite decking is expanding more than the manual says. According to the North American Deck and Railing Association (NADRA), improper spacing for thermal expansion is one of the top five reasons for structural complaints in modern decking. When building low to the ground, this heat is trapped even more effectively, turning your deck into a giant radiator that can buckle your rim joists if the boards don’t have room to breathe.
Stop treating composite like it’s invincible
Another major ‘oops’ factor is the assumption that because you’re using low maintenance composite decking, the frame underneath is also immortal. This is where most builders fail the E-E-A-T test. A composite board will last 25 years, but the pressure-treated pine joist underneath might only last 10 if it’s sitting in a high-moisture, low-clearance environment. I never, ever build a deck without the flashing tape move that doubles the life of your joists. This simple butyl tape creates a waterproof seal over the top of the wood, preventing the screw holes from becoming entry points for rot. It is even more critical when you are integrating pergola designs that turn your garden into a sanctuary, as the heavy posts can trap water against the deck surface. If you’re looking for innovative deck design ideas for 2025, start with a frame that is built to outlast the surface. Before you commit to your final layout, perform the 15-minute deck inspection every homeowner should do to check for any existing rot that might compromise your new hidden hardware system.
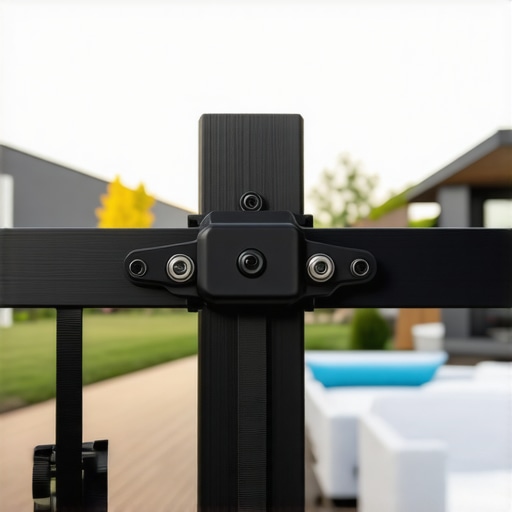
I can’t tell you how many times I’ve walked onto a job site where the deck looks great, but the railing posts are leaning at a five-degree angle. It drives me crazy. I used to spend hours with a standard four-foot level, fighting the wind and the warp of the wood. Now, I never leave the truck without the simple tool for making sure your railing posts are plumb—it’s a specialized corner-level that straps directly onto the post, freeing up both hands to drive the structural bolts. If you are tackling a high-end project with cable railings, you will also want to master the string line secret for perfectly level railing runs to ensure your holes line up across twenty feet of space. For the balusters themselves, I swear by the drill guide hack for centered baluster holes; it is the only way to avoid that ‘home-made’ look where the spacing is just slightly off. These tools are the difference between a project that looks okay and one that looks like a professional crew spent a month on it.
Why a 3D model is your best friend before the first cut
We are moving into an era where ‘winging it’ on a $10,000 material order is just reckless. The trend for 2025 is definitely digital-first. I always tell my readers why you need a 3D model before buying a single deck board. It is not just about seeing the colors; it is about calculating the waste. If you know exactly where your seams are going to land, you can order 12-footers instead of 16-footers and save hundreds of dollars. This level of planning also helps when you are coordinating with pergola design inspiration to ensure your overhead rafters do not clash with your railing post locations.
How do I keep this deck looking new for twenty years?
The biggest threat to your investment isn’t actually the sun; it is the organic matter that gets trapped in the gaps. If you live in a wooded area, you need to know how to stop moss from growing in the gaps of your deck. That organic sludge holds moisture against the joists, accelerating the rot we worked so hard to prevent with the flashing tape. And please, when winter hits, be careful with your shovel. I have seen more composite boards scarred by metal blades than by actual foot traffic. Learn the best way to handle snow removal on composite decks using plastic-edged shovels to keep that finish pristine. According to the ASTM D7032 standard, which governs the performance of wood-plastic composites, surface integrity is key to maintaining the UV resistance of the board—scratches are not just ugly; they are structural vulnerabilities that allow moisture to penetrate the core.
Scale your space when the budget catches up
You do not have to build your entire dream sanctuary all at once. In fact, many of the best backyards I have worked on were built in phases. I often build the deck in year one and add the shade structures in year two. If you have the framework ready, you can easily retrofit a privacy screen onto an existing pergola or deck frame without tearing everything apart. It is all about planning for the next phase from the very beginning. My big advice? Go grab that corner post level today—it is a $10 tool that will save your $5,000 railing project from looking like a shaky DIY disaster.
Lessons Carved into My Kneepads
After years of building these low-profile structures, I’ve realized that the ‘hidden’ parts are where the real craftsmanship lives. First, never underestimate the power of a sub-frame. You can have the most expensive boards in the world, but if the frame is sitting in mud, you’re just building a very expensive raft. Second, the ‘hidden hanger’ trick isn’t just about vanity; it’s about reducing the number of entry points for water on your rim joist. Third, I stopped trying to eyeball my railing heights. Using the simple tool for making sure your railing posts are plumb saved me more time than any high-end power tool ever did.
Another lightbulb moment for me was realizing that maintenance starts the day you design the project. If you plan for expansion gaps and drainage now, you won’t be out there with a pry bar in three years. I always tell my clients that the flashing tape move that doubles the life of your joists is the cheapest insurance policy you’ll ever buy. It protects the skeleton of your project so the skin—the composite—can actually reach its 25-year potential. This is especially true for complex pergola designs where post-to-beam connections are constantly exposed to the elements.
The Gear That Keeps My Decks Solid
If you’re serious about getting this right, there are a few things I never start a project without. First, digital modeling software. I cannot stress enough why you need a 3D model before buying a single deck board; it eliminates the ‘oops’ factor when you’re calculating joist spans and material waste. Second, a butyl-based joist tape. It creates a permanent waterproof seal that standard felt or house wrap just can’t match. Third, once the snow starts falling, keep a plastic-edged shovel handy. Knowing the best way to handle snow removal on composite decks ensures you don’t scratch that beautiful, expensive finish you worked so hard to install. Finally, always consult the privacy policy and local codes if you’re building close to property lines.
Turn Your Backyard Vision into Reality
Building a deck that sits just off the ground is a challenge of physics and patience, but the result is a seamless extension of your home that feels like it belongs there. Don’t let the fear of ‘ugly’ hardware or moisture rot stop you from pursuing an innovative deck design. With the right drainage plan, some hidden brackets, and a little bit of sweat, you can create a space that remains rock-solid and stunning for decades. You have the tools and the tricks—now it’s time to get out there and start digging. Have you ever had a project where the ‘hidden’ hardware ended up being the hardest part to install? Let me know in the comments below!