
I will never forget the sound of four hundred dollars worth of Western Red Cedar splintering into useless scraps because I thought I could ‘eyeball’ a twelve-foot radius arch. I stood in my driveway, sawdust sticking to my forehead, staring at a curve that looked more like a jagged mountain range than a graceful architectural feature. It was a humbling moment that almost made me quit building [pergola designs that turn your garden into a sanctuary](https://deckforgebuilders.com/pergola-designs-that-turn-your-garden-into-a-sanctuary) altogether. My mistake was simple but fatal: I was trying to fight the wood instead of guiding it. That’s when a mentor of mine showed me the plywood template trick, and it completely changed how I approach [innovative deck design ideas](https://deckforgebuilders.com/innovative-deck-design-ideas-that-elevate-your-homes-curb-appeal). Today, I am going to save you the heartbreak and the expensive lumber bills by showing you how to create a reusable guide that guarantees symmetry every single time.
Stop Wasting Expensive Lumber on Guesswork
Using a template isn’t about being ‘extra’; it is about precision that your hand simply cannot maintain over a long span. When you are working with beefy materials—and I always say [why 6×6 posts look better than 4x4s](https://deckforgebuilders.com/why-6×6-posts-look-better-than-4x4s-on-any-outdoor-structure) on these structures—the eye can easily be tricked by the sheer scale of the wood. A 1/4-inch piece of luan or scrap plywood allows you to perfect your curve on a cheap material first. You can sand the template smooth, check it against your rafters, and flip it to ensure both sides of your arch are identical. According to researchers at the Forest Products Laboratory, wood is an anisotropic material, meaning its properties and resistance change based on grain direction; this is why a jigsaw often ‘wanders’ when cutting thick beams but stays true when following a thin, pre-sanded guide. If you don’t use a template, you’re basically gambling with your materials.
Is a Plywood Template Just a Waste of Time?
You might think adding an extra step to an already complex build is unnecessary. I used to think the same until I realized that sanding a thin piece of plywood takes five minutes, while sanding a jagged 2×10 beam takes two hours and a lot of frustration. Have you ever started a cut and immediately realized your line was slightly off-center? [Contact us](https://deckforgebuilders.com/contact-us) and let me know if you’ve ever had to ‘hide’ a bad cut with extra trim or if you’ve ever wondered [why pergola rafter tails always rot first](https://deckforgebuilders.com/why-pergola-rafter-tails-always-rot-first) because of poor water runoff on a bad curve. We are going to fix that today by building a guide that works for you, not against you.
Grab a Sheet of Luan Before You Touch Your Cedar
The biggest mistake most DIYers make is drawing their cut line directly onto a $150 beam. Wood grain is notoriously deceptive; a dark streak in the timber can make a perfectly straight line look crooked to the naked eye. Instead, go to the scrap pile and grab a sheet of 1/4-inch luan or thin plywood. This is your ‘stunt double.’ You are going to do all your failing, erasing, and re-drawing on this cheap material. I remember building a massive 16-foot arch for a client who wanted a ‘cathedral’ feel in their backyard. I spent two hours just dialing in the template because I knew if it was off by even an eighth of an inch, the finished rafter would look like a sagging noodle once it was twenty feet in the air. This level of preparation is similar to how we approach the notched rafter secret for a pergola that never wobbles—it is all about the prep work before the assembly begins.
Plot Your Curve with the String and Nail Method
To get that graceful sweep, you do not need complex geometry. Drive a small finish nail into a flat workspace, loop a non-stretching string around it, and tie the other end to your pencil. This creates a giant compass. If you are working on a smaller scale, like a decorative bracket for railing systems for every deck, you can use a flexible piece of PVC trim as a ‘batten’ to bend into the desired shape. The key is to secure the center point of the arch first, then let the material dictate the natural flow of the curve. If the curve feels forced, it will look forced. Trust the physics of the bend. 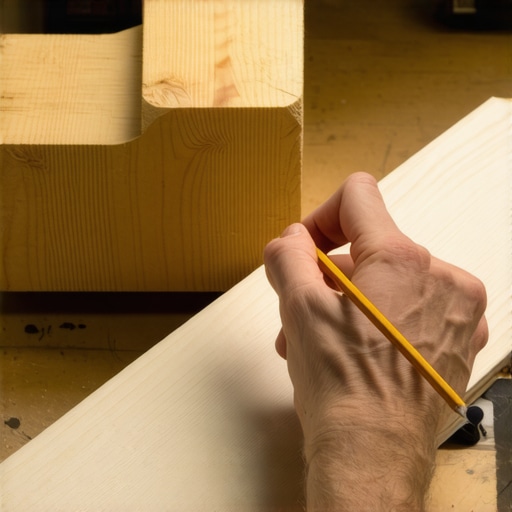
The Secret is in the Sanding
Once you have traced your curve onto the luan, cut it out with a jigsaw, staying about 1/16th of an inch outside the line. Now, here is the part everyone skips: sand that template until it is as smooth as glass. Any bump, dip, or ‘chatter’ mark from the jigsaw blade on your template will be magnified when you transfer it to the heavy beams. I use a spindle sander for tight curves and a simple sanding block for long sweeps. Think of the template like a track for a train; if there is a rock on the track, the whole train jumps. When you eventually move to the actual timber, you want your router or pencil to glide without a single hiccup. This precision is just as vital as using the simple tool for making sure your railing posts are plumb during the final installation.
The Flip Trick for Perfect Symmetry
The hardest part of an arch is making the left side match the right. To solve this, you only ever draw and cut half of your template. Once one half is perfect, you flip it over to trace the second half. This creates a mirrored image that is mathematically identical. If you try to draw the whole thing at once, you will inevitably have one side that is slightly steeper than the other, which becomes painfully obvious when you are looking at the structure from across the yard. This symmetry prevents water from pooling in uneven pockets, much like the 2 degree slope trick for proper deck water runoff ensures your structure stays dry. When you finally clamp your template to your structural beam, use at least three clamps. If the template shifts even a hair during the trace, you are back to square one. This method is the only way to prevent twisting pergola rafters from ruining the visual alignment of your sanctuary.The industry standard often pushes the idea that ‘the tighter the better’ when it comes to deck board seams. I’m here to tell you that’s a lie that leads to buckling. Many homeowners want their outdoor space to feel like an indoor living room, so they push composite boards flush against each other. However, according to the North American Decking and Railing Association (NADRA), failing to account for thermal expansion is one of the top causes of structural hardware failure and board warping. If you don’t follow the expansion gap rule that stops boards from buckling, your deck will eventually look like a rolling wave. I’ve seen $20,000 installations ruined because the builder ignored the ambient temperature during the install. This is why why your hidden fasteners are popping up in heat is a common call I get in July. Have you ever fallen into this trap? Let me know in the comments.
Why does your high-end railing still rattle?
You’ve spent thousands on premium materials, yet every time the wind blows, your balusters sound like a xylophone. The trap here is assuming that the pre-drilled holes or standard inserts are ‘one size fits all.’ They aren’t. Often, the thermal contraction of the railing material in winter creates just enough space for movement. This is where the drill guide hack for centered baluster holes saves your sanity. A slight misalignment during installation doesn’t just look bad; it creates a mechanical vibration point that can even lead to why your railing balusters are rattling and the 5-minute fix later on. Precision is not just about aesthetics; it is about silencing the structure.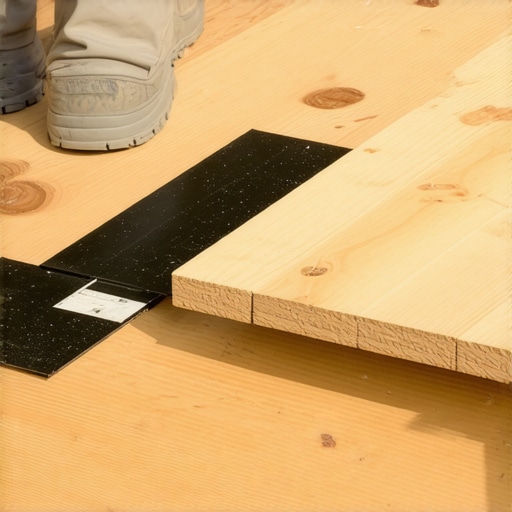
Stop building a greenhouse for your joists
Another nuance people miss is the interaction between different materials. People often assume that why pressure-treated wood still needs maintenance under composite is a myth. They think the ‘forever’ boards on top protect the ‘regular’ wood underneath. It’s actually the opposite. Composite traps moisture, creating a micro-greenhouse effect on your joists. If you aren’t using the flashing tape move that doubles the life of your joists, you’re building a beautiful surface over a rotting skeleton. It’s a sophisticated mistake that separates the pros from the weekend warriors. You need to look beyond the surface to maximize outdoor living with low maintenance composite decking properly. Similarly, failing to reinforce the frame for concentrated loads is a major ‘oops.’ If you are dreaming of a spa, you must learn how to calculate footings for a hot tub on your deck before you even order the lumber. Otherwise, you’ll notice why your deck boards are popping up at the ends as the frame begins to sag under the weight.Wait, if you’re seeing that sag I mentioned, you need to revisit the American Wood Council’s DCA 6—the ‘Prescriptive Residential Wood Deck Construction Guide.’ It is the gold standard for structural integrity, especially when calculating the staggering force of a snow load on a pergola or a water-filled tub. Most DIYers ignore table 3A, which dictates the maximum span for joists, and that is why their structures feel like a trampoline after two seasons. One tool I refuse to go to a job site without is a dedicated board-straightening lever. I personally use the Camo Lever because it allows me to lock in multiple rows of composite decking trends at once, ensuring that every gap is uniform before I drive a single screw. Without a lever, you’re fighting the natural ‘bow’ of the material, which even high-end boards have. When you combine this with the soap slippage method for pulling composite boards tight, the process moves from a struggle to a symphony. The soap acts as a temporary lubricant that lets the boards slide into the hidden fasteners without scuffing the expensive factory finish. It makes the installation feel like assembling a precision engine rather than wrestling with heavy lumber. 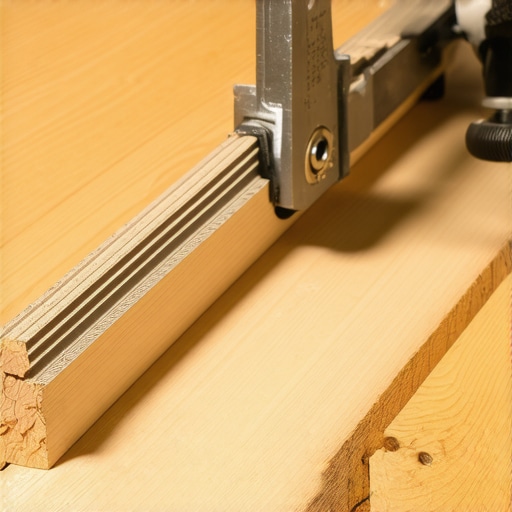
How can I keep my outdoor structures looking new for years?
Maintenance isn’t just about a pressure washer; in fact, I’ll tell you right now to keep the high-pressure nozzle away from your composite boards, as it can permanently etch the surface. You want to focus on the ‘hidden’ checkpoints. I recommend doing the 15-minute deck inspection every homeowner should do at the start of every spring. Look specifically for debris trapped between boards and check your composite decking secrets longevity tips for a lasting deck. In the future, I expect we’ll see more integrated ‘smart’ sensors in the joists to detect moisture levels before rot sets in, but for now, your best defense is the flash and tape method for protecting deck joists during construction. If you missed that window, focus on keeping organic matter—leaves and pine needles—out of the gaps. This prevents the ‘mulching effect’ that holds moisture against your wood frame.
Stop Wasting Money on Rough Estimates
I used to draw my plans on napkins, but now I won’t buy a single 2×4 until I’ve run the project through a 3D model. Why you need a 3d model before buying a single deck board isn’t just about the pretty picture; it’s about the cut list. When you see the structure in a digital space, you catch the ‘clash’ points—where a railing post hits a joist hanger—before you’re standing on a ladder with a saw. This digital dress rehearsal is how you elevate your backyard with innovative deck design ideas for 2025. It eliminates the ‘over-buy’ where you end up with $600 of extra composite that you can’t return. If you are struggling with a complex layout or wondering if your spans are safe, contact us and let’s look at your plans together. Try this today: before your next repair or build, map out just one corner in a 3D tool to see how the materials actually meet. You’ll be surprised how often your ‘mental math’ fails when confronted with 3D geometry.
The Most Expensive Mistakes I Made Before Using Templates
Over the years, I’ve learned that the biggest threat to your project isn’t a lack of skill; it’s a lack of patience during the setup. If you rush the template phase, you are essentially committing to hours of corrective sanding later. I once tried to skip the half-template flip trick on a high-end pergola design, and the resulting asymmetry was so obvious I had to replace three rafters on my own dime. Another lightbulb moment came when I realized that fixing a twisting rafter is infinitely harder than preventing it with proper storage and template-guided cuts. Lastly, always remember that your structure is only as strong as its hidden parts—don’t neglect flashing tape just because it isn’t visible to the neighbors. #IMAGE_PLACEHOLDER_E#
Gear That Saves My Back and My Budget
I don’t go into any build without my ‘Big Three.’ First, the Camo Lever is non-negotiable for anyone looking to maximize outdoor living with low maintenance composite decking; it takes the physical struggle out of straightening boards. Second, I keep a digital copy of the DCA 6 residential deck guide on my phone to double-check spans and load requirements on the fly. Finally, I swear by high-quality joist tape. It’s one of those composite decking secrets for longevity that ensures your frame stays as healthy as the boards on top. These tools turn a frustrating weekend of guesswork into a professional-grade installation that lasts decades.
Build Something That Outlasts the Season
Creating a backyard oasis is more than just a home improvement project; it is an investment in your daily quality of life. Whether you are perfecting a complex arch or simply upgrading your railing to something modern, take pride in the precision of the small details. If you ever feel overwhelmed by the technical geometry or need a professional eye on your plans before you buy lumber, contact us and we can help you navigate the process. There is nothing quite like the feeling of sitting under a pergola you built with your own hands, knowing every joint is tight and every curve is mathematically true. Have you ever had a project ‘fail’ or look crooked because you tried to eyeball a measurement? Let me know in the comments below!