
I was on my knees, sweating through my favorite shirt, looking down a forty-foot run of expensive composite. My heart sank. The first board was tight, the fifth was wide, and the tenth looked like it was heading toward the neighbor’s yard. I had spent thousands on materials, but my deck looked like a DIY disaster. We’ve all been there—thinking a ‘good eye’ is enough to keep things straight. It isn’t. If you’ve ever wondered how to fix gaps between composite boards after the fact, you know the nightmare of a ‘wavy’ deck. Today, I’m sharing the low-tech, zero-cost secret that saved my sanity: the cardboard spacer trick.
Your Deck Boards Are Moving Even When You Aren’t
You might think a board is just a board, but it’s actually a living, breathing thing—especially if you’re working with wood or even certain low-maintenance composite decking. Heat makes them grow; cold makes them shrink. When I first started out, I made the classic mistake of using a single plastic spacer I kept moving around. It was tedious, and I kept losing it in the grass. By the time I reached the end, my spacing had drifted by nearly half an inch. Precision isn’t just about being a perfectionist; it’s about structural health. According to the North American Deck and Railing Association (NADRA), improper board spacing is one of the most common reasons for structural decking complaints and moisture-related damage. If those boards are too close, water sits and rots your frame. If they’re too far, you’re looking at a tripping hazard. We need that ‘just right’ Goldilocks zone.
Will Cardboard Really Hold Up Long Enough?
I know what you’re thinking. Cardboard? Isn’t that a bit flimsy for a heavy-duty construction project? I used to be a skeptic too. I thought I needed some high-end, laser-cut specialized tool. But here’s the reality: cardboard from a shipping box is the perfect ‘sacrificial’ tool. It’s consistent in thickness, and you can cut a hundred of them in five minutes. When you’re looking for composite decking secrets for longevity, the simplest hacks are often the ones that actually work in the field. Have you ever finished a row only to realize your gaps are completely crooked? It’s a gut-punch, isn’t it? I’ve been there, and I want to help you avoid it. We are going to make sure that never happens to you again by mastering the exact thickness and placement of these DIY spacers to keep your lines as straight as an arrow.
Raid the Recycling Bin for Your New Favorite Tool
To get started, you do not need a trip to the big-box hardware store. Look for clean, dry corrugated cardboard—the kind from shipping boxes, not the thin stock used for cereal. Standard shipping cardboard is remarkably consistent, usually hovering right around 1/8 to 3/16 of an inch depending on the ply. Cut these into two-inch by two-inch squares. You want enough to put one every three feet along the length of your boards. While you are prepping the area, take a moment to look at your substructure; applying the joist tape secret for doubling your decks life is a crucial step to perform before the boards are actually in your way. Consistency in your spacers is like the heartbeat of the project; if the spacers vary, the whole rhythm of the deck falls out of sync. Using cardboard allows you to have a massive inventory of ‘sacrificial’ tools that you won’t mind getting dirty or accidentally stepping on.
Leave the Spacers in Place as You Go
The biggest mistake DIYers make is using just two or three plastic spacers and moving them along as they screw down the board. This creates ‘pivot points’ where the board can slightly bow or angle without you noticing. Instead, leave your cardboard squares wedged in the gaps for at least three or four rows. This creates a rigid block of aligned boards that prevents the ‘creeping’ effect. If you are working with a why your pressure-treated frame is pulling your composite apart situation, having these spacers in place acts as a buffer, ensuring that as you tighten fasteners, the boards aren’t being yanked out of alignment by a slightly twisted joist. It is a low-tech way to ensure the structural tension is distributed evenly across the entire surface.
Measure Twice or Prepare to Unscrew Everything
Even with perfect spacers, you must verify your progress. Every four rows, pull a tape measure from the house wall (or your starting rim joist) to the leading edge of the current board. Check this at both ends and the middle. If the measurements are even a quarter-inch off, you are headed for trouble. This is especially true when trying to keep up with composite decking trends that feature long, clean lines. If you find a discrepancy, you can slightly ‘cheat’ the next few rows by choosing slightly thicker or thinner pieces of cardboard. This is much easier than realizing at the end of the project that your last board needs to be ripped into a wedge shape to fit. Using the 3-4-5 triangle move for squaring up a new deck frame before you start will make this process significantly smoother, but the ‘every-four-row’ check is your safety net.
The Day My Deck Started Smiling at Me
I learned this the hard way back in 2019. I was rushing through a sixteen-foot run, feeling confident because I was using a single, high-end plastic spacer. I didn’t stop to measure back to the house because, in my head, ‘the tool was doing the work.’ By the time I hit row twelve, I stepped back and realized the boards had developed a distinct curve—it looked like the deck was smiling at me. The gap on the left was nearly half an inch wider than the gap on the right. I had to spend four hours backing out screws, which is a nightmare when you’re using hidden fasteners. Now, I use cardboard spacers and a the simple jig for drilling straight baluster holes to ensure every single detail is surgical. That ‘smiling’ deck taught me that a forty-cent piece of trash is more reliable than a twenty-dollar tool if you use it to create a physical constant across the entire deck surface.Everyone tells you that composite decking is a ‘set it and forget it’ solution. In my experience, that is the most dangerous myth in modern home improvement. While the boards themselves might carry a twenty-five-year warranty, the wooden frame underneath is often working on a much shorter clock. I have seen stunning innovative deck design ideas that elevate your homes curb appeal turn into bouncy, dangerous platforms within a decade because the builder prioritized the ‘look’ over the physics of the substructure. If you focus only on the surface, you are essentially putting a luxury car body on a rusted-out frame.
Your Deck Skeleton is More Important Than Its Skin
The reality is that composite material is heavy and flexible; it does not provide the same structural rigidity as traditional lumber. This is where most DIYers—and even some ‘pros’—get it wrong. They assume the boards will stiffen the frame. They won’t. In fact, if your joists are not perfectly flat, those expensive composite planks will follow every dip and hump in the wood. This is exactly why your composite deck feels spongy between joists even if you used the correct spacing. To combat this, you need to be obsessive about the leveling process before the first board ever touches the wood. According to the American Wood Council (AWC), moisture trapped between the deck board and the joist is the primary driver of premature structural decay. This is why I advocate for secondary protection even when the wood is pressure-treated.
The Secret Danger of Hidden Fastener Systems
We all love that smooth, screw-free aesthetic. It is a hallmark of composite decking trends that define high-end homes. However, there is a massive ‘oops’ factor here: thermal expansion. Unlike wood, which expands mostly in width, composite expands significantly in length. If you are using hidden clips on long runs without understanding the physics, the boards will eventually shear the clips or buckle. This is specifically why hidden fasteners fail on wide-profile boards when they are installed in peak summer heat or dead of winter. You need to account for that movement, or your ‘perfect’ deck will literally pull itself apart.
Why does my expensive railing start to rattle?
I get this question constantly. You spend thousands on a sleek aluminum system, only to have it wobble six months later. Most people blame the railing product, but the fault almost always lies in the ‘blocking.’ You cannot simply bolt a railing post into the side of a rim joist and expect it to stay solid. You need internal, solid-wood blocking that ties the post into at least two joists. Using the blocking trick that stops railing post wobble ensures that the leverage applied to the top of the rail is distributed across the entire frame, not just one piece of lumber. 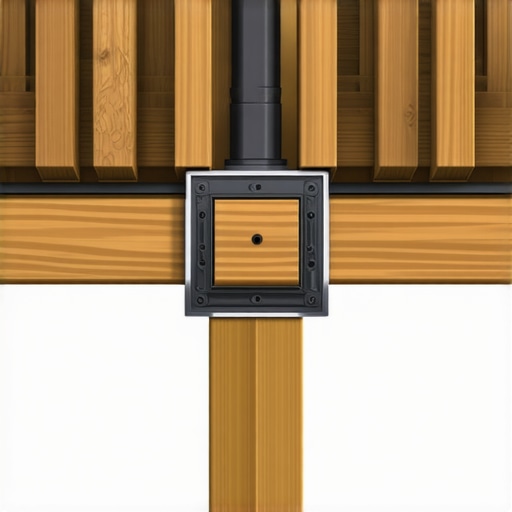
Don’t Fall for the Low-Maintenance Mirage
The biggest mistake you can make is assuming that ‘low maintenance’ means ‘no inspection.’ Even the best railing system for every deck requires a hardware check once a year. When you are building, you must look for potential rot traps. Paradoxically, some protective measures can actually backfire if installed incorrectly. For example, knowing why pressure-treated wood still rots under joist tape can save you from a catastrophic failure fifteen years down the line. It usually comes down to ‘crowning’—when a joist is installed with the curve facing down, creating a bowl that catches water despite the tape. Have you ever fallen into this trap of ignoring the skeleton for the skin? Let me know in the comments.
Stop Wrestling with Bowed and Stubborn Boards
The biggest secret in my tool bag isn’t a high-priced laser level; it is a heavy-duty board bender. Even the best low-maintenance composite decking can arrive with a slight crown or a stubborn bow. If you try to force these boards into place by hand, you will lose your mind and your spacing. I personally use a lever-action tool that locks onto the joist and pulls the board tight against my spacers while I drive the fasteners. This ensures that the pressure is even across the entire run. To keep everything looking uniform, I swear by the jig i use for consistent deck screw depth. If one screw is countersunk a millimeter deeper than the next, it creates a tiny shadow that your eye will catch every time the sun hits it. Consistency is the difference between a project that looks ‘done’ and one that looks ‘professional.’ 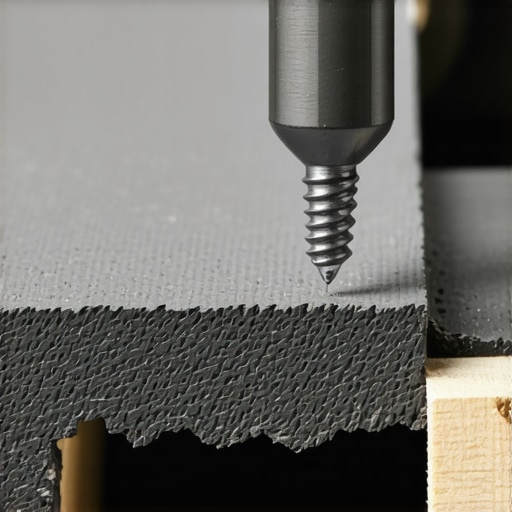
Your Framing Needs More Than Just a Prayer
We talked about the skeleton earlier, but let’s get technical. According to the American Wood Protection Association (AWPA) Use Category System, any lumber used in deck framing must meet specific ‘UC’ ratings to survive moisture exposure. I always go a step beyond the code. Before I lay a single plank, I use the shingle trick for protecting the top of your deck beam or high-quality butyl tape to ensure water sheds off the wood. I also suggest that you paint your deck joists black under composite. Why? Because the light-colored pressure-treated wood is visible through the gaps of your dark composite boards, and it looks incredibly messy. A quick coat of black exterior-grade paint makes the structure vanish, leaving only the beautiful surface of your composite decking trends to take center stage.
How do I maintain my composite deck and railing over time?
Maintenance isn’t about hard labor; it’s about smart habits. First, throw away your pressure washer. I have seen more decks ruined by high-pressure water than by actual weather. Knowing why you should never use a power washer on composite boards is the first step to preserving that factory finish. Instead, use a soft-bristled brush and a mild detergent twice a year to remove pollen and organic debris that can lead to mold. For your safety systems, check the hardware on your railing system for every deck at the start of every spring. Temperature swings can loosen bolts slightly, and a quick quarter-turn with a wrench can prevent that annoying ‘rattle’ from ever starting.
The Future of Backyard Construction
I predict we are heading toward a ‘modular’ revolution in outdoor design. In the next few years, I expect to see pergola trends shifting toward integrated smart-home technology, where sensors automatically adjust slats based on the sun’s position. We are already seeing this in high-end innovative deck design ideas for 2025, where lighting and climate control are baked into the initial frame rather than added as an afterthought. This means the ‘DIY’ of the future will require as much electrical knowledge as it does carpentry. If you want to stay ahead of the curve, start thinking about how you can integrate low-voltage power into your current build. My advice? Go grab a dedicated depth-control bit today and see how much faster and cleaner your board installation becomes.
The Hardest Lessons I Learned While Building Under the Sun
Building a deck is a marathon, not a sprint, and the mistakes you make in the first mile will haunt you at the finish line. Over the years, I have realized that the most expensive errors aren’t the ones you see—they are the ones you feel. Here are three things I wish I knew before I drove my first screw into a low-maintenance composite decking board: First, thermal movement is non-negotiable. Composite isn’t static; it expands in length more than you think. If you butt boards tightly against a wall without checking how to fix gaps between composite boards and your house, the summer heat will turn your deck into a series of speed bumps. Second, your frame is the master, the boards are the servants. If your joists are slightly off-level, even the most expensive composite will look wavy. I always use the string line trick for leveling deck joists to catch those dips before the decking goes down. Third, shadow lines don’t lie. The human eye is incredibly good at spotting a screw that is a tiny fraction of an inch deeper than its neighbor. Use a dedicated tool for consistency or prepare to stare at those dimples for the next twenty years.
Gear That Actually Belongs in Your Tool Belt
I am a firm believer that you don’t need a thousand-dollar workshop to build a masterpiece, but a few specific items will save your back and your sanity. First, invest in a dedicated depth-control bit; it is the only way to get a clean finish without over-driving screws as seen in the jig i use for consistent deck screw depth. Second, I highly recommend checking out the NADRA (North American Deck and Railing Association) safety checklists; they provide the gold standard for structural requirements that go beyond basic code. Third, don’t overlook your railing systems for safety and style; having a high-quality socket set and a cordless impact driver makes the difference between a shaky post and a rock-solid perimeter. Finally, always keep a roll of joist tape handy to prevent moisture from eating your frame from the top down.
Your Backyard is Waiting for Its Glow-Up
At the end of the day, a deck is more than just a collection of plastic and wood; it is where your summer memories are going to happen. Don’t let the fear of a crooked line stop you from starting. If you take it one board at a time and trust your spacers, you will end up with a space that rivals any professional build. Whether you are looking for innovative deck design ideas for 2025 or just trying to get that first row straight, the effort you put into the details now will pay off for decades. You have the tools and the tricks—now it is time to go out there and build something incredible. Have you ever had a deck board smile at you because the spacing was off? Let me know your biggest DIY save in the comments below!