
I remember standing on my first cedar deck at 7,200 feet, watching a bead of sweat hit a board and sizzle. Okay, maybe I’m exaggerating a little, but the mountain sun is no joke. By the second summer, those beautiful planks I’d spent a fortune on looked like they had been through a localized apocalypse. They weren’t just fading; they were splintering into thousand-year-old driftwood. My biggest mistake was thinking that a standard high-end wood stain could fight back against the thin atmosphere. It couldn’t. If you’ve ever walked barefoot on your deck in July only to feel like you’ve stepped onto a stovetop, you know exactly what I’m talking about. Today, I want to show you how to avoid my expensive failures and choose a surface that doesn’t just survive the UV rays but actually thrives in them.
High-Altitude UV is a Different Kind of Beast
Most people don’t realize that for every 1,000 feet you climb in elevation, the UV radiation levels increase by about 10% to 12% according to data from the World Health Organization. That means at 7,000 feet, your deck is taking a 70% harder beating than a deck at sea level. Standard pressure-treated wood or cheap PVC just can’t handle that level of cellular breakdown. This is why I eventually pivoted toward low-maintenance composite options that are engineered for extreme environments.
Is expensive capped composite actually worth the price tag?
I used to be a total wood-purist, but after three years of sanding and staining, I realized I was a slave to my backyard. The skepticism is real—composite isn’t cheap. However, if you learn how to distinguish high-quality capped decking from the bargain-bin stuff, you’ll find it’s the only thing that won’t turn into a grey, splintery mess by year three. When the sun is this intense, the ‘cap’ or the protective outer shell of the board is your only line of defense against warping. I’ve found that modern materials are the ultimate composite decking secrets to a deck that actually lasts a decade without me losing my mind. Have you ever noticed your deck boards starting to ‘cup’ or curve upward toward the sun after a particularly hot summer? Let me know in the comments, because that’s the first sign your material is waving the white flag.
The Heat Problem and Your Bare Feet
Another hard lesson I learned: dark colors are the enemy of high-altitude living. I once installed a beautiful ‘Mocha’ board that looked stunning in the showroom but became an active hazards in the Colorado afternoon. You have to be careful and avoid dark decking in high-sun areas unless you plan on wearing boots all summer long. Choosing the right material isn’t just about durability; it’s about making sure you can actually use the space without getting second-degree burns. We need to look at materials that reflect heat rather than absorbing it like a giant sponge.
Stop the skeleton from rotting before the boards even fade
Think of your deck frame like the foundation of a house. In high-altitude areas, the temperature swings are massive—freezing at night and baking by noon. This causes the wood to expand and contract like a set of lungs, eventually creating tiny cracks around your screws. Water gets in, the wood rots, and suddenly your expensive composite boards are attached to mush. This is why the flashing tape move that doubles the life of your joists is non-negotiable. I remember building a 10×10 platform for a client’s hot tub and skipping the tape because I was in a rush and thought the dry mountain air would protect me. Three years later, the boards started bouncing like a trampoline. When I pulled one up, the joist tops looked like wet cardboard despite the lack of rain. Since then, the joist tape secret for doubling your decks lifespan has been part of every single build I touch. It is like putting a permanent raincoat on your structural lumber before the sun has a chance to bake it brittle. 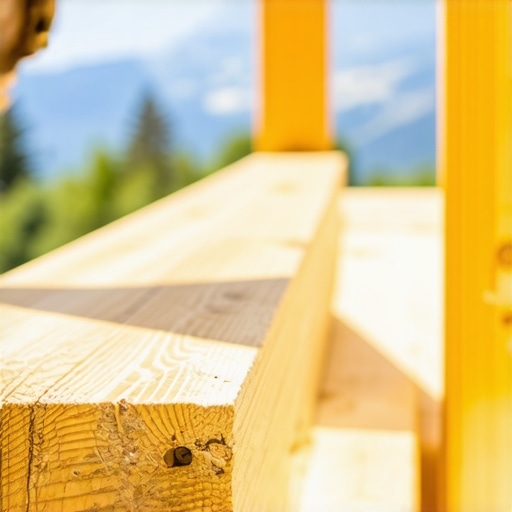
Pick a board that won’t cook your feet
Not all composites are created equal, and in thin air, the wrong choice can be painful. Most ‘standard’ boards are wood-plastic composites (WPC), which contain organic fibers that act like tiny heat sinks. These boards reach temperatures that can literally melt cheap flip-flops in the July sun. You need to look for Capped Polymer (PVC) decking. There is a specific reason why capped polymer composite stays cooler than wood plastic: it contains no wood flour to hold onto the heat. It is the difference between walking on a sun-baked rock and walking on a shaded tile. I used to think ‘capped’ meant ‘invincible,’ but it really just means ‘shielded.’ Imagine your deck is a space shuttle re-entering the atmosphere; the cap is the heat shield. Without it, the core simply disintegrates under the UV bombardment. This is why you must learn how to identify high-quality capped decking from the cheap stuff before you commit to a color. Also, when you install these, keep the expansion gap rule that stops boards from buckling in mind. In the mountains, a board can grow or shrink by a quarter-inch between sunrise and sunset. If you do not give it room to breathe, your beautiful flat surface will turn into a warped roller coaster by lunchtime.
Keep the mountain view without the wind-whistle
When you have a view of the peaks, the last thing you want is a chunky wood railing blocking 40% of the scenery. However, high altitudes come with high winds that can turn a backyard into a wind tunnel. I have seen glass railings turn into giant sails that vibrate so hard they shatter during a spring storm. That is why I have pivoted almost exclusively to cable. Using the stainless cable trick for views that never get blocked allows the wind to pass through the deck while keeping the focus on the horizon. The trick is all in the tension. You do not need a specialized crew if you know how to tension cable railings without specialized expensive tools. Just remember: if the cables aren’t tight enough to play like a guitar string, they will sag the moment the temperature drops in October, leaving you with a messy, rattling look that ruins the aesthetic of your mountain sanctuary.Everyone tells you that once you go composite, you will never pick up a brush or a cleaner again. In my experience, that is the most dangerous myth in the industry. Let’s dig deeper: the ‘maintenance-free’ promise is a marketing trap. While you won’t be staining every year, the high-altitude sun works like a slow-motion oven, baking organic debris, pollen, and mountain dust directly into the pores of your deck’s cap layer. If you don’t perform a basic seasonal rinse, that debris creates a microscopic abrasive layer that dulls the finish faster than any foot traffic ever could. I’ve seen $20,000 installations lose their luster in forty-eight months simply because the owner believed the ‘no-maintenance’ lie. To keep that showroom shine, you have to apply specific composite decking secrets like scheduled pH-neutral cleanings, especially after the spring pollen dump.
Why your hidden fasteners are popping up like toast
It’s the ultimate ‘oops’ factor for homeowners who prioritize aesthetics over physics. We all love the clean, screw-free look of hidden fasteners, but in high-elevation climates, the thermal expansion is violent. According to research by the Forest Products Laboratory, wood-plastic composites can expand and contract up to three times more than natural timber. If your builder used rigid, low-quality clips, the board will eventually shear the screw head right off as it expands in the noon sun. This is exactly why your hidden fasteners are popping up in heat and why I now only trust high-travel stainless steel clips that allow the board to slide slightly without compromising the grip. Have you ever fallen into this trap? Let me know in the comments. 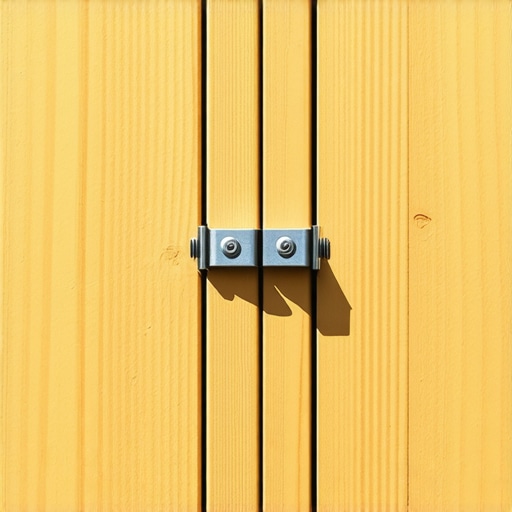
Can your current frame actually handle heavy ceramic planters?
Most people think the joist layout they inherited from an old wood deck is sufficient for a modern composite upgrade. It isn’t. Because composite is more flexible than wood, those 24-inch on-center joists will make your new deck feel like a trampoline. If you are planning on adding heavy features, you need to understand the joist spacing secret for decks with heavy ceramic planters, which usually involves tightening that frame to 12 inches on-center. Furthermore, if you’re dreaming of a mountain-view soak, you cannot skip the structural math for safely adding a hot tub to your deck. A standard deck is rated for 40-50 pounds per square foot, but a hot tub can easily exceed 100 pounds.
The freestanding pergola wins every single time
When it comes to shade, many homeowners insist on bolting a pergola directly to the house ledger. In the mountains, this is a recipe for disaster. Heavy snow loads on a pergola can create massive leverage that pulls on your house’s rim joist, potentially compromising your home’s envelope. This is why the ledger-free pergola why freestanding is often better is a hill I will die on. By keeping the structures separate, you avoid complex flashing issues and allow the pergola to move independently during high-wind events. Before you start digging, make sure you use the 3-4-5 rule for squaring your deck frame every time so your posts line up perfectly with your rafters. Finally, don’t just guess on the aesthetics; take the time to how to select the perfect railing system for every deck to ensure your safety features don’t clash with your structural choices.One of the fastest ways to turn a $30,000 investment into a scratched-up mess is by using the wrong shovel when the first October blizzard hits. I’ve seen homeowners go out with a heavy steel-edge shovel and leave permanent gouges in their boards. Learning the best way to handle snow removal on composite decks is about using plastic blades and sweeping with the grain to protect that expensive cap layer. If you live in a place where the temperature drops below zero regularly, you also need to be careful with your hardware choice. Cheap zinc-coated screws will become brittle and pop when the framing shrinks in the cold. I’ve seen it happen dozens of times. Understanding why your deck screws are snapping in cold weather taught me to only use 305 or 316-grade stainless steel fasteners, especially at high elevations where the freeze-thaw cycle is relentless and unforgiving.
How do I maintain my composite deck over time?
The biggest secret to longevity isn’t a complex chemical; it’s simple consistency. I recommend a deep wash every spring using nothing more than a soft-bristle brush and a bucket of warm, soapy water. Avoid the pressure washer at all costs! If you get the nozzle too close, the high pressure can actually etch the surface of the polymer or even peel back the grain texture. While you are performing your annual check, take a look at your ambiance and safety features. I always use the low-voltage lighting trick for highlighting deck levels to ensure that as the ground settles, nobody trips on a stair transition that has shifted by a fraction of an inch during the winter heave. Looking toward composite decking trends for durable solutions, the future of this industry is moving toward heat-reflective cool-roof pigments and even more advanced fire-resistant cores for mountain-dwellers. According to the American Wood Council’s DCA 6 guide, the structural integrity of your outdoor space is only as good as the mechanical connections between your posts and beams. This is why I always use the notched rafter secret for a pergola that never wobbles; it creates a physical interlocking joint that resists wind uplift better than any ledger screw ever could.  Before you even buy your first post or joist, I cannot stress enough why you need a 3d model before buying a single deck board. A digital model lets you visualize how the sun path will hit your specific plot, allowing you to deploy the simple shade sail hack for sunny afternoon pergolas before you realize your main seating area is a literal oven. Try this today: go out to your yard at 2:00 PM and mark exactly where the shadows fall with a handful of landscaping flags. That’s where your pergola posts belong, not just where they look symmetrical on a piece of paper.
The Reality of Building Where the Air is Thin
After decades of fighting the elements at high elevations, I have realized that the ‘perfect deck’ isn’t just about the most expensive materials, but about mastering the smallest physical details. First, never ignore the ‘bounce.’ If you feel any vibration when walking, it is usually because of a lack of lateral bracing; using the simple blocking move that stops your deck from shaking when you walk is the quickest way to make a DIY project feel like a professional build. Second, the aesthetics of your edges matter more than you think. I always recommend the double joist trick for perfectly flush picture frame borders to hide the raw, unfinished ‘meat’ of the board ends. Finally, remember that your deck moves. A structure at 8,000 feet is a living, breathing thing that needs space to expand, or the internal pressure will eventually cause the fasteners to fail.
Tools and Guides I Swear By
To get consistent results, I do not just rely on instinct; I use a specific set of resources and high-performance components. I always keep a copy of the American Wood Council structural guides handy for peace of mind. For design inspiration that actually works in harsh climates, I look at composite decking trends for durable solutions to see which heat-reflective technologies are hitting the market. When it comes to finishing touches, I consult the complete guide to choosing railing systems for safety and style to ensure I am not accidentally blocking the very view the homeowner fell in love with. If you are stuck on the visual side of your project, learning how to select the perfect railing system for every deck is the best way to bridge the gap between basic safety and high-end mountain aesthetics.
#IMAGE_PLACEHOLDER_E#
Your Mountain View is Waiting
Building in extreme environments is a test of patience and physics, but do not let the technical hurdles intimidate you from starting. By choosing a high-performance composite decking material and respecting the local climate through smart framing, you are creating a sanctuary that will host decades of sunsets and summer gatherings. If you ever feel overwhelmed by the structural requirements or the design choices, feel free to contact us for a second opinion on your mountain project. Your backyard should never be a source of stress—it should be your favorite room in the house. Are you planning a brand new build this year, or are you trying to revive an old wooden frame with new composite boards? Let me know your elevation and your biggest construction challenge in the comments below!