
I remember hosting my first big neighborhood BBQ after finishing my new backyard retreat. I had the perfect low-maintenance composite decking installed, the grill was sizzling, and the vibe was just right. But twenty minutes in, I noticed something awkward. My guests were huddled in the center of the deck, clutching their beer cans and wine glasses like they were afraid to let go. Then it happened. Mrs. Higgins from next door tried to balance her chardonnay on the narrow, beveled edge of my expensive aluminum railing. Splat. Red wine met gray composite. That was the visceral moment I realized most railing systems are built for safety, but they are absolutely useless for actual entertaining. I felt like a failure as a host because I’d focused on the floor and forgotten the furniture that isn’t furniture. Today, I’m going to show you how the cocktail rail hack—essentially a flat, functional surface atop your perimeter—will completely change how you use your outdoor space.
Stop Forcing Your Guests to Balance Drinks on Narrow Ledges
If you have ever tried to eat a plate of ribs while standing up on a deck, you know the struggle. Most standard railings are barely two inches wide and often peaked or rounded to shed water. That is great for the wood’s longevity, but terrible for a gin and tonic. By installing a matching deck board horizontally across the top of your balusters, you create a 5.5-inch wide surface that acts as a built-in bar. Here is how you actually execute this without making your deck look like a DIY disaster.
Pick a Board That Handles the Heat
You can’t just slap any piece of wood on top and call it a day. If you have already invested in low-maintenance composite decking, you want the cocktail rail to match the floor. I usually recommend a standard 5.5-inch deck board. But here is the trick: check the heat rating. I once installed a beautiful charcoal-colored rail on a south-facing deck in Georgia. By 2 PM, that rail was a hot plate. I learned the hard way that why black composite decking burns your feet also applies to your hands and drinks. Always opt for lighter shades or capped polymer options if your deck gets direct sun.
The Painters Tape Hack for Clean Cuts
When you are cutting these expensive boards, you only get one shot. If you are using a miter saw, the blade can sometimes “fray” the edges of the composite cap. I always use the painters tape hack for cutting composite boards without fraying. Just wrap the cut line in blue tape before you drop the blade. It keeps the plastic from splintering and gives you that factory-finish edge that makes the rail look professional. This is especially vital when the ends of the boards are exposed at the corners. 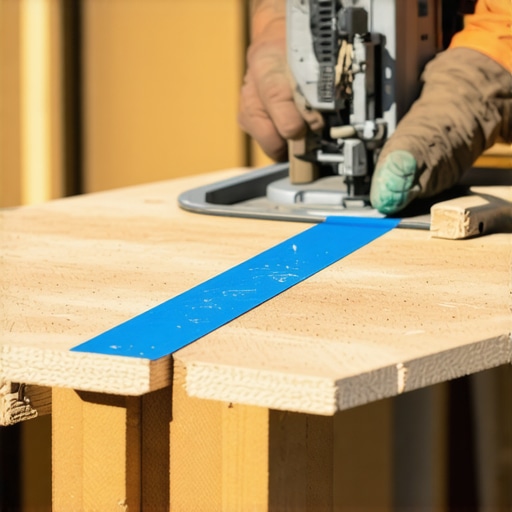
Anchor Your Rail So It Doesn’t Budge
A cocktail rail is only as good as the posts underneath it. If someone leans their weight on that 5.5-inch board and the whole system flexes, the “bar” feel is gone. This is where most people fail. They assume the standard hardware is enough for the extra leverage a wide board creates.
Use Blocking to Eliminate the Wobble
Before you even think about the top board, ensure your posts are rock solid. I use the blocking trick that stops railing post wobble by adding extra framing inside the joist cavities where the posts attach. Think of it like a sports car’s suspension; if the frame is stiff, the ride is smooth. On my own deck, I forgot to do this on the far corner near the stairs during a midnight rush to finish for a party. Now, every time someone sets down a heavy mug, you can see the wine ripple. It drives me crazy. Stiffen the frame first.
Fasten from the Bottom for a Clean Look
To keep the surface smooth for glasses, you don’t want screws sticking out the top. Use an “L” bracket or drill up through the top rail of your railing systems into the bottom of the deck board. However, be careful with the length. I once made the 3-inch screw mistake where I used fasteners that were just a hair too long. They poked through the beautiful wood-grain surface. It ruined the look and created a safety hazard for anyone sliding their hand along the rail.
Keep the Posts Plumb
Nothing ruins the illusion of a professional bar like a rail that slopes. Use the simple tool for making sure your railing posts are plumb—a long magnetic level is your best friend here. If the posts lean even a degree, your drinks will slowly migrate toward the edge, eventually ending up like Mrs. Higgins’ chardonnay. Accurate leveling ensures the surface remains functional for more than just aesthetics.
Why Over-Sizing Your Rail Board Is a Recipe for Disaster
Most pros will tell you that bigger is better when it comes to a functional bar surface. I disagree. I have seen homeowners try to install 8-inch wide boards to create a true “countertop” feel. While it looks great for the first week, you are effectively creating a giant lever. When a guest leans on that outer edge, the torque applied to your railing brackets is immense. This is exactly why your railing bracket keeps snapping in the cold; the material becomes brittle, and that extra leverage simply shears the hardware. Stick to the 5.5-inch standard; it is the “Goldilocks” zone for stability and utility.
The Expansion Trap That Buckles Even the Best Rails
The “Oops” factor usually involves the sun and a lack of math. According to the North American Deck and Railing Association (NADRA), composite materials can expand significantly depending on the temperature swing. If you pin both ends of a 12-foot cocktail rail tight against your posts, that board has nowhere to go but up. This is why your composite boards are crowning or buckling in the center of the span. You have to leave a “breathing” gap, typically about 1/16 to 1/8 of an inch, depending on the ambient temperature during installation. Mastering how to stop composite deck boards from expanding into your siding is a skill that carries over directly to your railing; you need to account for that movement at every termination point.
Should You Risk Using Hidden Fasteners on High-Traffic Rails?
While we all love a clean look, using standard hidden clips on a cocktail rail is often a mistake for high-traffic entertaining areas. These clips allow for lateral movement, which is great for the main floor, but on a railing, you want zero “slide” when someone sets down a heavy tray. For the best composite decking secrets regarding longevity, I recommend color-matched face screws with plugs. It provides the rigid shear strength required for a bar-top while maintaining that “invisible” finish. This ensures your innovative deck design ideas do not turn into a maintenance nightmare two seasons later. Have you ever fallen into this trap where your rails buckled or hardware snapped? Let me know in the comments.
Ditch the Pressure Washer Before You Ruin the Grain
If you want to keep that cocktail rail looking like a high-end bar top, put down the power washer. I have seen more homeowners destroy their low-maintenance composite decking by getting too aggressive with high-pressure water than I care to admit. It peels the protective cap and leaves the surface feeling like sandpaper. Instead, I rely on the vinegar and water mix that cleans composite better than chemicals. It is gentle enough for your guests’ wine glasses but tough enough to lift pollen and grill grease. If you do run into a stubborn spot, remember why you should never use a pressure washer on composite: the water can actually force debris deeper into the wood-plastic pores. Stick to a soft-bristle brush and some elbow grease for the best composite decking secrets regarding a pristine finish.
Precision Alignment with My Favorite Laser Trick
When I am setting up a long run of railing or checking the height of a pergola design, a standard tape measure isn’t enough for the level of perfection I demand. I swear by the level and laser method for setting pergola heights alone. Using a self-leveling green beam laser—which is far more visible in daylight than red beams—allows me to ensure every single post for my railing systems is perfectly height-matched to the fraction of an inch. If your rail is off by even a quarter inch over ten feet, you’ll feel it the second you set down a beer. 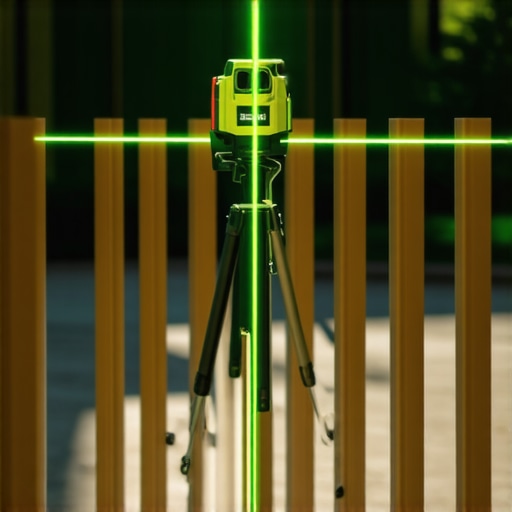
How can I make my railing system last a lifetime?
Longevity comes down to the things you can’t see once the boards are down. According to the American Wood Council’s NDS (National Design Specification) for Wood Construction, using G90 galvanized or stainless steel fasteners is non-negotiable for outdoor structures, especially in coastal or humid environments. I personally refuse to use anything but 304 or 316-grade stainless steel for my cocktail rail attachments. This prevents the chemical reaction between modern pressure-treated lumber and cheaper metals that leads to structural failure. To scale this longevity, I always check my framing with the 3-4-5 triangle move for squaring up a new deck frame. A perfectly square frame means your rails don’t have to fight against the geometry of the deck, which reduces stress on your hardware over the decades.
The Next Wave of Outdoor Entertaining Tech
Looking ahead, I see the “furniture-rail” trend evolving into a fully integrated smart surface. We are already seeing prototypes of innovative deck design ideas that incorporate wireless charging pads directly into the cocktail rail and low-voltage heating elements to keep drinks from freezing during winter gatherings. As these systems become more common, the precision of your initial install becomes even more critical. You cannot retrofit a high-tech rail onto a wobbly frame. My advice? Go out this weekend and check your railing posts for any sign of a shimmy. If you find one, use a heavy-duty structural screw to cinch it down—it is the easiest ten-minute fix to ensure your deck is ready for the next level of upgrades.
Lessons from the Field That Transformed My Building Style
I used to think of railings only as a safety barrier required by code. Now, I see them as the most important piece of furniture on the deck. Here are a few lightbulb moments I’ve had after years of trial and error:
- The Elbow Test is Real: Before you fasten everything down, stand at the rail and imagine leaning there with a friend. If it is too high or too low for a comfortable lean, adjust your post height now.
- Buy More than You Need: Always buy 10% more material for the top rail. Complex miter cuts for corners often lead to a few mistakes, and you do not want to be one board short on a Sunday afternoon.
- Respect the Gap: It feels counterintuitive to leave a space at the ends, but it is the only way to prevent the material from tearing its own screws out when the sun hits it.
My Go-To Tools for a Flawless Railing Install
Building a high-end low-maintenance composite decking project requires the right gear. These are the items I never head to a job site without:
- Kreg Deck Jig: This is my secret weapon for hidden fastening when I want the look of a seamless bar top without visible screws.
- 316-Grade Stainless Fasteners: I never compromise here. Cheap screws will bleed rust onto your composite, and once that stain sets, it is nearly impossible to remove even with the vinegar and water mix that cleans composite better than chemicals.
- Self-Leveling Green Laser: This tool ensures your railing systems are perfectly horizontal, which is non-negotiable for a functional cocktail surface.
Build the Space Your Friends Will Never Want to Leave
Creating a deck that truly works for people is about more than just square footage. It is about those small, intentional details like a dedicated place to set a drink or a sturdy spot to lean during a long conversation. When you put in the effort to master composite decking secrets like the cocktail rail, you are not just building a structure; you are building a backdrop for years of family memories. Don’t be afraid to experiment with innovative deck design ideas that prioritize how you actually live outside. Have you ever dealt with a wobbly railing that made your guests nervous? Let me know your fix in the comments below!