
I remember standing in my kitchen during a relentless April downpour, watching a slow, rhythmic drip-drop hit my new hardwood floors. My heart sank. I looked up at the ceiling, then out the window at the beautiful deck I’d finished just two summers prior. I was so proud of that build. I used the best composite, spent weeks on the no-visible-screw stairs, and thought I was a pro. But that drip was the sound of my house literally rotting from the outside in. It wasn’t the roof. It wasn’t the window. It was the ledger board—that heavy piece of timber that connects the deck to the house frame. I’d bolted it on tight, but I’d created a highway for water.
My Kitchen Ceiling Taught Me a Lesson I’ll Never Forget
The mistake I made was subtle, and honestly, it’s one I see in almost every DIY deck project I walk past today. I assumed that because the bolts were tight and the wood was pressure-treated, the house was safe. I didn’t account for capillary action—the way water can literally climb uphill or “cling” to surfaces to find a way into your siding. By the time I realized what was happening, I had to perform a structural vulnerability assessment for checking deck joist rot, and the results were grim. The rim joist of my actual house was soft enough to poke a screwdriver through. It is a gut-wrenching feeling that costs thousands to fix if you don’t catch it early.
Is it actually possible to keep a house dry with a deck attached?
Many homeowners fear that any hole poked into their home’s “envelope” is a death sentence for their drywall. I get it. You’re worried that no matter how much caulk you use, gravity and moisture will eventually win. But here’s the reality: you don’t need a miracle; you need a gap and the right metal. Today, we are going to fix the way you think about ledger boards. I’m going to show you how to move away from the dangerous “flush mount” and toward a system that breathes. We’re going to talk about the ledger gap fix that prevents house siding rot and why your current setup is likely a ticking time bomb.
Why the Standard Bolt-and-Go Method Is Failing Your Home
The traditional way of building involves slapping a 2×10 against the house and cranking down some lag bolts. It’s fast. It’s easy. It’s also how you end up with a massive repair bill for your kitchen wall. According to building science experts at the International Association of Certified Home Inspectors, improper ledger attachment is a primary cause of deck-related structural failures and moisture intrusion in North America. When you trap moisture between two pieces of wood with no airflow, you’re basically creating a petri dish for wood-destroying fungi. I learned the hard way that you need to use the drip edge trick for protecting deck ledger boards to break that surface tension. Have you ever noticed a mysterious damp spot or a “musty” smell near your deck door after a storm? If so, you might already be dealing with the deck to wall flashing mistake that causes kitchen rot. Let’s get into the nitty-gritty of how to actually bridge that gap safely and keep your subfloor bone-dry for the next thirty years.
Stop Your Ledger From Hugging Your House Too Tight
The first thing you need to do is stop thinking about the ledger as a structural glue that needs to be flush against your siding. Think of it like a bridge instead. You want to create a physical break between the ledger and your house using specialized spacers. I personally use stackable structural spacers to create a consistent half-inch gap. This is the ledger gap fix that prevents house siding rot by allowing water to fall straight through to the ground rather than being trapped against your home’s sheathing. I remember a job in a particularly rainy part of the Pacific Northwest where we did exactly this on a massive wrap-around project. Every other contractor who bid the job wanted to bolt it flush and ‘seal it with caulk,’ but we used the rubber spacer trick for better airflow under joists. Two years later, during a follow-up, that gap was as clean as the day we built it, with absolutely zero organic debris or moisture buildup behind the wood. 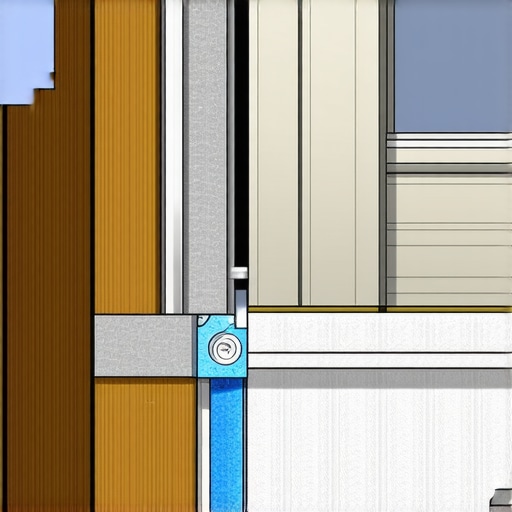
The Flashing Sandwich That Blocks Every Drop
You can’t just rely on the air gap alone; you need a layered defense system that I like to call the flashing sandwich. This starts with a high-quality stainless steel or vinyl ‘Z’ flashing that tucks up behind your house siding and then caps over the top of the ledger board. But here is the critical step where most DIYers and even some pros fail: they forget the back-flashing. I always install a wide layer of self-adhering waterproof membrane directly against the house’s sheathing before the ledger or spacers even touch the wall. When you combine this membrane with the drip edge trick for protecting deck ledger boards, you are essentially creating a water slide. The rain hits the flashing and is forced away from the house and into the gap. It is a simple physics play that prevents the ‘wicking’ effect that ruins drywall and subfloors.
Tape and Seal the Hidden Vulnerabilities
Every lag bolt or structural screw you drive through that ledger is a potential highway for a raindrop. This is why I never build a frame without using the joist tape secret for doubling your decks life. I wrap the entire top edge of the ledger and even apply small ‘patches’ of tape over the bolt holes before the washers go on. If you are planning to maximize outdoor living with low maintenance composite decking, this step is non-negotiable. Composite boards can last 25 to 30 years, but your pressure-treated frame will likely fail in 10 or 15 if it’s constantly damp. I’ve had to tear up beautiful, expensive boards because the builder skipped the tape and the joists underneath turned to mush. While you are working on the ledger, don’t forget to implement the under joist flashing move that stops post rot for any structural supports near the foundation. Once the ledger is secure, I always perform the garden hose test for proper deck water runoff. I’ll stand on a ladder and spray the wall above the deck for ten minutes straight. If I see water clinging to the ledger or disappearing behind the membrane, I know I have a leak to fix before the decking goes down. It is much better to find a flaw with a hose than to wait for a structural vulnerability assessment for checking deck joist rot five years down the road.Let’s dig deeper into the world of composite decking and advanced framing, because this is where the pros separate themselves from the weekend warriors. You’ve probably been told that composite is a ‘set it and forget it’ material. That is a dangerous myth. While you won’t be staining it every June, composite boards are essentially living, breathing plastics that react violently to temperature. In my experience, most DIYers fail because they treat composite like wood. It’s not. According to a technical study by the Forest Products Laboratory, wood-plastic composites can expand and contract up to three times more than traditional lumber across the same temperature gradient. If you don’t account for this, your beautiful boards will eventually buckle or shear their fasteners. Have you ever fallen into this trap? Let me know in the comments.
The Hidden Cost of Choosing Pretty Fasteners
Everyone wants that clean, fastener-free look, but beauty comes with a structural tax. I’ve seen countless projects where homeowners wonder why hidden fasteners fail on wide profile boards after just one season. The ‘oops’ factor here is simple: hidden clips often lack the lateral holding power to keep wide or heavy boards from ‘walking’ or shifting. When the sun beats down, those boards want to move, and if they are pinned only by a tiny plastic clip, they will eventually pop out or create unsightly gaps. This is especially true if you are using darker colors, which is why dark composite boards need extra expansion space compared to their lighter counterparts. If you aren’t leaving at least a 3/16-inch gap at the butt-joints, you’re building a ticking time bomb for a hot July afternoon.
How much room does your deck actually need to breathe?
Sophisticated builders know that it’s not just about the surface; it’s about the substructure. I see a lot of people spend $15,000 on high-end boards only to install them on a frame that isn’t square. If your frame is off even by half an inch, the expansion issues are magnified. I always suggest using the 3-4-5 triangle move for squaring up a new deck frame before the first board ever touches a joist. Without a perfectly square base, your miter joints will open up like a hungry alligator by the time winter rolls around. 
Why Your Cable Railings Sag Every January
Another advanced nuance involves railing systems. Cable railing is the peak of modern deck design, but it’s also the most commonly misunderstood. I’ve had clients call me in a panic because their expensive stainless cables are sagging. It’s rarely a hardware failure; it’s usually a framing failure. Most people don’t realize that a properly tensioned cable system puts thousands of pounds of lateral pressure on the end posts. If you didn’t use the blocking trick that stops railing post wobble, those posts will slowly pull toward each other. This is exactly why cable railing tensioners fail and how to prevent it—it’s not the metal snapping, it’s the wood post bowing under the load. Before you sign off on your railing, give it the 3-second push test for wobbly railing systems. If there is any play, your cables will never stay tight.
Don’t Let Your Boards Fade into a Patchy Mess
Finally, let’s talk about the ‘shadow effect.’ I see people install beautiful pergolas over their composite decks without realizing they are creating a permanent tan line. Over time, UV rays will slightly shift the color of even the best capped composites. If you have a permanent structure above, you might eventually notice why your composite decking is fading in patches. It’s not a defect in the board; it’s a failure to plan for environmental exposure. Always ask yourself how the sun hits your deck at 2 PM in August—that’s the ‘real’ color your deck will be in five years.
You’ve spent weeks planning and thousands on materials, but the real work starts the day you put your tools away. I’ve seen too many people treat a high-end composite deck like it’s invincible, only to call me three years later wondering why their boards look tired or why their screws are backing out. Maintenance isn’t just about cleaning; it’s about having the right kit in your garage to handle small issues before they become structural disasters.
The Two Tools That Save My Reputation Every Week
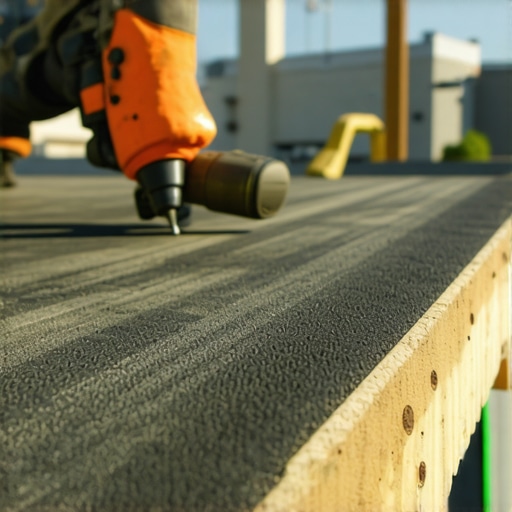
I don’t step onto a job site without a dedicated depth-control driver. If you are driving screws manually, you are going to end up with ‘mushrooming’—that ugly little ring of plastic that pops up around the screw head. I rely on the jig i use for consistent deck screw depth to ensure every single fastener is perfectly flush. It sounds like a small detail, but when you look across a 400-square-foot surface, that uniformity is what makes it look professional rather than DIY. My other secret weapon? A high-quality heat gun. Accidents happen during furniture moves, but you can actually learn how to fix scuffs on dark composite boards with a heat gun by gently softening the plastic to blend the texture back together. It’s a magic trick that has saved me from replacing entire boards more times than I can count.
How do I make my deck last thirty years instead of ten?
The secret isn’t a miracle product; it’s avoiding the ‘death by cleaning’ trap. I tell all my clients: why you should never use a power washer on composite boards is because the high pressure can actually open up the pores of the material, making it more susceptible to permanent staining later. Instead, I always recommend the vinegar and water mix that cleans composite better than chemicals. It’s gentle, it’s cheap, and it won’t kill your landscaping. According to the North American Deck and Railing Association (NADRA), over 40 million decks in the U.S. are past their life expectancy, and missing a simple annual inspection for rot or loose connections is the number one cause of sudden structural failure. Checking your ledger and joists every spring is these composite decking secrets longevity tips for a lasting deck that most homeowners ignore until it’s too late.
Smart Decks and the End of Manual Maintenance
Looking ahead, the trend is moving away from static structures toward ‘smart decks.’ We are starting to see integrated sensor systems that can detect moisture buildup behind the ledger or alert you if a railing post has exceeded its tension limits. In the next five years, I predict we’ll see bio-based composites that actually ‘heal’ small surface scratches when exposed to direct sunlight. Until then, you need to be smart about your layout. For instance, always follow the propane fire pit clearance rule every deck owner needs to ensure your heat source doesn’t warp your investment. If you want to elevate your space right now, try using the jig i use for consistent deck screw depth on your next repair—you’ll be amazed at how much cleaner the finish looks. Don’t let your hard work fade; take ten minutes this weekend to walk your frame and look for those hidden drips.
What Professionals Hide About Ledger Attachments
Over a decade of building has taught me that the biggest secrets aren’t in the manuals; they are in the failures we see years later. First, never trust caulk to be your primary water barrier. Caulk is a temporary sealant that eventually dries and cracks, while a physical metal barrier lasts decades. Second, the ‘tight is right’ mentality is a trap when it comes to the house wall. A ledger that is bolted flush without any breathing room acts like a sponge, pulling moisture directly into your home’s framing. I always use the 3-4-5 triangle move for squaring up a new deck frame as my absolute first step, because if the frame isn’t perfect, the water management system will eventually shift and fail. Finally, I’ve learned that the ‘shadow effect’ is real; if you plan on adding a pergola trends inspired structure later, account for those UV patterns now so your boards fade evenly across the entire surface.
The Toolbox That Keeps My Deck Standing
I don’t believe in buying every gadget on the shelf, but these specific tools are non-negotiable for a professional finish. I rely heavily on the jig i use for consistent deck screw depth to ensure that every single fastener looks identical, which prevents the ‘mushrooming’ effect common in DIY composite projects. For checking the health of an existing structure before a renovation, I never go without a long-shank screwdriver for the structural vulnerability assessment for checking deck joist rot. I also keep a roll of high-quality butyl tape in my bag, because the joist tape secret for doubling your decks life is the cheapest insurance policy you can buy for a wood frame. For maintenance, a simple gallon of white vinegar is my go-to for the vinegar and water mix that cleans composite better than chemicals, keeping the surface pristine without the risk of high-pressure damage.
#IMAGE_PLACEHOLDER_E#
Take Control of Your Backyard Legacy
Building a deck is more than just adding square footage; it’s about creating a safe, durable sanctuary for your family. By moving away from the dangerous flush-mount ledger and embracing air gaps and proper flashing, you are protecting the very bones of your home. These composite decking secrets longevity tips for a lasting deck are meant to shift your perspective from a weekend project to a thirty-year investment. Don’t be afraid to take the extra time to tape those joists or run the hose test; that attention to detail is what separates a deck that rots in five years from one that hosts graduation parties for decades to come. Your home’s envelope is precious—treat it with the respect it deserves, and your deck will reward you with a lifetime of memories. Have you ever noticed water stains or musty smells near your deck door after a heavy rain? Let me know your experiences in the comments below.