
I remember stepping out onto my deck last July, coffee in hand, ready to soak in the morning sun. Then I saw it. A weird, dull grey blotch right next to the grill that looked like the deck had aged ten years overnight. My heart sank. I’d spent a fortune on these boards because I thought they were indestructible. It wasn’t just dirt; it was like the life had been sucked out of that one specific area. If you’re staring at a patchy deck right now, I know that feeling of instant regret. You bought composite to escape the constant maintenance of wood, yet here you are with a spotted floor.
That Heart-Sinking Moment You Spot a Faded Patch
When I first installed my deck, I fell for the marketing hook, line, and sinker. I thought low maintenance meant zero care. I ignored the composite decking secrets that seasoned pros usually whisper about. The truth is, composite is tough, but it isn’t a slab of granite. Those patches usually aren’t a sign of a bad deck, but rather a sign that something specific is happening to the surface chemistry of your boards. We’re going to figure out exactly why your boards are losing their luster and how to bring that uniform color back without ruining the texture. I want to help you avoid the panic I felt when my backyard oasis started looking like a patchwork quilt.
Wait, Is My Deck Actually Permanent or Was I Sold a Lie?
It’s the biggest fear every homeowner has after dropping five figures on a project: did I just buy fancy plastic that’s going to look like junk in three years? I’ve seen it happen. Sometimes, composite decking looks like plastic and loses its color because of low-quality resins, but more often than not, it’s an environmental reaction. My big mistake? I used a cheap outdoor rug with a rubber backing. The chemicals in the rubber literally cooked the surface of the boards during a heatwave. I felt like an idiot. But it’s a mistake you can learn from. Have you noticed any weird spots under your furniture or near your planters? I’d love to hear if you’re seeing the same thing.
According to the International Association of Certified Home Inspectors (InterNACHI), while composite is resistant to rot, certain environmental factors like concentrated UV reflection from low-E windows can actually melt or severely discolor boards in localized patches. This isn’t just about the sun being hot; it’s about how your home’s unique layout interacts with the material. If you have dark composite boards, they are even more susceptible to these thermal and chemical reactions. Today, I’m going to show you how to diagnose if your issue is a chemical burn, a UV hot spot, or just stubborn oxidation that we can fix with the right approach.
Stop the Bleeding and Identify the Culprit
Before you reach for any heavy-duty chemicals, you have to play detective. Not every grey spot is a death sentence for your boards. Often, what looks like a permanent fade is actually a layer of microscopic oxidation or ‘biofilm’—basically, a thin skin of environmental gunk that mimics the look of sun damage. When I was dealing with my deck, I realized that I was looking at two different problems: one was a genuine chemical burn from a rug, and the other was just stubborn environmental film that hadn’t been touched in years. If you want to keep up with composite decking trends, you need to know that modern capped boards handle this better than older generations, but they still require a specific diagnostic touch.
Scrub it Down Before You Panic
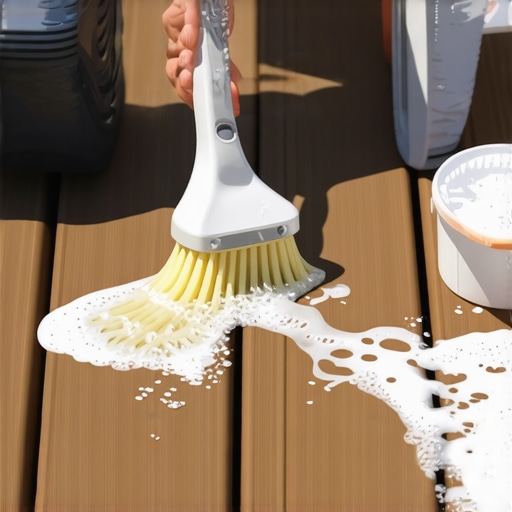
Your first move is always a deep, non-abrasive clean. I cannot stress this enough: why you should never use a power washer on composite boards is because the high pressure can actually open up the ‘pores’ of the plastic-wood hybrid, making it even more susceptible to future fading. Instead, start with a basic mixture. Use the soap and sponge fix for oil stains and general grime first. I once spent a whole Saturday morning scrubbing a ‘faded’ corner only to realize it was just localized pollen build-up that had baked into the texture. A soft-bristle brush and a lot of elbow grease are your best friends here.
The Simple Way to Check if the Fade is Permanent
If the cleaning doesn’t work, try the ‘Wet Test.’ Pour a little water on the faded patch. If the color magically returns to its original glory while wet, you’re looking at surface oxidation. This is great news because it means the pigment is still there; it’s just being obscured. If the board stays dull even when soaking wet, the UV rays have actually bleached the material. This is where the the wet sand test comes in handy for understanding how your specific board texture reacts to moisture and light. If you have 5 colors of composite that hide dirt the best, you might find that tan and light grey boards show this oxidation much less than dark browns or blacks.
Bring the Color Back Without Ruining the Grain
Once you’ve confirmed it’s not just dirt, you need to address the surface chemistry. For light scuffs and minor surface fading on capped composites, heat can actually be a tool—if you’re brave. I remember the first time I used a heat gun on my deck. I had a nasty scuff from a metal chair that looked like a white scar on my dark boards. My hand was shaking as I waved the heat gun over it, but slowly, the plastic resins reached their ‘flow’ temperature and the white mark disappeared. You can learn how to fix scuffs on dark composite boards with a heat gun, but you have to be incredibly careful. If you linger too long, you’ll melt the wood-grain pattern right off the board, leaving a shiny, flat mess that looks worse than the fade.
Avoid These Surface-Killing Mistakes
When you’re desperate to see color again, you might be tempted to use bleach. Don’t. Knowing why you should never use bleach on composite decks is vital because bleach breaks down the wood fibers within the composite, leading to a permanent ‘furry’ texture that traps even more dirt. If you’re dealing with a genuine UV-bleached deck, your best bet is a specialized composite deck restorer—a liquid that acts more like a stain than a paint. It’s designed to penetrate the surface and bond with the plastic resins, giving you back that uniform look without the risk of peeling that you’d get with traditional house paint.
Let’s get real for a second. We’ve all been sold on the dream of ‘install and forget,’ but as someone who has spent years on their hands and knees inspecting joists, I can tell you that mindset is exactly how expensive mistakes happen. The most common myth I hear is that hidden fasteners are the gold standard for every deck. While they look sleek, I’ve seen countless homeowners wonder why hidden fasteners fail on wide-profile boards after just one season. On wider boards, the lateral pressure from thermal expansion is so intense that it can actually snap those clips or cause the boards to ‘walk’ right out of their tracks. Sometimes, a high-quality color-matched screw is actually the smarter, more structural choice, even if it isn’t as trendy.
Why Your Structure Is Secretly Fighting Your Deck Boards
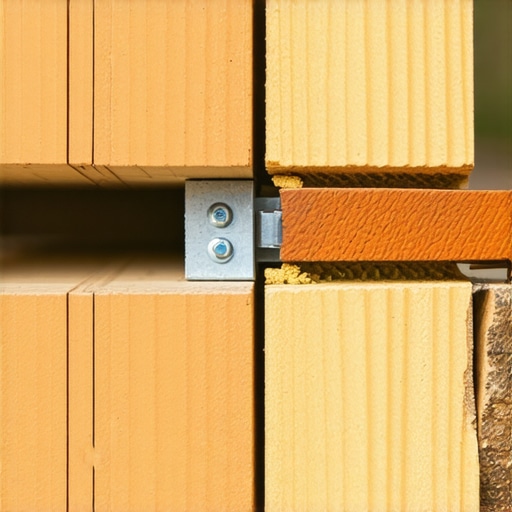
Here is a nuance most people miss: your composite boards and your pressure-treated wood frame are in a constant tug-of-war. Composite expands and contracts with temperature, while wood expands and contracts with moisture. When you have a hot, humid day, they are moving in different directions at different rates. This is often why your pressure-treated frame is pulling your composite apart. According to the North American Decking and Railing Association (NADRA), structural failures in composite decks are frequently traced back to this physical tension, which can exert hundreds of pounds of force on your fasteners. If you didn’t leave enough gap at the butt joints, the boards will eventually ‘volcano’ or hump up in the middle, and no amount of cleaning will fix that.
Can You Actually Skip the Mid-Span Post on Your New Pergola?
When you start adding features like pergolas or heavy railing systems, the math changes instantly. A common ‘oops’ factor I see is builders treating composite like it has the same structural stiffness as cedar. It doesn’t. If you’re adding a shade structure, you need to understand why your pergola needs a mid-span post you didnt account for. Without it, the weight of the headers can cause the deck surface to dip over time, leading to that annoying ‘trampoline’ feel when you walk. I’ve also noticed a disturbing trend with joist tape. While it’s marketed as a lifesaver, if you don’t apply it to a perfectly dry beam, you’re just sealing in moisture. This is why your deck joists are rotting underneath the tape in some of the most expensive ‘pro’ builds I’ve audited.
The Spongy Floor and the Uplift Danger
Have you ever noticed your deck feels a bit soft under your feet, even though the boards look brand new? It’s a common complaint, and usually, it’s because the joist spacing was set at 16 inches on center instead of the 12 inches recommended for many high-end composites. This is why your composite boards feel spongy under heavy furniture or during a hot afternoon when the plastic resins are at their most flexible. It isn’t a defect in the board; it’s a failure in the ‘bones’ of the deck. Similarly, if you’re building upwards, you have to worry about the wind. I’ve seen beautiful structures turn into kites because the builder didn’t realize why most diy pergolas fail the uplift test in storms. It’s not about the weight of the wood; it’s about the mechanical connection to the frame. Have you ever fallen into this trap or noticed your deck moving in ways it shouldn’t? Let me know in the comments, and we can troubleshoot the ‘why’ together.
I’ve learned that the difference between a “DIY-looking” project and a professional build comes down to the tools you use when nobody is looking. When I’m setting up a heavy overhead structure, I don’t trust my eyes anymore. I rely on the string line trick for perfectly plumb pergola beams because even a quarter-inch lean at the base becomes a glaring four-inch lean at the top. I also never start a project without my Bosch GLL3-330CG green-beam laser. It’s the only way to ensure the level and laser method for setting pergola heights alone actually works without needing a second person to hold a tape measure. For the decking itself, I swear by the jig i use for consistent deck screw depth to prevent those annoying “mushroom” heads that trap water and dirt. These aren’t just gadgets; they are the difference between a railing that rattles and one that feels like it’s part of the house.
Stop Guessing and Grab a Real String Line
Speaking of railings, if you’re worried about safety, you need to perform the 3-second push test for wobbly railing systems once every spring. I’ve seen beautiful glass and cable setups that look modern but have zero structural bite because the builder skipped the internal blocking. If you’re in that camp, don’t tear it all down just yet. You can often learn how to fix a wobbly top rail without removing the balusters by adding localized reinforcement to the post base using structural screws. This isn’t just about aesthetics; it’s about making sure your family is safe when they lean against the rail to look at the sunset. I also recommend checking your spacing; learning how to space railing balusters without ever using a tape measure ensures that your safety gaps remain consistent even as the house settles.
Why I Always Inspect My Joists at 10 PM
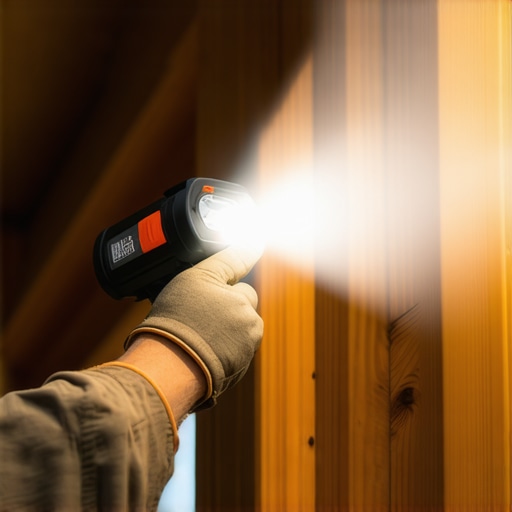
According to the American Wood Council’s Design for Code Acceptance No. 6 (DCA6), the ledger connection—where the deck meets the house—is the most common point of catastrophic failure. They recommend specific lateral load connectors that most people omit. This is why I swear by the flashlight trick for finding hidden joist rot at night. The high-contrast shadows created by a bright beam help you spot “alligatoring” or fungal growth in the wood that you’d miss in broad daylight. If you find something suspicious, it’s time for a deeper structural vulnerability assessment for checking deck joist rot to ensure your family isn’t standing on a ticking time bomb.
How do I maintain my deck’s structural integrity over time?
Maintenance isn’t just about cleaning the surface; it’s about a consistent ritual of inspection and minor adjustments. I recommend a three-step annual process: check your ledger flashing for gaps, tighten your railing brackets, and inspect the beam-to-post connections for any signs of shifting. If you have a pergola, pay attention to the canopy tension; why your pergola canopy keeps tearing during high winds is often due to fixed points that don’t allow for material “give.” Replacing old hardware with spring-loaded tensioners can save you hundreds in fabric costs over a few seasons. I also suggest reviewing composite decking secrets and longevity tips for a lasting deck to manage airflow properly underneath your boards.
Looking forward, I predict we are going to see “Smart Decks” become the industry standard within the next decade. We’re already seeing moisture sensors that can be embedded into the joists to alert you via an app when your framing is staying wet too long or if the structure is shifting beyond safe tolerances. For now, we rely on mechanical excellence and a watchful eye. If you want to be proactive, go out tonight and try the flashlight trick on your ledger board. It takes two minutes and could save you from a major structural failure down the road.
Building a deck is a massive investment, but keeping it beautiful is a strategy. If your boards are looking tired, remember that most issues are solvable if caught early. I’ve spent countless hours under joists and on my knees scrubbing boards to learn that the difference between a deck that lasts 10 years and one that lasts 30 is simply attention to detail. Let’s wrap this up with the hard-earned wisdom that will actually save your weekend and your wallet.
The Brutal Lessons My Own Backyard Taught Me
The most important thing I realized is that composite decking isn’t a static product; it’s a living part of your home’s ecosystem. Here are the lightbulb moments that changed how I approach maintenance:
- The ‘Clean First’ Rule: Most ‘permanent’ stains are actually surface-level biofilms that just need the right chemistry, not a replacement board.
- Movement is Normal: Seeing your gaps change size with the seasons isn’t a failure; it’s the material doing exactly what it was engineered to do.
- The Framing Matters Most: You can have the most expensive boards in the world, but if you don’t use the framing move that stops deck boards from bouncing, the whole experience will feel cheap.
- Invisible Issues are the Real Killers: A faded board is annoying, but the ledger flashing mistake that causes interior house mold is what actually destroys a home’s value.
Tools That Saved My Sanity and My Structure
I don’t go into any restoration project without a specific set of gear. These aren’t just recommendations; they are the items that have consistently performed when the cheap stuff failed. First, I never trust a standard level for long spans anymore; I use a high-end green-beam laser to ensure the structure is perfectly true. For fastening, I’ve moved exclusively to structural screws over traditional lag bolts because they offer better pull-down strength without the need for pre-drilling. If you’re planning an upgrade, look into innovative deck design ideas that elevate your homes curb appeal to see how modern hardware integrates into high-end aesthetics. Finally, for safety, I always refer to the NADRA (North American Decking and Railing Association) inspection checklists. They are the gold standard for verifying that your railing systems for safety and style are actually up to code and secure for your family.
#IMAGE_PLACEHOLDER_E#
Reclaim the Deck You Were Promised
You didn’t buy a deck to spend every Saturday worrying about grey spots or wobbly posts. You bought it for the late-night conversations and the quiet morning coffees. By taking these small steps to address surface fading and structural tension, you are moving away from ‘maintenance’ and toward ‘stewardship.’ Whether you are implementing low maintenance composite decking solutions or just trying to fix an old mistake, remember that your deck is an extension of your home. Use the flashlight trick, check your joists, and don’t be afraid to use a little heat to bring that color back. Your outdoor oasis is waiting for you to bring it back to life. Have you noticed your deck boards expanding and hitting your siding, or are your gaps staying consistent? Let me know in the comments below!