
I remember the exact moment I realized I had made a massive mistake with my backyard oasis. I was leaning over my beautiful, custom-built cedar planter to prune some petunias when the floor beneath me didn’t just creak—it groaned. I grabbed a screwdriver from my pocket and gave the rim of the planter a poke. It went straight through the wood like a hot knife through butter. I had spent thousands on stunning deck design strategies, only to realize I’d built a slow-motion wrecking ball right into the structure. The very feature I thought added the most charm was actually holding a wet sponge against my house’s most important supports. If you are planning a new build or looking at your existing setup, we need to talk about why these integrated garden beds are often a recipe for disaster and how you can save your wood before it is too late.
Those Gorgeous Planters Are Actually Trapping Water Against Your Frame
The logic seems sound at first: you want greenery, and you want it to look integrated. However, soil is heavy and, more importantly, it is incredibly efficient at holding onto moisture. When you build a planter directly into your decking, you are creating a zone where the wood can never truly dry out. Even with a plastic liner, condensation forms between the liner and the timber. I learned this the hard way when I performed the ice pick test for checking joist strength on older decks and found that my main support beams were essentially wet mulch. The constant dampness invites fungal growth that eats through cellulose faster than you’d believe. According to the American Wood Council, wood kept at a moisture content above 20% for extended periods is at high risk for decay, and a dirt-filled box is the perfect environment to hit that threshold. If you didn’t use the joist tape secret for doubling your decks life during the initial build, that water is seeping directly into the screw holes and grain.
Are built-in planters really that much worse than pots?
The short answer is yes, because they lack the critical air gap required for evaporation. When you use a standalone pot, there is usually a tray or at least a few inches of air between the bottom of the plant and your deck boards. Built-in units often sit flush against the joists or the composite decking, sealing off the airflow. Once the rot starts inside the planter walls, it spreads horizontally into your deck’s subframe. I once thought my “heavy-duty” pond liner would protect everything, but the weight of the wet soil eventually caused the frame to shift just enough to tear the plastic, letting the rot-inducing moisture escape right onto my beams. Have you noticed any soft spots or discoloration around your deck greenery lately? It might be time to take a closer look before the damage becomes structural. We are going to look at why this happens and how to pivot to safer alternatives that still give you that lush look.
If you aren’t ready to rip out your integrated planters, you need to create what I call the ‘Death Valley’ zone—a space so dry and well-ventilated that fungus can’t even find a foothold. Think of your deck joists like a sponge; if they are constantly touching wet soil through a thin layer of plastic, they will eventually saturate. The solution isn’t more plastic; it is more air. I started using the rubber spacer trick for better airflow under joists on every planter-adjacent beam I install now. By lifting the planter box even half an inch off the actual deck surface, you allow cross-ventilation to wick away moisture before it can settle into the wood grain. This tiny gap acts like a miniature wind tunnel, ensuring that even after a heavy downpour, your structural members aren’t sitting in a puddle.
Create an Air Gap to Stop Wood Decay in Its Tracks
A few summers ago, I was helping a neighbor who had built a massive “wrap-around” planter for her elevate-your-backyard-innovative-deck-design-ideas-for-2025 project. It looked incredible, but within six months, the composite decking boards were starting to buckle. When we pulled the boards up, the top of the joists looked like wet cardboard. We didn’t just replace the wood; we redesigned the planter to be ‘removable.’ We built a structural shelf inside the planter frame that held heavy-duty plastic trays, but the frame itself had drainage holes that aligned with the gaps in the deck. This is why I always suggest the garden hose test for proper deck water runoff before you ever dump a single bag of soil. If the water doesn’t clear the frame in under thirty seconds, your design is essentially a slow-acting pool.
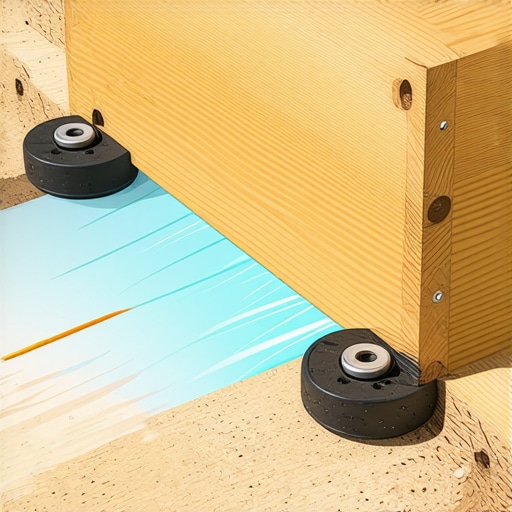
The Rubber Spacer Trick That Saves Your Joists
If you are building new, don’t let the planter walls share a face with your house or your main deck rim joists. I use a technique called “sistering with a gap.” I install a secondary piece of pressure-treated lumber to hold the planter, but I separate it from the main frame using heavy-duty galvanized washers or composite shims. This creates a 1/4-inch drainage channel. If you’ve already noticed your deck feels soft near a garden bed, you might need to look at how to fix the bounce in your over-spanned-deck-joists, as the moisture likely weakened the wood’s internal fibers. To further protect the setup, I treat the hidden wood with a copper-based preservative and then apply composite decking secrets longevity tips for a lasting deck, like using high-quality flashing tape over the top of any wood that might even think about touching wet dirt. It sounds like overkill until you have to replace a $500 beam because of a $5 petunia.
Let’s dig even deeper into the materials themselves, because switching to high-end composite doesn’t always save you from the structural mistakes I’ve just described. There is a common myth that choosing a synthetic material means you can ignore the rules of drainage and airflow. In my experience, composite is actually *less* forgiving of trapped heat and moisture than cedar is. While the boards themselves won’t rot, the pressure treated frame is pulling your composite apart underneath those planters. When you trap moisture between a non-porous composite board and a damp wooden joist, you create a localized greenhouse effect that accelerates timber decay far faster than if the wood were fully exposed to the rain. This is the ‘Oops’ factor most DIYers miss: the board survives, but the foundation it is clipped to turns to mush.
Stop Believing the Myth That Composite is Bulletproof
Everyone tells you that composite is maintenance-free, but they rarely mention thermal expansion in hybrid designs. Wood expands with moisture, but composite expands with heat. If you’ve built a heavy, soil-filled garden bed directly over your boards, you’ve created a massive heat sink. On a hot day, the exposed boards will expand while the boards shaded by the planter stay cool. This differential movement creates massive shear stress on your fasteners. I’ve seen countless projects where homeowners wonder why their composite deck boards are expanding into their siding or buckling near the garden edge. According to a study by the Forest Products Laboratory, wood-plastic composites (WPCs) are susceptible to ‘creep’—a slow, permanent deformation when subjected to constant loads and high temperatures. That heavy planter isn’t just a moisture risk; it’s a structural weight that is literally warping your deck’s ‘spine’ over time.
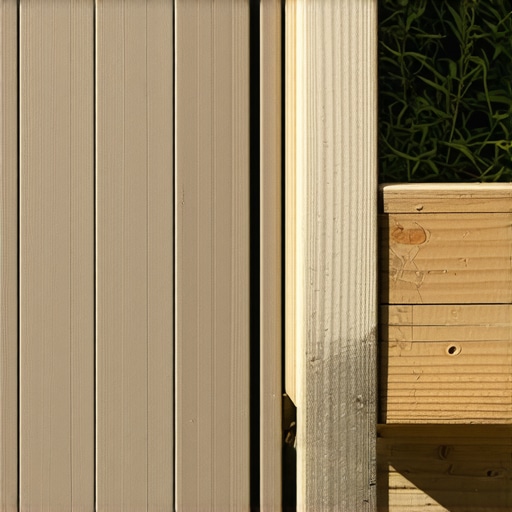
Why does your composite deck feel spongy despite perfect joist spacing?
If you have followed the 16-inch-on-center rule and your deck still feels a bit ‘bouncy’ near your greenery, it is likely because of localized moisture saturation in the subframe. When soil sits against the frame, the wood fibers soften, losing their structural integrity long before you see visible mushrooms or rot. This is why your composite deck feels spongy between joists even if the boards look brand new. To combat this, I recommend the ‘Wet Sand Test.’ Before you commit to a layout, place a heavy bag of wet sand where your planter will go and leave it for a week. Use a level to check for any deflection in the joists. If it dips even a fraction of an inch, you need to add a mid-span beam. This is the same reason your pergola needs a mid-span post you didn’t account for—the added weight of plants, soil, and water is often 3x what the original deck was engineered to hold. Have you ever fallen into this trap where you thought more expensive materials would fix a design flaw? Let me know in the comments.
I don’t just build these things; I live with them, and that means I’ve spent more Saturdays than I’d like to admit scrubbing, tightening, and inspecting every square inch of my outdoor space. Maintenance isn’t just about making things look pretty for a BBQ; it’s about protecting your financial investment. Every spring, I pull out what I call my ‘deck doctor’ kit. While most people are just spraying off dirt, I am looking for the hidden signals of structural fatigue. If you want your space to last thirty years instead of ten, you need a proactive strategy that goes beyond a simple broom and hose.
The Three Tools I Never Start a Maintenance Check Without
People think I am being over-the-top when I bring a pinless moisture meter out to a ‘plastic’ deck, but I am not measuring the boards—I am measuring the skeleton. I personally use a Wagner Orion meter because it allows me to scan the joists through the gaps without damaging the wood. This is how I catch the early signs of moisture creep before the fungus takes hold. If you aren’t checking the humidity levels of your subframe, you are flying blind. Another essential is a high-quality torque wrench for your railing posts. I’ve seen so many homeowners over-tighten their bolts, which actually crushes the wood fibers and leads to the 3-second push test for wobbly railing systems becoming a failing grade. You want your fasteners snug, but not so tight that they lose their ability to flex with the temperature.

When it comes to the surface, stop reaching for the pressure washer. I have lost count of how many times I have had to explain why you should never use a power washer on composite boards. It might look clean for a minute, but you are effectively micro-scarring the surface, which makes it a magnet for future stains. Instead, I rely on the vinegar and water mix that cleans composite better than chemicals. It’s gentle enough for the environment but incredibly effective at breaking down the organic biofilm that turns into slippery algae. According to the ICC-ES AC174 technical documentation, maintaining the surface integrity is critical for ensuring the slip-resistance ratings of your boards remain valid over the life of the product.
How do I keep my composite deck from looking like plastic over time?
The dreaded ‘plastic’ look usually comes from a buildup of hard water minerals and UV-degraded pollen. To keep that high-end matte finish, you need to understand the 7 reasons your composite decking looks like plastic and tackle them with regular, non-abrasive cleanings. I also suggest checking your railing tension annually. I’ve written extensively about why your cable railing sagged after only one winter, and it’s usually just a matter of the wood posts settling. A quick adjustment now prevents a total system failure later. As for the future, I predict we are heading toward ‘smart decks’ where integrated sensors in the ledger board will alert your phone the moment a leak is detected behind the siding.
Stop Ignoring the Small Gaps and Tensioners
As you look at composite decking trends durable solutions for modern outdoor living, remember that the most durable solution is the one that is actually maintained. If you have a pergola, don’t forget to check the beam connections. I’ve seen beautiful structures start to lean because someone forgot to tighten the lag bolts after the wood went through its first dry season. Whether you are using how to select the perfect railing system for every deck as your guide or building a custom sanctuary, the key is consistency. Try this: go out today and perform a simple ‘flashlight test’ under your deck. If you see even a hint of a water stain on a joist, it’s time to apply some of the tips we’ve discussed before it becomes a structural nightmare.
Hard Truths About Deck Features That Look Better Than They Function
If there is one thing a decade in the dirt has taught me, it is that Mother Nature is a patient assassin. You can have the most expensive composite decking secrets longevity tips for a lasting deck in your back pocket, but if you don’t respect the physics of water, your frame will pay the price. I used to think I could out-engineer rot with fancy sealants, but the real ‘lightbulb moment’ came when I realized that airflow is more powerful than any chemical treatment. Every design choice, from pergola designs that turn your garden into a sanctuary to your planter boxes, needs to prioritize ‘breathability’ over aesthetics. When you stop fighting the elements and start working with them, your maintenance list shrinks and your peace of mind grows.
#IMAGE_PLACEHOLDER_E#
The Survival Kit for Your Backyard Investment
To stay ahead of the curve, I rely on a few non-negotiables. First, the Wagner Orion moisture meter is my go-to for checking the health of joists behind the scenes. Second, I constantly revisit stunning deck design strategies to see how modern drainage is evolving and to ensure I am not repeating the mistakes of the past. I also highly recommend keeping a roll of high-performance flashing tape handy; using the joist tape secret for doubling your decks life is the single most cost-effective insurance policy you can buy during any repair. These tools don’t just save wood; they save your weekends from being consumed by major structural overhauls.
Building for the Next Thirty Years
Creating a beautiful home isn’t about a one-time build; it’s about the stewardship of your space. Whether you are choosing how to select the perfect railing system for every deck or troubleshooting a soft board near a garden bed, remember that you are building more than a platform—you are building the foundation for your family’s future memories. Take your time, inspect the details, and don’t be afraid to pull up a board to make sure the core is solid. Your future self, lounging on a perfectly preserved deck, will thank you for the effort you put in today. Have you ever discovered a surprise soft spot while cleaning your composite decking? Let me know your story below.