
I remember the exact moment I realized my freestanding pergola was basically a beautiful, expensive oven. It was mid-July, the humidity was thick enough to chew, and despite the overhead shade, I was sweating through my shirt while trying to enjoy a quiet afternoon. I looked up at those gorgeous rafters and thought, ‘I need a fan.’ But then I looked at the lack of a house wall to hide wires and the way the structure swayed in a light breeze, and I froze. My first attempt was a total disaster—I actually tried to zip-tie an indoor fan to a beam just to see if it worked. It looked like a crime scene, and the first rainstorm fried the motor. [IMAGE_PLACEHOLDER]
Turning Your Pergola into a Breezy Sanctuary
If you have been browsing pergola design inspiration and wondering why none of the photos show the messy electrical conduit, it is because there is a trick to it. Today, I am going to show you how to mount a fan that stays put, looks professional, and survives the elements. We are going to solve the two biggest hurdles: structural stability and hiding those ugly wires. I made the mistake of ignoring the ‘wobble factor’ early on, and let me tell you, a rotating fan acts like a gyroscope that wants to pull your structure apart if it isn’t braced correctly. You really need to understand why your pergola shakes when the wind blows before you even think about hanging a ten-pound motor from the rafters. Have you ever started an outdoor project only to realize you had no plan for the power source?
Will an outdoor fan actually survive the winter?
It is the number one question I get from neighbors. The skepticism is fair—electricity and rain are famously bad neighbors. However, the secret lies in the UL ‘Wet Rating.’ According to the National Electrical Code (NEC), any fan installed in a location where water can drip or splash directly onto the unit must be wet-rated, not just damp-rated. A damp-rated fan is for a covered porch; a freestanding pergola needs the heavy-duty stuff. I once tried to save fifty bucks by using a damp-rated model, and the blades drooped like wet noodles within three months. To keep things rock-solid, I highly recommend looking into the steel bracket move for high wind pergolas to ensure your mounting point doesn’t become a point of failure. We’re moving past the ‘hope it works’ phase and getting into the real-world engineering that makes your backyard feel like a resort.
Build a Foundation That Actually Supports the Fan
Think of your fan as a small, heavy airplane engine that wants to fly away. You cannot simply screw it into a single rafter and expect it to stay balanced. The key is creating a rigid ‘H’ frame between two rafters. I remember my second attempt at this—I was so confident that I just used a couple of long wood screws. Big mistake. Within a week, the vibration had loosened the screws, and the fan was rattling like a spray-paint can. To avoid this, you need to use a heavy-duty weather-proof junction box rated for fan support. This box should be bolted through a solid block of wood that spans the gap between your rafters. If you find your timber is already showing signs of age, check out how to fix a pergola rafter that is starting to twist before you add the extra stress of a motor.
Using the blocking trick that stops railing post wobble applies here too; by locking those rafters together, you distribute the weight and the centrifugal force across the entire structure rather than a single board. I now use 4-inch structural screws and galvanized L-brackets for every fan mount I build. It feels like overkill until the first time a summer storm brings 40-mph gusts and your fan doesn’t even flinch.
Route Power Without Creating an Eyesore
Now comes the part everyone hates: the wiring. Since you don’t have walls to hide Romex, you have to embrace the industrial look of conduit or get very clever with your routing. I prefer using 1/2-inch EMT (Electrical Metallic Tubing) painted to match the stain of the wood. It blends in surprisingly well if you run it along the top edge of the rafters where the shadow line naturally falls. If you are already planning pergola designs that turn your garden into a sanctuary, you don’t want a gray pipe ruining the aesthetic. #IMAGE_PLACE_HOLDER_B#
When I was working on a project last summer, I tried to hide the conduit behind a decorative trim piece, but I quickly realized that trapping moisture against the wood was a recipe for rot. Instead, use stand-off straps to keep the conduit slightly off the wood surface. This allows water to run behind it and evaporate. If you’re also considering adding some ambiance, the low-voltage lighting trick for highlighting deck levels can be integrated into the same power run, saving you the headache of drilling two sets of holes.
Prevent the Shake That Shreds Your Pergola
Structural integrity is non-negotiable. A freestanding pergola is essentially a giant table with no floor, making it susceptible to ‘racking’ or leaning. When that fan starts spinning at high speed, it introduces a rhythmic vibration that can slowly loosen every joint in your structure. This is why you need to understand why your pergola needs knee braces. Without those 45-degree supports at the posts, the top-heavy weight of the fan will eventually turn your beautiful structure into a parallelogram. I once saw a DIY fan install where the owner ignored the braces, and after a season of use, the whole pergola leaned three inches to the left. We had to use the steel bracket move for high wind pergolas just to pull it back to plumb and keep it there. Don’t skip the bracing; it’s the difference between a lifetime of shade and a weekend of demolition.
Most people assume that more power equals more comfort, but that is a dangerous myth when you are dealing with open-air structures. Everyone says to buy the fan with the highest CFM rating, but in my experience, the ‘air-cone’ matters more than raw volume. If you have a fan that pushes air in a wide, shallow arc, the breeze is lost to the yard before it ever hits your skin. You need a fan with a steep blade pitch—ideally 14 degrees or higher—to force that air down into your seating area. This is a nuance often missed in pergola trends that prioritize aesthetics over aerodynamics. I have seen countless homeowners buy ‘designer’ fans that look great in a catalog but barely move a leaf because the blade angle is too flat. 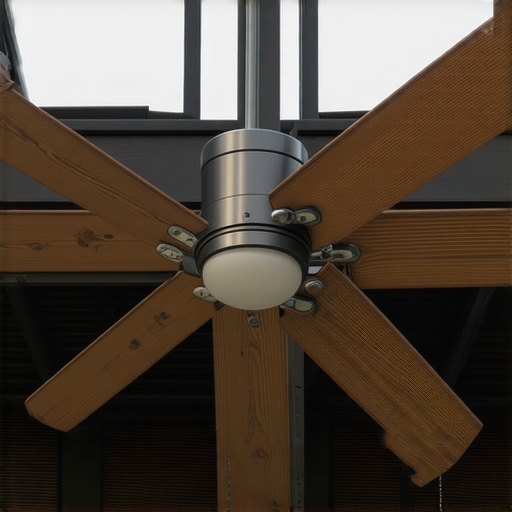
The Pendulum Effect and the Hidden Danger of Long Downrods
The biggest ‘oops’ factor I see in the field is the neglect of the ‘pendulum effect.’ When you use a long downrod to lower the fan from a high rafter, you are creating a lever. If the fan is even slightly out of balance, that lever amplifies the vibration and begins a slow, rhythmic swing that can eventually compromise your fasteners. This is especially true if you haven’t yet addressed why your pergola shakes when the wind blows. I once watched a heavy industrial fan literally back its own galvanized screws out of a cedar beam because the homeowner didn’t use a locking stabilizer collar. If you are mounting to anything other than solid timber, like low-maintenance composite decking materials used for decorative posts, you must ensure the internal structural core is handling the load.
Can your motor survive the flash-freeze cycle of a typical winter?
This is where the pros separate from the amateurs. Standard outdoor fans are tested for rain, but they aren’t always tested for the expansion and contraction of freezing moisture inside the housing. According to the Underwriters Laboratories (UL) Standard 507, specific materials must be used for motor enclosures in wet locations to prevent condensation buildup that leads to internal rust. If you live in a climate where temperatures swing wildly, your fan needs to be as rugged as the hardware discussed in why your railing bracket keeps snapping in the cold. Do not just look for the ‘Wet’ label; look for a fan with a stainless steel motor housing and ABS plastic blades. Wood blades, even ‘weatherproofed’ ones, will eventually warp and throw the motor out of balance, which is the fastest way to turn your sanctuary into a safety hazard. When planning your layout, consider how to select the perfect railing system to complement the industrial look of your conduit. Have you ever fallen into this trap? Let me know in the comments.I remember the exact moment I realized my freestanding pergola was basically a beautiful, expensive oven. It was mid-July, the humidity was thick enough to chew, and despite the overhead shade, I was sweating through my shirt while trying to enjoy a quiet afternoon. I looked up at those gorgeous rafters and thought, ‘I need a fan.’ But then I looked at the lack of a house wall to hide wires and the way the structure swayed in a light breeze, and I froze. My first attempt was a total disaster—I actually tried to zip-tie an indoor fan to a beam just to see if it worked. It looked like a crime scene, and the first rainstorm fried the motor. [IMAGE_PLACEHOLDER]
Turning Your Pergola into a Breezy Sanctuary
If you have been browsing pergola design inspiration and wondering why none of the photos show the messy electrical conduit, it is because there is a trick to it. Today, I am going to show you how to mount a fan that stays put, looks professional, and survives the elements. We are going to solve the two biggest hurdles: structural stability and hiding those ugly wires. I made the mistake of ignoring the ‘wobble factor’ early on, and let me tell you, a rotating fan acts like a gyroscope that wants to pull your structure apart if it isn’t braced correctly. You really need to understand why your pergola shakes when the wind blows before you even think about hanging a ten-pound motor from the rafters. Have you ever started an outdoor project only to realize you had no plan for the power source?
Will an outdoor fan actually survive the winter?
It is the number one question I get from neighbors. The skepticism is fair—electricity and rain are famously bad neighbors. However, the secret lies in the UL ‘Wet Rating.’ According to the National Electrical Code (NEC), any fan installed in a location where water can drip or splash directly onto the unit must be wet-rated, not just damp-rated. A damp-rated fan is for a covered porch; a freestanding pergola needs the heavy-duty stuff. I once tried to save fifty bucks by using a damp-rated model, and the blades drooped like wet noodles within three months. To keep things rock-solid, I highly recommend looking into the steel bracket move for high wind pergolas to ensure your mounting point doesn’t become a point of failure. We’re moving past the ‘hope it works’ phase and getting into the real-world engineering that makes your backyard feel like a resort.
Build a Foundation That Actually Supports the Fan
Think of your fan as a small, heavy airplane engine that wants to fly away. You cannot simply screw it into a single rafter and expect it to stay balanced. The key is creating a rigid ‘H’ frame between two rafters. I remember my second attempt at this—I was so confident that I just used a couple of long wood screws. Big mistake. Within a week, the vibration had loosened the screws, and the fan was rattling like a spray-paint can. To avoid this, you need to use a heavy-duty weather-proof junction box rated for fan support. This box should be bolted through a solid block of wood that spans the gap between your rafters. If you find your timber is already showing signs of age, check out how to fix a pergola rafter that is starting to twist before you add the extra stress of a motor.
Using the blocking trick that stops railing post wobble applies here too; by locking those rafters together, you distribute the weight and the centrifugal force across the entire structure rather than a single board. I now use 4-inch structural screws and galvanized L-brackets for every fan mount I build. It feels like overkill until the first time a summer storm brings 40-mph gusts and your fan doesn’t even flinch.
Route Power Without Creating an Eyesore
Now comes the part everyone hates: the wiring. Since you don’t have walls to hide Romex, you have to embrace the industrial look of conduit or get very clever with your routing. I prefer using 1/2-inch EMT (Electrical Metallic Tubing) painted to match the stain of the wood. It blends in surprisingly well if you run it along the top edge of the rafters where the shadow line naturally falls. If you are already planning pergola designs that turn your garden into a sanctuary, you don’t want a gray pipe ruining the aesthetic. #IMAGE_PLACE_HOLDER_B#
When I was working on a project last summer, I tried to hide the conduit behind a decorative trim piece, but I quickly realized that trapping moisture against the wood was a recipe for rot. Instead, use stand-off straps to keep the conduit slightly off the wood surface. This allows water to run behind it and evaporate. If you’re also considering adding some ambiance, the low-voltage lighting trick for highlighting deck levels can be integrated into the same power run, saving you the headache of drilling two sets of holes.
Prevent the Shake That Shreds Your Pergola
Structural integrity is non-negotiable. A freestanding pergola is essentially a giant table with no floor, making it susceptible to ‘racking’ or leaning. When that fan starts spinning at high speed, it introduces a rhythmic vibration that can slowly loosen every joint in your structure. This is why you need to understand why your pergola needs knee braces. Without those 45-degree supports at the posts, the top-heavy weight of the fan will eventually turn your beautiful structure into a parallelogram. I once saw a DIY fan install where the owner ignored the braces, and after a season of use, the whole pergola leaned three inches to the left. We had to use the steel bracket move for high wind pergolas just to pull it back to plumb and keep it there. Don’t skip the bracing; it’s the difference between a lifetime of shade and a weekend of demolition.
Most people assume that more power equals more comfort, but that is a dangerous myth when you are dealing with open-air structures. Everyone says to buy the fan with the highest CFM rating, but in my experience, the ‘air-cone’ matters more than raw volume. If you have a fan that pushes air in a wide, shallow arc, the breeze is lost to the yard before it ever hits your skin. You need a fan with a steep blade pitch—ideally 14 degrees or higher—to force that air down into your seating area. This is a nuance often missed in pergola trends that prioritize aesthetics over aerodynamics. I have seen countless homeowners buy ‘designer’ fans that look great in a catalog but barely move a leaf because the blade angle is too flat.
The Pendulum Effect and the Hidden Danger of Long Downrods
The biggest ‘oops’ factor I see in the field is the neglect of the ‘pendulum effect.’ When you use a long downrod to lower the fan from a high rafter, you are creating a lever. If the fan is even slightly out of balance, that lever amplifies the vibration and begins a slow, rhythmic swing that can eventually compromise your fasteners. This is especially true if you haven’t yet addressed why your pergola shakes when the wind blows. I once watched a heavy industrial fan literally back its own galvanized screws out of a cedar beam because the homeowner didn’t use a locking stabilizer collar. If you are mounting to anything other than solid timber, like low-maintenance composite decking materials used for decorative posts, you must ensure the internal structural core is handling the load.
Can your motor survive the flash-freeze cycle of a typical winter?
This is where the pros separate from the amateurs. Standard outdoor fans are tested for rain, but they aren’t always tested for the expansion and contraction of freezing moisture inside the housing. According to the Underwriters Laboratories (UL) Standard 507, specific materials must be used for motor enclosures in wet locations to prevent condensation buildup that leads to internal rust. If you live in a climate where temperatures swing wildly, your fan needs to be as rugged as the hardware discussed in why your railing bracket keeps snapping in the cold. Do not just look for the ‘Wet’ label; look for a fan with a stainless steel motor housing and ABS plastic blades. Wood blades, even ‘weatherproofed’ ones, will eventually warp and throw the motor out of balance, which is the fastest way to turn your sanctuary into a safety hazard. When planning your layout, consider how to select the perfect railing system to complement the industrial look of your conduit. Have you ever fallen into this trap? Let me know in the comments.
Eliminate the wobble with a laser level
I used to think my ‘calibrated’ eye was good enough for leveling beams until I installed my first 60-inch fan. If that beam is even a fraction of a degree off, the fan’s internal bearings will scream in agony within six months because of the uneven load distribution. This is where I stopped playing around and started using the level and laser method for setting pergola heights alone. It’s the only way to ensure your mounting frame is perfectly parallel to the ground. For the actual attachment, I’ve found that the drill guide hack for centered baluster holes works just as well for fan mounting blocks; it keeps your pilot holes perfectly vertical so the mounting screws don’t bite at an angle and weaken the timber fibers. 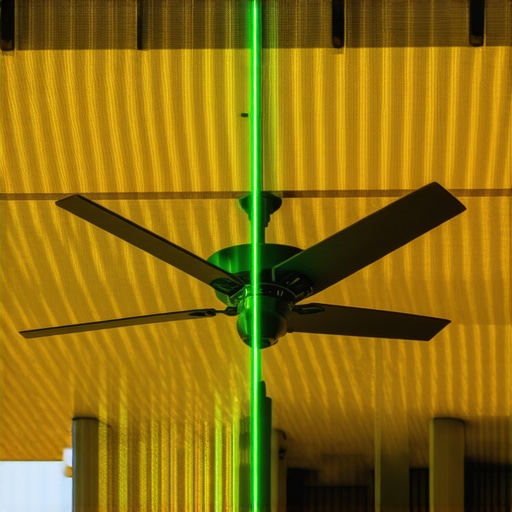
How do I maintain my outdoor fan and pergola over time?
Maintenance isn’t just about wiping down the blades; it’s about structural vigilance. You need to keep a close eye on your wood-to-metal contact points, especially where the fan canopy meets the wood. I’ve seen too many people focus on the fan and ignore why pergola rafter tails always rot first. If moisture wicks into those ends, the vibration from the fan will accelerate the decay by opening up small checks in the grain. Every spring, I check my fasteners for ‘back-out.’ According to the American Wood Council (AWC) DCA 6, fasteners in outdoor structures are subject to significant withdrawal force due to constant moisture cycling. If your structure is built with low-maintenance composite decking, apply composite decking secrets longevity tips for a lasting deck to the entire structure. If you notice greasy buildup from the motor, use the soap and sponge fix for oil stains on composite decking to keep the floor of your sanctuary pristine.
The future of shade is automated and smart
I predict we are moving toward ‘set-and-forget’ outdoor environments. We are already seeing pergola trends shifting toward integrated smart sensors that pull the fan speed up as the ambient temperature rises. Matching these with composite decking trends durable solutions for modern outdoor living means your backyard will soon be smarter than your living room. If you’re planning to scale up—perhaps adding infrared heaters—remember that your electrical load will jump, so pull a dedicated 20-amp circuit now. My challenge to you: don’t just screw a fan to a beam—build that reinforced ‘H’ frame with through-bolts and see how much quieter your pergola feels immediately.
Hard-Won Truths from My Failed Pergola Fan Experiments
Looking back at my first attempt, the biggest lesson I learned was that silence is a luxury you have to build for. If your fan makes even a tiny clicking sound, that rhythm will eventually shake your structure loose. I realized that using 45-degree supports isn’t just about wind; it’s about counteracting the motor’s vibration, which is why why your pergola needs knee braces is the most important structural rule you can follow. I also learned that “water-resistant” is a marketing term, while “UL Wet Rated” is a safety standard—never confuse the two when your family’s safety is on the line. Finally, always over-engineer your blocking; a fan is a dynamic load, not a static one, and it requires more than just standard wood screws to stay put over the years.
The Only Tools I Trust to Keep Your Outdoor Breeze Safe
If you want to do this once and never touch it again, you need more than a ladder and a screwdriver. I swear by my self-leveling laser because the level and laser method for setting pergola heights alone is the only way to ensure your fan isn’t fighting gravity from the moment you turn it on. I also recommend picking up a high-quality drill guide; the drill guide hack for centered baluster holes ensures your structural bolts go in perfectly straight, preventing the timber from splitting under the weight of the motor. For the electrical side, stick to 1/2-inch EMT conduit—it’s durable, easy to paint, and handles the expansion and contraction of the seasons far better than plastic alternatives. [IMAGE_PLACEHOLDER]
Your Backyard Is Ready for its Grand Resort Moment
There is a specific kind of magic that happens when you sit under your own freestanding pergola on a sweltering August afternoon and actually feel a cool, consistent breeze. It transforms the space from a decorative structure into a functional living room. By focusing on the structural integrity and the wet-rated specs we discussed, you aren’t just adding a fan; you are investing in years of comfortable, outdoor memories. Don’t let the technical hurdles of wiring or bracing hold you back—once that first breeze hits your face, every bit of extra effort will feel completely worth it. Have you ever run into a structural wobble problem that made you pause a project? Let me know in the comments below!