
I’ll never forget the feeling of my thumb sinking straight into the decorative scrollwork of my cedar pergola rafter. It was supposed to be the ‘crown jewel’ of my backyard. Instead, after just five years, it looked like a soggy biscuit. I had spent weeks obsessing over pergola design inspiration from modern to classic looks, but I ignored the one thing that actually mattered: the physics of end grain. It was a rookie mistake that cost me a long weekend of repairs and a decent chunk of change. We often focus on the big picture, like stunning deck design strategies, while moisture is busy feasting on the most exposed parts of our lumber. Today, I am going to show you exactly why those rafter tails are a magnet for rot and how you can protect your investment before it’s too late. Have you noticed any soft spots or ‘spongy’ wood on your rafters lately?
The End Grain Straw Effect That Kills Your Wood
When you look at a piece of wood, you have to remember it was once a living thing that transported water from roots to leaves. Those internal ‘straws’ are still there, and when you leave the end grain of a rafter tail exposed to the elements, it’s like leaving a bunch of open pipes facing the rain. Gravity pulls that water down, and surface tension keeps it clinging to the bottom edge of your decorative cuts. This is exactly why I stopped using pine for pergola rafters years ago; it just can’t handle that level of moisture intake. According to the USDA Forest Products Laboratory, wood absorbs moisture significantly faster—up to fifteen times faster—through the end grain than through its sides. This constant cycle of soaking and drying leads to checking, which opens the door even wider for fungal spores. If you aren’t careful, you’ll eventually find yourself looking for the simple way to fix a sagging deck beam because the rot has traveled further into the structure than you ever imagined.
Is This Just a Losing Battle Against Nature?
I get it. You’re worried that no matter what you do, the wood will eventually give up. You might even be thinking that low-maintenance composite decking solutions are the only way to avoid rot entirely, but you love the look of real timber overhead. It isn’t a hopeless fight, but it does require a change in how we cut and seal our projects. My early mistake was thinking a quick coat of stain was enough. It wasn’t. I should have been looking at the 15-degree cut that keeps water off your pergola beams or even considering the copper cap trick for extending post life adapted for rafter ends. We are going to dive into the specific structural reasons why water collects where it does and how a few simple design tweaks can add a decade to your pergola’s life.
Angled Cuts Shed Water Faster Than Flat Ends
I spent a Saturday afternoon last July helping my neighbor replace three rafters on his year-old pergola. It was painful to watch him pull down wood that should have lasted decades. The culprit wasn’t just the rain; it was the flat, decorative scrollwork that acted like a shelf for moisture. We replaced them using a simple template I’d made for the 15-degree cut that keeps water off your pergola beams. This ensures that every drop of water that hits the rafter tail has a clear, downward path to the ground rather than clinging to the bottom edge. When you leave a cut perfectly vertical, surface tension holds water against the end grain for hours after a storm. By adding that slight 15-degree slope to the bottom of your decorative tail, you use gravity as a natural squeegee. 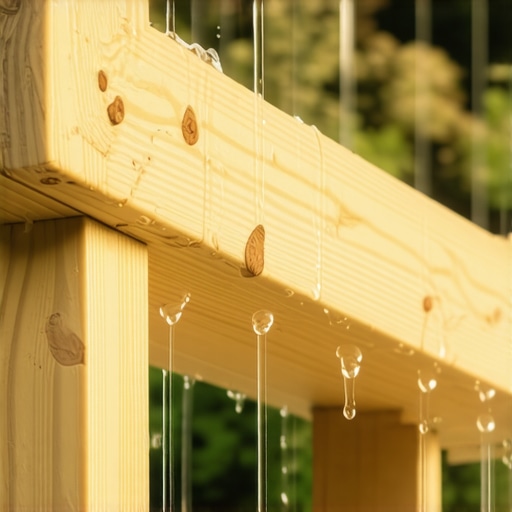
Seal Your Ends Like You Mean It
Once those cuts are made, you have to treat the end grain like a thirsty sponge. Most people just spray the whole structure and call it a day, but that is a recipe for failure. I now take a small container of high-quality wood preservative and literally soak the tips of the rafters for five minutes each before installation. You might have wondered if the deck joist tape test applies to pergolas. While tape is essential for horizontal beams, for vertical or angled rafter ends, a deep-penetrating oil-based sealer is your best defense. This is critical because why pressure treated wood still rots under joist tape often comes down to the internal moisture not being able to escape; sealing the ends properly allows the wood to repel external liquid while still letting the timber ‘breathe.’
Metal Caps Provide the Ultimate Protection
If you live in a particularly wet climate, chemical sealers might not be enough. This is where you should adapt the copper cap trick for extending post life to your rafter tails. Custom-fitted metal flashing or copper caps on the very tips of your rafters act like an umbrella. I started doing this after seeing a 20-year-old pergola in the Pacific Northwest that looked brand new because the owner had capped every exposed end grain with a small strip of lead-free flashing. It might seem like overkill until you realize it saves you from a total teardown.
Structural Stability and Alignment
Protecting the wood from rot is only half the battle; you also need to ensure the structure doesn’t twist as it ages. Using the steel bracket move for high-wind pergolas provides a rigid connection that keeps your rafters from bowing, which can create new gaps for water to enter. I always use the secret to perfectly centered pergola rafters—a simple layout jig—to ensure each piece is aligned. When rafters are perfectly centered and plumb, water sheds evenly across the entire structure rather than pooling in the low spots of a warped board.
Stop assuming composite means zero maintenance
We’ve all heard the pitch: buy composite, and you’ll never have to pick up a brush again. While it’s true that composite decking secrets for longevity often focus on the boards themselves, the most common advanced mistake is ignoring the skeletal system underneath. In my experience, a ‘maintenance-free’ deck often fails because the pressure-treated frame rots out from under the boards within fifteen years. When you mix a synthetic top with a natural frame, you create a moisture trap. This is precisely why your pressure-treated frame is pulling your composite apart; the materials expand and contract at different rates, and the wood stays damp longer than it would if it were fully exposed to the sun. To fight this, I’ve started advising homeowners that why you should paint your deck joists black under composite isn’t just about aesthetics; it’s a critical UV and moisture shield that matches the lifespan of the decking. According to the American Wood Council, the interface between deck boards and joists is the primary site for fungal growth because water remains trapped in the tight capillary space for days.
Why does your high-end composite deck feel like a trampoline?
If you’ve ever walked across a brand-new, expensive deck only to feel a subtle, rhythmic bounce, you’ve encountered a common engineering oversight. Many installers use standard 16-inch on-center joist spacing, but for many composite profiles, that is simply too wide for a truly rigid feel. This is why your composite deck feels like a trampoline. To get that solid-as-concrete feel, you need 12-inch spacing and the framing move that stops deck boards from bouncing. 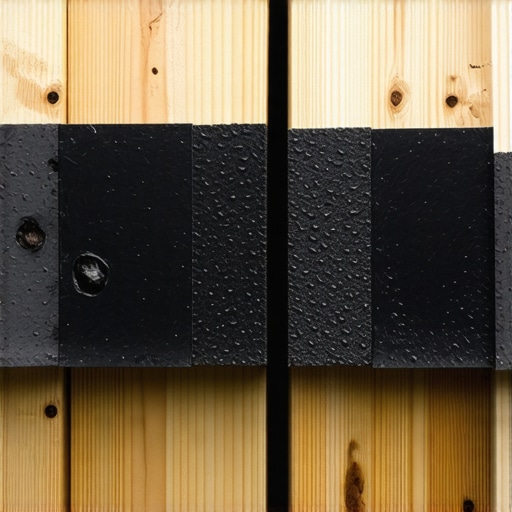
Avoid the railing wobble that ruins your curb appeal
Nothing screams ‘DIY mistake’ louder than a railing that flexes when you lean on it. The hidden nuance here isn’t the bracket itself; it’s what’s inside the rim joist. Most people focus on how to select the perfect railing system for every deck, but they fail to install internal blocking. Without the blocking trick that stops railing post wobble, you are essentially asking a few lag bolts to hold up the weight of a grown adult against a massive amount of leverage. This is also where the ‘oops factor’ usually happens: people use the wrong fasteners. I see the 3-inch screw mistake that ruins composite joists constantly; when you use standard screws instead of structural-grade bolts for railing posts, you’re creating a ticking time bomb of structural fatigue. Have you ever fallen into this trap of prioritizing the finish over the framing? Let me know in the comments. By shifting your focus from what looks good to what supports the weight, you can ensure your project lasts as long as the mortgage. If you have questions about specific hardware, you can always contact us for a professional consultation.
The tools that saved my back and my budget
I used to think I could eye-ball a level line across twelve feet of air. I was wrong every single time. It wasn’t until I switched to the level and laser method for setting pergola heights alone that my structures actually started looking professional. If you are working by yourself, a rotary laser isn’t a luxury; it is your best friend. It ensures that your beams sit perfectly flat, which prevents the uneven weight distribution that leads to the structural reason your pergola is leaning. When everything is square from the start, using the 3-4-5 triangle move for squaring up a new deck frame, you save hours of frustration during the decking phase. I also swear by the jig I use for consistent deck screw depth. There is nothing that ruins innovative deck design ideas faster than screws driven at different depths, creating little puddles of water on every board.
The cleaning mix that beats hardware store chemicals
Once the build is done, the real work of preservation begins. I have stopped buying those expensive, caustic deck brighteners that kill the grass and dry out my skin. Instead, I rely on the vinegar and water mix that cleans composite better than chemicals. It is gentle enough for low-maintenance composite decking but acidic enough to kill mold spores before they take root. #IMAGE_PLACE_HOLDER_D#
How do I maintain my outdoor structure over time?
Maintenance isn’t just about a spring cleaning; it is about a structural audit. Every season, I perform how to test your deck for structural fatigue by checking the connections at the ledger board. The experts at Simpson Strong-Tie emphasize in their technical literature (specifically Bulletin T-C-DECKLAT19) that the lateral load connection is where most older decks fail. If you aren’t checking your bolts, you’re missing the big picture. I also suggest using the ice pick test for checking joist strength on older decks to catch soft spots before they become safety hazards. Looking ahead, I suspect we will see a massive shift toward light-gauge steel framing to avoid the rot issues entirely, bringing composite decking trends to a whole new level of durability. I challenge you to go out this weekend and try the vinegar-wash method on a small patch—you will be shocked at how much better it looks without the harsh fumes. If you are worried about what you might find during your inspection, contact us for a second opinion.I’ll never forget the feeling of my thumb sinking straight into the decorative scrollwork of my cedar pergola rafter. It was supposed to be the ‘crown jewel’ of my backyard. Instead, after just five years, it looked like a soggy biscuit. I had spent weeks obsessing over pergola design inspiration from modern to classic looks, but I ignored the one thing that actually mattered: the physics of end grain. It was a rookie mistake that cost me a long weekend of repairs and a decent chunk of change. We often focus on the big picture, like stunning deck design strategies, while moisture is busy feasting on the most exposed parts of our lumber. Today, I am going to show you exactly why those rafter tails are a magnet for rot and how you can protect your investment before it’s too late. Have you noticed any soft spots or ‘spongy’ wood on your rafters lately?
The End Grain Straw Effect That Kills Your Wood
When you look at a piece of wood, you have to remember it was once a living thing that transported water from roots to leaves. Those internal ‘straws’ are still there, and when you leave the end grain of a rafter tail exposed to the elements, it’s like leaving a bunch of open pipes facing the rain. Gravity pulls that water down, and surface tension keeps it clinging to the bottom edge of your decorative cuts. This is exactly why I stopped using pine for pergola rafters years ago; it just can’t handle that level of moisture intake. According to the USDA Forest Products Laboratory, wood absorbs moisture significantly faster—up to fifteen times faster—through the end grain than through its sides. This constant cycle of soaking and drying leads to checking, which opens the door even wider for fungal spores. If you aren’t careful, you’ll eventually find yourself looking for the simple way to fix a sagging deck beam because the rot has traveled further into the structure than you ever imagined.
Is This Just a Losing Battle Against Nature?
I get it. You’re worried that no matter what you do, the wood will eventually give up. You might even be thinking that low-maintenance composite decking solutions are the only way to avoid rot entirely, but you love the look of real timber overhead. It isn’t a hopeless fight, but it does require a change in how we cut and seal our projects. My early mistake was thinking a quick coat of stain was enough. It wasn’t. I should have been looking at the 15-degree cut that keeps water off your pergola beams or even considering the copper cap trick for extending post life adapted for rafter ends. We are going to dive into the specific structural reasons why water collects where it does and how a few simple design tweaks can add a decade to your pergola’s life.
Angled Cuts Shed Water Faster Than Flat Ends
I spent a Saturday afternoon last July helping my neighbor replace three rafters on his year-old pergola. It was painful to watch him pull down wood that should have lasted decades. The culprit wasn’t just the rain; it was the flat, decorative scrollwork that acted like a shelf for moisture. We replaced them using a simple template I’d made for the 15-degree cut that keeps water off your pergola beams. This ensures that every drop of water that hits the rafter tail has a clear, downward path to the ground rather than clinging to the bottom edge. When you leave a cut perfectly vertical, surface tension holds water against the end grain for hours after a storm. By adding that slight 15-degree slope to the bottom of your decorative tail, you use gravity as a natural squeegee.
Seal Your Ends Like You Mean It
Once those cuts are made, you have to treat the end grain like a thirsty sponge. Most people just spray the whole structure and call it a day, but that is a recipe for failure. I now take a small container of high-quality wood preservative and literally soak the tips of the rafters for five minutes each before installation. You might have wondered if the deck joist tape test applies to pergolas. While tape is essential for horizontal beams, for vertical or angled rafter ends, a deep-penetrating oil-based sealer is your best defense. This is critical because why pressure treated wood still rots under joist tape often comes down to the internal moisture not being able to escape; sealing the ends properly allows the wood to repel external liquid while still letting the timber ‘breathe.’
Metal Caps Provide the Ultimate Protection
If you live in a particularly wet climate, chemical sealers might not be enough. This is where you should adapt the copper cap trick for extending post life to your rafter tails. Custom-fitted metal flashing or copper caps on the very tips of your rafters act like an umbrella. I started doing this after seeing a 20-year-old pergola in the Pacific Northwest that looked brand new because the owner had capped every exposed end grain with a small strip of lead-free flashing. It might seem like overkill until you realize it saves you from a total teardown.
Structural Stability and Alignment
Protecting the wood from rot is only half the battle; you also need to ensure the structure doesn’t twist as it ages. Using the steel bracket move for high-wind pergolas provides a rigid connection that keeps your rafters from bowing, which can create new gaps for water to enter. I always use the secret to perfectly centered pergola rafters—a simple layout jig—to ensure each piece is aligned. When rafters are perfectly centered and plumb, water sheds evenly across the entire structure rather than pooling in the low spots of a warped board.
Stop assuming composite means zero maintenance
We’ve all heard the pitch: buy composite, and you’ll never have to pick up a brush again. While it’s true that composite decking secrets for longevity often focus on the boards themselves, the most common advanced mistake is ignoring the skeletal system underneath. In my experience, a ‘maintenance-free’ deck often fails because the pressure-treated frame rots out from under the boards within fifteen years. When you mix a synthetic top with a natural frame, you create a moisture trap. This is precisely why your pressure-treated frame is pulling your composite apart; the materials expand and contract at different rates, and the wood stays damp longer than it would if it were fully exposed to the sun. To fight this, I’ve started advising homeowners that why you should paint your deck joists black under composite isn’t just about aesthetics; it’s a critical UV and moisture shield that matches the lifespan of the decking. According to the American Wood Council, the interface between deck boards and joists is the primary site for fungal growth because water remains trapped in the tight capillary space for days.
Why does your high-end composite deck feel like a trampoline?
If you’ve ever walked across a brand-new, expensive deck only to feel a subtle, rhythmic bounce, you’ve encountered a common engineering oversight. Many installers use standard 16-inch on-center joist spacing, but for many composite profiles, that is simply too wide for a truly rigid feel. This is why your composite deck feels like a trampoline. To get that solid-as-concrete feel, you need 12-inch spacing and the framing move that stops deck boards from bouncing.
Avoid the railing wobble that ruins your curb appeal
Nothing screams ‘DIY mistake’ louder than a railing that flexes when you lean on it. The hidden nuance here isn’t the bracket itself; it’s what’s inside the rim joist. Most people focus on how to select the perfect railing system for every deck, but they fail to install internal blocking. Without the blocking trick that stops railing post wobble, you are essentially asking a few lag bolts to hold up the weight of a grown adult against a massive amount of leverage. This is also where the ‘oops factor’ usually happens: people use the wrong fasteners. I see the 3-inch screw mistake that ruins composite joists constantly; when you use standard screws instead of structural-grade bolts for railing posts, you’re creating a ticking time bomb of structural fatigue. Have you ever fallen into this trap of prioritizing the finish over the framing? Let me know in the comments. By shifting your focus from what looks good to what supports the weight, you can ensure your project lasts as long as the mortgage. If you have questions about specific hardware, you can always contact us for a professional consultation.
The tools that saved my back and my budget
I used to think I could eye-ball a level line across twelve feet of air. I was wrong every single time. It wasn’t until I switched to the level and laser method for setting pergola heights alone that my structures actually started looking professional. If you are working by yourself, a rotary laser isn’t a luxury; it is your best friend. It ensures that your beams sit perfectly flat, which prevents the uneven weight distribution that leads to the structural reason your pergola is leaning. When everything is square from the start, using the 3-4-5 triangle move for squaring up a new deck frame, you save hours of frustration during the decking phase. I also swear by the jig I use for consistent deck screw depth. There is nothing that ruins innovative deck design ideas faster than screws driven at different depths, creating little puddles of water on every board.
The cleaning mix that beats hardware store chemicals
Once the build is done, the real work of preservation begins. I have stopped buying those expensive, caustic deck brighteners that kill the grass and dry out my skin. Instead, I rely on the vinegar and water mix that cleans composite better than chemicals. It is gentle enough for low-maintenance composite decking but acidic enough to kill mold spores before they take root. #IMAGE_PLACE_HOLDER_D#
How do I maintain my outdoor structure over time?
Maintenance isn’t just about a spring cleaning; it is about a structural audit. Every season, I perform how to test your deck for structural fatigue by checking the connections at the ledger board. The experts at Simpson Strong-Tie emphasize in their technical literature (specifically Bulletin T-C-DECKLAT19) that the lateral load connection is where most older decks fail. If you aren’t checking your bolts, you’re missing the big picture. I also suggest using the ice pick test for checking joist strength on older decks to catch soft spots before they become safety hazards. Looking ahead, I suspect we will see a massive shift toward light-gauge steel framing to avoid the rot issues entirely, bringing composite decking trends to a whole new level of durability. I challenge you to go out this weekend and try the vinegar-wash method on a small patch—you will be shocked at how much better it looks without the harsh fumes. If you are worried about what you might find during your inspection, contact us for a second opinion.
Hard-Won Truths from My Pergola Heartbreak
Building something beautiful is easy; building something that survives five years of horizontal rain is where the real skill lies. I spent far too long prioritizing visuals over physics. I’ve realized that the ‘hidden’ details—like how water moves through a joint—are more important than the paint color. I also learned that ‘composite’ isn’t a synonym for ‘invincible.’ You still have to account for the frame below, or you’re just putting a fancy tuxedo on a skeleton that’s falling apart. Remember the shingle trick for protecting the top of your deck beam if you want your substructure to match the thirty-year warranty on your boards. Also, never underestimate the wind; why most diy pergolas fail the uplift test in storms often comes down to the lack of proper hardware at the post base.
The Resource Kit That Separates Pros from Amateurs
I don’t gatekeep the tools that made my life easier. If you are serious about your next project, you need to look beyond the standard big-box store advice. I rely heavily on professional structural guides from industry leaders for the heavy lifting. For inspiration that stays grounded in reality, I look at pergola trends: crafting shade and elegance in your outdoor space to see how others are solving the drainage-vs-style puzzle. I also suggest bookmarking the complete guide to choosing railing systems for safety and style because railings are the most visible failure point in any build. These aren’t just resources; they are the blueprints for a project that won’t require a teardown in five years.
Build a Backyard Legacy That Lasts
Your outdoor space is an extension of your home, and with a little extra attention to the details we’ve discussed, it can be a place of joy rather than a constant source of repair bills. Don’t be intimidated by the technicality of things like joist spacing or end-grain physics. Every expert started with a warped board and a lesson learned the hard way. By implementing smart elevate your backyard innovative deck design ideas for 2025, you aren’t just building a deck or a pergola—you’re building a legacy of quality. Have you ever discovered a hidden rot spot that completely changed how you approach home maintenance? Let me know below in the comments.