
I’ll never forget the sinking feeling in my gut when I finished my first big composite project. I’d spent three weekends and a small fortune, but standing there on the lawn, the deck looked less like a cozy retreat and more like a giant, gray Tupperware lid. It was too uniform. Too sterile. My neighbor came over, squinted, and asked, “So, is that the stuff you never have to paint, or did you just get a deal on industrial flooring?” That stung. But it also started my obsession with figuring out how to get that low-maintenance composite decking convenience without sacrificing the warmth and character of real cedar or Ipe. Today, we are going to fix that. I’m sharing the exact strategies I’ve learned—mostly through trial and error—to make those synthetic boards look so much like timber that your guests will be reaching for their coasters instinctively. We’re going to talk about variegated colors, grain patterns, and the installation tricks that hide the “fake” parts. [IMAGE_PLACEHOLDER]
Stop the Plastic Vibe Before the First Screw Goes In
The biggest mistake I made early on was choosing a solid, monolithic color. In nature, a piece of wood is never just “brown.” It’s a mix of ambers, sienna, and deep chocolate. If you want your deck to look authentic, you need to look at composite decking trends for modern living that prioritize multi-tonal streaking. This “variegation” mimics the natural growth rings of a tree. You also have to consider the texture. Early generations of composite were essentially smooth, which is a dead giveaway. Modern high-end options use embossed grain patterns that aren’t repetitive. According to industry data from the Freedonia Group, the demand for wood-alternative decking is expected to grow by 5% annually through 2024, largely because manufacturers have finally cracked the code on “aesthetic realism.” But even the best boards won’t help if you don’t choose the right deck color for your house to ground the space.
Is it actually possible to fool a wood purist?
I get this question all the time. People are skeptical because they remember the shiny, slippery plastic decks of the early 2000s. The truth is, while nothing will ever *be* wood, you can get 95% of the way there if you understand how light hits the surface. I once skipped the “scratch test” and ended up with a deck that looked great until my dog ran across it; now I always check how different brands handle dog claws before recommending a board. Have you ever stood on a composite deck and felt like something was just… off? Tell me about your biggest “deck envy” moment in the comments. One of the most effective ways to break up the “fake” look is through framing. Using the double joist trick for picture frame borders gives the structure a finished, architectural feel that screams “custom wood craftsmanship” rather than “assembled kit.”
Ditch the Grid and Go Diagonal
The easiest way to spot a DIY composite job from a mile away is a layout that looks like a basic graph paper drawing. If you want that high-end timber feel, you need to break the visual plane. Using the diagonal board layout that makes small decks look huge changes how the human eye perceives the grain; it forces the gaze outward to the corners, making the space feel expansive and custom-built. I remember a project in a tight suburban backyard where the client wanted a massive look on a postage-stamp budget. We ran the boards at a 45-degree angle, and suddenly, the ‘plastic’ feel vanished because the lines were dynamic, not repetitive. It takes about 15% more material in waste, but the payoff in curb appeal is massive. When you combine this with the double joist trick for picture frame borders, you create a defined perimeter that mimics the way a master carpenter frames a hardwood floor inside a luxury home. 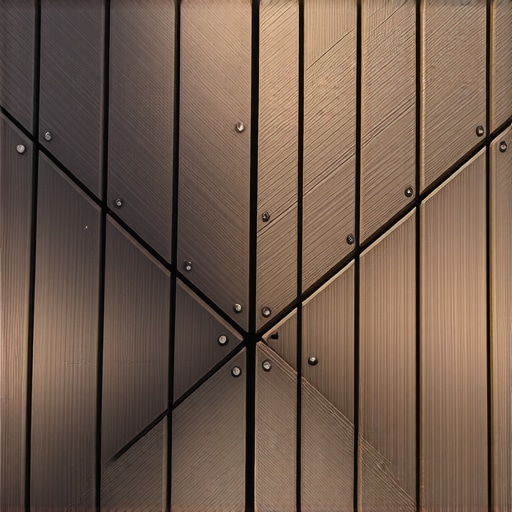
Mind the Gaps or Pay the Price
One mistake I made during a record-breaking July heatwave taught me more than any manual ever could. I buttoned the boards up too tight, thinking I was being ‘precise.’ By noon, those boards were bowing like a cheap plastic ruler because I ignored the expansion gap rule that stops boards from buckling. Composite is like a living organism in the sun; it expands and contracts significantly more than wood. To keep that professional look, use the cardboard spacer trick for consistent board gaps. It’s a low-tech way to ensure every single line is uniform. If your gaps are inconsistent, it screams ‘synthetic.’ If they are perfect, it looks like precision-milled Ipe.
Select a Railing That Doesn’t Look Like a Toy
Nothing ruins the illusion of a wood deck faster than flimsy white plastic railings. They look like they belong on a PVC fence, not a high-end outdoor living space. You need to select the perfect railing system for every deck by focusing on materials that provide contrast. I’m a huge advocate for the modern farmhouse deck black railings and light wood look. Matte black aluminum or steel railings provide a slim, architectural profile that lets the ‘wood’ of the deck boards be the star of the show. Think of the railing as the frame of a painting; it should support the art, not distract from it.
Anchor the Space with Heavy Timber Elements
To truly fool the eye, you have to mix your materials. A deck that is 100% composite can feel sterile, but when you add a structure like a pergola, you have an opportunity to introduce real weight. When planning, remember why 6×6 posts look better than 4x4s on any outdoor structure. The 4×4 posts look like toothpicks, whereas 6×6 posts provide the structural ‘thud’ that we associate with permanent, high-value architecture. You can even use pergola design inspiration from modern to classic looks to find a style that uses composite for the deck surface but real, stained timber for the overhead beams. This hybrid approach gives you the durability of synthetic where you walk and the warmth of real wood where you look.
The Maintenance-Free Myth That Rots Your Joists
Everyone tells you that composite is a ‘set it and forget it’ material, but in my experience, that mindset is exactly what leads to structural failure a decade down the line. While the surface boards won’t rot, the pressure-treated lumber underneath is still vulnerable to moisture trapped in the gaps. This is the ultimate ‘oops’ factor: homeowners spend $20,000 on premium boards but skip the $100 worth of protection for the frame. If you want your investment to last, you must use the flashing tape move that doubles the life of your joists. Without it, water sits between the joist and the composite, creating a rot-inducing sandwich that you can’t see until a board sags. I always recommend performing the 10-minute flashlight test for finding hidden ledger rot every spring, even if your deck looks brand new on top. Have you ever discovered a hidden rot problem after it was too late? Let me know in the comments. 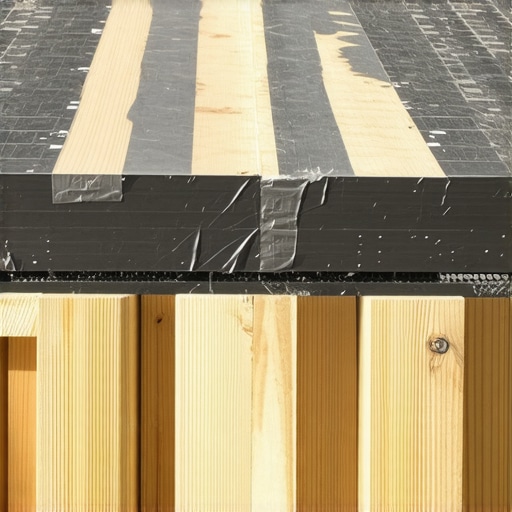
The Hidden Fastener Trap Nobody Warns You About
Hidden fasteners are the darling of modern deck design because they provide that clean, screw-free look. However, there is a contrarian reality most contractors won’t admit: they make individual board replacement a total nightmare. If a heavy grill drops and cracks a single board in the middle of your deck, why hidden fasteners can be a maintenance nightmare becomes very apparent very quickly. You often have to unzip half the deck just to reach the damaged piece. To mitigate this, I suggest using hidden fasteners for the main field but sticking to color-matched screws for high-traffic transition areas. Also, be wary of joist spacing; many people stick to the standard 16 inches on center, but that is why your composite deck feels like a trampoline. For a rock-solid feel that mimics a concrete porch, 12 inches on center is the pro move.
Does Your Dark Deck Have to Feel Like Hot Lava?
This is the number one question I get from families with kids or pets. Modern dark ambers and charcoals look incredible, but they absorb heat like a cast-iron skillet. Research published in the Journal of Applied Polymer Science highlights that the thermal expansion and heat retention of wood-plastic composites are significantly higher than traditional timber. If you are set on a dark aesthetic, you need to understand why black composite decking burns your feet and how to fix it, which often involves choosing capped polymer options that are engineered for better solar reflectance.
Stop Your Pergola From Doing the Backyard Sway
When it comes to overhead structures, most DIYers focus on the rafters and forget the physics of lateral load. This is why your pergola shakes when the wind blows. A beautiful structure shouldn’t feel like it’s going to tip over in a thunderstorm. The secret to a rigid, professional-grade build isn’t more screws; it’s geometry. Using the notched rafter secret for a pergola that never wobbles ensures that the wood-on-wood connection handles the stress, not just the metal hardware. By locking the beams into the posts with actual joinery, you create a structure that feels like a permanent part of the home’s architecture rather than a flimsy garden accessory.
Keep the Pressure Washer in the Garage
I’ve seen more composite boards ruined by aggressive cleaning than by actual foot traffic. It’s tempting to blast away that spring pollen, but it’s exactly why you should never use a pressure washer on composite. High-pressure water can actually etch the surface of the plastic or polymer cap, creating tiny micro-crevices that trap dirt and mold even deeper into the grain. Instead, I stick to a soft-bristle brush and a pH-neutral cleaner. If you want the real composite decking secrets for longevity, it is all about gentle, consistent rinsing rather than one annual high-pressure blast.
The Cheap Drill Guide That Saves Your Sanity
Precision is what makes a deck feel high-end rather than a weekend hobby project. If your balusters are even an eighth of an inch off, the whole railing looks like a jagged tooth. I never start a railing install without the drill guide hack for centered baluster holes. It’s a simple jig that ensures every single hole is perfectly vertical and spaced. When you’re working with dark ambers or charcoals, you’ll also find that a standard pencil is virtually invisible; I always use the pencil trick for marking dark composite boards to make sure my cuts are surgical. 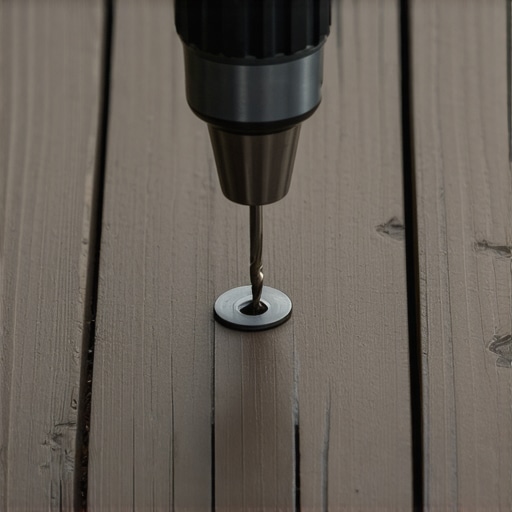
How do I keep my composite deck from looking aged and dingy?
The secret to long-term results isn’t just cleaning; it’s a proactive inspection schedule. I perform the 15-minute deck inspection every homeowner should do once every six months. I’m looking for board crowning or loose fasteners that could lead to bigger issues. According to technical bulletins from the North American Deck and Railing Association (NADRA), structural fatigue often begins in the ledger and joist connections that are hidden from view, so checking the underside for moisture traps is just as important as the surface aesthetic.
Why Your Next Project Starts in the Cloud
Looking ahead, I believe we are moving toward a new era of Smart Decking. We’re already seeing the integration of the low-voltage lighting trick for highlighting deck levels that can be controlled via smartphone, but the next step is embedded moisture sensors. Imagine a deck that notifies your phone if the joists are holding too much water. For now, the closest we have to that foresight is digital planning. That is why you need a 3d model before buying a single deck board. It allows you to catch layout errors in the virtual world where they cost nothing to fix. If you really want to level up your game, try using the drill guide hack on your next railing project; the professional alignment will make every penny spent on premium materials feel worth it.
The Hard Lessons I Learned While Chasing the Perfect Finish
I’ve spent years analyzing why some decks look like a million bucks while others look like they belong in a toy aisle. The biggest lightbulb moment for me was realizing that deck design is about the details you don’t see as much as the ones you do. I used to think the board color was everything, but it’s actually the framing and the transitions that sell the illusion of luxury.
- The Substructure Matters More Than the Surface: I learned the hard way that why pressure-treated wood still needs maintenance under composite is the most overlooked part of any build. If the frame rots, your expensive boards are useless.
- Don’t Trust Your Eyes Alone: When shopping for materials, always take samples home. You need to know how to identify high-quality capped decking from the cheap stuff by looking at the thickness of the outer layer, not just the pretty pattern.
- Stability is a Feeling: A deck that wobbles or bounces feels “fake.” Over-engineering your joist spacing is the fastest way to make a synthetic material feel like solid timber.
[IMAGE_PLACEHOLDER]
The Gear and Guides That Save My Projects
You don’t need a warehouse full of tools, but you do need the right ones. For every project, I rely on a few specific resources to ensure things stay on track. First, I never skip the digital phase. Understanding why you need a 3d model before buying a single deck board is crucial because it helps you visualize transitions before you make a single cut. Second, I’ve moved away from standard materials for overhead structures; why I stopped using pine for pergola rafters taught me that cedar or high-end redwood is the only way to avoid twisting over time. Finally, I always check the NADRA (North American Deck and Railing Association) guidelines for current safety codes to ensure my “pretty” deck is also a safe one.
Your Outdoor Sanctuary is Waiting
Building a space that brings your family together is one of the most rewarding things you can do for your home. Don’t let the fear of “making it look cheap” stop you from starting. By applying these stunning deck design strategies, you’re not just laying boards; you’re crafting a legacy of summer dinners and quiet morning coffees. Use the tricks we’ve discussed—the diagonals, the heavy posts, and the careful cleaning—and you’ll have a space that looks incredible for decades. Which part of the “wood illusion” are you most worried about getting right? Let me know in the comments below!