
I remember the first time I invited my father-in-law over to see my “masterpiece” of a back deck. I had spent weeks obsessing over composite decking trends and picking the perfect color. But the moment he leaned his frame against the corner railing, I saw it: a terrifying three-inch sway. My heart sank. I had used the right bolts and followed the basic diagrams, but the edge of that deck felt like it was made of balsa wood. It was a classic rookie moment that taught me a lesson I never forgot. The strength of your deck doesn’t actually come from the posts or the boards you see—it lives in the framing hidden underneath. Today, I am going to show you how to fix that bounce forever by doubling up your perimeter.
Stop Building Decks That Sway Like a Hammock
Most DIY guides show a single rim joist carrying the load at the perimeter. It looks fine on paper. But in the real world, that single 2×8 or 2×10 is under massive torsional stress the second you bolt a railing post to it. When someone leans on that rail, the joist wants to twist inward. I made the mistake of thinking a few extra lag screws would solve it. They didn’t. The International Residential Code (IRC) R507 has specific requirements for lateral loads, and simply winging it with single-member rims is a common reason why your composite deck feels like a trampoline. Doubling up—the Double-Rim Secret—creates a structural beam that resists twisting and gives your railing systems a rock-solid anchor that won’t budge an inch. It turns a wobbly platform into a fortress.
Is Doubling Up Really Worth the Lumber Price?
I get it. Wood isn’t cheap these days. You might be looking at your budget and wondering if adding a second perimeter joist is just overkill. But consider this: you are already spending thousands on innovative deck design ideas that elevate your home. Cutting corners on the structural skeleton is like putting a Ferrari engine in a cardboard frame. By doubling that rim, you aren’t just stiffening the rail; you are also setting yourself up for the double joist trick for perfectly flush picture frame borders, which is the hallmark of a professional-level finish. It is the difference between a deck that lasts ten years and one that stays solid for thirty. Have you ever felt that gut-wrenching give when you stand near the edge of a high-up deck? I have been there, and I can tell you that the peace of mind is worth every penny of that extra lumber.
Build a Perimeter That Refuses to Budge
The core of the ‘Double-Rim Secret’ is turning two independent pieces of lumber into a single, monolithic structural beam. Think of it like a skyscraper’s skeleton; individual steel beams are strong, but when they are tied together, they become immovable. For your deck, this means laminating two rim joists—usually 2x8s or 2x10s—directly against each other. When I was working on a project for a rustic mountain deck, the sheer weight of the heavy timbers and the leverage of the railing meant a single rim was never going to cut it. We doubled up, and the difference was night and day.
Create a Laminated Beam by Doubling the Joists
To start, cut your outer rim joist to length and tack it into place. Then, cut a second ‘inner’ rim joist to the exact same dimension. Before you marry them together, apply a heavy bead of exterior-grade construction adhesive between the boards. This isn’t just for stickiness; it fills the microscopic gaps between the wood fibers, preventing the boards from rubbing and squeaking later on. Once the adhesive is down, you need to use 3-inch structural screws rather than standard nails. I learned the hard way that nails can back out over time due to the expansion and contraction cycles of wood. Use a ‘W’ pattern for your screws, spacing them every 12 inches. This staggered layout ensures the load is distributed evenly across the entire face of the beam, eliminating the structural reason your deck feels bouncy. 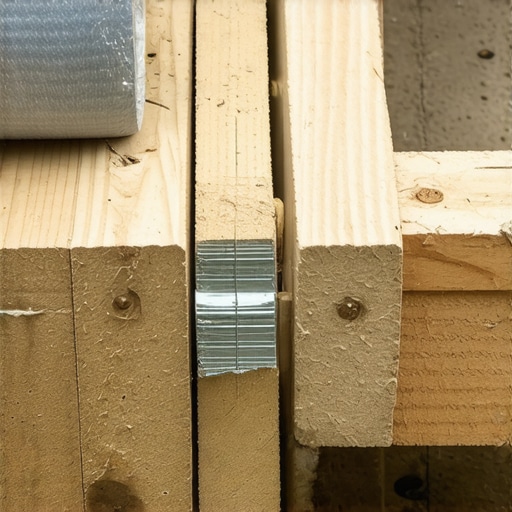
Protect Your Investment with the Flashing Tape Trick
Here is where most DIYers—and even some pros—drop the ball. When you sandwich two pieces of pressure-treated lumber together, you create a tiny capillary gap where water loves to hide. If moisture gets trapped between those two joists, they will rot from the inside out, no matter how much chemical treatment they have. During a 2019 build, I skipped the tape on a small section of a privacy screen, and three years later, I could literally poke a screwdriver through the middle of the ‘solid’ beam. To avoid this, use the flash and tape method for protecting deck joists. Apply a high-quality butyl tape over the top of both joists so it covers the seam entirely. This simple step ensures that your composite decking secrets for longevity actually work, keeping the wood dry and the structure sound for decades.
Why This Matters for Your Railing Safety
Once your double rim is cured and fastened, it becomes the ultimate anchor point. When you go to how to select the perfect railing system, you are no longer bolting into a flimsy board that can twist. You are bolting into three inches of solid wood. This is also the foundation for the double joist trick for perfectly flush picture frame borders, allowing you to run a decorative perimeter board that hides all your cut ends. It is about more than just strength; it is about creating a flat, stable surface that makes every subsequent step of the build easier and more precise.
But even with a double rim, I have seen seasoned pros trip over the fundamental physics of the materials they use. A common myth in the DIY world is that ‘tight is right.’ When you are driving fasteners into composite, there is a massive temptation to bury the head as deep as possible to ensure it never moves. This is actually a recipe for disaster. According to research by the Forest Products Laboratory, the mechanical properties of wood-plastic composites react differently to fastener pressure than traditional lumber. If you over-torque, you create micro-fractures in the core that will expand and contract during the next freeze-thaw cycle. This is exactly the 3-inch screw mistake that ruins composite joists and leads to loose, rattling boards within just two seasons. When you are building, ‘snug’ is the goal, not ‘crushed.’
The Cold-Day Gapping Trap You Must Avoid
Here is the nuance most people miss: wood moves based on moisture, but composite moves based on temperature. If you install your deck on a brisk 45-degree morning and leave a standard 3/16-inch gap, those boards are going to expand like crazy when the August sun hits them. I have walked onto decks where the boards have literally buckled and ‘tented’ off the joists because they had nowhere to go. You must follow the expansion gap rule that stops boards from buckling, which involves adjusting your spacing based on the ambient temperature during the installation. It sounds like overkill, but it is the difference between a flat floor and a structural mountain range. This mismatch is also why your hidden fasteners are popping up in heat; the board moves significantly while the clip stays rigid, eventually shearing the screw or pulling it out of the joist entirely.
Does Your Railing Color Affect Your Deck’s Longevity?
We often pick railings based on the aesthetic of innovative deck design ideas, but the physics of heat absorption can actually shorten the life of your perimeter framing. A dark black aluminum rail looks incredible and modern, but it acts as a giant heat sink. In high-sun areas, why your black aluminum railing gets too hot to touch is only half the problem. That heat transfers through the mounting plates and directly into your double-rim joists, accelerating the drying and cracking of the pressure-treated wood underneath. If you aren’t using joist tape or high-quality flashing, you are essentially baking the moisture out of the grain, leading to early structural rot. It is these tiny, invisible interactions that separate a ‘good enough’ deck from a lasting masterpiece. These are the composite decking secrets that most contractors won’t take the time to explain because they are too busy rushing to the next job site. Have you ever fallen into the ‘gap trap’ or seen your hidden fasteners pop up in the middle of July? Let me know in the comments below.
To avoid those headaches, I’ve realized that having the right hardware on hand is only half the battle; the other half is using the right gear to install it. I used to rely on my eyes to ‘sight’ a post, but now I won’t start a job without the simple tool for making sure your railing posts are plumb. A post-level that straps onto the timber allows you to keep both hands free for driving fasteners, ensuring that your double-rim remains perfectly vertical under the load. When you are working with pergola trends that involve heavy overhead beams, even a half-degree lean at the base can translate into a massive wobble at the rafters.
Upgrade Your Gear to Stop Guessing
For any structural build involving a double-rim, I recommend a high-torque impact driver over a standard drill. Driving five-inch structural screws into laminated pressure-treated lumber requires significant rotational force; a standard drill will often overheat or strip the head, leaving you with a fastener that is stuck halfway. I personally use a 12-inch magnetic bit extender to reach into tight corners between joists where a bulky tool body can’t fit. This precision is vital for executing the flashing tape move that doubles the life of your joists. If your tape isn’t pressed flat because a screw head is sticking up, you’re creating a shelf for water to sit on, defeating the entire purpose of the protection. 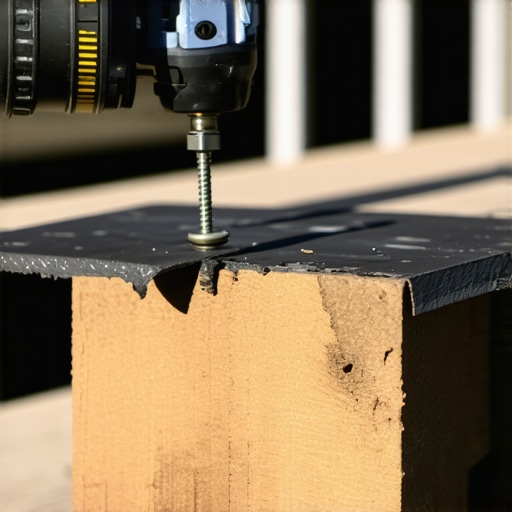
How do I maintain my structural deck and railing over time?
Maintenance isn’t just about aesthetics; it’s about structural integrity. The North American Decking and Railing Association (NADRA) suggests that the vast majority of deck failures occur because of neglected hardware or rot at connection points. I recommend performing the 15-minute deck inspection every homeowner should do every spring. Look for ‘weeping’ around your bolts—dark stains that suggest moisture is penetrating the wood. When it comes to the surface, maximize outdoor living with low-maintenance composite decking by using a soft-bristle brush and a pH-neutral cleaner. I have seen too many beautiful finishes ruined because a homeowner thought a power washer was a shortcut; in reality, why you should never use a pressure washer on composite comes down to the risk of etching the material and voiding your warranty.
Why 3D Modeling is the Future of Outdoor Design
Looking ahead, the days of sketching a deck on a napkin are over. I predict that within the next five years, augmented reality (AR) will be the standard for every DIYer. We are already seeing why why you need a 3d model before buying a single deck board—it allows you to visualize how shadows from your pergola will fall and where the double-rim joists need to be reinforced for a hot tub or heavy kitchen. Modern software can now calculate the exact expansion gaps needed based on your local climate data. This technology ensures that your composite decking secrets for longevity are baked into the plan before you even pick up a saw. If you want a deck that looks as good in 2040 as it does today, try using a scrap piece of flashing tape as a temporary ‘third hand’ to hold your spacers in place during your next board layout—it’s a small trick that ensures perfect alignment every time.
Hard Lessons from the Joist Trenches
Over the years, I’ve realized that building to ‘minimum code’ is often the fastest way to a wobbly result. After seeing how much a single 2×10 can twist under pressure, I learned that doubling up isn’t just about raw strength; it’s about eliminating the micro-movements that eventually lead to why your cable railing sagged over winter. Another lightbulb moment came when I stopped using standard nails for structural ties. The pull-out resistance of a structural screw is vastly superior, especially when you are integrating railing systems that require absolute rigidity. Finally, I’ve learned that the ‘best’ material is worthless if the skeleton is weak. You can buy the most expensive boards, but without a double-rim, it will always feel like a temporary stage rather than a permanent home addition.
My Personal Structural Toolkit
If you’re ready to get started, don’t just wing it with a random bucket of hardware. I personally rely on the North American Decking and Railing Association (NADRA) for their safety checklists; they are the gold standard for structural integrity. I also never start a project without high-quality butyl tape—check out the deck joist tape test does it actually stop rot to see why I’m such a believer. For the design phase, I always recommend software that helps you visualize innovative deck design ideas before you cut a single board. It saves hours of frustration and prevents costly lumber waste.
Build a Deck That Lasts a Lifetime
Building a deck is a massive undertaking, but there is no feeling quite like walking onto a platform you built yourself and realizing it doesn’t move a fraction of an inch. Whether you are exploring pergola trends or just trying to fix a bouncy corner, focus on that hidden framing first. When you master the skeleton, the beauty of your composite decking will shine for decades to come. You have the knowledge now; all that’s left is to pick up the tools and start framing.
Have you ever noticed your railing swaying when someone leans on it? Let me know in the comments how you plan to beef up your perimeter!