
It was a crisp Saturday morning, the kind where the coffee tastes better because you’re sitting on your own deck, when I saw it. A jagged, spider-web fracture crawling up from the bottom of my brand-new vinyl post sleeve. I’d spent a small fortune on those materials, thinking I was building a ‘maintenance-free’ sanctuary. Instead, I was looking at a total eye-sore that felt like a personal failure. I remember kneeling down, touching the sharp plastic edge, and wondering if I had just thrown my weekend—and my budget—down the drain. If you’ve seen that same hairline crack starting to widen, I know exactly how that sinking feeling in your gut feels. Today, I’m going to show you exactly why this happens and how we can stop those sleeves from splitting ever again. [image placeholder]
The Hidden Stress That Shatters Your Deck Aesthetics
When I first started DIYing my outdoor spaces, I made a classic ‘over-achiever’ mistake: I tightened the base bolts of my railing posts like I was trying to win a world-strongman competition. I thought ‘tighter is safer.’ I was wrong. By cranking down on those fasteners, I left zero room for the material to breathe. Most people don’t realize that composite and vinyl sleeves are essentially living, moving things; they expand in the summer sun and shrink when the frost hits. If you use the hidden bracket trick but don’t account for this movement, something has to give. Usually, it’s the base of your sleeve. We often focus so much on making sure posts are perfectly plumb that we forget the physics of thermal expansion. According to technical studies by Fine Homebuilding, composite materials can experience significant linear expansion, which creates immense pressure at fixed points like the deck surface. If your sleeve is trapped between a heavy railing and a rigid deck board, it’s basically in a vice.
Will my entire railing system eventually fail?
It’s a valid fear—no one wants a guest leaning on a railing that’s structurally compromised. The good news is that while those cracks look like a disaster, they are often cosmetic ‘stress relief’ fractures rather than a sign the post itself is going to fall over. However, if you ignore them, moisture gets trapped inside, leading to rot on the underlying 4×4 or 6×6 wood post. I’ve learned the hard way that following composite decking secrets for longevity means respecting the gap. Have you noticed a crack appearing right after a major temperature swing in your area? You aren’t alone, and it’s usually the first sign that your installation was just a hair too tight. Let’s dig into how we can fix the pressure points before the next season hits.
To prevent your post sleeves from becoming victims of the weather, you have to stop treating them like structural lumber. Think of the vinyl sleeve like a loose-fitting coat, not a pair of skinny jeans. The first real step to a crack-free deck is ensuring that the sleeve is never actually touching the deck boards. I remember a project three years ago in humid Virginia where I ignored this. I sat the sleeve flush against the composite decking, thinking it looked cleaner. By mid-August, the heat had caused the deck boards to swell and the sleeve to expand downward. With nowhere to go, the bottom of the sleeve buckled and eventually shot a three-inch crack right up the corner. Now, I always leave a consistent 1/4-inch breathing room at the bottom, often hiding the gap with a post skirt. This is just as important as the expansion gap rule that stops boards from buckling.
Stop the Crushing Pressure at the Base
When you slide that sleeve over your 4×4, it should practically dance. If you have to hammer it down, stop immediately. You likely have a slight crown in the wood or a rogue bolt head in the way. Shaving down the wood post is far better than forcing a tight fit. This ensures that when the wood naturally retains moisture and swells, it won’t exert outward pressure on the plastic. 
Give the Material Some Room to Grow
Once the sleeve is on, focus on the base plate. Many DIYers make the mistake of using the sleeve itself to help level the post. Instead, use the shim trick for leveling a railing on the internal wood post first. You want your structural post perfectly vertical before the sleeve even touches the deck. If the sleeve is forced into an angle because the internal post is crooked, the plastic will be under constant tension. Over time, that tension turns into a fracture. Think of it like a bent plastic ruler; it might hold for a while, but it is always waiting for a reason to snap.
The Right Way to Secure Your Brackets
The biggest culprit for mid-sleeve cracks is the railing bracket. When you screw your railing into the post, those screws pass through the vinyl and into the wood. Here is the secret: pre-drill your holes in the vinyl sleeve slightly larger than the screw diameter. This creates a slip joint. If you don’t do this, the screw pins the vinyl tightly against the wood. When the wood shrinks and the vinyl expands, they fight each other. By drilling a larger pilot hole in the plastic, the sleeve can slide a fraction of a millimeter behind the screw head without cracking. This is part of those composite decking secrets that pro builders use to keep high-end jobs looking brand new for a decade.
Handle the Railing Connections with Care
It is tempting to use an impact driver and zip those bracket screws until the plastic indents. Do not do it. You are essentially creating a perforated line, like on a notebook page, making it easy for the post to tear. Use a handheld screwdriver for those last few turns. You want the bracket snug, but not embedded. I once saw a gorgeous pergola design ruined because the builder over-torqued every single decorative sleeve. Within one winter, every post had a hairline fracture because the material could not move with the temperature swings.
Check for Plumb Without the Pressure
Always use the simple tool for making sure your railing posts are plumb on the internal structural post, not the sleeve itself. Plastic can be deceptive; it can bow or warp slightly in the sun, giving you a false reading. If you trust the sleeve’s surface to be your guide, you might end up cranking down on one side of the base to fix a lean that does not actually exist, putting unnecessary torque on the base of the vinyl which will eventually lead to a blowout.
Most people assume that once the sleeve is over the wood post, the job is basically finished. But here is the contrarian truth: your vinyl or composite sleeve is only as stable as the lumber you hide inside it. While common wisdom says vinyl is ‘maintenance-free,’ I have seen thousands of dollars in materials ruined because the builder used ‘wet’ pressure-treated 4x4s that hadn’t been allowed to reach an equilibrium moisture content. As that internal wood dries, it inevitably twists and cups. Since your railing is screwed through the sleeve and into that wood, the plastic is forced to follow the wood’s movement. This is why I often advocate for why 6×6 posts look better than 4x4s; the larger mass of a 6×6 is much more resistant to the dramatic torque that snaps vinyl sleeves.
Why Your Wood Post is Quietly Destroying Your Vinyl
The ‘oops’ factor most DIYers miss is the drainage trap. We all want a tight, seamless look where the post skirt meets the deck, but a perfectly sealed skirt creates a vertical terrarium. If water gets behind the sleeve—and it always does—it has nowhere to go. This moisture accelerates the twisting of the internal wood post. According to the American Wood Council’s Design for Code Acceptance (DCA 6), wood shrinkage is a primary factor in fastener displacement. When the wood shrinks or swells, it puts immense localized pressure on the points where your brackets are attached. If you haven’t used the complete guide to choosing railing systems to select high-quality materials, that pressure will manifest as a jagged crack. 
Does Internal Wood Torque Compromise Your Railings Safety Rating?
This is the nuance that separates a pro from an amateur. A crack in the sleeve is usually cosmetic, but the torque that caused it can loosen the lag bolts holding your post to the frame. If you notice your post has a new ‘wiggle’ along with the crack, you are likely dealing with the structural reason your deck feels bouncy. To prevent this, I always recommend using kiln-dried-after-treatment (KDAT) lumber for the structural posts or opting for low-maintenance composite decking solutions that include metal internal posts. When you are buying your kit, knowing how to identify high-quality capped decking and matching components will ensure the outer ‘skin’ can handle the thermal stresses of the seasons. Have you ever fallen into this trap of using wet lumber under your expensive sleeves? Let me know in the comments. We are all here to learn from those hidden mistakes so our next project lasts a lifetime.Even after you’ve mastered the gap and chosen the right wood, you can’t just walk away and expect perfection forever. Maintenance for me isn’t about scrubbing with soap—though that helps—it’s about the structural check-up. I always perform the 15-minute deck inspection every homeowner should do at the start of every spring. I’m looking for that subtle movement in the post bases and checking if the winter freeze-thaw cycle has backed out any screws. If you’re building new, don’t skip the flashing tape move that doubles the life of your joists. It’s the cheapest insurance policy against the rot that eventually causes your railing posts to wobble and the vinyl to snap under the shifting weight. 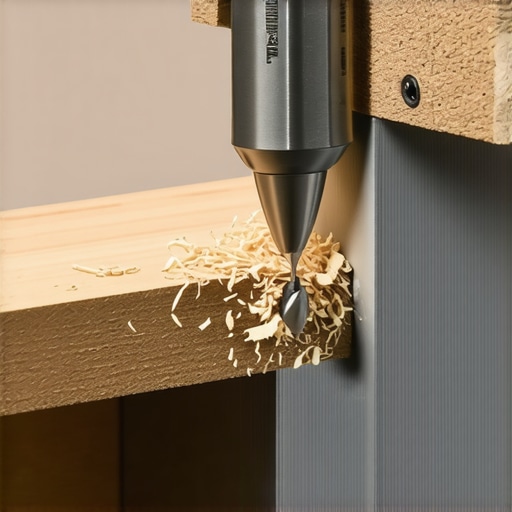
Stop Guesstimating and Start Measuring
The National Design Specification (NDS) for Wood Construction notes that moisture content changes can lead to significant fastener withdrawal capacity loss. This is why I use a specific tool: a high-quality drill guide. Using the drill guide hack for centered baluster holes ensures that your screws are biting into the dead center of the internal wood post, maximizing that grip and preventing the ‘leaning post’ syndrome that plagues most DIY builds. If you’re off by even an eighth of an inch, the screw won’t have enough wood to bite into, and the expansion of the vinyl sleeve will eventually pull that bracket right out.
How do I maintain my composite railing system over time?
Maintenance is a game of tension and drainage. Every year, I recommend loosening and re-snugging (not over-tightening) your bracket screws to ensure they haven’t become bound by debris or grit. This allows the thermal movement to continue without stress. You should also clear out any organic material trapped under the post skirts. If you’ve followed composite decking secrets, you know that keeping the airway open is the only way to keep the internal wood post dry.
Why the Next Five Years Belong to Metal Subframes
Looking ahead at composite decking trends for modern outdoor living, I predict we are going to see a massive shift away from wood-based internal posts entirely. In five years, if you aren’t using an aluminum or galvanized steel internal post system, you’re going to feel behind the curve. These materials have near-zero thermal expansion compared to wood and vinyl, meaning those hairline cracks we talked about will finally become a thing of the past. It’s a slightly higher upfront cost, but for a ‘set it and forget it’ lifestyle, it’s unbeatable. I want you to try this: next time you’re at the hardware store, grab a roll of butyl joist tape and a proper metal drill guide. Even if you only use it for one section of your railing, you’ll see the difference in rigidity and peace of mind immediately.
Hard Lessons from My Most Expensive Cracking Disaster
After years of fixing split vinyl, I realized that heat is often the silent killer. If you install your sleeves on a frigid morning and fit them tight, they will scream for mercy by the first 90-degree afternoon in July. Always aim to install during a moderate temperature or increase your ‘breathing’ gap if you’re working in the cold. Another lightbulb moment was realizing that south-facing railings take 30% more thermal stress than those in the shade. On those sunny stretches, I now double-check that the post skirts aren’t pinched. Remember, your railing is an assembly of moving parts, and as soon as you treat it like a static block of concrete, you’ve already invited the first fracture. I also learned that composite decking secrets for longevity aren’t just about the boards—they apply to every accessory you bolt down.
Gear That Keeps My Railing Post Sleeves Intact
I don’t step onto a job site without a few specific items that ensure these sleeves never fail. First, I swear by using KDAT (Kiln Dried After Treatment) 4x4s. They have already done their shrinking in a controlled environment, so they won’t twist your vinyl into a pretzel later. Second, a high-quality metal drill guide is non-negotiable. I use the drill guide hack for centered baluster holes even for my main bracket pilots to ensure everything is perfectly aligned. Finally, I always keep a roll of butyl tape handy. Using the flashing tape move that doubles the life of your joists on the top of the internal wood post prevents water from seeping into the end grain, which is the root cause of the swelling that cracks sleeves from the inside out.
Building a Deck That Outlasts the Seasons
You’ve put in the sweat and the investment to create a beautiful outdoor sanctuary. By respecting the physics of the materials and giving your post sleeves the room they need to move, you’re ensuring that your low-maintenance composite decking remains a source of pride rather than a maintenance headache. Don’t let a few hairline cracks dampen your DIY spirit; now you have the pro-level blueprint to stop them before they start. Just keep an eye on things during the 15-minute deck inspection every homeowner should do each spring to catch any minor shifts early.
Have you noticed your post sleeves expanding or making a ‘popping’ sound on hot days? Let me know in the comments below!