
I’ll never forget the sound—the sickening, wet crunch of wood giving way under my boot. It was five years ago, and I was helping a friend replace a few boards on his ten-year-old deck. From the surface, the wood looked decent. But as soon as we pulled those planks up, I saw the truth. The joists underneath were basically black, soggy oatmeal. It was a total structural failure hiding in plain sight. I felt sick for him. All that money spent on high-end boards, and the skeleton of the deck was rotting away because water had nowhere to go. That was the day I realized that even the best composite decking secrets and longevity tips mean nothing if you ignore the pressure-treated lumber underneath. I had made the same mistake myself on my very first build, thinking that ‘pressure-treated’ meant ‘invincible.’ It doesn’t. But there is a incredibly cheap fix I use on every project now. [image]
Stop Letting Rain Kill Your Deck From the Inside
You’d think that screws and nails are the only things holding your deck together, but it’s actually the surface area where the board meets the joist that decides your deck’s fate. When rain falls, it seeps into the gaps between your deck boards and sits directly on top of the joists. It doesn’t just evaporate. It lingers. This moisture creates a perfect breeding ground for fungi. According to the USDA Forest Products Laboratory, wood-to-wood contact points are the most vulnerable areas for decay because they trap moisture and prevent the wood from ‘breathing’ or drying out. By the time you see the rot from the side, it’s already too late. This is why I always insist on the flashing tape move that doubles the life of your joists. It creates a waterproof barrier that keeps that timber bone-dry for decades.
Is This Just an Expensive Marketing Gimmick?
I get it. You’re already spending a fortune on lumber, and now some guy on the internet is telling you to buy rolls of black tape. You might be wondering if this is just another way for hardware stores to squeeze an extra hundred bucks out of you. I used to be a skeptic too. I figured if the old-timers didn’t need it, why should I? But the old-timers were working with old-growth wood that was naturally more rot-resistant. Today’s pressure-treated lumber is often ‘wet’ and fast-grown, making it much more prone to checking and splitting as it dries. When you use the flash and tape method for protecting deck joists, you aren’t just stopping rot; you’re also sealing around the screw holes, which is where the moisture usually starts its slow, destructive journey. Have you ever pulled up a ‘perfect’ board only to find the structure underneath looking like a swamp? It’s a heartbreaking sight, but it’s one we can easily avoid. Let’s look at how to do it right.
Clean the Surface or Face the Consequences
Before you even touch a roll of tape, you have to address the state of your lumber. If you’ve ever wondered why your pressure-treated wood feels wet even after weeks of sitting on your driveway, it’s because the chemical treatment saturates the fibers to the core. Trying to apply flashing tape to wet, muddy, or dusty joists is like trying to use a Band-Aid underwater. It just won’t stick. I take a stiff-bristle brush to the top of every joist to knock off the construction grime. If the wood is physically damp to the touch, wait. The adhesive needs a dry surface to create that molecular bond. Think of this as the primer coat on a car; if the base is bad, the top layer is useless.
Roll It Out for a Permanent Bond
Once the wood is prepped, you start the actual application. Using the flash and tape method for protecting deck joists is essentially giving your lumber a permanent raincoat. You want to center the tape over the joist so it hangs over each side by about a quarter-inch. This creates a ‘cap’ that sheds water away from the vertical faces of the wood. Back in 2019, I was rushing a pergola install before a massive thunderstorm hit. I slapped the tape down with my hands, thinking a good press was enough. Three days of humidity later, the tape looked like a corrugated roof—bubbles everywhere. I had to peel back $200 worth of material because the adhesive never bit into the wood. Now, I don’t move an inch without my J-roller. Running a small rubber roller over the tape forces the adhesive into the wood grain, sealing it so tightly that air can’t even get in. 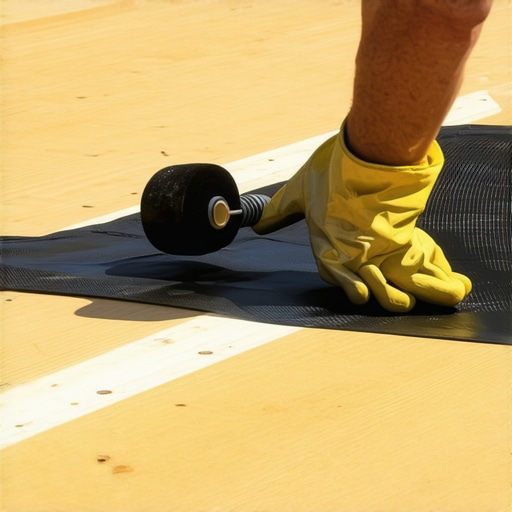
The Overhang Trick for Rim Joists
The perimeter of your deck—the rim joists—is where the most visible rot usually starts. This is where the ‘drip’ happens. I always use the drip edge hack for preventing deck rim joist rot by extending the tape slightly further out than on the internal joists. This ensures that any water running off the edge of your deck boards doesn’t curl back under and soak into the rim. If you are building a high-end frame, combine this with the double rim joist secret for rock solid deck edges to ensure your structure is as stiff as it is dry.
Seal Around the Hardware
Every time you drive a screw through a deck board and into a joist, you are creating a tiny well where water can collect. The beauty of high-quality butyl tape is that it ‘self-heals.’ When the screw passes through, the tape wraps around the threads like a gasket. This is a critical line of defense because internal moisture at the screw point is a major reason why your deck screws are snapping in cold weather. The freezing water expands in the wood, putting immense pressure on the metal. By keeping that screw hole bone-dry, you’re protecting the hardware just as much as the timber. It’s a small step that transforms a ten-year deck into a thirty-year deck.Most DIYers—and even some pros—think that a rock-solid railing is achieved simply by cranking down more lag bolts. It’s a common belief that more torque equals more safety. But I’ve seen 4×4 posts split right down the middle because the installer didn’t account for the leverage forces at play. According to the American Wood Council’s Design for Code Acceptance (DCA 6), a railing post must withstand a 200-pound concentrated load at the top. If you’re just bolting into the rim joist, you’re asking a few inches of wood grain to hold back hundreds of pounds of leverage. This is where the hidden bracket trick for perfectly rigid railing posts becomes a lifesaver. By using internal tension-tie connectors, you transfer that force directly into the floor joists, not just the edge of the deck.
Why does your composite decking expand more than the manual says?
It’s a frustrating mystery for many: you leave the required gap, but by July, your boards are buckled. The nuance most people miss is the heat absorption factor. While a manual might suggest a specific gap based on a 70-degree day, a dark gray board sitting in direct South-facing sun can reach 150 degrees. Research from the University of Maine’s Advanced Structures and Composites Center indicates that surface temperatures on capped composites can drastically exceed ambient air, causing linear expansion that outpaces standard calculations. If you don’t adjust your gaps for the sun-soak factor, why your composite decking is expanding more than the manual says becomes painfully obvious as the boards move and distort. 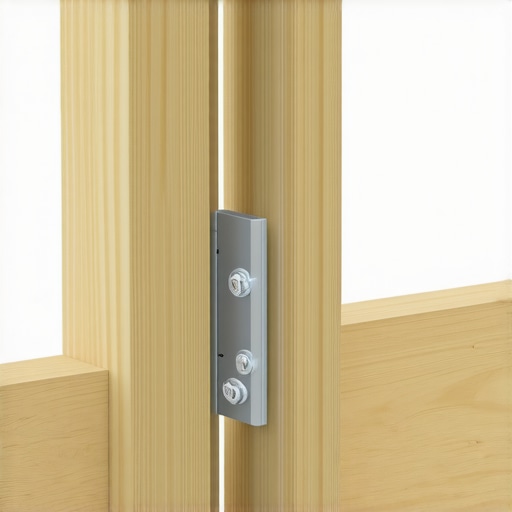
The Miter Trap That Ruins Premium Finishes
There is a specific trap when building those beautiful picture-frame borders or mitered corners. Most people treat composite like wood, cutting 45-degree angles and hoping for the best. However, composite primarily moves along its length. In the winter, those beautiful miters will open up like a hungry mouth, and in the summer, they can actually crush each other. To avoid this, I never rely on just screws. I use the pvc glue trick for gap-free composite miters to chemically bond the ends together. This creates a single unit that moves as one, rather than two boards fighting each other. Also, be careful with your choice of clips; why hidden fasteners can be a maintenance nightmare often comes down to the lack of lateral stability they provide in these high-movement areas. When you’re investing in the complete guide to choosing railing systems for safety and style, don’t let a simple expansion oversight turn your masterpiece into a repair project. Have you ever fallen into this trap where you followed the instructions and the wood still buckled? Let me know in the comments.
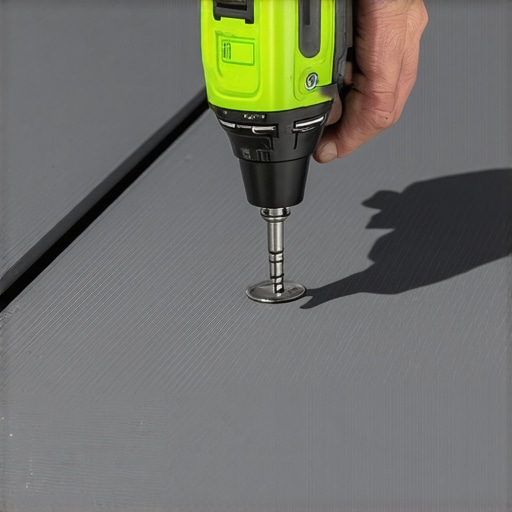
Moving beyond the initial build, I have learned that the tools you use for finishing are just as important as the lumber itself. Many DIYers reach for a standard cordless drill and call it a day, but that is a recipe for stripped screws and uneven surfaces. I personally swear by a depth-drive tool attached to a high-torque impact driver. It ensures that every single fastener is set at the exact same depth, avoiding the dreaded ‘mushrooming’ effect where the composite material bulges around the screw head. If you want a flawless look, the secret to making composite decking look like real wood is all in these microscopic details. Using a dedicated jig system like the CAMO Marksman also ensures your spacing remains consistent even as the boards naturally flex during installation.
Equip Yourself with Tools That Actually Save Your Back
Another tool I never step onto a job site without is a high-quality bow wrench. Composite boards are notorious for arriving slightly bowed from the supplier. Trying to manhandle a sixteen-foot board into a straight line while simultaneously driving screws is a losing battle. A deck board straightener allows you to lock the board in place with one hand, leaving your other hand free to secure it. This level of precision is exactly what separates a ‘backyard project’ from a professional-grade installation. I’ve seen beautiful designs ruined simply because the installer didn’t have the leverage to close a half-inch gap at the end of a run. While you are at it, make sure you are using composite decking secrets and longevity tips to keep those boards looking brand new long after the tools are packed away.
How do I maintain my composite deck’s finish over time?
Maintenance is where most people get complacent. They hear ‘low maintenance’ and assume ‘zero maintenance.’ To keep your deck safe, you should perform the 15-minute deck inspection every homeowner should do at least once a year. According to the North American Deck and Railing Association (NADRA), the ledger connection—where the deck attaches to your house—is the primary failure point in 90% of deck collapses. Check for rusted bolts and signs of wood decay in the house rim joist. For the surface, why you should never use bleach on your composite deck becomes clear when you see how harsh chemicals can break down the protective cap of the board. Instead, use a mild soap and a soft-bristle brush. In the winter months, be careful with your shovel; the best way to handle snow removal on composite decks is using a plastic shovel with no metal edge to prevent permanent gouges.
What the Next Generation of Decking Looks Like
Looking ahead, the trend is moving toward total digital precision. I predict that within five years, every high-end deck will be pre-cut using CNC technology based on a 3D scan of the home’s foundation. This is why you need a 3d model before buying a single deck board today; it eliminates waste and ensures your stairs and railings fit perfectly without ‘on-the-fly’ hacking. We are also seeing a shift toward heat-reflective polymers that stay cool even in the dead of summer, solving the biggest complaint about darker composite colors. I highly encourage you to try using a depth-drive bit on your next repair or build; it is the single most effective way to elevate the professional feel of your outdoor space immediately.
The Hardest Lesson I Learned While Chasing a Perfect Finish
It is funny how the most expensive mistakes usually happen when you are trying to save twenty minutes. I have spent more time fixing fast mistakes than I ever spent doing it right the first time. For instance, the day I realized the hidden reality of why pressure-treated wood still needs maintenance under composite was a total pivot point for me. I stopped viewing the frame as a set-it-and-forget-it component and started treating it with the same respect as the surface boards.
Another lightbulb moment was realizing that aesthetics are easy, but structural integrity is the real skill. I used to focus on the color of the boards, but now I focus on modern composite decking trends and durable solutions that prioritize the skeleton of the deck. If the joists are not bone-dry and the fasteners are not perfectly set, even the most expensive boards will eventually fail you.
The Gear That Separates Pros from Weekend Warriors
To get that high-end look, I rely on a few non-negotiables. First, a high-torque impact driver paired with a depth-setting bit—this stops the material from mushrooming. Second, I always check my structural layouts against pergola designs that turn your garden into a sanctuary to see how vertical elements can double as architectural features. #IMAGE_PLACEHOLDER_E# Finally, never underestimate a 3D model; it is the best tool for spotting a clearance issue before you cut a single sixteen-foot board.
Build a Space That Survives the Elements
At the end of the day, your deck is where you will host barbecues, watch sunsets, and relax with family. Whether you are installing custom railing systems for safety and style or just refreshing a few boards, take pride in the hidden details. The flashing tape, the proper gapping, and the structural hardware are what turn a simple platform into a legacy project. Your future self will thank you every time it rains. Have you ever started a deck project only to realize the frame was in worse shape than you thought? Let me know your hidden rot stories in the comments below!