
I was standing there with a pry bar, expecting a quick five-minute fix for a squeaky board, when I saw it. My “lifetime” pressure-treated joist was a soggy, pulpy mess that looked more like wet chocolate cake than structural lumber. I’d spent thousands on premium composite decking, thinking I was set for life, but the skeleton underneath was giving up the ghost after only seven years. It’s a gut-punch that way too many of my neighbors are dealing with lately. If you’ve noticed your deck feels a little “springy” or you’re seeing dark stains on your framing, you aren’t crazy. Your wood really is rotting faster than it used to. Today, we’re going to dig into the weird science of modern lumber and how a few simple moves can save your structure from an early grave.
Stop Treating Your Deck Frame Like It’s Invincible
We grew up believing that “green wood” meant it could survive a nuclear winter. My biggest mistake early on was assuming that pressure-treated wood still needs maintenance even when it is tucked away under the boards. I thought the chemicals were a magic shield. But here’s the reality: today’s treatment processes are much more prone to leaching and specific moisture issues than the old-school stuff we used decades ago. According to research from the USDA Forest Products Laboratory, modern copper-based treatments require aggressive moisture management to actually meet their life-expectancy ratings in high-moisture zones. Without it, you’re basically building a giant sponge that rots from the inside out.
Is Modern Lumber Actually Lower Quality?
You might be wondering if you’re getting ripped off at the lumber yard. It certainly feels that way when you see a 4×4 start to twist before you even get it off the truck. The truth is, we are using faster-growth timber these days, which is less dense and more prone to soaking up water like a thirsty camel. If you combine that with the way water gets trapped between the joist and the decking, you have a recipe for disaster. This is exactly why using joist tape has gone from a luxury “extra” to a total necessity in my recent builds.
The Hidden Killer Lurking Under Your Deck Boards
The real culprit isn’t usually a massive flood; it’s the slow, silent “sandwich effect.” When you screw down a deck board, you create thousands of tiny entry points for moisture. Water sits in those holes, and because there’s almost zero airflow between the board and the joist, it never dries out. It just sits there, stewing in the summer heat. I’ve even seen gorgeous pergola designs fail prematurely because the top of the beams weren’t protected from standing water. Have you ever poked a screwdriver into your joists only to have it sink in like it’s hitting soft butter? I want to hear your deck horror stories. We are going to fix this by mastering the flashing tape move that stops the rot before it starts.
Seal the Top Surface Before Your Boards Go Down
Think of joist tape like a high-end raincoat for your lumber’s spine. When you drive a screw through a deck board and into a joist, you are essentially creating a tiny straw that sucks water directly into the heart of the wood. To stop this, you need to apply a butyl-based flashing tape along the top of every single joist. I learned this the hard way on a project in a shaded, damp valley. The homeowner had opted for low-maintenance composite decking, but the previous builder had skipped the tape. Within just three years, the screw holes had become miniature wells, holding stagnant water against the grain. We ended up having to pull the boards and use tricks to fix spongy deck boards because the wood was already softening. If they had spent an extra $150 on the flashing tape move during the initial build, that frame would have lasted forty years instead of five.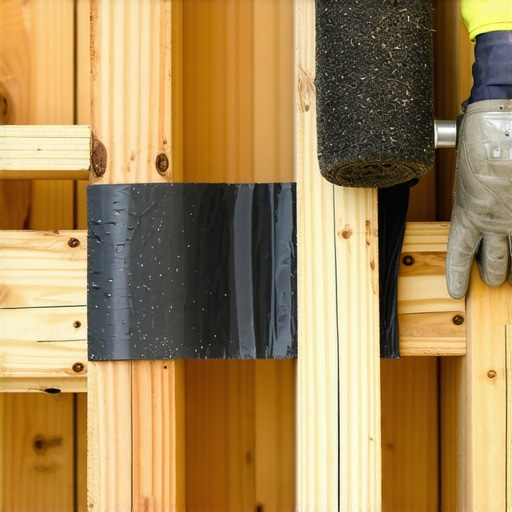
Why Butyl Over Asphalt?
Not all tapes are created equal. Old-school asphalt tapes tend to dry out and crack when the temperature swings, but butyl tape stays flexible and actually ‘self-seals’ around the shank of the screw. This creates a watertight gasket. When you’re laying it down, make sure the wood is dry and give it a firm press with a small roller or the back of your hammer to ensure there are no air bubbles where moisture can hide.
Stop the Rot at the Rim Joist
The outer perimeter of your deck—the rim joist—is the most exposed part of the entire structure. It takes the brunt of the wind, rain, and snow. If water gets trapped between the rim joist and the fascia board (that pretty trim piece on the outside), you’re looking at a structural failure in record time. I always recommend using the drip edge hack. By installing a small L-shaped flashing that directs water away from the face of the wood, you prevent the ‘wicking’ effect that destroys the perimeter. This is especially vital if you are building pergola designs that attach directly to the deck frame, as those heavy posts put extra stress on the rim.
Tighten the Skeleton to Eliminate the Bounce
A deck that feels ‘springy’ isn’t just annoying; it’s a sign that the wood is flexing too much, which opens up cracks and allows more water to enter. To prevent this, you need to master the art of ‘blocking.’ This involves placing short pieces of joist material perpendicular between your main runs. It’s the simple blocking move that transfers the weight across the entire frame rather than just one or two boards. I usually stagger my blocks every 4 to 6 feet in a row. It makes the deck feel like a solid concrete floor and keeps the lumber from twisting as it seasons. While you’re down there, always double-check your layout using the 3-4-5 rule to ensure your frame is perfectly square before the first board is ever cut. A square frame means fewer gaps where water can pool and less stress on your fasteners over time.Everyone tells you that hidden fasteners are the gold standard for high-end builds. They look sleek and seamless, but here is the contrarian truth: in high-heat environments, they can be a liability. I have spent years fixing projects where homeowners wonder why your hidden fasteners are popping up in heat. It is rarely a product defect; it is a failure to respect the laws of physics. If you do not give those boards room to breathe, they will find their own way out. This is a classic ‘oops’ factor where aesthetics override engineering, and it usually ends with buckled boards and stripped screws.
Respect the Expansion Gap or Pay the Price
The biggest myth in the industry is that ‘plastic doesn’t move.’ In reality, composite decking moves significantly more than wood, just in a different way. While wood swells with moisture, composite expands and contracts with temperature. According to technical bulletins from the North American Decking and Railing Association (NADRA), failure to account for linear thermal expansion is a leading cause of structural aesthetic failure. This is why mastering the expansion gap rule that stops boards from buckling is non-negotiable. If you install your boards tight against a wall on a 60-degree morning, they will have nowhere to go when the July sun hits 100 degrees.
Why is your composite decking expanding more than the manual says?
Often, it is because of the ‘heat island’ effect on your specific site. If your deck is surrounded by stone walls or glass sliders, the surface temperature can soar far beyond the ambient air temperature. I always recommend why capped polymer composite stays cooler than wood plastic as a starting point for sunny builds. These materials handle thermal stress much better, but they still require a pro-level layout. 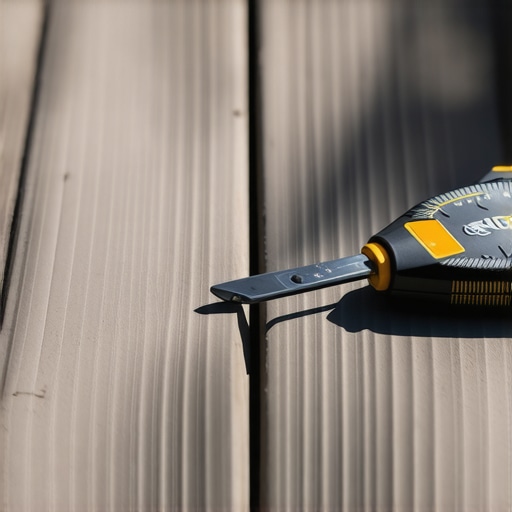
The Ledger-Free Pergola Advantage
Another common mistake is the assumption that every pergola needs to be attached to the house. While it feels more secure, puncturing your siding creates a permanent vulnerability for water intrusion. In my experience, the ledger-free pergola is often the superior choice. It allows the structure to move independently of your home and eliminates the risk of rotting out your house’s rim joist. To keep a freestanding structure stable, you just need to use the notched rafter secret for a pergola that never wobbles. This mechanical connection provides the rigidity that bolts alone simply cannot match.
Fix the Bounce Before You Finish the Railing
If you have already laid your boards and realized the frame is still a bit ‘active,’ do not try to hide it with a heavy railing. A heavy railing on a bouncy frame is how you end up with why your railing post sleeves are cracking at the base. The torque from people leaning on the rail, combined with a flexing frame, will snap those plastic sleeves like toothpicks. Instead, go back underneath and use the simple blocking move to stiffen the joists. It is much easier to add $50 worth of scrap wood blocking now than to replace a $2,000 railing system in three years. Have you ever fallen into this trap where your ‘perfect’ deck started buckling after the first heatwave? Let me know in the comments.
The Tools That Saved My Sanity on the Last Job
I’ve learned the hard way that brute force is no match for the right specialized equipment. When you are installing a high-end railing system for every deck, the difference between a ‘DIY look’ and a ‘pro finish’ is often just a $20 tool. For instance, I never start a railing project without the drill guide hack for centered baluster holes. Freehanding those holes is a fool’s errand; one slight tilt of the wrist and your entire railing line looks like a row of crooked teeth. I also keep a specialized scriber in my bag for those tricky spots where the deck meets the house. If you are dealing with a stone veneer, you need to master how to scribe deck boards to an uneven stone foundation. It creates that seamless, built-in look that makes neighbors stop and stare. These aren’t just gadgets; they are the difference between a deck that looks like it belongs there and one that looks like it was slapped against the siding.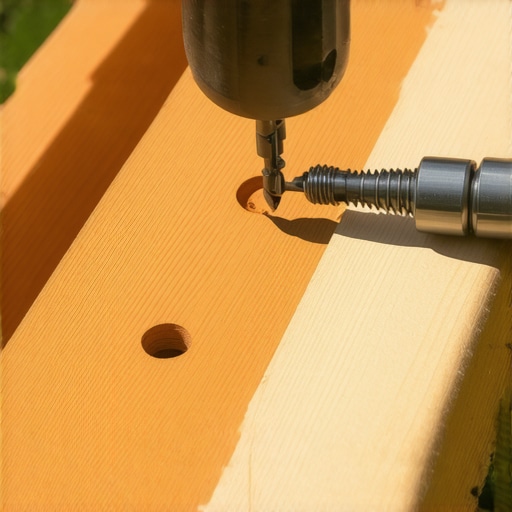
How do I maintain my composite deck and railing over the years?
Long-term maintenance is where most people drop the ball. They think ‘low maintenance’ means ‘no maintenance.’ To keep your space pristine, you should perform the 15-minute deck inspection every homeowner should do every spring. Check the hardware, look for loose boards, and clear out the debris between the gaps. And please, for the love of your warranty, why you should never use bleach on your composite deck is a lesson you don’t want to learn the expensive way. Bleach can break down the UV inhibitors in the capping, leading to premature fading. If you’re unsure if your remaining wood components need a refresh, use the simple spray test to see if your wood deck needs sealing. If the water beads, you’re good; if it soaks in, it’s time to get to work. For those with aluminum railings, keep an eye on the finish. High-quality systems follow the AAMA 2604/2605 standards for high-performance organic coatings, which are designed to resist the chalking and fading that usually plagues outdoor metal. Even these need a simple rinse with soap and water to remove corrosive salts and pollen that can eat away at the gloss over a decade.
Why 3D Modeling is the Future of Outdoor Building
Looking ahead, the days of sketching on a napkin are over. I predict that within five years, every major build will require a digital twin. This is why you need a 3d model before buying a single deck board. These models allow us to simulate how the sun will hit your pergola designs at 4 PM in July, ensuring you actually get the shade you’re paying for. It also prevents the ‘oops’ of ordering $500 worth of extra composite boards that you don’t need. When winter rolls around, these detailed plans also help you remember where the structural beams are, which is vital for the best way to handle snow removal on composite decks without damaging the surface. Before you commit to your next big renovation, I strongly encourage you to try one specific advanced move: use a 3D modeling tool to visualize your expansion gaps and joist layouts. It’s the ultimate way to catch mistakes on the screen before they become permanent in the wood.
Hard-Won Truths from a Decade of Deck Building
If there is one thing I’ve learned after years of getting my hands dirty, it’s that a beautiful surface is only as good as the skeleton supporting it. I spent years chasing the latest composite decking trends, only to realize that the most expensive boards in the world won’t save a frame that wasn’t built for moisture. My biggest ‘lightbulb’ moment came when I stopped viewing a deck as a static object and started seeing it as a living machine that needs to breathe and shed water. You have to respect the elements, or they will reclaim your hard work within a decade. It is better to spend more on your joist protection now than to tear up a gorgeous floor later.
- The ‘Set it and Forget it’ Trap: Low maintenance doesn’t mean zero maintenance. Even the best builds need a spring checkup to ensure debris hasn’t clogged your drainage gaps.
- Structural Priority: If you have to choose between a fancier board and better hardware, choose the hardware every single time. A solid frame is the only thing that actually protects your investment.
- The Beauty of the Frame: A perfectly square frame, achieved with the 5-shim trick for leveling out-of-square deck frames, makes every subsequent step of the installation ten times easier.
#IMAGE_PLACE_HOLDER_E#
The Only Resources I Trust for Real Results
I don’t just rely on gut feeling; I use data and proven systems. For anyone serious about their next project, you absolutely must check out the complete guide to choosing railing systems for safety and style to ensure your perimeter is as strong as your floor. If you are still on the fence about materials, I often look at why ipe wood is the only real competitor to high-end composite to understand the durability standards we are trying to beat. Most importantly, never skip the planning phase. I cannot stress enough why you need a 3d model before buying a single deck board. It eliminates the guesswork and prevents those expensive, mid-project trips back to the lumber yard.
Build a Structure Your Family Will Enjoy for Decades
There is a unique kind of satisfaction in standing on a deck you built yourself, knowing that it is shielded from rot and engineered for the long haul. This project isn’t just about adding square footage to your home; it’s about creating an outdoor sanctuary where you’ll spend your best summer evenings. Don’t be intimidated by the technical details. Take it one joist, one board, and one screw at a time. By applying these pro secrets to your composite decking project, you aren’t just building a deck—you’re building a legacy of quality and a space for memories in your own backyard.
Have you ever had a deck frame fail sooner than expected because of a hidden moisture trap? Let me know your experiences in the comments below!