
I stood there in the fading August light, my knees aching and my pride shattered. I had just finished installing thirty-two balusters on my first major deck project, only to realize the final gap near the post was wide enough to fit a small child through, while the starting gap was barely two inches. It looked ridiculous. It didn’t matter that I had carefully researched the best railing system for safety and style; the spacing was an absolute disaster. I ended up having to unscrew every single one, leaving my beautiful cedar rails looking like a piece of Swiss cheese. That was the day I realized that “eyeballing it” or just “starting at one end” is a guaranteed recipe for frustration.
Stop Settling for That Awkward Last Baluster Gap
Most of us dive into a project thinking we’ll just start at one end and work our way across. It sounds logical. But unless you are a mathematical wizard or incredibly lucky, you’ll end up with an asymmetrical mess that screams “rookie mistake.” This matters because your eyes naturally crave symmetry. When you look at modern farmhouse deck designs, what makes them truly stand out isn’t just the black-on-wood color palette—it’s the rhythmic, perfectly even spacing of every vertical element. I’ve learned the hard way that the difference between a DIY job and a professional finish lies entirely in the layout phase before the first screw even touches the wood. My biggest early mistake was forgetting to account for the actual width of the baluster itself when calculating the run. I’d measure the space between posts, divide by four, and then wonder why I was off by several inches by the time I reached the other side. You need a system that centers the entire array on the rail, ensuring the gaps at both ends are identical. We are going to fix that today using a simple layout trick that works whether you’re building a pergola with privacy screens or a standard backyard deck. By the time we’re done, you’ll have the confidence to tackle any section length without that nagging fear of the “big gap” at the end.
Is Precision Measuring Actually Worth the Hassle?
You might be thinking, “Will anyone really notice if one gap is slightly bigger than the rest?” The answer is a resounding yes. According to the International Residential Code (IRC), balusters must be spaced so that a 4-inch sphere cannot pass through any point at any location. This is a safety standard designed to protect small children from getting stuck. If your spacing is uneven, you might accidentally create a gap that fails a local inspection or, worse, creates a real safety hazard for your family. Beyond safety, once you see an off-center railing, you can’t un-see it. I’ve found that using the counter-bore secret for seamless connections only truly pays off if your initial layout is rock solid. Have you ever finished a section of railing only to realize the last piece just didn’t fit right? Drop a comment and tell me how you tried to hide it—I’ve heard some wild stories about people using extra-wide trim or “decorative” posts just to mask a 5-inch gap! Before you grab your drill, we need to master the “Center-Out” method. It’s the only way to guarantee that your custom railing systems look like they were installed by a high-end contractor. It involves finding the dead center of your rail and working toward the posts, but there’s a specific way to handle the math so you don’t lose your mind in the process.
To achieve the high-end look found in innovative deck design ideas that elevate your homes curb appeal, you must treat your railing layout like a precision engineering project. The biggest secret is to stop measuring from the posts. Posts can be slightly out of plumb or spaced inconsistently, even if you used the 3-4-5 rule for squaring your deck frame every time. Instead, you need to find the absolute center of your top and bottom rails and build your pattern outward toward the ends.
Find Your Center Point First
Grab your tape measure and mark the exact midpoint between your two posts on both the top and bottom rails. This mark is your North Star. Before you even touch a baluster, you have to decide: will a baluster sit directly on this center mark, or will the center mark represent the middle of a gap? This decision depends on the total length of your run. If you want to avoid those awkward, tiny slivers of wood at the posts, you need to test both scenarios. I remember a specific project where I was building a 12×12 deck with a grill and table; I blindly put a baluster on the center mark and ended up with a 1-inch gap at the post. It looked like an accident. If I had simply shifted the layout so the center mark was a gap, I would have had a beautiful 3-inch space at both ends.

Do the Math the Easy Way
To calculate the layout, you need to know your “unit width.” This is the width of one baluster plus your desired gap. For example, if you are using standard 1.5-inch balusters and want a 3.5-inch gap, your unit width is 5 inches. Divide the total distance between your posts by this unit width. If you get a remainder that is less than your baluster width, you know your end gaps are going to be dangerously tight or visually cramped. This is where how to select the perfect railing system for every deck becomes a game of numbers. You might need to shrink your gap by a quarter-inch to make the ends look intentional and balanced. When you get this right, the railing doesn’t just provide safety; it creates a visual rhythm that makes the whole structure feel solid.
Why a Physical Spacer Beats a Tape Measure
Once your math is set, put the tape measure away. Using a tape measure for every single baluster introduces “cumulative error.” If you are off by just 1/16th of an inch on each one, by the time you’ve installed ten balusters, you are over half an inch off your mark. Instead, use the spacer trick for consistent gaps in wood decking. Cut two blocks of scrap wood to your exact gap width. Place these blocks between the last installed baluster and the next one. This ensures that every single opening is identical, regardless of any slight bows in the wood. I’ve seen people skip this step on custom railing systems only to have their balusters look like a set of crooked teeth from a distance.
Lock Everything Down to Prevent Rattles
As you work from the center out toward the posts, ensure you are pre-drilling every hole. Even if your lumber feels soft, driving screws close to the ends of balusters is a recipe for splitting. If you’re worried about stability, consider adding the 20-bracket that fixes wobbly railing posts fast to your main support structure before the balusters go in. A rock-solid frame prevents the rails from shifting while you are trying to maintain that perfect spacing. Once you hit the posts, the final gaps on the left and right should be mirror images of each other. If they aren’t, you know exactly where the layout went wrong before you’ve committed to the final screw.
You’ve likely heard that composite is the ultimate ‘set it and forget it’ material for your home. While I often recommend it to maximize outdoor living with low maintenance composite decking, there is a massive nuance most DIYers—and even some contractors—completely ignore: thermal expansion. Most people believe that if you screw every component down as tight as possible, it will stay put forever. In reality, expert data from the North American Deck and Railing Association (NADRA) suggests that improper fastening that fails to account for material movement is a leading cause of structural aesthetic failure. If you pin a composite rail too tightly between two rigid posts, it has nowhere to go when the summer sun hits it. It will either bow outward or, more likely, cause why your railing post sleeves are cracking at the base. Have you ever fallen into this trap where your beautiful straight lines turned into a wavy mess by July? Let me know in the comments.
Don’t Fight Physics with Your Fasteners
The biggest mistake I see in custom railing systems for safety and style is the assumption that wood and composite behave the same way under heat. Wood expands primarily in width, but composite expands significantly in length. If your layout doesn’t respect the expansion gap rule that stops boards from buckling, you are essentially building a ticking time bomb. I once saw a gorgeous black railing system literally pop its own screws out because the installer didn’t leave the required 1/8-inch buffer at the bracket. It’s a painful lesson to learn when you have to replace expensive post sleeves because the pressure from the expanding rail split them right down the middle.
Why does my railing sag only during the winter months?
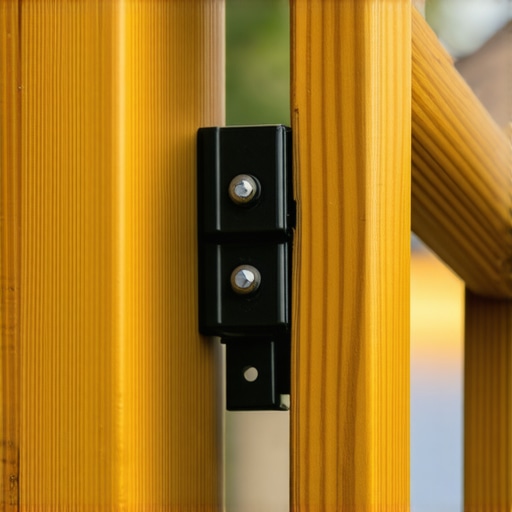
This is what I call the ‘Ghost Gap’ phenomenon. When temperatures drop, your materials contract. If you didn’t account for this, those tiny gaps you left for the brackets might double in size, making the rail feel loose or causing it to pull away from the house entirely. This is particularly notorious in cable systems, which explains why your cable railing sagged over winter. The ‘oops’ factor here is trying to solve the problem by over-tightening the cables during a cold snap. When summer returns, that extra tension can actually pull your corner posts out of plumb as the frame relaxes. Instead of brute force, you should use the hidden bracket hack for invisible pergola connections logic: use sliding slip-brackets on one end of long runs to allow the material to breathe without sacrificing structural integrity. Understanding these micro-movements is the true mark of an expert builder.
I’ve spent years experimenting with every gimmick in the hardware aisle, but if there’s one tool that changed the game for my railing installs, it’s a high-visibility green beam laser level. While I’ve written about the string line secret for perfectly level railing runs, the truth is that string can sag or catch the wind on a gusty afternoon. A laser gives you an undeniable, unshakeable reference point that doesn’t bend. When I’m setting post heights for custom railing systems for safety and style, I want to see that green line hitting the same spot on every single post across a forty-foot span. It’s the only way to ensure your top rail doesn’t look like a roller coaster once the final cap is snapped on. According to the Forest Products Laboratory’s ‘Wood Handbook,’ wood can lose or gain moisture until it reaches the Equilibrium Moisture Content of its environment, which is why I never build without a professional-grade moisture meter. If your framing is too wet when you install the rails, the subsequent shrinkage will pull your perfectly spaced balusters out of alignment. 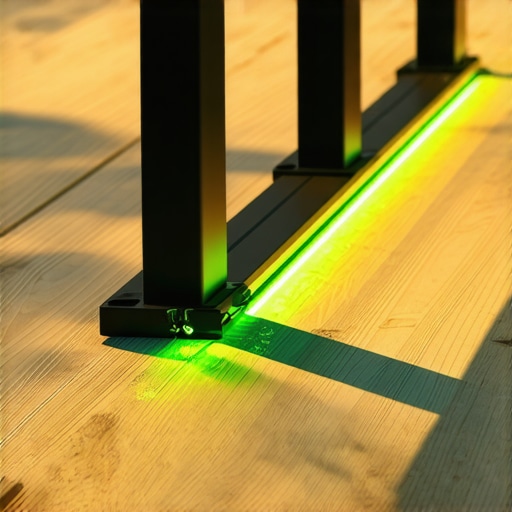
Ditch the Sagging String for a Quality Laser Level
Beyond just leveling, the longevity of your build depends on what you can’t see. I swear by butyl-based joist tape. Most DIYers skip it because it feels like an unnecessary expense, but using the joist tape secret for doubling your decks lifespan is the difference between a deck that rots out in twelve years and one that stays rock-solid for forty. When water gets trapped between your railing post and the rim joist, it creates a rot pocket. A simple layer of tape acts as a gasket, sealing the wood fibers from the moisture that inevitably gets trapped there. I’ve noticed a growing trend where deck design is moving toward ‘smart’ integration; I predict that within five years, we will see railing systems with built-in tension sensors that alert your smartphone when cable lines need a quarter-turn adjustment.
How do I maintain my decking and railing over time?
Maintenance isn’t just about a periodic power wash. In fact, if you’re using low maintenance composite decking, you should put the power washer away entirely—the high pressure can actually scar the protective ‘cap’ layer of the board. Real maintenance is a 15-minute structural walkaround once a season. Use the 15-minute deck inspection every homeowner should do to check the underside of your railing connections. This is where most people fail. They focus on the surface beauty and ignore why pressure-treated wood still needs maintenance under composite. If you have a cable system, use the tensioner secret for tight cable railings to ensure they haven’t loosened due to structural settling. For those with wood components, check for small cracks and apply a clear sealer to the end-grain. Following these composite decking secrets and longevity tips will save you thousands in premature replacement costs. Before you start your next build, I challenge you to try the moisture meter method: test your framing wood before you ever attach a rail or board. If it’s above 19% moisture content, let it dry. It is the single best way to prevent your railing screws from snapping when the wood eventually shrinks.
What Every Pro Knows About the Hidden Physics of Deck Railings
Looking back at my first disaster, the biggest takeaway wasn’t just about math—it was about patience. Professional-grade results come from respecting the material. I’ve learned that a ‘dry run’ is never a waste of time. Before you ever pull the trigger on your drill, lay your balusters out on the deck boards to see the rhythm. You might realize that your planned spacing feels too busy or too sparse. I always tell my clients to select the perfect railing system based on the view they want to keep, not just what is on sale. Also, never underestimate the power of a second set of eyes; what looks ‘straight enough’ to you after six hours in the sun might look crooked to a neighbor standing at the curb.
The Three Tools That Save My Projects Every Time
If you want to move from ‘DIY-er’ to ‘Master Builder,’ your toolbox needs an upgrade. First, stop guessing if your wood is dry enough; a professional moisture meter is your best friend to prevent future warping. Second, I cannot stress the value of the 20-bracket that fixes wobbly railing posts fast. It turns a frustratingly shaky post into a rock-solid anchor in minutes. Finally, if you are working with modern materials, keep a bottle of high-quality adhesive handy—using the pvc glue trick for gap-free composite miters ensures those corners stay tight through every season change. These aren’t just gadgets; they are the difference between a deck that lasts a decade and one that lasts a generation.
Your Backyard Masterpiece is Waiting
Building a deck is more than just an outdoor renovation; it is an investment in your home’s lifestyle and value. Whether you are following the latest composite decking trends or sticking with classic cedar, the care you put into the layout today will pay dividends for years to come. Don’t be intimidated by the math or the precision required for custom railing systems for safety and style. Take it one section at a time, trust your spacers, and don’t be afraid to adjust your plan if the site conditions demand it. You have the tools and the knowledge—now it is time to get out there and build something you are proud of. Have you ever started a railing project only to find your posts were out of square? Let me know in the comments below, and let’s troubleshoot your build together!