
I’ll never forget the sinking feeling I had after finishing my first big cedar deck. Everything was square, the levels were perfect, and the wood was gorgeous. But then, I looked at the railing. Every single connection was punctuated by a bright, galvanized screw head that stuck out like a sore thumb against the warm grain. It didn’t look like a high-end custom build; it looked like a weekend DIY project gone slightly wrong. That was my lightbulb moment. I realized that if you want a professional finish, you have to hide the work that holds it all together.
Stop Settling for Ugly Visible Screws on Your Railing
When I first started out, I made the classic mistake of thinking that secure had to mean visible. I figured if I didn’t see the fastener, I couldn’t trust it. Boy, was I wrong. Using a railing system that shows every bolt and bracket is like wearing a tuxedo with neon yellow suspenders. It just doesn’t fit the vibe of a modern outdoor space. Today, I’m going to walk you through the counter-bore secret—a technique that lets you sink your fasteners deep into the wood or composite and hide them behind a matching plug. It’s the difference between a railing that looks bolted on and one that looks like it grew right out of the deck frame. Whether you’re working with premium composite decking or classic pressure-treated lumber, this one move changes the entire architecture of your backyard.
Is the extra drilling actually worth your time?
I get it. You’re tired. You’ve been hauling boards all day and the last thing you want to do is drill twice for every single hole. You might be worried that drilling deeper into the post will weaken the connection. But here is the reality: perfectly rigid railing posts don’t come from the size of the screw head; they come from the depth and grip of the threads. In fact, according to the American Wood Council, pre-drilling and counter-boring can actually prevent the wood from splitting at the ends, which is a major cause of railing failure over time. Have you ever stepped back from a project and felt like the hardware was the only thing you could see? It’s a frustrating spot to be in, but we can fix that. By learning how to hide stair railing hardware and using the counter-bore method on your flat runs, you’re not just building a safety barrier—you’re crafting a piece of furniture for your yard. Let’s get into the specifics of how to do this without losing your mind.
Choose the Right Bit for a Clean Bore
The first step in making your hardware disappear is selecting the right tool for the job. You aren’t just making a hole; you’re creating a precision pocket. For natural wood, I always reach for a Forstner bit rather than a standard twist bit. Think of a twist bit like an angry beaver chewing through fibers; it’s messy and leaves a ragged edge. A Forstner bit, however, shears the wood at the perimeter first, leaving a flat-bottomed hole that looks like it was machined in a factory. I learned this the hard way on a rainy Tuesday in Seattle while rushing a mahogany railing. I skipped the pilot hole and tried to muscle a standard bit through—the bit skated across the grain, leaving a six-inch scar on a three-hundred-dollar post. Now, I use the drill guide hack to keep the bit from wandering. Whether you’re working with cedar or high-end composite decking, a clean entry point is the difference between a pro finish and a hack job.
Set Your Depth to Protect the Structure
Once you have the right bit, you need to find the ‘Goldilocks zone’ for depth. You want to sink your fastener about 1/4 inch to 3/8 inch below the surface. If you go too shallow, the plug won’t have enough surface area to grip the sides of the hole and will eventually pop out. If you go too deep, you risk weakening the wood where the screw head seats. Before you start drilling into your expensive posts, use a scrap piece to test your depth. I usually wrap a piece of blue painter’s tape around the drill bit as a depth stop. This ensures that even after sixty holes, every single one is identical. When you’re leveling the run and prepping for assembly, this consistency is what makes the final product look seamless.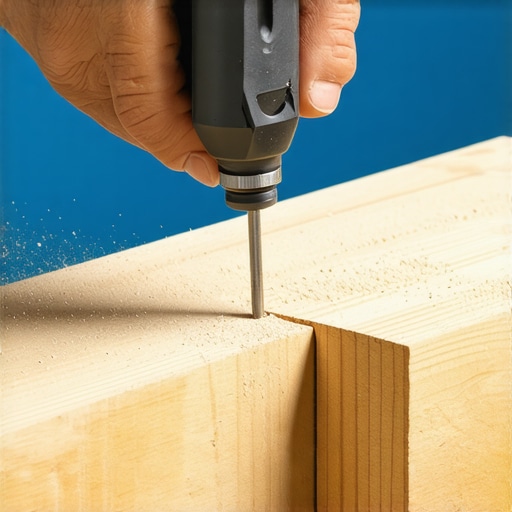
Turn Scraps into Invisible Armor
After the screws are driven home, it’s time for the magic trick: the plugs. For modern outdoor living spaces, many manufacturers sell color-matched plug kits that are virtually invisible. However, if you’re working with natural timber, use a plug cutter on your leftover scrap wood. This is a critical nuance—always cut your plugs from the same boards you used for the railing so the grain and tannin levels match. Apply a tiny drop of waterproof wood glue to the side of the plug, not the bottom of the hole. I once over-glued a whole set of railing caps, and the hydraulic pressure literally pushed the plugs back out of the holes ten minutes later. It looked like a slow-motion jack-in-the-box. Just a drop, tap it in with a rubber mallet so the grain is oriented in the same direction as the post, and let it sit. Once dry, a quick pass with a sharp chisel or fine-grit sandpaper makes the connection vanish. This method is the key to creating perfectly rigid railing posts that don’t look like they are held together by a hardware store’s clearance aisle.Most people assume that going ‘hidden’ is the ultimate sign of a professional build. But here is the contrarian truth: in some high-traffic scenarios, visible color-matched screws are actually superior. Why? Because why hidden fasteners can be a maintenance nightmare often comes down to accessibility. If a single board in the middle of your deck gets damaged by a fallen grill or a heavy planter, a hidden system can turn a twenty-minute fix into a four-hour teardown of half the deck surface just to reach the one damaged piece. One massive trap I see DIYers—and even some pros—fall into is ignoring the ‘thermal shuffle.’ I’ve seen beautiful modern outdoor living spaces literally tear themselves apart because the builder didn’t respect the expansion gap rule that stops boards from buckling. Composite expands and contracts significantly more than wood. If you pin those boards too tightly without a plan for movement, those expensive hidden clips will eventually pop or shear off entirely. According to research published by the North American Deck and Railing Association (NADRA), the majority of deck failures aren’t due to the wood rotting through, but rather the failure of the connections and fasteners under repeated environmental stress. 
Can your railing handle the seasonal thermal shuffle?
This is the advanced question you need to ask yourself. When you’re integrating premium composite decking with a heavy-duty railing, you are dealing with two different materials that ‘breathe’ at different rates. If you have ever noticed why your railing post sleeves are cracking at the base, it is usually because the substructure has shifted while the sleeve remained rigid. I also see a lot of folks neglect what is under the hood. They spend thousands on the top boards but go cheap on the frame. Even if you use the best materials, why pressure-treated wood still needs maintenance under composite is a lesson you do not want to learn five years too late. When I am designing a complex layout, like a ledger-free pergola, I prioritize the ‘vibration test’ over the ‘look’ every time. A structure that looks pretty but wobbles in the wind is a liability, not an asset. Have you ever fallen into the trap of choosing aesthetics over structural logic? Let me know in the comments—I would love to hear your horror stories or wins. It is all part of the craft.I’ve spent a lot of time talking about the ‘pretty’ side of building, but let’s talk about the grit: the tools that actually make the job happen without a trip to the ER. If you are still using a standard drill for your decking screws, you are doing it the hard way. I personally swear by a sub-compact impact driver with a brushless motor. It offers more control for those delicate railing connections where one slip means a permanent scar on a expensive post. For composite, I use a dedicated edge-fastening jig because it hides the fastener in the groove, preventing the ‘mushrooming’ effect where the plastic curls up around the screw head. This is vital for maintaining a clean look while you maximize outdoor living with low-maintenance composite decking. When I’m setting up long runs, I ditch the traditional string and use a green-beam rotary laser. It’s the only way to ensure perfectly level railing runs across a forty-foot span where even a tiny dip is visible to the naked eye.
How do I keep my composite deck looking brand new for years?
Maintenance is where most people get lazy, and it’s where your investment starts to bleed value. The first rule is simple: why you should never use bleach on your composite deck—it can break down the UV inhibitors in the cap layer, leading to premature fading. Instead, I recommend a pH-neutral soap and a soft-bristle brush twice a year. According to the Simpson Strong-Tie Deck Connection and Fastening Guide (F-DECKRP24), hardware corrosion is a leading cause of structural failure in coastal areas. This is why I always check the underside of the frame during the 15-minute deck inspection every homeowner should do. Look for white crusty deposits on your joist hangers; that’s the first sign of galvanic corrosion. If you catch it early, you can treat it; if you wait, you’re replacing the whole ledger.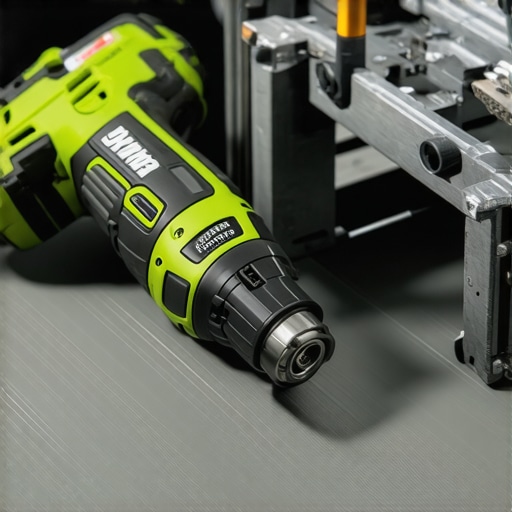
Predicting the shift toward modular precision
I predict that the next five years will move away from ‘build-on-site’ and toward ‘modular precision.’ We are already seeing this with pergola trends where aluminum kits are designed to be as easy to assemble as high-end furniture. This shift is why I emphasize that why you need a 3D model before buying a single deck board isn’t just for show anymore—it’s for accuracy. If you want to stay ahead of the curve, start thinking about your backyard as a series of integrated systems rather than just a pile of wood. Grab a high-quality impact driver and try the counter-bore method on your next project; once you see that seamless finish, you’ll never go back to visible screws.
The Hardest Lesson I Learned While Chasing a Seamless Finish
Building high-end decks taught me that the smallest details often hide the biggest traps. One of my biggest face-palms was ignoring the grain direction on wooden plugs; even if the wood matches perfectly, a vertical grain plug in a horizontal rail looks like a polka dot once the sun hits it. I also learned that why hidden fasteners can be a maintenance nightmare isn’t just a catchy phrase—it’s a reality when you have to tear up six boards to replace one warped sleeper. Don’t be the builder who sacrifices access for vanity just to hide a few screws in a high-stress area.
The Gear I Actually Use to Stop the Wobble
If you want to move beyond the basic DIY look, you need to upgrade your kit. I never start a project without a set of high-carbon Forstner bits; they are the only way to get those flat-bottomed holes required for a professional plug without tearing the wood fibers. For the heavy lifting, I rely on why you need a 3D model before buying a single deck board to visualize the fastener layout before I even touch a saw. I also highly recommend checking the safety standards from the North American Deck and Railing Association (NADRA) to ensure your aesthetic choices don’t compromise the railing system integrity during extreme weather.
Your Backyard Deserves This Level of Detail
At the end of the day, these techniques—the counter-boring, the precision drilling, and the strategic planning—are about pride in craftsmanship. You aren’t just slapping boards together; you’re creating a durable sanctuary for your family. When you take the extra ten minutes to hide a screw or align a plug, you’re telling everyone who visits that quality matters to you. It’s time to stop settling for ‘good enough’ and start building for ‘forever.’ Your next maximize outdoor living with low-maintenance composite decking project is the perfect place to test these skills. Have you ever had a railing project go sideways because of a small hardware mistake? Let me know in the comments below!