
I still remember the first pergola I ever built in my own backyard. I was so proud of those hefty cedar beams, feeling like a real craftsman. I spent the better part of a Tuesday afternoon with a tape measure and a carpenter’s pencil, marking every 16 inches on center with what I thought was surgical precision. But when the last structural screw was driven home and I finally stepped back to admire my work, my heart absolutely sank. The rafters didn’t look uniform. They looked like a chaotic, waving picket fence. It turned out that a tiny 1/8th-inch error on the very first rafter had snowballed—a phenomenon we call ‘ruler creep’—into a glaring two-inch gap disaster by the time I reached the end. I felt like a total amateur, especially when my neighbor leaned over the fence and asked if it was ‘supposed to be asymmetrical.’ I wanted to crawl under my composite decking and never come out. [image_placeholder]
Stop Measuring Every Single Rafter Gap
If you have ever tried to eyeball a layout or rely purely on a tape measure across a 16-foot span, you have likely felt that same pit in your stomach. We often get swept up in the excitement of pergola design inspiration from modern to classic looks and completely forget the basic physics of human error during installation. The real secret to a professional finish isn’t found in a better calculator or a more expensive level; it is found in eliminating the opportunity for mistakes to stack on top of each other. I used to think I could just ‘wing it’ by measuring from the previous mark, but that is the fastest way to ensure your shadows look like a jagged mess on your patio. Today, I am going to walk you through the math-free way to get every single rafter sitting exactly where it belongs. We are moving away from the tape measure and toward a more reliable, physical method.
Is this level of precision really worth the extra hours?
You might be wondering if you are just being too hard on yourself. After all, it’s just a garden structure, right? Wrong. According to the team at Britannica, the human eye is remarkably sensitive to misalignments, a phenomenon known as Vernier acuity. We can detect a break in a straight line that is incredibly minute, meaning your brain will register that ‘something is wrong’ with your pergola trends even if you can’t immediately point to the specific rafter that is off. I learned this the hard way when I had to back out thirty structural screws because the spacing looked ‘skewed’ from the kitchen window. It was a miserable three hours of rework that could have been avoided with one simple trick. Have you ever stood back from a big DIY project only to realize you had to start over because of a tiny early mistake? It is a gut-punch every single time. By switching to the scrap wood spacer for perfectly uniform pergola slats, you take the ‘human’ out of the human error equation. Let’s dive into why your current layout method is likely lying to you and how we can fix that before you cut a single piece of wood.
Stop Fighting Your Tape Measure
Every time you hook your tape measure to the end of a beam and pull a mark, you introduce a tiny variable. Is the hook slightly loose? Is the pencil lead too thick? These micro-deviations are why your pergola designs that turn your garden into a sanctuary often end up looking slightly ‘off’ when viewed from a distance. I learned this while working on a project where I was trying to match the clean lines of a custom railing system. I thought I could be precise enough with a Sharpie, but wood expands and contracts. By the time I reached the fifth rafter, I was off by half an inch. The solution isn’t to be a better measurer; it’s to stop measuring altogether. Just as the 3-4-5 triangle move for squaring up a new deck frame provides a physical guarantee of a 90-degree angle, a physical spacer provides a physical guarantee of a gap.
Cut a Physical Block Instead of Marking Lines
Grab a piece of scrap wood—ideally from the same material you’re using for the rafters to account for thickness—and cut it to the exact width of the gap you want between your slats. If you are aiming for a 12-inch on-center layout with 2×6 rafters, your spacer should be 10.5 inches long. This block becomes your ‘master key.’ Instead of looking at a tape measure, you simply butt the spacer against the face of the last rafter you installed and slide the next one tight against it. I once used this during a tricky install over a hot tub where I couldn’t easily reach the beam ends to mark them. By using the scrap wood spacer for perfectly uniform pergola slats, I was able to install twelve rafters in twenty minutes, and the spacing was dead-on to the millimeter. 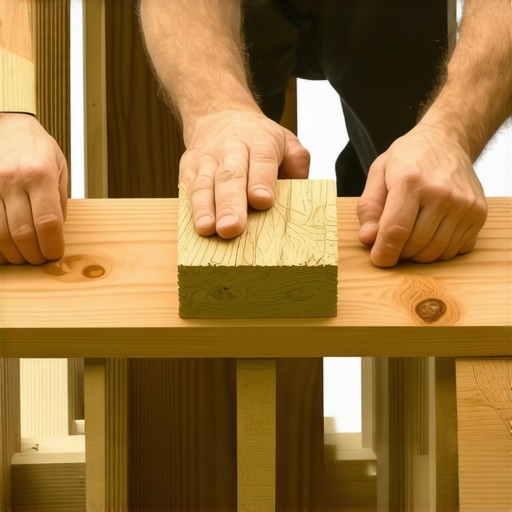
Ensure Your Beams are Plumb Before You Start
A spacer is only as good as the foundation it rests on. If your main support beams are leaning even slightly, your rafter spacing will start to ‘parallelogram’ as you move across the structure. This is where many DIYers fail. Before you even touch that spacer, you need to use the string line trick for perfectly plumb pergola beams to ensure everything is upright. I remember a humid July morning where I rushed this step on a pressure-treated frame. Because the wood was wet and heavy, it started to pull. I didn’t realize that why your pressure-treated frame is pulling your composite apart applies to pergolas too—the tension of the rafters can actually warp a weak beam if it isn’t braced.
The Final Lock Down Sequence
Once you have your spacer in place, don’t just drive a screw through the top. Use a clamp to hold the rafter against the spacer and the beam simultaneously. This prevents the ‘drift’ that happens when a screw tip grabs the wood and pushes the rafter slightly away from your mark. While you’re at it, consider adding the 15-degree cut that keeps water off your pergola beams to the ends of your rafters before you lift them. It adds a professional architectural detail that makes the whole project look like it was done by a high-end contractor rather than a weekend warrior. This physical method of spacing works because it relies on the consistency of the wood block, which doesn’t change, rather than your eyes or your tape measure, which both lie to you when you’re tired.Once those rafters are spaced perfectly and the symmetry is locked in, most DIYers breathe a sigh of relief. But this is exactly where the ‘amateur’ and ‘pro’ paths diverge. I have seen countless homeowners master the layout only to watch their hard work warp, sag, or pull apart within three seasons. We need to talk about the physics of movement, because if you treat your composite decking like it is a static, dead material, it will eventually remind you that it is anything but.
Stop Believing the Maintenance-Free Myth
One of the biggest mistakes I see is the assumption that ‘low-maintenance’ means ‘low-precision.’ In fact, working with high-end materials requires more foresight than traditional lumber. For instance, many people ignore the thermal expansion coefficients. They butt their boards tight against the house, only to wonder why your composite boards are crowning and how to fix it later that summer. Unlike wood, which mostly expands and contracts with moisture, composite is a thermal sponge. If you do not leave the proper gaps, the boards have nowhere to go but up. A study by the American Wood Council (AWC) emphasizes that structural connections must account for these dynamic forces, or you risk shear failure at the fasteners. I have walked onto decks that felt like a carnival funhouse because the installer didn’t account for the heat-sink effect of dark colors. 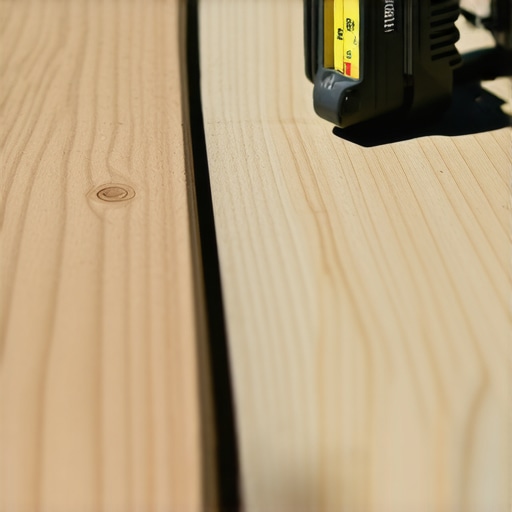
The Lateral Stability Trap Most Builders Ignore
Everyone focuses on vertical loads—making sure the deck can hold a hot tub or a crowd of people. But what about the ‘sway’? I have seen beautiful structures that feel like they are on a boat during a light wind. This often happens because people skip the knee braces or fail to realize the structural reason your pergola is leaning is actually rooted in the lack of lateral blocking. Even a perfectly spaced rafter system cannot save a frame that lacks ‘racking’ resistance. This is why I always advocate for the blocking trick that stops railing post wobble. If your posts aren’t integrated into the frame with solid blocking, your railing systems for safety and style are just expensive decorations that will eventually feel loose and unsafe.
Can your railing system actually survive a heavy winter?
This is a question I get from homeowners who notice their cable rails sagging after the first freeze. The hidden nuance here is the tensioning. In cold weather, metal contracts. If you tensioned your cables to the max in the July heat, that winter contraction can actually pull your corner posts out of plumb. It is a delicate balance of physics and foresight. I once had to go back to a project in February to loosen twenty-four cables because the customer was worried about the posts snapping. It was a classic case of ‘over-building’ without understanding material behavior. Have you ever fallen into this trap where you thought you were making it stronger, but you were actually creating a new problem? Let me know in the comments.
The Difference Between Sturdy and Rigid
Many builders think the solution to a ‘bouncy’ deck is just more wood. However, you can use the thickest beams in the world and still end up with a structure that vibrates when you walk. Usually, it is because of why your composite deck feels like a trampoline: the joist span is technically ‘within code’ but doesn’t meet the ‘deflection’ standards for a premium feel. If you are aiming for innovative deck design ideas for 2025, you have to design for the feel of the walk, not just the math of the load. This means adding mid-span blocking and using the joist tape secret to prevent the wood-on-wood squeaking that makes a new deck feel old. By paying attention to these advanced nuances, you transition from someone who just ‘built a deck’ to someone who crafted an outdoor sanctuary that will stand for decades.Maintaining the structural integrity of your outdoor space is where you really prove your mettle as a builder. I have seen beautiful projects crumble because the owner ignored the ‘skeleton’ of the structure. Before you lay your final boards, you must implement the joist tape secret for doubling your decks life. This butyl-based tape creates a waterproof barrier that prevents the top of your joists from rotting where the screws penetrate. If you are working on a retrofit, I always suggest performing the ice pick test for checking joist strength on older decks. It is a simple, tactile way to ensure you aren’t building a new masterpiece on a crumbling foundation.
Shield your skeleton before the decking goes down
Most people think the decking is the most important part, but it is actually the framing that dictates the lifespan. I personally never start a job without the jig i use for consistent deck screw depth. If you drive a screw too deep, you create a tiny ‘cup’ in the wood or composite that collects water, leading to localized rot or freeze-thaw damage. By using a depth-setting bit, every single fastener sits perfectly flush, which is one of those composite decking secrets longevity tips for a lasting deck that separates the pros from the amateurs. [image_placeholder]
How do I maintain my deck and pergola over time?
The biggest threat to your investment isn’t the sun; it is the wrong cleaning method. I have watched homeowners destroy their warranty by using high-pressure water, which is why you should never use a power washer on composite boards. It can open up the pores of the material and lead to permanent staining. Instead, I rely on the vinegar and water mix that cleans composite better than chemicals. It is gentle, cheap, and surprisingly effective at killing mold spores without bleaching your boards. For your railing, remember to check the hardware every spring. The blocking trick that stops railing post wobble only works if the bolts are tight. According to the North American Decking and Railing Association (NADRA), a significant percentage of deck failures occur due to railing or ledger board issues that could have been caught during a ten-minute annual inspection.
Invest in the tools that eliminate the guesswork
If you are serious about maximizing outdoor living with low maintenance composite decking, you need to stop using a standard drill for everything. I switched to a high-torque impact driver years ago because it reduces ‘cam-out’ and preserves the heads of your expensive stainless steel screws. As we look toward 2025, the trend is moving toward smarter, integrated systems like 7 lighting ideas for modern outdoor kitchens and app-controlled deck features. Learning how to test your deck for structural fatigue now will save you thousands when you decide to upgrade to these heavier, more complex designs later. I challenge you to go out this weekend and perform a structural vulnerability assessment for checking deck joist rot. Identifying one soft spot now is the difference between a simple fix and a total teardown next season.
Hard Truths Learned One Rafter at a Time
I used to think that a beautiful design was 90% aesthetic and 10% structural. I was dead wrong. After years of fixing ‘wobbly’ structures, I realized that the skeleton is the soul of the project. If you ignore the hidden details, your composite decking secrets longevity tips for a lasting deck won’t matter because the frame will fail you first. Precision isn’t about being a perfectionist; it’s about respecting the materials you work with. When you follow stunning deck_design strategies, you aren’t just building a floor; you’re engineering a long-term experience for your family. My biggest lightbulb moment was accepting that tape measures are for rough cuts, but physical jigs are the only way to achieve a professional final finish that won’t leave you frustrated. [image_placeholder]
Upgrade Your Toolkit for Precision Results
To get that high-end look, you need a few specific items that take the human guesswork out of the equation. I never step onto a job site without a high-torque impact driver; it prevents the stripped screw heads that can ruin the sleek look of modern composite decking trends. Furthermore, I live by the joist tape secret for doubling your decks life because moisture management is the single most important factor in structural longevity. If you find your current deck feels a bit soft or bouncy underfoot, you should definitely check out how to fix the bounce in your over-spanned deck joists before you apply your finishing boards. Finally, for anyone doing complex railing work, the simple jig for drilling straight baluster holes is a massive time-saver that ensures your lines are perfectly vertical every single time.
Ready to Start Your Build?
Don’t let the fear of a ‘perfect’ layout stop you from starting your journey toward a better backyard. Whether you are aiming for a modern minimalist look or a classic cedar feel, the secret is always found in the quality of your prep work. Your outdoor living space is a significant investment in your home’s value and your daily lifestyle. By focusing on physical spacers and deep structural protection now, you are ensuring that investment pays off for decades to come. Now that you have the blueprint for uniform rafters and a solid foundation, it is time to grab your scrap wood and start your layout. Have you ever started a project only to realize your layout was off by a full inch by the time you reached the end?